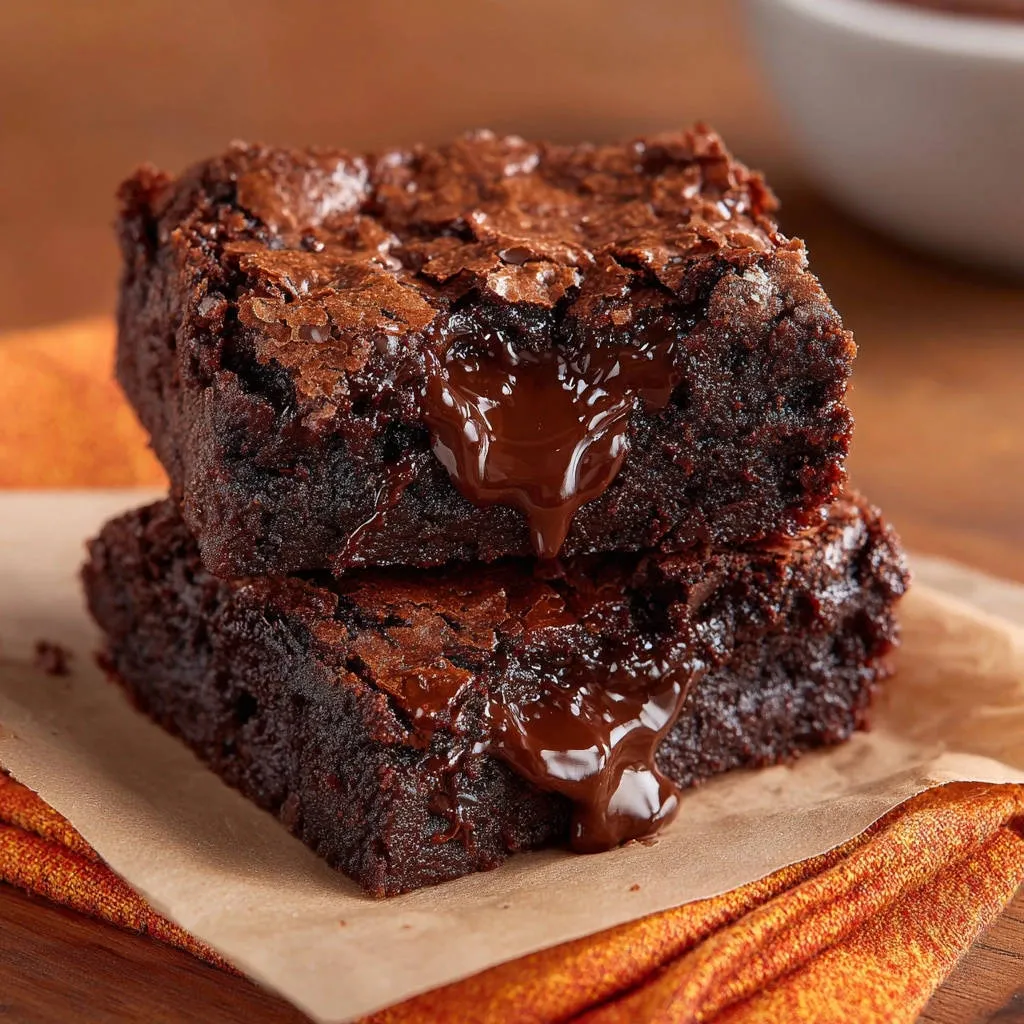
I spent years making amazing brownies that lacked that signature, thin, crackly, shiny top layer we all desperately crave. It wasn’t until I perfected the rapid whisking method that I finally mastered the secret to guaranteed success in these Ultra-Fudgy Chocolate Lava Brownies.
This recipe delivers an intense chocolate flavor, a breathtakingly shiny crust, and a molten center, ensuring they are the most reliable, decadent treats you will ever bake.
Beyond Basic: Why These Ultra-Fudgy Chocolate Lava Brownies Get Rave Reviews
These aren’t just standard brownies; they are engineered for a perfect textural contrast that elevates the experience beyond simple baked squares.
We solve the two biggest brownie challenges: achieving a glossy finish and maintaining that supremely moist, dense interior that defines fudginess.
The Elusive, Mirror-Like Crackly Crust (And How We Guarantee It)
The secret lies in treating the melted butter, chocolate, and sugar like a meringue base.
By vigorously whisking the granulated sugar into the warm fat for exactly 60 seconds, you dissolve the sugar crystals, which, when baked, rise to form that thin, signature crackly crust.
Guaranteed Gooey Lava Center with Every Bite
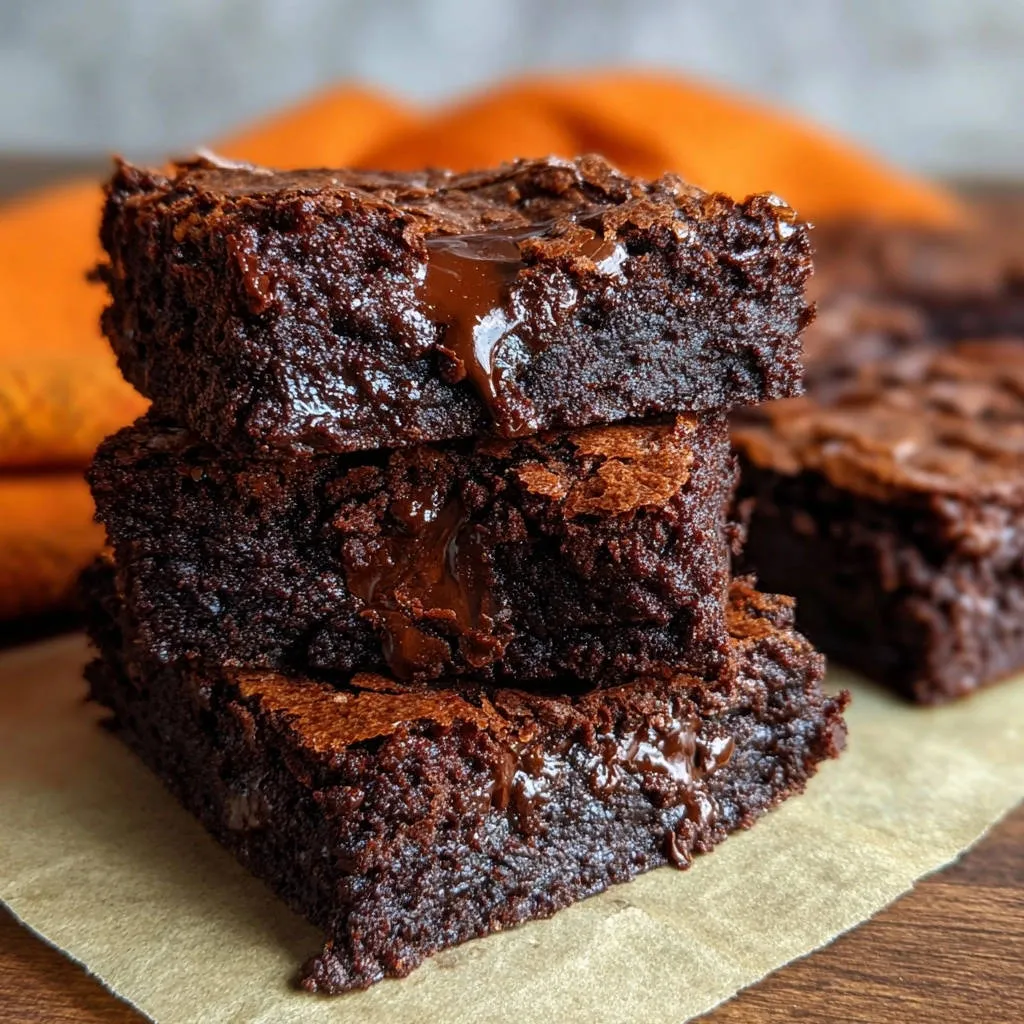
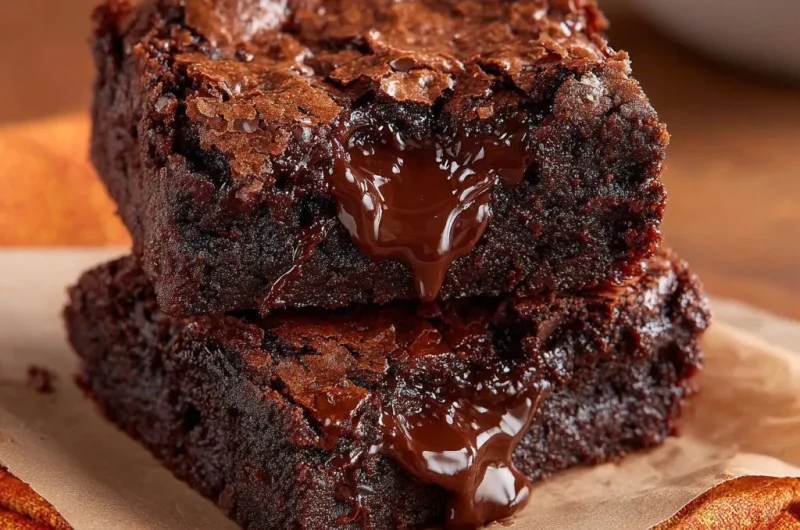
The signature “lava” effect comes from reserving and layering extra chocolate chips directly into the center of the batter.
These chips melt slowly during baking, creating pockets of intensely gooey, molten chocolate that spill out when the warm treat is cut.
Fudginess That Never Falls Flat or Becomes Cakey
This recipe utilizes a high ratio of fat and chocolate to flour, which naturally discourages gluten development and promotes density.
Equally crucial is the slow cooling process, which allows the warm center to set without losing moisture, locking in that signature dense texture.
The Building Blocks of Decadence: Ingredients That Matter
Selecting the Best Chocolate and Cocoa Powder
Using quality semisweet chocolate chips ensures a classic, balanced sweetness that complements the final texture.
Unsweetened cocoa powder is essential for boosting the deep, complex chocolate notes without adding extra sugar.
For an even deeper chocolate experience, explore ultimate fudgy cocoa brownies.
The Crucial Sugar Duo: Granulated and Brown
Granulated sugar is necessary for structure and is the key component in forming the thin, shiny, crackly crust.
If you also enjoy a brilliant crisp crust, you’ll want to try creamy lemon crumble bars.
Packed light brown sugar adds critical moisture and a subtle molasses flavor, which contributes directly to the chewy, fudgy texture.
Fats and Flours: The Right Balance for Fudgy Results
Unsalted butter is preferred as it gives you complete control over the total salt content of the final product.
We use minimal all-purpose flour; ensure you measure it accurately by spooning it into the measuring cup, as too much will quickly result in a dry, cakey brownie.
Preparation Perfection: Tools and Setting Up for Success
Essential Equipment for Your Brownie Adventure
- 8×8 Inch Metal Baking Pan: A metal pan conducts heat quickly and evenly, which is preferred for fudgy textures.
- Parchment Paper: Necessary for lining the pan and ensuring the treats can be easily removed.
- Heavy Bottom Saucepan: Essential for melting the chocolate base slowly and evenly without scorching.
- Whisk: Crucial for the 60-second vigorous whisking technique that creates the shiny crust.
- Rubber Spatula: Used for gently folding in the flour, preventing the mixture from being overmixed.
The Critical Step of Lining the Pan (Why Overhang Matters)
Preheating the oven to 325°F while you prepare your pan is vital for immediate baking consistency.
Lining the 8×8 pan with parchment paper, allowing a significant overhang on two sides, is your extraction tool; once cooled, you simply lift the entire block out for clean cutting.
Mastering the Shiny Crust Technique: The Heart of the Recipe
Achieving the Perfect Melt: Butter, Chocolate, and Cocoa
Combine the butter, the initial quantity of chocolate chips, and cocoa powder in your heavy bottom saucepan over the lowest possible heat.
Stir constantly until the mixture is fully melted and perfectly smooth, then immediately remove it from the heat source.
The 60-Second Vigorous Whisking Rule: Dissolving the Sugar Crystals
Add both the granulated and brown sugars into the warm, melted chocolate mixture while it is still hot off the stove.
Using a sturdy whisk, beat the mixture vigorously and relentlessly for a full 60 seconds.
This intense agitation and the warm temperature of the mixture dissolve the sugar crystals, creating a glossy, meringue-like structure that sets into the perfect crackly top layer during baking.
Integrating the Wet Ingredients Gently
Allow the whisked chocolate base to cool down slightly; it should feel warm to the touch, not hot enough to scramble an egg.
Add the large eggs one at a time, whisking them in until they are just incorporated, followed by the vanilla extract.
Step-by-Step Directions to Ultra-Fudgy Chocolate Lava Brownies
-
Prep and Preheat:
Preheat your oven to 325°F and line your 8×8 inch metal baking pan with parchment paper, ensuring a generous overhang for later.
-
Execute the Shiny Crust Base:
Follow the rigorous whisking method described in the previous section, combining the melted chocolate base with the sugars for one full minute.
-
Whisk in Eggs and Vanilla:
Ensure the mixture has cooled slightly before incorporating the eggs one by one, whisking until fully emulsified.
-
Fold in the Dry Ingredients:
Gently incorporate the flour and salt using a rubber spatula until just combined.
Warning: Do not overmix. Overmixing activates gluten, resulting in a tough, cakey texture rather than fudgy decadence.
-
Creating the Signature Lava Center:
Pour half the batter into the prepared pan, distribute the reserved 1/2 cup of chocolate chips evenly, and carefully layer the rest of the batter on top.
This layering ensures a guaranteed molten center that bursts with extra chocolate flavor upon cutting.
-
Bake and Test the Fudginess:
Bake at 325°F for 30 to 35 minutes.
The edges should be set, but the center must still look soft and ‘jiggly’ when nudged-this is the sign of perfect underbaking for extreme fudginess.
-
The Essential Slow Cool Down:
Remove the pan immediately and allow it to cool completely in the pan on a wire rack before cutting.
This slow cooling process allows the center to continue setting up without losing moisture, locking in the gooey texture, yielding true Ultra-Fudgy Chocolate Lava Brownies.
More Sweet Ideas
If you enjoyed these ultra-fudgy chocolate lava brownies, you might also like these other sweet treats.
- For a delightful breakfast or dessert, consider making Cinnamon Sugar Waffles to complement your chocolate craving.
- If you’re looking for a portable and satisfying snack with chocolate, try these Homemade Chocolate Chip Granola Bars.
Troubleshooting and Chef’s Secrets for Flawless Results
Why Did My Brownies Come Out Cakey or Dry?
The two most common culprits are overmixing and overbaking.
Aggressively mixing the flour develops gluten, making the texture tough, while baking even five minutes too long evaporates precious moisture.
The Temperature Factor: Why 325°F is Your Friend
A slightly lower and slower baking temperature of 325°F is essential for maximum fudginess.
It prevents the egg proteins from setting too quickly, allowing the chocolate and fat to dominate the texture and retain moisture better than higher-temperature baking.
How to Get Perfectly Clean, Sharp Slices Every Time
Wait until the brownies are completely cool-or even better, slightly chilled-before cutting.
Use a large, sharp chef’s knife dipped in very hot water and wiped clean between each slice; the heat melts the chocolate momentarily for a perfect, clean break.
Customizing Your Ultra-Fudgy Chocolate Lava Brownies
Serving Suggestions: The Best Way to Enjoy Maximum Ooze
Maximum Melt: Slightly reheat individual squares in the microwave for 10-15 seconds to reactivate the lava center.
A Touch of Salt: Sprinkle a few flakes of flaky sea salt (like Maldon) on top immediately after they come out of the oven to intensify the chocolate flavor.
A La Mode: Serve warm with a scoop of premium vanilla bean ice cream and a drizzle of caramel sauce for an unforgettable dessert experience.
Make-Ahead and Optimal Storage for Longevity
Store cooled brownies in an airtight container at room temperature for up to five days.
They freeze exceptionally well; wrap individual cooled squares tightly in plastic wrap, then aluminum foil, and store for up to three months.
Can I Double the Batch? (And Why You Might Need to Adjust the Time)
Yes, you can easily double this recipe, but you must transfer it to a larger 9×13-inch pan.
The bake time will need to increase, likely to 40-50 minutes, but the key doneness test-a slightly jiggly center-remains the same.
Frequently Asked Questions About Fudgy Brownie Baking
Is it necessary to use both chocolate chips and cocoa powder?
Absolutely. The cocoa powder provides a rich, intense, deep chocolate baseline flavor complexity, while the melted chocolate chips contribute sweetness, fat, and a smoother texture.
What if I don’t have brown sugar?
If you only have granulated sugar, you can still proceed, but your Ultra-Fudgy Chocolate Lava Brownies will be slightly less chewy and moist.
For a closer substitute, combine 1/2 cup of granulated sugar with 1 teaspoon of molasses, mixing well before adding it to the chocolate base.
How long should I let the mixture cool before adding the eggs?
Wait about 5 to 7 minutes after the vigorous whisking step. The mixture should feel warm, allowing the sugar to remain dissolved, but it should not be hot enough to feel uncomfortable on your wrist or cause the eggs to cook.
Ready to Impress? Share Your Ultra-Fudgy Chocolate Lava Brownies Masterpiece!
You now hold the secret to the ultimate homemade brownie: the guaranteed shiny crust, the extreme fudgy density, and the molten lava center.
Following these concise, expert steps ensures that your next batch of Ultra-Fudgy Chocolate Lava Brownies will be nothing short of perfection.
It’s time to preheat your oven and create a dessert that will truly amaze everyone who takes a bite.
Chocolate Lava Brownies
Course: DessertCuisine: AmericanDifficulty: easy16
small brownies (8×8 pan)15
minutes35
minutes350
kcal50
minutesAchieve that elusive, thin, crackly, shiny top layer on your brownies using a quick, vigorous whisking technique. This simple method dissolves sugar crystals in warm fat, guaranteeing the fudgiest, gooey results. Complete with a hidden lava center of extra melted chocolate.
Ingredients
1 cup (2 sticks) unsalted butter
1 cup semisweet chocolate chips, plus 1/2 cup extra for lava center
1/2 cup unsweetened cocoa powder
1 1/2 cups granulated sugar
1/2 cup packed light brown sugar
3 large eggs
1 tablespoon vanilla extract
3/4 cup all-purpose flour
1 teaspoon salt
Directions
- Prepare the Pan and Oven. Preheat your oven to 325 degrees F. Line an 8×8 inch metal baking pan with parchment paper, leaving an overhang on two sides for easy removal later.
- Execute the Shiny Crust Technique. Combine the butter, 1 cup of chocolate chips, and cocoa powder in a heavy bottom saucepan over low heat. Stir constantly until the butter and chocolate are fully melted and smooth. Immediately remove the mixture from the heat. Add both the granulated and brown sugars to the warm chocolate mixture. Using a whisk, beat the mixture vigorously for a full 60 seconds. This step is critical; dissolving the sugar crystals in the warm fat is what creates the perfect meringue-like layer that becomes the crackly crust.
- Combine Wet Ingredients. Allow the mixture to cool slightly (it should be warm, but not hot enough to cook the eggs). Add the eggs one at a time, whisking well after each addition until fully incorporated. Stir in the vanilla extract.
- Add Dry Ingredients. Gently fold in the flour and salt using a rubber spatula until just combined. Do not overmix. Overmixing develops gluten and results in a cakey, dry brownie.
- Create the Lava Center. Pour half of the batter into the prepared pan. Sprinkle the remaining 1/2 cup of chocolate chips evenly over the batter. Pour the remaining batter on top, spreading gently to cover the center chips. The extra chips will melt during baking, ensuring that signature gooey lava center.
- Bake and Cool. Bake for 30 to 35 minutes. The edges should look set, but the center should still look slightly soft and barely jiggle when nudged. This is essential for fudginess. Immediately remove from the oven and allow to cool completely in the pan on a wire rack before cutting. Cooling slowly helps the center set up properly and locks in the fudgy texture. Cut and serve when cooled, or reheat slightly for maximum ooze.
Notes
- Cooling completely in the pan is essential for locking in the fudgy texture and ensuring clean cuts.