
I used to struggle with grainy or thin cheese sauces when making homemade macaroni and cheese, a common frustration for many home cooks. After countless kitchen experiments, I finally perfected a method that guarantees a perfectly creamy, dreamy, and never-grainy Baked Mac and Cheese.
This foolproof recipe delivers that rich, velvety sauce everyone craves, making it an absolute crowd-pleaser for any occasion.
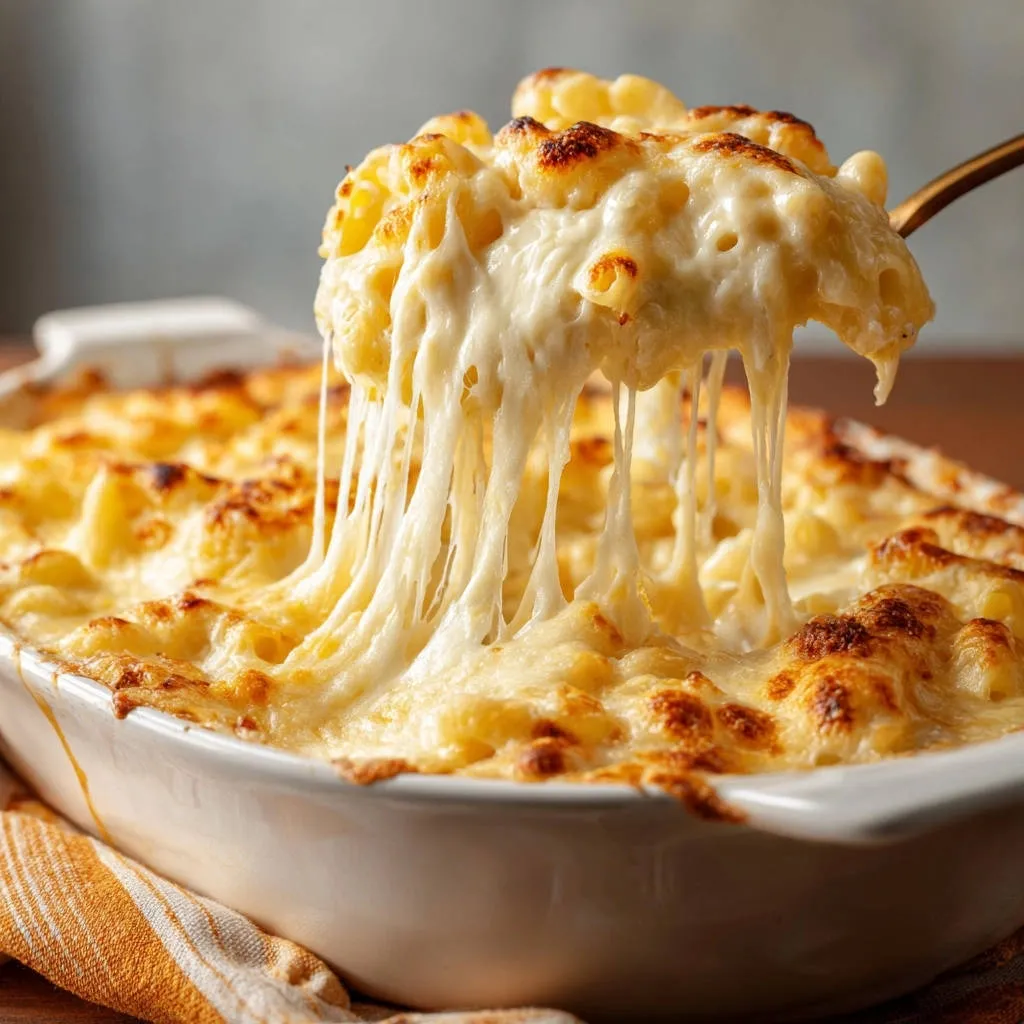
Say Goodbye to Grainy: The Baked Mac and Cheese You’ve Dreamed Of
This Baked Mac and Cheese recipe stands out for its consistently luxurious texture, ensuring every bite is smooth and satisfying. We banish the dreaded grainy sauce through specific techniques that enhance melt and prevent separation.
If you’re after more creamy goodness, check out this creamy cheesy chicken bake.
You can count on this dish to be a reliable showstopper, always delivering on its promise of rich, cheesy goodness. It’s truly the ultimate comfort food, elevated to perfection.
Essential Tools for Your Baked Mac and Cheese Adventure
Large Pot: For cooking the macaroni efficiently and ensuring even cooking.
Large Saucepan or Dutch Oven: Crucial for preparing the roux and cheese sauce, ensuring even heating and ample space for whisking.
Whisk: Essential for achieving a lump-free roux and a silky smooth, emulsified cheese sauce.
9×13 Inch Baking Dish: The perfect size for baking this creamy casserole, allowing for a golden, bubbly top.
Grater (Optional): If you prefer to shred your own cheese, which is highly recommended for optimal melt and texture.
The Heart of the Dish: Ingredients for Irresistible Baked Mac
Pasta Perfection: Choosing Your Macaroni
Elbow macaroni is the quintessential choice for Baked Mac and Cheese, its small, curved shape perfectly cradling the rich sauce.
Cooking the pasta al dente is crucial; it will finish cooking in the oven, ensuring tender yet firm bites and preventing mushiness.
Crafting the Velvety Sauce: Dairy Essentials
Unsalted butter forms the foundational fat for our roux, contributing a rich, milky flavor to the béchamel.
Whole milk, gently warmed before adding, is absolutely critical for developing a smooth, lump-free béchamel and a truly luxurious sauce texture.
The Cheese Blend That Makes It Sing
Sharp cheddar cheese is indispensable, offering that robust, tangy, and deeply savory flavor profile classic to any superb Baked Mac and Cheese.
Monterey Jack cheese brings a wonderfully mild creaminess and exceptional melting qualities, beautifully balancing the cheddar’s sharpness.
For the best results, shred your own cheese; pre-shredded varieties often contain anti-caking agents that can hinder a truly smooth melt.
Pantry Staples: Seasoning and Flavor Boosters
All-purpose flour, when cooked with butter, creates the essential roux, thickening the milk into a sumptuous béchamel sauce.
Salt and freshly ground black pepper are vital for seasoning, enhancing all the cheesy flavors and bringing balance to the dish.
A final drizzle of melted butter over the top before baking promises an extra layer of richness and a gorgeous, golden-brown crust.
Your Step-by-Step Guide to Baked Mac and Cheese Bliss
-
Preheat and Prep:
Preheat your oven to 375 degrees F (190 degrees C) and lightly grease a 9×13 inch baking dish. This ensures the Baked Mac and Cheese bakes evenly and prevents any sticking.
-
Cook the Macaroni:
Cook the elbow macaroni according to package directions until al dente. It should still have a slight bite, as it will finish cooking in the oven, preventing it from becoming mushy. Drain well and set aside.
-
Mastering the Roux:
In a large saucepan or Dutch oven, melt 4 tablespoons of butter over medium heat. Once melted, add the flour and whisk constantly for 1 to 2 minutes to create a smooth roux.
Cook until lightly golden, but do not let it brown too much, as this can affect the color and delicate flavor of the final cheese sauce.
-
The Silky Sauce Secret: Whisking in the Milk:
Gradually whisk in the warmed milk, a little at a time, making sure to fully incorporate each addition before adding more. This controlled addition is crucial for preventing lumps and ensuring a silky smooth sauce.
Continue whisking until the sauce begins to thicken, which typically takes about 5 to 7 minutes as it gently simmers.
-
Melted Magic: Incorporating the Cheeses:
Remove the saucepan from the heat. Stir in the salt and pepper.
Add the shredded cheddar and Monterey Jack cheeses in batches, stirring gently until each batch is fully melted and incorporated into the sauce before adding more.
Adding cheese off the heat is a key technique that prevents it from separating or becoming grainy, locking in that smooth, creamy texture for your Baked Mac and Cheese.
-
Bringing It All Together: Assembly:
Add the cooked macaroni to the glorious cheese sauce and stir until everything is thoroughly combined and every piece of pasta is coated in the luxurious sauce.
-
Prepare for Baking:
Pour the macaroni and cheese mixture into your prepared baking dish. If desired, you can sprinkle a little extra shredded cheese on top for a beautiful golden crust.
Drizzle with the 1 tablespoon of melted butter over the top for an even more irresistible finish and enhanced browning.
-
Baking to Golden Perfection:
Bake for 20 to 25 minutes, or until the top is bubbly and golden brown. The edges should be slightly crisp and the cheese melted to perfection.
Let it rest for a few minutes before serving to allow the sauce to set slightly, which ensures perfect, non-runny scoops of your decadent Baked Mac and Cheese.
Chef’s Secrets: Elevate Your Baked Mac and Cheese
The “Warmed Milk” Advantage: Always warm your milk before adding it to the roux. This significantly reduces the chances of lumps forming and helps the sauce thicken more smoothly and quickly.
Shred Your Own Cheese: Pre-shredded cheeses often contain anti-caking agents that can make your sauce slightly less smooth. Freshly shredded cheese melts beautifully and integrates seamlessly for a superior creamy mac and cheese.
Taste as You Go: Don’t be afraid to taste the béchamel before adding cheese, and then taste the final sauce. Adjust salt and pepper as needed to perfect the flavor profile.
Don’t Overbake: While a golden top is desirable, overbaking can unfortunately dry out the sauce and make the pasta mushy. Watch for bubbling and light browning, then remove from the oven promptly.
Patience with Resting: Allowing the Baked Mac and Cheese to rest for 5-10 minutes after baking helps the sauce set and prevents it from being too runny when served, leading to cleaner, more satisfying portions.
Beyond the Classic: Delicious Variations & Serving Ideas
Amping Up the Cheese Factor
Experiment with other good melting cheeses like Gruyere, Fontina, or Colby Jack for different flavor dimensions and a unique cheese sauce.
For a sharper bite, consider adding a touch of freshly grated Parmesan or a smoky gouda for complex layers of flavor.
Adding a Protein Punch
Stir in cooked, shredded chicken, crispy crumbled bacon, or even sautéed shrimp for a heartier, more substantial meal.
Sautéed ham or thinly sliced hot dogs can also be delicious and family-friendly additions to this macaroni and cheese casserole.
Vegetable Enhancements
Fold in blanched broccoli florets, sweet peas, or sautéed mushrooms for added nutrients and texture contrast.
A touch of finely minced jalapeño or a dash of your favorite hot sauce can introduce a subtle, exciting kick.
Perfect Pairings: What to Serve Alongside
Serve your Baked Mac and Cheese with a simple, crisp side salad dressed with vinaigrette to cut through the richness.
For even more creamy cheese goodness, explore Southern baked mac and cheese strategy.
Crusty bread for scooping up every last bit of creamy sauce, or roasted seasonal vegetables, make excellent and complementary accompaniments.
Make Ahead & Storage Tips for Your Mac and Cheese
Can You Assemble Ahead of Time?
You can assemble the mac and cheese mixture in the baking dish a day in advance, cover it tightly with plastic wrap, and refrigerate.
Allow it to come closer to room temperature for about 30 minutes before baking. You might need to add an extra 5-10 minutes to the baking time to compensate for the colder starting temperature.
Reheating for Optimal Creaminess
For best results, reheat individual portions in the microwave with a splash of milk or cream to restore that coveted creaminess to your homemade mac.
Larger portions can be reheated in the oven at 300°F (150°C), covered with foil, until warmed through. Again, add a little extra milk or cream if the cheese sauce seems dry.
Freezing Leftovers
Baked Mac and Cheese freezes surprisingly well. Portion into freezer-safe containers, ensuring minimal air exposure, and freeze for up to 3 months.
Thaw overnight in the refrigerator before reheating gently in the oven or microwave, adding milk as needed to revitalize the sauce.
Troubleshooting Common Baked Mac and Cheese Hiccups
Why is My Sauce Grainy or Lumpy?
A grainy sauce often results from adding cheese directly to a very hot sauce, causing the proteins to seize, or overcooking it after the cheese is added. Always remove the sauce from the heat before stirring in cheese, and add it in batches.
Lumps typically come from not whisking the flour thoroughly into the butter to create a smooth roux, or adding the milk too quickly. Always whisk constantly to create a homogenous roux and add milk gradually while continuously whisking.
My Mac and Cheese is Dry!
Dryness can be caused by overbaking, which cooks out moisture, or using too little milk in the original cheese sauce recipe. Ensure you follow baking times closely and do not reduce the milk quantity.
If reheating, a splash of milk or cream can wonderfully revive dry leftovers, helping the sauce become creamy and luxurious again.
How to Fix a Thin Sauce
If your sauce is too thin, it might not have been cooked long enough to thicken, or perhaps the roux wasn’t cooked quite right. Continue to gently simmer and whisk until it reaches your desired consistency, usually 5-7 minutes.
Alternatively, you can make a small slurry of cornstarch and cold milk (1 teaspoon cornstarch to 2 tablespoons cold milk), then whisk it into the hot sauce and cook for another minute until thickened.
Your Baked Mac and Cheese Questions, Answered
What kind of pasta is best for baked mac and cheese?
While elbow macaroni is traditional, other short, tubular, or shell-shaped pastas work wonderfully. Cavatappi, orecchiette, or medium shells hold the rich cheese sauce beautifully within their curves and ridges, creating delightful bites.
Can I use low-fat milk for the sauce?
Whole milk is highly recommended for the richest, creamiest sauce, contributing significantly to its body and mouthfeel. While you can use lower-fat milk, the sauce may not be as thick or as luxurious. If using low-fat, be extra careful not to overcook, as it’s more prone to separation.
How do I prevent the cheese from clumping?
The key is to add the shredded cheese in batches to the sauce off the heat, stirring thoroughly after each addition until melted and fully incorporated. This gentle, gradual melting prevents the cheese from seizing up and clumping, ensuring a smooth béchamel.
Is it possible to make this gluten-free?
Yes, absolutely! Simply substitute the all-purpose flour for a good quality gluten-free all-purpose flour blend (ensure it contains xanthan gum or add it if needed). Use gluten-free elbow macaroni cooked according to package directions, and the rest of the recipe remains naturally gluten-free.
Why did my sauce separate?
Sauce separation often occurs when cheese is added to a sauce that is too hot, causing the fats to “break” from the proteins, or if the sauce is overcooked after the cheese has been added. Overcooking can lead to an oily, broken sauce, so gentle heat and careful timing are crucial for your cheese sauce.
Ready to Create Your Own Baked Mac and Cheese Masterpiece?
With this comprehensive guide, you now have all the tools, techniques, and insider knowledge to create a truly unforgettable Baked Mac and Cheese. No more struggles with grainy sauces or bland flavors – just pure, unadulterated creamy perfection that will quickly become a cherished staple in your home.
Complementary Dishes
Round out your mac and cheese meal with these other cheesy favorites.
- If you enjoy rich, melted cheese, you’ll appreciate this Smooth & Creamy Cheese Dip, perfect for dipping or drizzling.
- For a hearty casserole experience that echoes the comfort of mac and cheese, consider this Cheesy Corn Casserole with its satisfying textures.
We encourage you to try this recipe and experience the delight of a perfectly rich, velvety, and bubbly Baked Mac and Cheese for yourself. Share your creations and let us know your favorite variations in the comments below!

Mac and Cheese
Course: Main CourseCuisine: AmericanDifficulty: easy8
servings25
minutes25
minutes450
kcal55
minutesThis recipe guarantees a perfectly creamy, dreamy sauce that will have everyone asking for seconds! Say goodbye to grainy or thin sauces with this foolproof homemade Baked Mac and Cheese.
Ingredients
1 pound elbow macaroni
4 tablespoons unsalted butter
4 tablespoons all-purpose flour
4 cups whole milk, warmed
1 teaspoon salt
1/2 teaspoon black pepper
8 ounces sharp cheddar cheese, shredded
8 ounces Monterey Jack cheese, shredded
1 tablespoon butter, melted (for topping)
Directions
- Preheat your oven to 375 degrees F (190 degrees C). Lightly grease a 9×13 inch baking dish.
- Cook the elbow macaroni according to package directions until al dente. It should still have a slight bite as it will finish cooking in the oven. Drain well and set aside.
- In a large saucepan or Dutch oven, melt the 4 tablespoons of butter over medium heat. Once melted, add the flour and whisk constantly for 1 to 2 minutes to create a smooth roux. Cook until lightly golden, but do not let it brown too much.
- Gradually whisk in the warmed milk, a little at a time, making sure to fully incorporate each addition before adding more. This step is crucial for preventing lumps and ensuring a silky smooth sauce. Continue whisking until the sauce begins to thicken, about 5 to 7 minutes.
- Remove the saucepan from the heat. Stir in the salt and pepper. Add the shredded cheddar and Monterey Jack cheeses in batches, stirring gently until each batch is fully melted and incorporated into the sauce before adding more. Adding cheese off the heat prevents it from separating or becoming grainy, locking in that smooth, creamy texture.
- Add the cooked macaroni to the cheese sauce and stir until everything is thoroughly combined and coated.
- Pour the macaroni and cheese mixture into your prepared baking dish. If desired, you can sprinkle a little extra shredded cheese on top for a beautiful golden crust. Drizzle with the 1 tablespoon of melted butter.
- Bake for 20 to 25 minutes, or until the top is bubbly and golden brown. Let it rest for a few minutes before serving to allow the sauce to set slightly.
Notes
- Let it rest for a few minutes before serving to allow the sauce to set slightly.