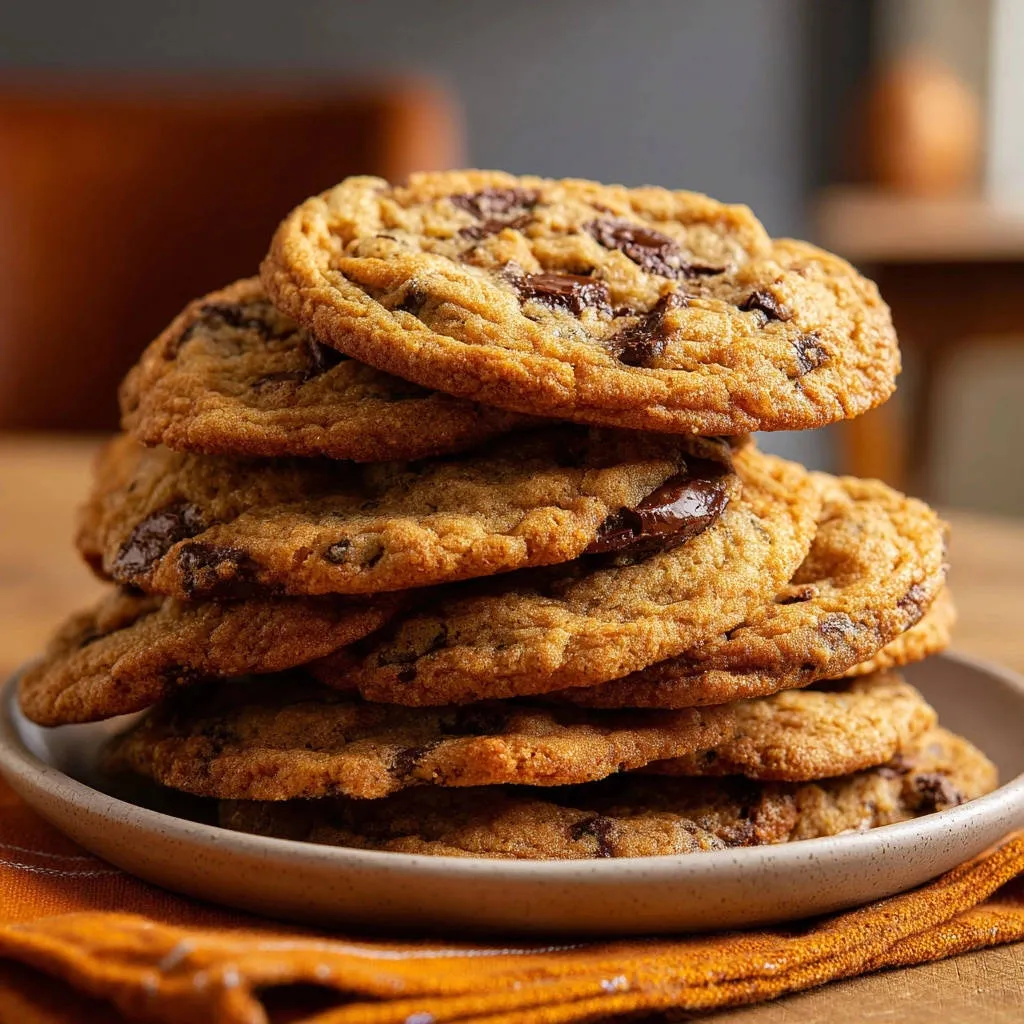
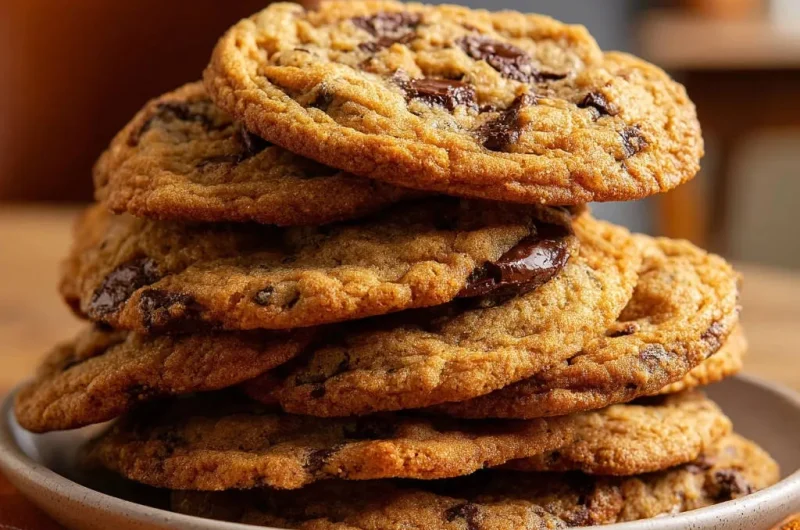
For years, I pulled disappointing, flat puddles out of the oven, never achieving that thick, chewy balance that defines true Bakery Style Chocolate Chip Cookies.
The secret isn’t just in the ingredients, but in two critical techniques-the addition of cornstarch and a non-negotiable dough chilling period-that transform these treats from average to absolutely professional-grade.
This recipe ensures guaranteed height, a tender center, and the perfect rich flavor that will make everyone ask for your secret.Stop Settling for Flat Cookies: Why This Recipe Works
The Power of Cornstarch: Achieving That Soft Center
The addition of one teaspoon of cornstarch is a game-changer for cookie texture.
Cornstarch helps to tenderize the dough by inhibiting the formation of gluten strands, which prevents the cookies from becoming cakey or tough.
It also slightly thickens the dough, assisting the overall structure and contributing to that desirable soft, almost fudgy center.
The Magic of the Chill: Preventing the Spread
Chilling the dough is the single most important defense against thin, greasy cookies.
When the dough is refrigerated, the cold temperature solidifies the butter, which raises its melting point.
During baking, the chilled butter melts slower, giving the cookie structure (the flour, eggs, and leavening agents) time to set before the fat fully liquefies and causes the cookie to collapse.
The minimum 30 minutes chill is effective, but an overnight rest allows the flour to fully hydrate and the flavors to deepen, yielding an even better result.
Chewy Edges and Gooey Centers: Decoding the Perfect Bake Time
Achieving the perfect contrast-chewy edges and a gooey center-comes down to precise timing and observation.
You must pull the cookies from the oven when the edges are set and a rich golden brown, but the very centers still look slightly undercooked and puffy.
For those who enjoy the molten center, explore our molten lava chocolate chip cookie pie.
The final crucial step is letting the cookies cool on the hot baking sheet for five minutes.
This period allows the residual heat from the pan to continue cooking the center, locking in the gooey texture without drying out the edges.
The Essential Ingredients for Maximum Flavor and Structure
Butter Temperature: Why “Slightly Softened” Matters
For proper creaming, butter should be “slightly softened,” meaning it yields easily to light pressure but is still cool to the touch (around 65°F).
If the butter is too warm or melted, it cannot incorporate air properly during the creaming stage, resulting in a dense cookie texture.
If the butter is too cold, the creaming will be difficult, and the final batter will be tough and heavy.
Brown vs. Granulated: Mastering the Sugar Ratio
The combination of brown and granulated sugar is essential for both flavor and structure in these Bakery Style Chocolate Chip Cookies.
Granulated sugar provides necessary structure and promotes spreading, ensuring the edges crisp up.
Brown sugar, which contains molasses, is slightly acidic and attracts moisture, resulting in a chewier, softer cookie that stays moist longer.
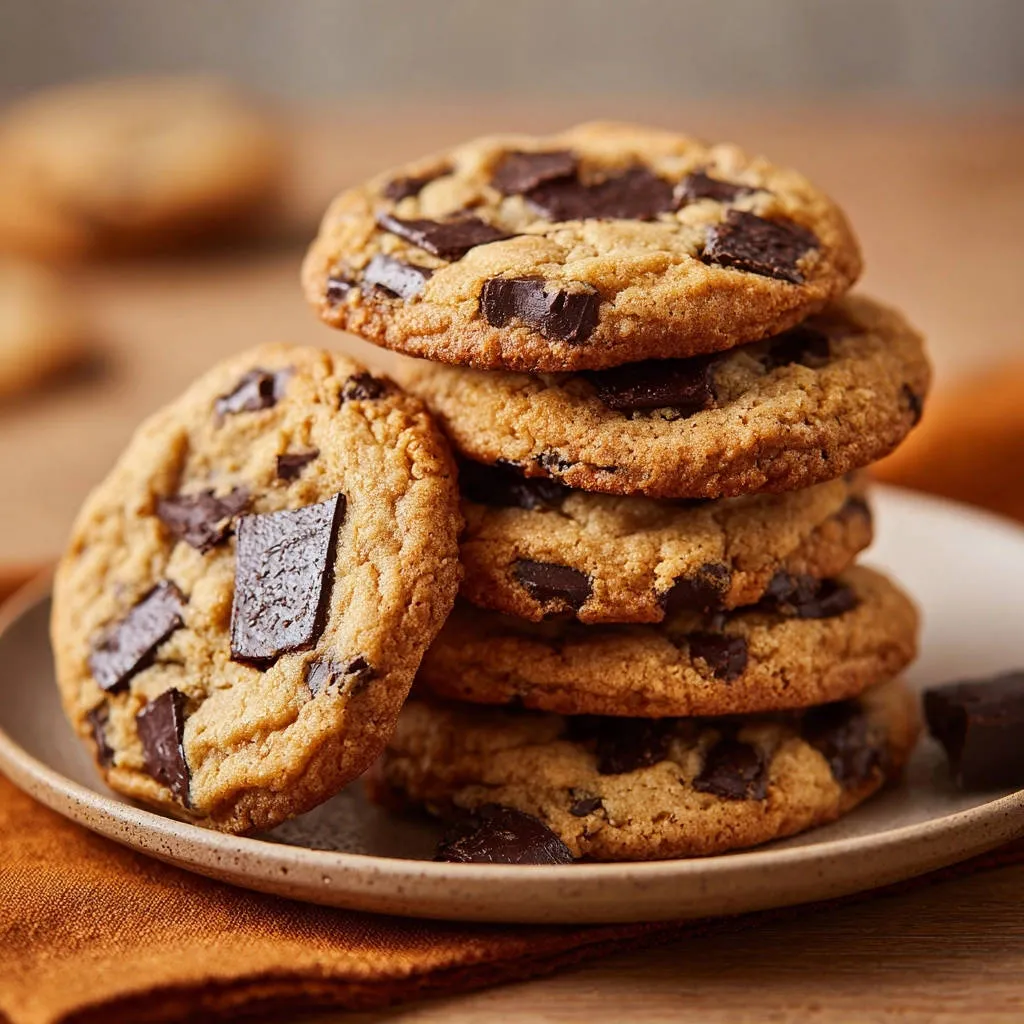
Choosing the Perfect Chocolate Chips (Chunks vs. Quality)
While semi-sweet chips are traditional, using high-quality chocolate chunks will give you a superior, meltier mouthfeel.
Larger chunks offer dramatic pockets of soft chocolate that look beautiful when the cookies are warm.
Always choose a brand with a cacao content of 55-65% for the best balance of sweetness and deep chocolate flavor.
For those who also enjoy the rich taste of dark chocolate, consider trying our frosted dark chocolate toffee cookies.
The Right Tools for Bakery-Quality Results
Essential Mixing Equipment
An electric stand mixer or a powerful hand mixer is crucial for properly creaming the butter and sugar.
This step, which takes 3 to 4 minutes, is too taxing and lengthy for hand mixing and requires consistent power to maximize aeration.
The Importance of Parchment Paper
Always line your baking sheets with parchment paper or silicone mats-never grease the pans directly.
This prevents sticking, promotes even heating, and ensures the bottom of the cookies stay thick rather than spreading too rapidly on a slick surface.
Accurate Measurements: Digital Scale vs. Measuring Cups
For bakery-level consistency, I highly recommend weighing your flour using a digital kitchen scale (2 1/4 cups typically equals 270g).
Flour scooped directly from a bag can easily be over-measured by 20-30%, leading to dry, crumbly dough; weighing guarantees accuracy.
Baking Mastery: Step-by-Step Instructions for Perfect Bakery Style Chocolate Chip Cookies
- Preparing the Dry Foundation (Including the Cornstarch)
Whisk together the flour, baking soda, salt, and the critical cornstarch in a medium bowl.
Pre-mixing these ingredients ensures the leavening agents and cornstarch are evenly distributed throughout the batch, guaranteeing consistent lift and texture.
- Creaming for Air and Lightness
In a large bowl, use your electric mixer to beat the slightly softened butter, granulated sugar, and brown sugar until the mixture transforms.
Continue beating for a full 3 to 4 minutes until the mixture is visibly lightened in color and takes on a fluffy, airy texture-this trapped air is what provides the final lift.
- The Slow Integration of Eggs and Vanilla
Add the two large eggs one at a time, beating just until each egg yolk is fully incorporated before adding the next.
This slow integration prevents the mixture from breaking or curdling and ensures the fats and liquids emulsify smoothly.
Finish this stage by mixing in the vanilla extract.
- Combining and the Anti-Spread Fix: Mandatory Chilling
Gradually add the prepared dry mixture to the wet ingredients, mixing on the lowest speed until the flour streaks have just disappeared.
Stop mixing immediately; overmixing develops gluten and results in tougher cookies.
Stir in the chocolate chips by hand, then wrap the dough tightly and refrigerate for a minimum of 30 minutes, or preferably for two hours or overnight for maximum thickness.
- Scoop and Bake Preparation
Preheat your oven precisely to 375 degrees F and line two sturdy baking sheets with parchment paper.
Scoop rounded, uniform balls of dough (approximately 1.5 tablespoons each) onto the prepared sheets.
Maintain at least two inches of spacing between the dough balls to allow for necessary expansion without merging.
- Reading the Visual Cues and Cooling Technique
Bake for 9 to 11 minutes, rotating the sheets halfway through for even color.
Remove the cookies when the edges are a deep golden brown and the centers are still pale, puffy, and look slightly undone.
Allow them to cool undisturbed on the baking sheet for exactly 5 minutes; this critical step allows the centers to set and achieves that perfect chewy internal structure.
Chef’s Secrets: Advanced Tips to Elevate Your Cookies
The Pre-Bake Garnish
For that professional, picture-perfect appearance, reserve about 1/4 cup of chocolate chips or chunks.
Press 3 to 4 extra chips onto the visible top of each scooped dough ball just before placing them in the oven.
How to Ensure Uniform Texture
Ovens often have hot spots, which can lead to uneven baking and spreading.
To ensure all your Bakery Style Chocolate Chip Cookies achieve the same golden color and texture, rotate the baking sheets 180 degrees at the 5-minute mark.
A Dash of Flaky Sea Salt
Once the cookies come out of the oven, immediately sprinkle a tiny pinch of flaky sea salt (like Maldon) over the top of each hot cookie.
This adds an incredible flavor dimension, enhancing the sweetness and balancing the richness of the chocolate and butter.
Reviving Stale Cookies
If your cookies start to lose their moisture after a few days, place them in an airtight container alongside half a slice of plain white bread.
The bread will release its moisture into the cookies, keeping them soft and fresh for several extra days.
Make-Ahead Magic: Freezing Dough and Storage
How to Prepare and Freeze Cookie Dough for Later
Scoop the dough balls onto a parchment-lined baking sheet and place the entire tray in the freezer for about one hour until the dough is rock-solid.
Transfer the frozen dough balls into a heavy-duty freezer bag, labeling with the date; they will keep well for up to 3 months.
To bake from frozen, simply place the dough on the baking sheet and add 2-3 minutes to the total bake time (no need to thaw).
Storing Baked Cookies: Keeping Them Fresh and Soft
Once completely cooled, store the finished cookies in an airtight container at room temperature.
Properly stored, these thick treats will retain their moisture and chewiness for 4 to 5 days.
Quick Serving Suggestions: Beyond the Glass of Milk
Turn these exceptional cookies into gourmet desserts for your next gathering.
They make incredible ice cream sandwiches when filled with high-quality vanilla bean ice cream.
Alternatively, serve them slightly warm alongside an artisanal coffee or a glass of rich, cold milk for the ultimate classic pairing.
Frequently Asked Questions About Baking Chocolate Chip Cookies
Can I Substitute Baking Powder for Baking Soda?
No, this substitution will significantly alter the final result.
Baking soda requires an acid (like the molasses in brown sugar) to activate and promotes spread, while baking powder is a complete leavener that promotes upward puff and causes less spreading.
Substituting powder will result in thicker, rounder, but potentially drier, less chewy cookies.
What if I don’t have time to chill the dough?
While the full chill is critical, if you are pressed for time, you can flash freeze the scooped dough balls on a tray for 10 to 15 minutes before baking.
Skipping the chill entirely means the butter will melt too quickly in the oven, causing your cookies to spread into a noticeably thinner disk.
How do I make these gluten-free or dairy-free?
For a reliable gluten-free version, substitute the all-purpose flour cup-for-cup with a good-quality 1:1 gluten-free baking blend that contains xanthan gum.
To make them dairy-free, substitute the unsalted butter with a high-quality vegan butter stick alternative (avoid tubs), keeping the quantity and temperature the same.
You now possess the foundational knowledge and expert techniques needed to stop struggling and start mastering the perfect batch of Bakery Style Chocolate Chip Cookies.
More Sweet Treats
After enjoying these bakery-style chocolate chip cookies, you might want to explore other delightful breakfast and dessert options.
- For a warm and spiced start to your day, consider these Cinnamon French Toast Stacks, offering a satisfyingly crisp texture.
- If you’re in the mood for something fun and nostalgic, these S’mores Pancakes bring a playful, campfire-inspired sweetness to your table.
Go ahead, mix up a batch of this flawless dough, observe the magic of the cornstarch and the chill, and prepare to share your masterpiece with the world!
Chocolate Chip Cookies
Course: DessertCuisine: AmericanDifficulty: easy4
30 cookies20
minutes11
minutes550
kcal60
minutesStop settling for thin, disappointing cookies! This recipe provides the guaranteed secret to achieving perfect bakery texture with chewy edges and soft centers every single time. The addition of cornstarch and a required chilling period prevents spreading and locks in flavor.
Ingredients
2 1/4 cups all-purpose flour
1 teaspoon baking soda
1 teaspoon salt
1 teaspoon cornstarch
1 cup (2 sticks) unsalted butter, slightly softened
3/4 cup granulated sugar
3/4 cup packed light brown sugar
2 large eggs
2 teaspoons vanilla extract
2 cups semi-sweet chocolate chips or chunks
Directions
- Prepare Dry Ingredients. In a medium bowl, whisk together the flour, baking soda, salt, and the key ingredient, cornstarch. Setting aside the dry mixture helps ensure even distribution of the raising agents and the cornstarch.
- Cream Wet Ingredients. In a separate large bowl, using an electric mixer, beat the slightly softened butter, granulated sugar, and brown sugar on medium speed until the mixture is light and fluffy (about 3 to 4 minutes). This creaming action adds necessary air.
- Add Eggs and Vanilla. Beat in the eggs one at a time, ensuring each is fully incorporated before adding the next. Stir in the vanilla extract.
- Combine and Introduce the Anti-Spread Fix. Gradually add the dry ingredient mixture to the wet mixture, mixing on low speed until just combined. Do not overmix. Stir in the chocolate chips by hand. This is the crucial step to prevent excessive spread: wrap the dough tightly and refrigerate for a minimum of 30 minutes. If you have time, 2 hours or overnight is even better. The cold temperatures solidify the butter, which makes it melt slower in the oven and prevents the cookies from collapsing into thin puddles.
- Scoop and Bake. Preheat your oven to 375 degrees F. Line two baking sheets with parchment paper. Scoop rounded tablespoon-sized balls of dough onto the prepared sheets, ensuring they are at least 2 inches apart.
- Finish Baking. Bake for 9 to 11 minutes. The edges should be set and golden brown, but the centers should still look slightly soft. Allowing them to cool on the pan for 5 minutes before transferring them to a wire rack locks in that perfect, chewy texture.
Notes
- For extra chewy cookies, make sure your butter is only slightly softened, not fully melted. Don’t overmix the dough once the dry ingredients are added; stopping just as streaks of flour disappear will help prevent tough cookies.