There’s nothing quite as frustrating as meticulously crafting dessert truffles, only for them to crumble during dipping or lose their perfect shape. I’ve been there, but after countless experiments, I finally cracked the code to perfectly firm and delightfully smooth Berry Cheesecake Truffles.
This recipe transforms a common kitchen frustration into a triumph, delivering luscious, stable treats that are as beautiful to behold as they are delicious to eat. Get ready for impressive results every time, perfect for any occasion or a special personal indulgence.
For a similar cheesecake experience, check out this method for Red Velvet Cheesecake Stuffed Cookies.
Beyond Basic: The “No-Crumble” Secret to Our Berry Cheesecake Truffles
Many home bakers struggle with truffles that lack structure, leading to a messy, unsatisfactory experience. The key often lies in the balance of ingredients and, critically, the precise chilling times.
Our recipe for these delectable berry cheesecake truffles specifically addresses this by focusing on two non-negotiable chilling phases. These steps bind the ingredients thoroughly, ensuring your truffle base becomes perfectly firm and resilient.
This method guarantees that each truffle holds its spherical shape flawlessly, even when dipped in warm chocolate. The result is a smooth, delightful texture and an elegant appearance that makes these homemade truffles truly special.
Gather Your Goodies: Simple Ingredients for Sublime Berry Cheesecake Truffles
The Heart of the Truffle: Cake Crumbs & Creamy Filling
Vanilla Cake Crumbs: These form the essential base, contributing a tender texture and a foundational sweetness. They bind the mixture beautifully, providing structure for your no-bake cheesecake truffles. Feel free to use leftover baked cake or a store-bought pound cake for convenience.
Softened Cream Cheese: This is where the “cheesecake” magic happens! Cream cheese provides the creamy tang, rich moisture, and crucial binding power, ensuring your truffles are both flavorful and hold their shape.
Sweetness & Scent: Powdered Sugar & Vanilla
Powdered Sugar: Unlike granulated sugar, powdered sugar dissolves effortlessly into the no-bake mixture, contributing to a wonderfully smooth and uniform truffle consistency. It adds the perfect touch of sweetness without any grittiness.
For a similar approach to achieving that smooth texture, explore creamy pumpkin swirl cheesecake.
Vanilla Extract: A kitchen staple, vanilla extract deepens the overall flavor profile, adding a warm, aromatic note that complements both the cheesecake and berry elements beautifully.
The Perfect Coat: White Chocolate & Flavorful Toppings
White Chocolate Melting Wafers or Chips: These are ideal for coating as they melt smoothly and harden quickly to a crisp, attractive finish. They provide a sweet, creamy shell that encases the soft cheesecake interior.
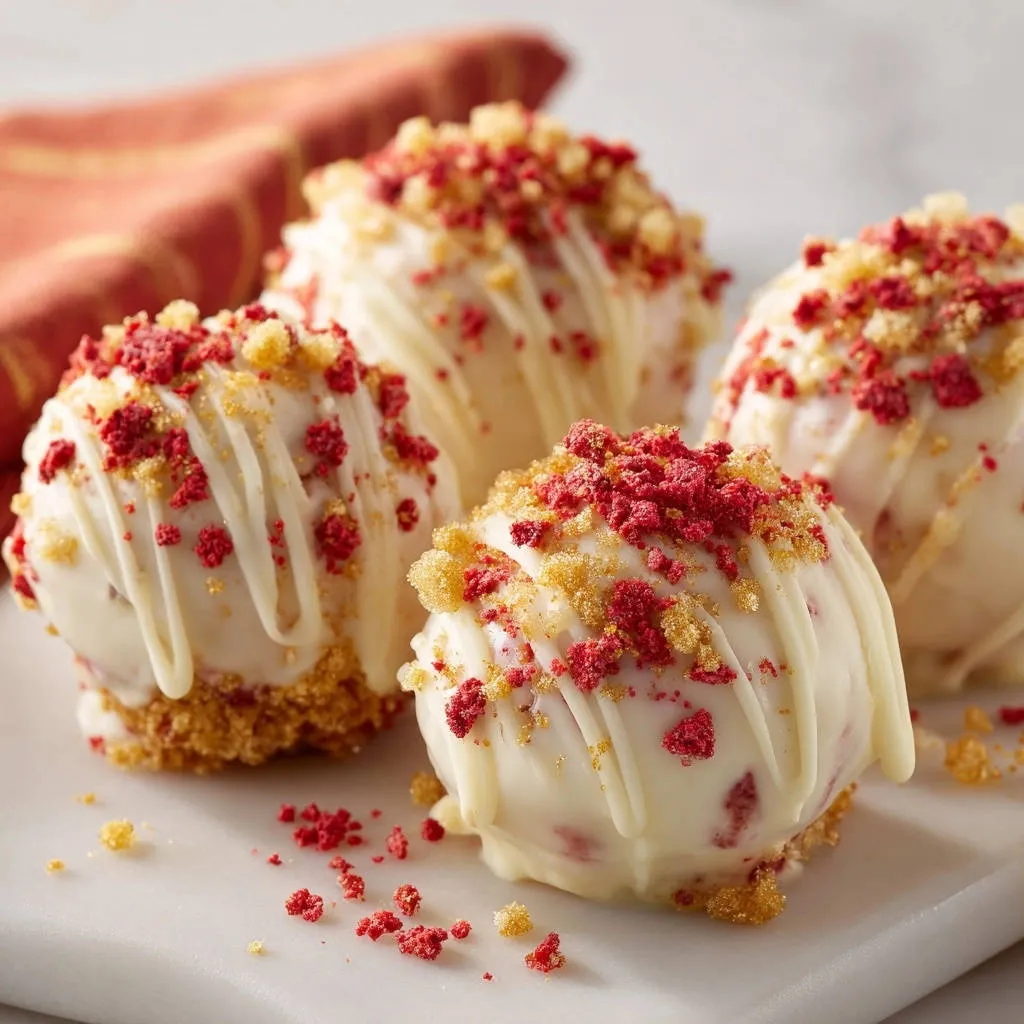
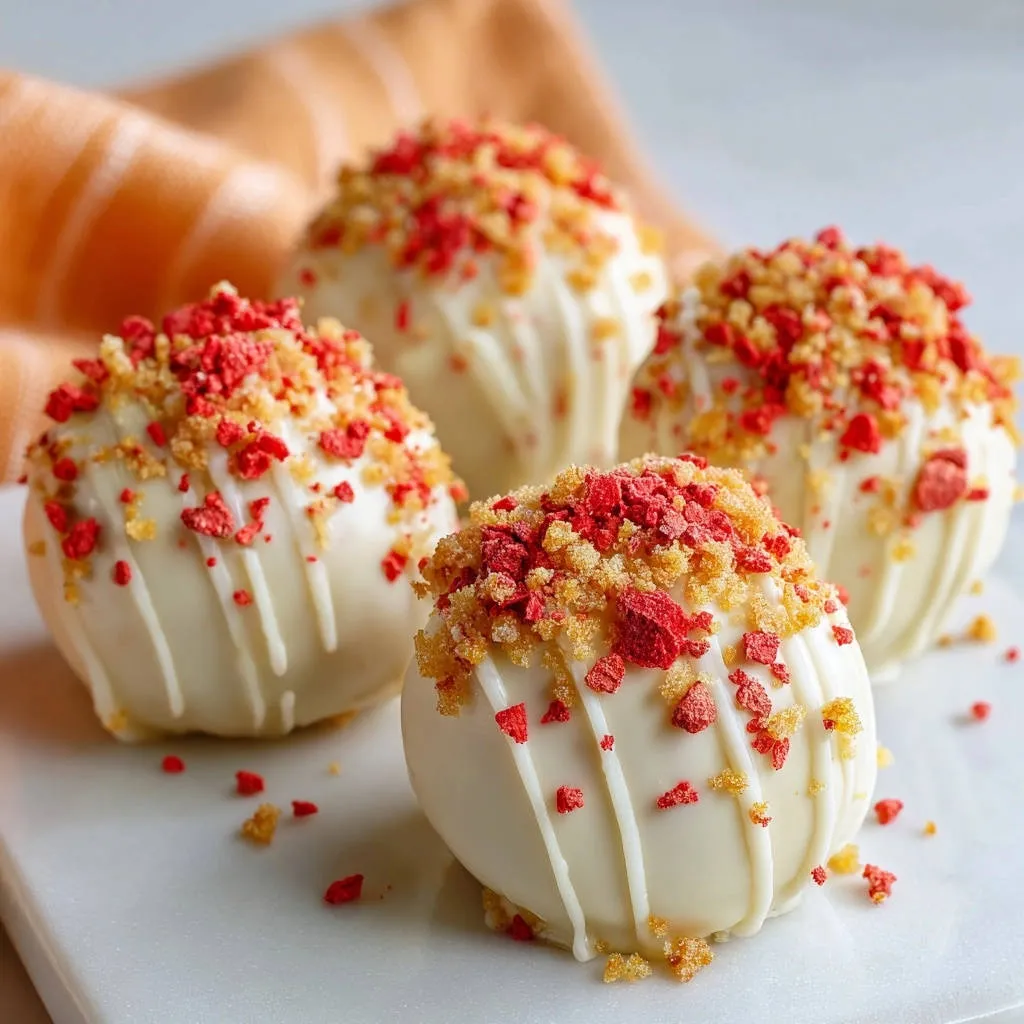
Freeze-Dried Raspberry Crumbs: These are a game-changer! They offer an intense burst of tart berry flavor, a vibrant pop of color, and a delicate crunch, elevating these berry cheesecake truffles beyond the ordinary.
Graham Cracker Crumbs: Providing a classic cheesecake crust flavor and a delightful textural contrast, graham cracker crumbs are the perfect companion to the raspberry. Together, they create a familiar yet exciting topping.
For creative variations, consider finely chopped pistachios, toasted shredded coconut, mini chocolate chips, or a simple drizzle of dark chocolate over the white chocolate coating.
Tools for Truffle Triumph: What You’ll Need
Mixing & Chilling Essentials
Medium Bowl: A sturdy bowl is essential for combining your truffle base ingredients thoroughly. Choose one large enough to allow for easy mixing without spills.
Spoon or Spatula (and your hands!): For initial mixing, a strong spoon or silicone spatula works well. Your clean hands will be invaluable for achieving that perfect, uniform dough-like consistency.
Parchment-Lined Baking Sheet: Parchment paper prevents sticking and makes transferring your truffles effortless during chilling and after dipping, ensuring a smooth finish.
Dipping & Finishing Aids
Microwave-Safe Bowl: Used for melting the white chocolate, ensuring even heating and a smooth consistency. A small, deep bowl helps with easy dipping.
Fork or Dipping Tool: A standard dinner fork works perfectly, or invest in a specialized dipping tool for a cleaner, more professional coating process.
Airtight Container: Crucial for storing your finished Berry Cheesecake Truffles, maintaining their freshness and preventing them from absorbing fridge odors.
Crafting Your Berry Cheesecake Truffles: A Step-by-Step Guide
- Prepare the Truffle Base:
In a medium bowl, combine the vanilla cake crumbs, softened cream cheese, powdered sugar, and vanilla extract. Use a sturdy spoon or your clean hands to mix until a uniform, dough-like mixture forms.
This is the critical stage: the mixture should be moist enough to hold its shape when pressed together, but not sticky. This ensures your truffles won’t crumble later.
- First Chill for Firmness:
Cover the bowl with plastic wrap and refrigerate the mixture for at least 30 minutes.
This initial chilling period allows the ingredients to bind together and firm up, which is essential for easier rolling and dipping in subsequent steps.
- Roll into Perfect Spheres:
Once thoroughly chilled, scoop out small portions, about 1 tablespoon each. Roll these portions between your palms to form smooth, compact balls.
Place the formed truffles on a parchment-lined baking sheet, ensuring they are not touching.
- Second Chill for Dipping Success:
Return the baking sheet with the rolled truffles to the refrigerator for another 15 minutes.
This second chill is crucial for making the truffles perfectly firm, preventing them from breaking apart or melting when dipped into the warm chocolate.
- Melt the White Chocolate:
In a microwave-safe bowl, melt the white chocolate melting wafers or chips according to the package directions. Stir frequently until the chocolate is completely smooth and fluid.
Work carefully to avoid overheating, which can cause the chocolate to seize.
- Dip & Coat with Care:
Using a fork or a dedicated dipping tool, gently lower each chilled truffle into the melted white chocolate. Tap gently against the side of the bowl to remove any excess chocolate.
Place the coated truffle back onto the parchment-lined baking sheet.
- Add Flavorful Toppings:
Immediately after dipping each truffle, while the chocolate is still wet, generously sprinkle the top with a mix of the freeze-dried raspberry crumbs and graham cracker crumbs.
This ensures the toppings adhere beautifully to the fresh chocolate coating.
- Set & Enjoy:
Allow the truffles to set at room temperature until the chocolate hardens completely. For a quicker set, you can refrigerate them for 10 to 15 minutes.
Once set, store your delicious Berry Cheesecake Truffles in an airtight container in the refrigerator.
Pro Tips for Perfect Berry Cheesecake Truffles Every Time
Achieving the Ideal Truffle Mixture Consistency: The first mixing step is paramount. The mixture should feel like firm play-dough – moist enough to stick together, but not sticky on your hands. If it’s too dry, add a tiny bit more softened cream cheese; if too wet, incorporate a few more cake crumbs.
The Power of Chilling: Don’t Skip It! Both chilling phases are non-negotiable for success. The first chill binds the ingredients, while the second ensures the truffles are solid enough to withstand the warmth of the melted chocolate without deforming, preventing a messy dipping experience.
Melting White Chocolate Like a Pro: Always melt white chocolate slowly and gently. Overheating can cause it to seize (become lumpy and thick). Use short bursts in the microwave, stirring well after each, or opt for a double boiler for more controlled melting.
Creative Topping Variations: While raspberry and graham cracker crumbs are fantastic, feel free to experiment! Consider finely chopped nuts, toasted coconut, mini chocolate chips, sprinkles, a drizzle of dark chocolate, or even a dusting of cocoa powder for different flavors and textures.
Serving Suggestions & Smart Storage for Your Sweet Treats
Perfect Pairings & Presentation Ideas
These Berry Cheesecake Truffles are as delightful to look at as they are to eat. Serve them in mini cupcake liners on a decorative platter for an elegant presentation at parties or gatherings.
They pair wonderfully with a freshly brewed cup of coffee, a delicate tea, or even a sparkling rosé for a touch of sophisticated sweetness. These homemade truffles also make thoughtful, impressive gifts when packaged in a pretty box.
Storing Your Berry Cheesecake Truffles
To maintain their optimal texture and freshness, always store your truffles in an airtight container in the refrigerator. This protects them from absorbing odors and keeps the chocolate coating firm.
Properly stored, these delicious dessert bites will remain fresh for up to one week. However, their irresistible flavor usually means they won’t last that long!
Make-Ahead Magic
For ultimate convenience, the truffle mixture (before rolling) can be made a day in advance and stored in the refrigerator. This reduces prep time on a busy day.
You can also roll the truffles and perform the second chill ahead of time, then dip them closer to when you plan to serve. This strategy allows for less stress on event day, making these perfect party treats.
Truffle Troubleshoot: Common Issues & Quick Fixes
Why Are My Truffles Crumbly?
This usually indicates your truffle base mixture was too dry. Ensure you’ve used softened cream cheese, and if still crumbly, add a tiny bit more cream cheese until it holds together easily when pressed.
My Chocolate Seized When Melting!
Seized chocolate is often a result of overheating or introducing water. To salvage, try stirring in a teaspoon of vegetable oil or shortening at a time until it smooths out, or start fresh with a clean, dry bowl and melt slowly.
The Truffles Are Too Soft to Dip.
This is a clear sign they haven’t been chilled sufficiently. Return them to the refrigerator for another 15-30 minutes, or even the freezer for 5-10 minutes, until they are very firm.
Chocolate Coating Is Too Thick or Streaky.
If the coating is too thick, your chocolate might be too cool or you’re not tapping off enough excess. Gently rewarm the chocolate slightly if it’s too cool. For streaks, ensure the truffles are very cold before dipping, and the chocolate is perfectly smooth.
Your Berry Cheesecake Truffles Questions Answered
Can I use homemade cake crumbs?
Absolutely! Homemade vanilla cake crumbs work wonderfully and can even enhance the flavor. Ensure they are fully cooled before mixing. For best results, use a food processor to create fine, uniform crumbs, which ensures a smooth truffle texture.
How long do Berry Cheesecake Truffles last?
When stored in an airtight container in the refrigerator, these truffles will stay fresh and delicious for up to 7 days. Their incredible flavor and delightful texture mean they’re usually devoured long before then, though!
Can I freeze these truffles?
Yes, you can! Place the finished truffles on a baking sheet in the freezer until solid, then transfer them to an airtight, freezer-safe container. They can be frozen for up to 1 month. Thaw them in the refrigerator before serving for the best texture.
What if I don’t have freeze-dried raspberries?
No problem! You can use other freeze-dried fruits, finely chopped nuts, sprinkles, or even a dusting of cocoa powder or a drizzle of contrasting dark chocolate. Get creative with your toppings to match your taste or occasion!
Are these truffles gluten-free?
This recipe can easily be made gluten-free by simply using gluten-free vanilla cake crumbs. All other ingredients are typically gluten-free, but always double-check labels to be absolutely sure, especially with white chocolate wafers.
Ready to Indulge? Share Your Berry Cheesecake Truffles Creation!
Now that you have the ultimate guide to creating perfectly shaped, delightfully creamy Berry Cheesecake Truffles, it’s time to unleash your inner pastry chef! This recipe promises impressive results with minimal fuss, making it ideal for both novice bakers and seasoned dessert enthusiasts. We’re confident you’ll love the smooth texture and vibrant berry flavor of these no-bake cheesecake truffles.
What to Try Next
If you enjoyed these berry cheesecake bites, explore more delightful cream cheese creations.
- For a savory starter with a similar creamy base, consider these Cranberry Dill Cheese Balls, featuring a bright blend of herbs.
- If you like the tartness of berries and cream cheese, you might enjoy this Cranberry Orange Walnut Cream Cheese Dip for a different take on the flavor combination.
Don’t keep these irresistible treats a secret! Whip up a batch for your next gathering, surprise a loved one, or simply enjoy them as a personal indulgence. We’d love to see your beautiful creations – share your Berry Cheesecake Truffles photos on social media and tag us!

Cheesecake Truffles
Course: DessertCuisine: AmericanDifficulty: easy24
truffles40
minutes15
minutes180
kcal60
minutesNo more crumbly truffles! This recipe reveals the simple trick to making perfectly firm and smooth dessert truffles every time. Enjoy the delightful texture and flavor of these easy-to-make berry cheesecake treats.
Ingredients
2 cups vanilla cake crumbs (from a baked cake or store bought pound cake)
4 ounces cream cheese, softened
1/4 cup powdered sugar
1/2 teaspoon vanilla extract
12 ounces white chocolate melting wafers or chips
2 tablespoons freeze dried raspberry crumbs
2 tablespoons graham cracker crumbs
Directions
- In a medium bowl, combine the vanilla cake crumbs, softened cream cheese, powdered sugar, and vanilla extract. Mix with a spoon or your hands until a uniform, dough like mixture forms. It should be moist enough to hold its shape when pressed together, but not sticky. This is the crucial step to ensure they don’t crumble!
- Cover the bowl and refrigerate the mixture for at least 30 minutes. This chilling time helps the ingredients bind and firm up, making the truffles much easier to roll and dip.
- Once chilled, scoop out small portions (about 1 tablespoon each) and roll them into smooth, compact balls. Place the formed truffles on a parchment lined baking sheet.
- Return the baking sheet with the truffles to the refrigerator for another 15 minutes. A second chill ensures they are perfectly firm before dipping, preventing them from breaking apart in the warm chocolate.
- In a microwave safe bowl, melt the white chocolate melting wafers or chips according to package directions, stirring until completely smooth.
- Using a fork or a dipping tool, dip each chilled truffle into the melted white chocolate, tapping gently to remove any excess. Place the coated truffle back on the parchment lined baking sheet.
- Immediately sprinkle the top of each wet truffle with a mix of the freeze dried raspberry crumbs and graham cracker crumbs.
- Let the truffles set at room temperature until the chocolate hardens, or refrigerate for 10 to 15 minutes for a quicker set. Store in an airtight container in the refrigerator.
Notes
- The double chilling process is key for truffles that hold their shape and are easy to dip.