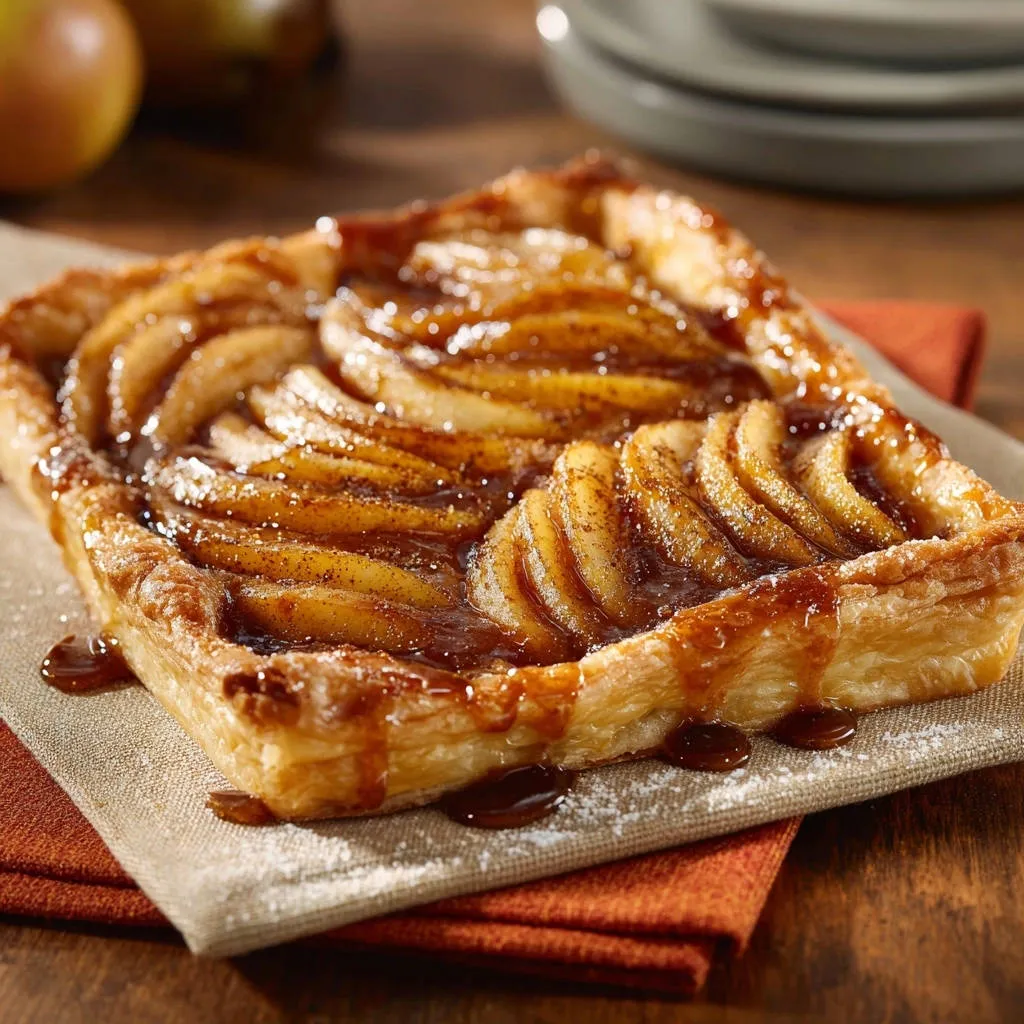
For years, the dream of a perfectly crisp, flaky fruit tart was often thwarted by a disappointing, soggy bottom. I’ve been there, wishing for that ideal balance of tender fruit and golden pastry, only to find moisture had claimed victory. This recipe for Caramelized Apple Puff Pastry Tart introduces a simple, yet utterly transformative trick, ensuring a beautifully crisp base every single time, making it truly special.
Get ready to impress with this elegant, yet incredibly easy-to-make dessert that delivers a symphony of textures and flavors without the common pitfalls.
Beyond Basic: What Makes Our Caramelized Apple Puff Pastry Tart So Irresistible?
The “Soggy Bottom” Solution: Our Game-Changing Trick
This recipe employs a clever method to create a protective, caramelizing barrier on the pastry. It effectively seals the crust, ensuring your tart remains perfectly crisp, resisting any moisture from the juicy apples.
For a similar sweet and fruity experience, explore salted caramel apple turnovers.
Simplicity Meets Sophistication: An Easy Gourmet Treat
Utilizing store-bought puff pastry, this Caramelized Apple Puff Pastry Tart eliminates complex dough work. You achieve an elegant, gourmet appearance with minimal effort, perfect for any occasion.
A Symphony of Textures: Flaky Pastry, Tender Apples
Each bite offers the satisfying crunch of a golden, flaky crust, contrasting beautifully with the soft, tender, and warmly spiced caramelized apples. It’s a delightful interplay that elevates a simple fruit tart.
Gather Your Goods: The Simple Ingredients for a Stunning Tart
Puff Pastry: The Golden Canvas
One sheet of thawed puff pastry is your secret weapon for an effortlessly elegant base. Ensure it’s properly thawed but still cold for the best puff and flakiness.
Look for all-butter varieties if possible, as they yield superior flavor and a richer, golden finish.
Apples: Choosing the Perfect Sweet-Tart Balance
Two medium apples, such as Honeycrisp or Granny Smith, provide the ideal sweet-tart profile. Thinly slicing them ensures they cook evenly and become perfectly tender.
Crisp varieties hold their shape well, preventing a mushy filling. For another comforting apple dessert, you might enjoy our classic apple pie recipe.
For a similarly satisfying bite, check out these cheesy garlic swirls.
Sweeteners & Spice: Enhancing Natural Flavors
Granulated sugar plays multiple roles here, sweetening both the apples and forming part of our “no soggy bottom” barrier. Ground cinnamon adds warmth, perfectly complementing the fruit.
The Butter-Sugar Glaze: A Final Flourish
Unsalted butter, combined with additional granulated sugar and water, creates a simple yet effective glaze. This adds a beautiful sheen and a touch more sweetness, sealing in flavor.
Powdered sugar for dusting offers a delicate, elegant finish and an extra touch of sweetness.
Your Kitchen Arsenal: Tools for Tart Perfection
Baking & Oven Essentials
Baking Sheet: A sturdy, flat baking sheet is essential for even heat distribution.
Parchment Paper: Prevents sticking and makes cleanup a breeze, ensuring your pastry doesn’t fuse to the pan.
Small Saucepan: Needed for melting butter and sugar to create the perfect tart glaze.
Prep & Assembly Aids
Sharp Knife: Crucial for thinly slicing apples and lightly scoring the puff pastry, creating a clean border.
Fork: Used for piercing the pastry base, a key step in preventing sogginess and ensuring an even bake.
Pastry Brush: Ideal for evenly coating the pastry with melted butter and the final glaze.
Medium Bowl: For tossing the apple slices with sugar and cinnamon, ensuring thorough coating.
Step-by-Step Guide: Crafting Your Caramelized Apple Puff Pastry Tart
- Preheat Oven and Prep Pastry:
Preheat your oven to 400F (200C). This high temperature is vital for the puff pastry to achieve its signature lift and crispness.
Line a baking sheet with parchment paper. Gently unroll one sheet of thawed puff pastry onto the prepared baking sheet, ensuring it lies flat.
Using a sharp knife, lightly score a 1-inch border around the edge of the pastry sheet, being careful not to cut all the way through. This intentional scoring helps the edges puff up beautifully and creates a defined frame for your fruit.
- The Secret to No Soggy Crust:
Here’s the game-changer for your Caramelized Apple Puff Pastry Tart! Pierce the inner rectangle of the pastry all over with a fork. This strategic pricking prevents the center from puffing up too much, creating a stable and solid base for your apples.
Then, lightly brush the inner rectangle (inside your scored border) with 1 tablespoon of the melted butter. This butter layer adds rich flavor and contributes to the barrier.
Finally, sprinkle evenly with 1 tablespoon of granulated sugar. This combination of butter and sugar creates a protective, caramelizing barrier that helps prevent the fruit’s moisture from making your crust soggy, guaranteeing a wonderfully crisp pastry.
- Prepare the Fruit:
In a medium bowl, toss the thinly sliced apples with the remaining 3 tablespoons of granulated sugar and the ground cinnamon until evenly coated. This ensures every apple slice is infused with sweet, warm spice before baking.
- Assemble the Tart:
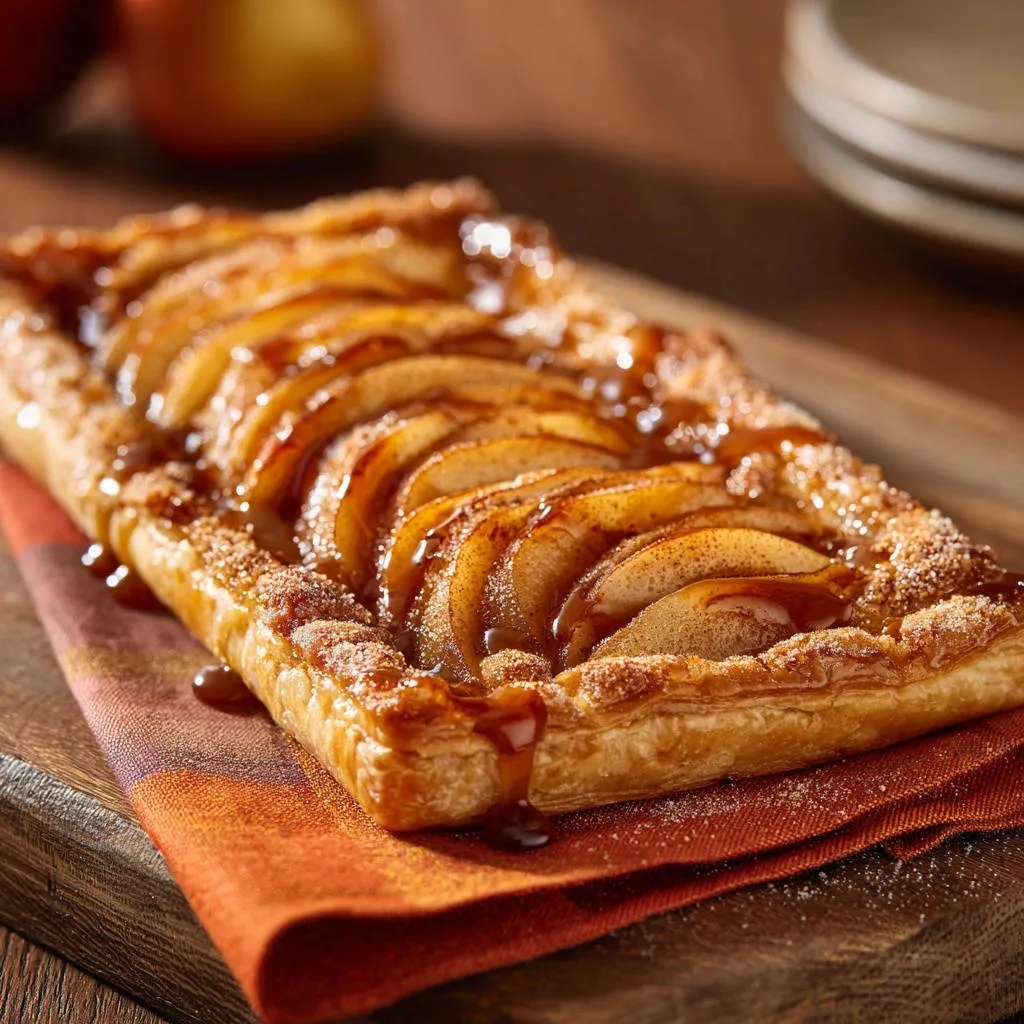
Arrange the apple slices neatly in overlapping rows or a circular pattern within the scored border on the pastry. Taking a moment for a beautiful arrangement makes your tart even more appealing.
- Bake to Perfection:
Bake for 20-25 minutes, or until the pastry is golden brown and puffed, and the apples are tender. Keep an eye on the color, as ovens can vary.
If the edges are browning too quickly, you can loosely tent them with foil. This protects them from over-browning while the center finishes cooking and the apples soften.
- Create the Glaze:
While the Caramelized Apple Puff Pastry Tart is baking, prepare your glaze. Melt the remaining 1 tablespoon of butter with 1 tablespoon of granulated sugar and 1 tablespoon of water in a small saucepan over low heat.
Stir constantly until the sugar dissolves and it forms a light syrup. This quick glaze adds shine and another layer of sweetness.
- Glaze and Serve:
Once the tart is out of the oven, immediately brush the warm apple slices and crust edges with the prepared glaze. The warmth of the tart helps the glaze soak in beautifully.
Let cool slightly before dusting with powdered sugar. Slice and enjoy that perfectly crisp crust and juicy apple filling!
Setting the Stage: Preheat & Pastry Prep
The Crisp Crust Secret: Preventing Moisture
Apple Prep: Sweetening the Filling
Artful Arrangement: Assembling Your Tart
Baking Brilliance: Achieving Golden Perfection
The Finishing Touch: Glaze & Dust
Chef’s Pro Tips: Elevate Your Tart to Masterpiece Status
Don’t Skimp on the Scoring
The 1-inch border scoring isn’t just for looks; it helps direct the pastry’s puff. Ensure your knife is sharp and the score is deep enough to make a visible line, but not so deep it cuts through completely. This creates a beautifully defined, golden brown edge.
Mastering the Fork Prick Technique
When piercing the inner rectangle, aim for even distribution and depth. This crucial step prevents the center from rising excessively, creating a solid foundation for your apples and guaranteeing a crisp pastry base.
Apple Slicing for Even Cooking
Consistency is key when slicing apples. Aim for uniform, thin slices, approximately 1/8 to 1/4 inch thick. This ensures all apples cook at the same rate, resulting in a uniformly tender filling for your Caramelized Apple Puff Pastry Tart.
Temperature Control: The Key to Golden Edges
Keep a close eye on your oven during baking. If the pastry edges are browning too quickly before the apples are tender, loosely covering them with aluminum foil is a smart move. This prevents burning and allows the rest of the tart to catch up.
Glaze Immediately for Maximum Shine
Apply the warm butter-sugar glaze immediately after removing the tart from the oven. The residual heat helps the glaze melt into the apples and pastry, imparting a beautiful sheen and locking in moisture for a delectable finish.
Solving Common Tart Troubles: Quick Fixes for a Flawless Dessert
“My Pastry Isn’t Puffing Up!”
Ensure your puff pastry is still relatively cold when it goes into the oven. Warm pastry prevents the butter layers from creating steam, which is essential for a good puff. Also, make sure your oven is fully preheated to the correct temperature.
“Apples Aren’t Tender Enough (or Too Mushy)!”
If apples are too firm, they might have been sliced too thick, or your oven temperature was slightly off. For mushy apples, they may have been sliced too thin, or overbaked. Always slice uniformly and check for doneness around the 20-minute mark.
“Edges Are Burning!”
This often happens if the oven is too hot or the tart is positioned too close to the top heating element. As mentioned, loosely tenting the edges with foil is the best solution. You can also try moving the baking sheet to a lower rack in the oven.
Serving & Savoring: The Perfect Accompaniments
Classic Pairings
A scoop of vanilla bean ice cream or a dollop of freshly whipped cream is a timeless complement to this warm Caramelized Apple Puff Pastry Tart. The cold, creamy texture beautifully contrasts the tart’s warm, crisp and tender elements.
A light drizzle of extra caramel sauce can also enhance the caramelized apple flavor, adding another layer of decadence to this delightful easy dessert.
Unexpected Delights
For a unique twist, try serving with a sprinkle of toasted pecans or a very thin slice of sharp cheddar cheese on the side. The nutty crunch or savory tang provides an intriguing counterpoint to the sweet fruit.
More Apple Goodness
Continue your apple-themed meal with these sweet treats.
- For a fun breakfast twist, try these homemade apple cinnamon toaster strudels, featuring a similar spiced apple filling.
- If you love cinnamon and apples, whip up some apple cinnamon roll pancakes for a fluffy, flavorful start or end to your day.
Consider a dusting of cinnamon sugar instead of plain powdered sugar for an extra aromatic kick.
Plan Ahead: Make-Ahead & Storage Solutions for Your Tart
Can You Prepare the Tart in Advance?
You can assemble the Caramelized Apple Puff Pastry Tart completely and refrigerate it for up to 2 hours before baking. Just make sure to cover it loosely. This allows you to prep ahead and bake fresh for guests.
Alternatively, you can slice the apples and toss them with sugar and cinnamon, storing them in an airtight container in the fridge for up to a day. Assemble just before baking for the best crispness.
Storing Leftovers for Optimal Freshness
Store any leftover tart slices in an airtight container at room temperature for up to 2 days, or in the refrigerator for up to 4 days. The pastry may soften slightly over time.
Reheating for that “Just Baked” Experience
To revive the crispness of leftover Caramelized Apple Puff Pastry Tart, reheat slices in a preheated oven at 350F (175C) for about 5-10 minutes. This will help the pastry re-crisp beautifully. Alternatively, a toaster oven works wonderfully for individual slices.
Your Top Questions About This Caramelized Apple Puff Pastry Tart Answered
What type of apples work best?
Honeycrisp or Granny Smith are ideal due to their firm texture and excellent sweet-tart balance. Other good choices include Fuji, Braeburn, or Gala, which also hold their shape well when baked, ensuring juicy apples every time.
Can I make this dairy-free?
Yes, you can substitute a dairy-free puff pastry (many brands are naturally vegan) and use a plant-based butter alternative for both brushing the pastry and making the glaze. The taste and texture will remain very similar.
Can I freeze puff pastry?
Absolutely! Store-bought puff pastry comes frozen and can be kept in your freezer for months. For more delightful puff pastry creations, explore our other recipes that make use of this versatile ingredient.
How do I know when the tart is done?
Your Caramelized Apple Puff Pastry Tart is done when the pastry is deeply golden brown, significantly puffed around the edges, and the apples appear tender and slightly caramelized. A gentle poke with a knife should reveal soft apples.
Ready to Impress? Share Your Caramelized Apple Puff Pastry Tart Masterpiece!
There you have it – the ultimate guide to creating a stunning Caramelized Apple Puff Pastry Tart that promises a perfectly crisp pastry, juicy apples, and flavors that sing of autumn. This easy dessert is perfect for any gathering, from a casual brunch to an elegant dinner party.
Dive into your kitchen with confidence, and prepare to be amazed by the delicious results. Don’t forget to share your beautifully golden brown, homemade treat with us!

Caramelized Apple Puff Pastry Tart
Course: PastryCuisine: InternationalDifficulty: easy4
servings15
minutes20
minutes240
kcal40
minutesAchieve the ultimate crisp crust with this Caramelized Apple Puff Pastry Tart! A simple trick prevents sogginess, creating a flaky base topped with tender, cinnamon-spiced apples. Easy to make and utterly delicious for any occasion.
Ingredients
1 sheet puff pastry, thawed
2 medium apples (like Honeycrisp or Granny Smith), thinly sliced
1/4 cup granulated sugar, divided
1/2 teaspoon ground cinnamon
2 tablespoons unsalted butter, melted, divided
1 tablespoon water
Powdered sugar, for dusting
Directions
- Preheat Oven and Prep Pastry: Preheat your oven to 400F (200C). Line a baking sheet with parchment paper. Gently unroll one sheet of thawed puff pastry onto the prepared baking sheet. Using a sharp knife, lightly score a 1-inch border around the edge of the pastry sheet, being careful not to cut all the way through. This border will help the edges puff up beautifully.
- The Secret to No Soggy Crust: Here’s the game-changer! Pierce the inner rectangle of the pastry all over with a fork. This prevents the center from puffing up too much and creates a solid base. Then, lightly brush the inner rectangle (inside your scored border) with 1 tablespoon of the melted butter, and sprinkle evenly with 1 tablespoon of granulated sugar. This creates a protective, caramelizing barrier that helps prevent the fruit’s moisture from making your crust soggy.
- Prepare the Fruit: In a medium bowl, toss the thinly sliced apples with the remaining 3 tablespoons of granulated sugar and the ground cinnamon until evenly coated.
- Assemble the Tart: Arrange the apple slices neatly in overlapping rows or a circular pattern within the scored border on the pastry.
- Bake to Perfection: Bake for 20-25 minutes, or until the pastry is golden brown and puffed, and the apples are tender. If the edges are browning too quickly, you can loosely tent them with foil.
- Create the Glaze: While the tart is baking, melt the remaining 1 tablespoon of butter with 1 tablespoon of granulated sugar and 1 tablespoon of water in a small saucepan over low heat until the sugar dissolves and it forms a light syrup.
- Glaze and Serve: Once the tart is out of the oven, immediately brush the warm apple slices and crust edges with the prepared glaze. Let cool slightly before dusting with powdered sugar. Slice and enjoy that perfectly crisp crust!
Notes
- The melted butter and sugar barrier is key to preventing a soggy crust.