For years, I struggled with the common frustration of soggy tortillas when making Cheesy Chicken Enchiladas, undermining an otherwise perfect dish. That quest for the ideal texture led me to a simple, yet utterly transformative technique that ensures every single enchilada maintains its integrity. This recipe isn’t just about incredible flavor; it’s about mastering that elusive perfect bite, making it a reliable favorite for any family dinner.
Ditch the Mush: Why This Enchilada Recipe is a Game-Changer
This Cheesy Chicken Enchiladas recipe stands apart, solving the age-old problem that plagues many home cooks: mushy tortillas. We’ve all been there, anticipating a delicious bite only to be met with a sauce-logged mess.
For those who dislike soggy tortillas, consider trying this spicy chicken enchilada casserole.
The “Never Mushy” Promise: A Technique You’ll Love
The secret lies in a quick, intentional oil dip for each corn tortilla. This brief bath creates a protective barrier, preventing the tortilla from absorbing too much sauce and losing its structural integrity.
The result is a tender, pliable tortilla that holds its shape beautifully through baking and serving. You’ll achieve that satisfying texture without any crispiness, ensuring a truly delightful experience.
Effortless Comfort: Why This Recipe Fits Your Life
This recipe for Cheesy Chicken Enchiladas is designed for busy weeknights, offering maximum flavor with minimal fuss. It’s perfect for families, comfort food lovers, or anyone craving a hearty, satisfying meal.
With straightforward steps and accessible ingredients, you can bring this beloved Mexican comfort food to your table easily. It’s a dish that feels special yet is incredibly simple to execute.
A Flavor Profile That Pleases Everyone
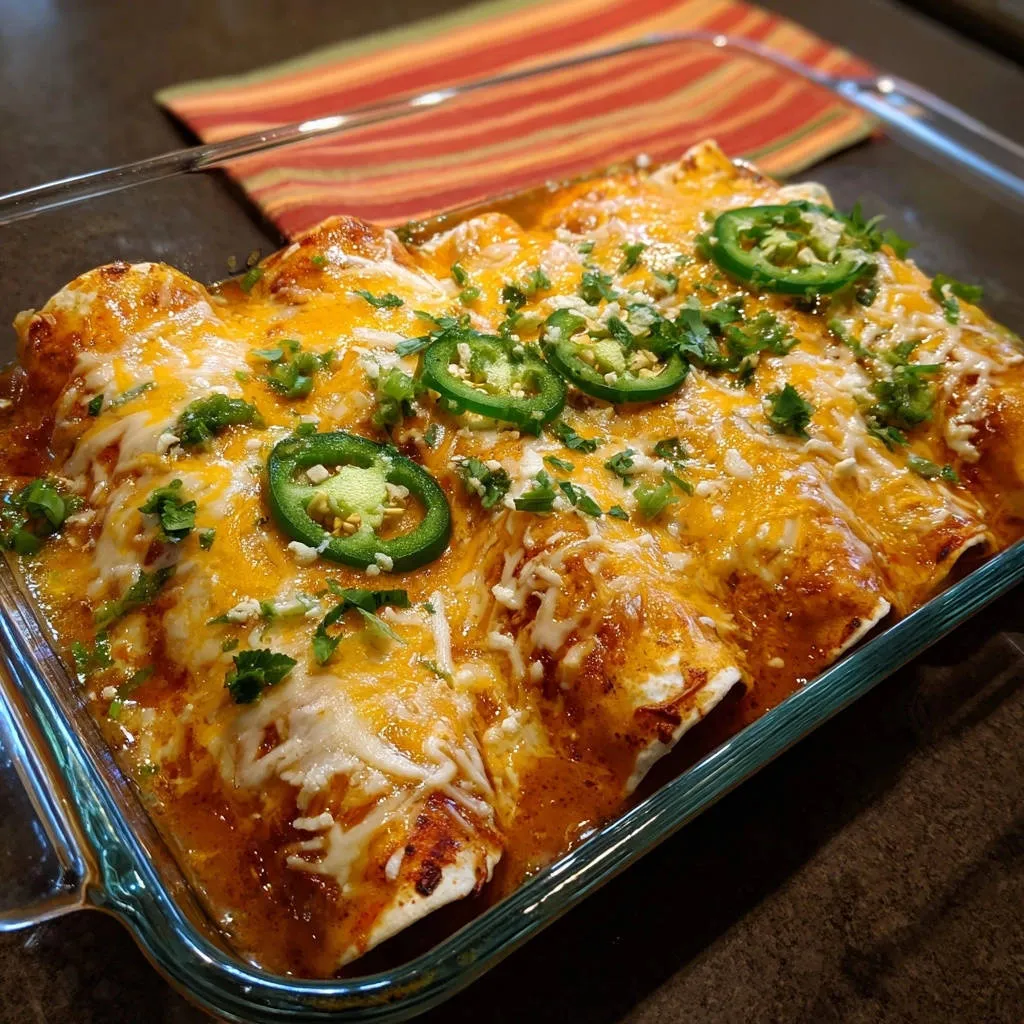
Beyond the perfect texture, these Cheesy Chicken Enchiladas boast a harmonious blend of savory chicken, rich red enchilada sauce, and melted, bubbly cheese. The fresh garnishes add a vibrant finish.
It’s a classic combination that appeals to a wide range of palates. The balance of savory, creamy, and fresh notes ensures every bite is a delightful experience.
The Flavor Foundation: Simple Ingredients for Superb Cheesy Chicken Enchiladas
Great dishes start with quality ingredients. Here’s a closer look at what you’ll need for these magnificent Cheesy Chicken Enchiladas, with insights into selection and purpose.
The Heart of the Dish: Juicy Shredded Chicken
You’ll need 2 cups of cooked shredded chicken breast. This can come from a rotisserie chicken for ultimate convenience, or you can boil or bake chicken breasts until tender and then shred them.
For an extra layer of flavor, consider tossing your shredded chicken with a dash of cumin, a pinch of chili powder, or a tablespoon of the enchilada sauce. This pre-seasoning ensures the chicken filling is robust and delicious.
The Star of the Show: Corn Tortillas (and Our Secret Prep!)
Twelve corn tortillas are essential for authentic enchilada flavor and texture. Corn tortillas inherently possess a distinct flavor and firmer structure once cooked, which is crucial for this dish.
Our unique oil dip technique transforms them into pliable, non-soggy vessels, ensuring they stand up to the rich sauce. This step is the cornerstone of our “no mushy tortillas” promise.
For more pliable tortillas, discover the secret to classic green chile chicken enchiladas.
That Signature Taste: Bold Red Enchilada Sauce
A 28-ounce can of good quality red enchilada sauce forms the backbone of this recipe. The sauce provides moisture, flavor, and helps bind all the ingredients together.
While a quality store-bought sauce is perfectly fine, feel free to enhance it with a touch of garlic powder, onion powder, or a pinch of sugar to balance the acidity. For the ambitious, a homemade sauce adds another dimension of freshness.
Creamy Goodness: The Perfect Cheese Blend
Two cups of shredded Mexican blend cheese are ideal for their meltability and balanced flavor. This blend typically includes Monterey Jack, Cheddar, Asadero, and Queso Blanco.
These cheeses melt beautifully, creating that irresistible bubbly, golden-brown crust we all love. You can also use a mix of freshly shredded sharp cheddar and Monterey Jack for a similar effect.
Fresh & Vibrant: Jalapeño and Cilantro
One fresh jalapeño, thinly sliced, and 1/4 cup of fresh chopped cilantro are your finishing touches. They provide a burst of freshness, a slight herbaceous note, and a mild, pleasant kick.
These garnishes not only add visual appeal but also cut through the richness of the cheese and sauce. They elevate the overall experience with their bright flavors.
Just a Splash: Essential Vegetable Oil
You’ll need 1/4 cup of vegetable oil specifically for the critical tortilla preparation step. This oil facilitates the quick softening and barrier creation in our tortillas, preventing them from becoming soggy.
Any neutral-flavored oil like canola or sunflower oil works perfectly here. It’s a small amount that makes a huge difference in the final texture of your Cheesy Chicken Enchiladas.
Equipping Your Kitchen for Enchilada Success
Having the right tools at hand makes the enchilada-making process smooth and enjoyable. You likely have most of these items already.
Must-Have Cookware
9×13 Inch Baking Dish: This standard size is perfect for accommodating 12 enchiladas in a single layer. A ceramic or glass dish works best for even baking and presentation.
Medium Skillet: Essential for quickly dipping your corn tortillas in oil. A non-stick skillet can be helpful for easy cleanup.
Handy Utensils
Tongs: Absolutely crucial for safely handling hot tortillas in the oil. Long-handled tongs provide the best control and protection.
Shredding Forks (Optional): If you’re cooking and shredding your own chicken, two forks make quick work of shredding the tender meat.
Measuring Cups and Spoons: For accurate ingredient quantities, especially for the sauce and cheese.
Your Step-by-Step Guide to Perfectly Baked Cheesy Chicken Enchiladas
Follow these detailed steps to create Cheesy Chicken Enchiladas that are rich in flavor and boast that sought-after non-soggy texture.
- Prepping Your Baking Dish & Oven:
Begin by preheating your oven to 375 degrees F (190 degrees C). Lightly grease a 9×13 inch baking dish; this prevents sticking and makes cleanup easier, ensuring your enchiladas lift out perfectly.
- Crafting Your Chicken Filling:
Prepare your chicken filling. You can simply use 2 cups of pre-cooked, shredded chicken breast for a quick option. Alternatively, mix the shredded chicken with a tablespoon or two of enchilada sauce and a dash of ground cumin for an enhanced, savory flavor.
- The Game-Changing Tortilla Treatment:
This is the critical step for non-soggy tortillas. Heat the vegetable oil in a medium skillet over medium-high heat. Using tongs, quickly dip each corn tortilla into the hot oil for about 5 to 10 seconds per side, just until it’s softened and pliable, but not crispy.
This quick dip creates a protective barrier, preventing the tortilla from absorbing too much sauce and becoming mushy. Immediately place the softened tortillas on paper towels to drain any excess oil before moving to the next step.
- Layering the Sauce Foundation:
Pour about 1/2 cup of the red enchilada sauce into the bottom of your prepared baking dish. This creates a flavorful bed for the enchiladas and helps prevent them from sticking, ensuring a moist base.
- Coating Each Tortilla:
Now, dip each softened tortilla into the remaining enchilada sauce. Ensure both sides are lightly coated; this adds another layer of flavor and ensures the tortillas remain moist and tender during baking.
- Filling and Rolling Your Enchiladas:
Place a line of your seasoned shredded chicken filling down the center of each sauced tortilla. Sprinkle a small amount of the shredded Mexican blend cheese over the chicken.
Roll up the tortilla tightly and place it seam-side down in the prepared baking dish. This ensures the enchilada stays intact. Repeat this process with the remaining tortillas, arranging them snugly in the dish.
- Sauce It Up: The Final Drench:
Once all the Cheesy Chicken Enchiladas are rolled and neatly arranged in the dish, pour the remaining enchilada sauce evenly over the top. Make sure every enchilada is generously coated for maximum flavor and moisture.
- The Cheesy Crown:
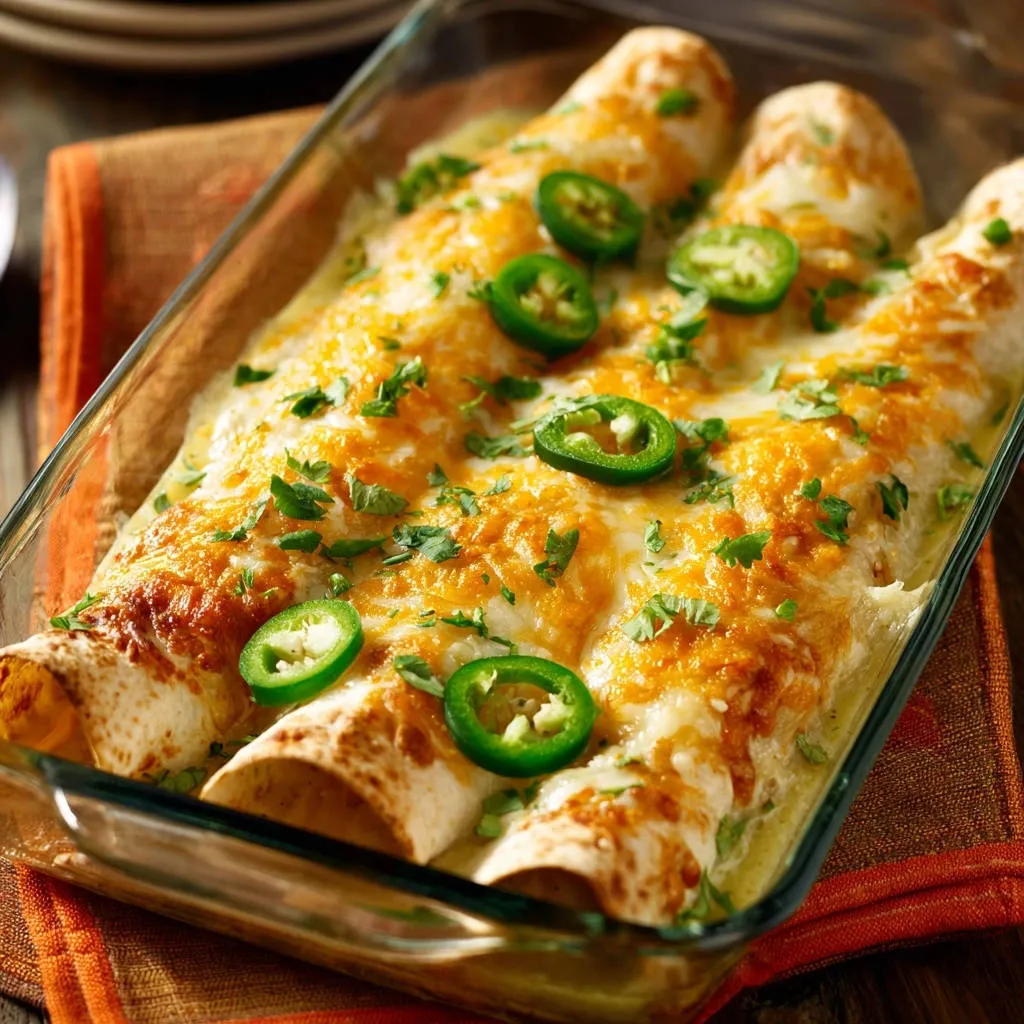
Sprinkle generously with the remaining shredded Mexican blend cheese. This will create a luscious, bubbly, and golden-brown crust that is utterly irresistible once baked.
- Baking to Golden, Bubbly Glory:
Bake for 20 to 25 minutes in your preheated oven. The enchiladas are ready when the cheese is beautifully melted and bubbly, and the entire dish is heated through and simmering at the edges.
- The Final Flourish: Garnish and Serve:
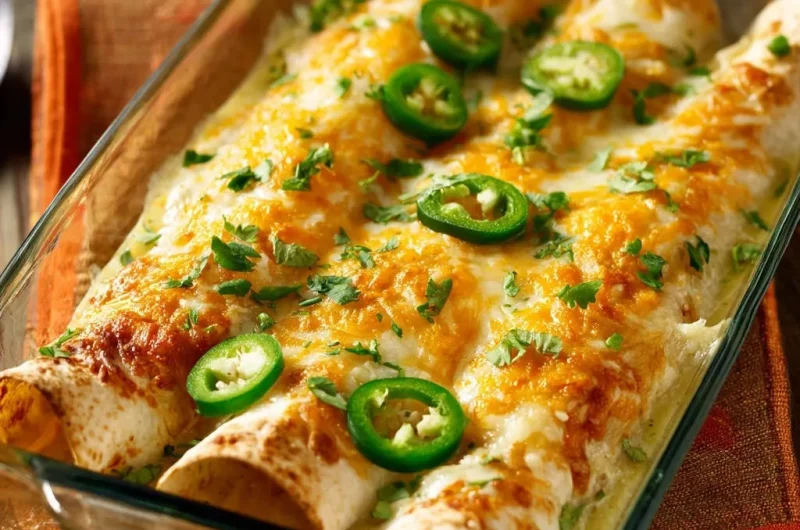
Remove the baking dish from the oven. Before serving your homemade enchiladas, garnish them with fresh sliced jalapeños and chopped cilantro. These fresh additions provide a vibrant contrast to the rich flavors.
Elevate Your Enchilada Game: Expert Tips & Variations
Take your Cheesy Chicken Enchiladas from great to extraordinary with these expert tips and creative variations.
Perfecting the Tortilla Oil Dip: The oil should be hot enough to sizzle gently when the tortilla touches it, but not smoking. A proper dip yields a pliable, slightly softened tortilla; if it becomes crispy, your oil is too hot or the dip was too long. Adjust heat and speed for optimal results.
Boosting Chicken Filling Flavor: Elevate your chicken by sautéing a quarter cup of finely diced onion and a clove of minced garlic before adding the shredded chicken. Stir in a teaspoon of chili powder or smoked paprika for a deeper, more complex flavor profile in your Cheesy Chicken Enchiladas.
Spice Level Customization: For milder enchiladas, remove the seeds and white membrane from the jalapeño before slicing, as this is where most of the heat resides. If you prefer more heat, add a pinch of cayenne pepper to the chicken filling or a dash of hot sauce to the enchilada sauce.
Beyond Chicken: Creative Filling Alternatives: Experiment with different proteins for your enchilada casserole. Cooked and shredded pork carnitas, ground beef seasoned with taco spices, or a hearty vegetarian mix of black beans, corn, and roasted bell peppers all make fantastic fillings.
Homemade vs. Store-Bought Sauce: To enhance store-bought red enchilada sauce, stir in a teaspoon of cocoa powder for depth, a touch of apple cider vinegar for brightness, or a pinch of sugar to balance acidity. For a simple homemade version, sauté chili powder, flour, and spices, then whisk in broth and tomato paste until thickened.
Common Enchilada Quandaries & Quick Solutions
Even seasoned cooks can encounter challenges. Here are solutions to common enchilada problems, ensuring your homemade enchiladas are always a triumph.
Why Are My Tortillas Still Soggy (or Too Crispy)?
If your tortillas are still soggy, the oil wasn’t hot enough, or the dip wasn’t long enough to create that protective barrier. If they’re too crispy, your oil was too hot, or you left them in for too long, essentially frying them.
The goal is a quick, medium-high heat dip until pliable. Practice with one or two tortillas to find the sweet spot for your stove and skillet before committing to the batch.
My Enchiladas Are Falling Apart When Served!
This usually indicates overfilling or not rolling them tightly enough. Ensure you don’t overstuff each tortilla, as this makes rolling difficult and risks tearing.
Roll them firmly from one end to the other, creating a snug cylinder. Placing them seam-side down in the baking dish also helps them hold their shape during baking.
The Sauce Tastes Flat – How Can I Fix It?
A flat sauce can be easily remedied. Before pouring, taste your enchilada sauce. Stir in a pinch of salt, a dash of garlic powder, or a little more cumin to awaken the flavors.
A teaspoon of sugar or a splash of lime juice can also balance the flavors and add brightness, especially with store-bought varieties.
Cheese Isn’t Melting Evenly or Looks Greasy.
Greasy cheese often happens with pre-shredded cheese that contains anti-caking agents, or if the oven temperature is too high, causing the fat to separate too quickly. Ensure your oven isn’t overheating.
Using freshly shredded cheese from a block typically melts more smoothly. If it’s not melting evenly, ensure your oven rack is in the middle position for consistent heat distribution.
What to Serve with Your Cheesy Chicken Enchiladas
Complement your delicious Cheesy Chicken Enchiladas with a variety of side dishes that enhance the meal without overpowering it. Here are some perfect pairings.
Round Out Your Meal
To complement your cheesy chicken enchiladas, consider these flavorful additions.
- For a touch of sweet heat to cut through the richness, try this Hot Honey Jalapeño Cornbread with its satisfying crunch.
- If you prefer a softer crumb, this Honey Jalapeño Cornbread offers a delightful balance of sweet and spicy.
Classic Mexican Side Dishes
Mexican Rice: A staple side, fluffy and flavorful, perfect for soaking up any extra sauce.
Refried Beans: Creamy and satisfying, they offer a comforting contrast to the enchiladas.
Elotes (Mexican Street Corn): Grilled corn slathered with mayonnaise, cotija cheese, and chili powder provides a smoky, tangy, and slightly spicy kick.
Fresh & Light Accompaniments
Simple Green Salad: A crisp salad with a light vinaigrette offers a refreshing counterpoint to the rich enchiladas.
Pico de Gallo: Freshly diced tomatoes, onions, cilantro, and jalapeño add a vibrant, zesty crunch.
Guacamole & Chips: A creamy, cool side that’s always a crowd-pleaser and adds healthy fats.
Thirst-Quenching Drink Pairings
Agua Fresca: Refreshing fruit-infused water, like horchata (rice milk) or jamaica (hibiscus), is a perfect authentic pairing.
Iced Tea or Lemonade: Classic, simple options that cut through the richness and cleanse the palate.
Smart Prep & Storage for Easy Meal Planning
Making your Cheesy Chicken Enchiladas even more convenient with smart preparation and storage strategies. This makes them ideal for meal prepping or busy schedules.
Can I Assemble These Enchiladas Ahead of Time?
Absolutely! You can assemble the entire enchilada casserole up to one day in advance. Cover it tightly with plastic wrap or foil and refrigerate.
When ready to bake, let it sit at room temperature for 30 minutes before baking as directed, possibly adding 5-10 minutes to the baking time if still very cold.
Refrigeration Best Practices for Leftovers
Leftover Cheesy Chicken Enchiladas should be stored in an airtight container in the refrigerator within two hours of cooking. They will remain fresh and delicious for 3-4 days.
Ensure they are fully cooled before sealing to prevent condensation, which can make them watery.
Freezing for Future Feasts: Tips and Tricks
Enchiladas freeze wonderfully! For best results, bake them first, let them cool completely, then wrap individual portions or the entire pan tightly in plastic wrap and then foil. Freeze for up to 2-3 months.
Alternatively, you can assemble them unbaked, wrap well, and freeze. When ready to bake, thaw overnight in the fridge and bake as directed.
Reheating Your Enchiladas for Optimal Flavor and Texture
For baked and refrigerated enchiladas, cover with foil and reheat in a 350°F (175°C) oven for 20-25 minutes, or until heated through. Uncover for the last few minutes if you want to crisp the cheese.
From frozen, bake covered at 350°F (175°C) for 45-60 minutes, then uncover and bake until bubbly and hot. Microwaving is an option for single servings but may soften the tortillas more.
Your Cheesy Chicken Enchiladas Questions Answered
Here are answers to some frequently asked questions about making these delectable Cheesy Chicken Enchiladas, providing clarity and confidence.
What Kind of Chicken is Best for Shredding?
Boneless, skinless chicken breasts are ideal for shredding due to their lean texture and ease of preparation. Boneless chicken thighs can also be used for a richer, more succulent filling.
A store-bought rotisserie chicken offers maximum convenience, as it’s already cooked and seasoned, requiring just a quick shredding.
Can I Use Flour Tortillas Instead of Corn?
While corn tortillas are traditional and recommended for their flavor and the “no soggy” technique, you can use flour tortillas. However, the oil-dip step is less critical for flour tortillas as they are more pliable.
Flour tortillas will absorb more sauce, potentially leading to a softer, less structured result, but they still make a delicious enchilada casserole.
How Do I Make This Recipe Gluten-Free?
This recipe is naturally gluten-free if you ensure your enchilada sauce is also gluten-free. Most corn tortillas are naturally gluten-free, but always check the label to confirm.
Avoid any store-bought chicken seasonings that might contain hidden gluten, sticking to simple spices like cumin, chili powder, and salt.
What’s the Best Way to Reheat Leftover Enchiladas?
The best way to reheat leftover Cheesy Chicken Enchiladas is in the oven. This method helps the tortillas retain some texture and keeps the cheese from becoming overly greasy.
Cover them with foil to prevent drying out, then bake at 350°F (175°C) until warmed through. A quick pop under the broiler at the end can re-crisp the cheese.
How Spicy Are These Cheesy Chicken Enchiladas?
As written, this recipe for Cheesy Chicken Enchiladas offers a mild spice level, primarily from the fresh jalapeño garnish. The red enchilada sauce can vary, but most canned versions are mild to medium.
You have full control to adjust the heat by removing jalapeño seeds for less spice, or adding cayenne pepper, chili powder, or hot sauce for more kick in the chicken filling or sauce.
Ready to Roll? Your Delicious Enchilada Journey Awaits!
Now you have all the tools and knowledge to create a truly exceptional pan of Cheesy Chicken Enchiladas. Say goodbye to soggy tortillas and hello to perfectly textured, flavor-packed bites.
This recipe isn’t just about food; it’s about bringing joy and comfort to your table. Don’t hesitate to make this a staple in your meal rotation. Share your creations, leave a comment with your favorite tips, and enjoy every delicious moment!
Chicken Enchiladas
Course: Main CourseCuisine: MexicanDifficulty: easy4
12 enchiladas25
minutes25
minutes450
kcal50
minutesEnchiladas are a classic comfort food, but soggy tortillas can be a real problem. This recipe cracks the code to perfectly structured, delicious enchiladas every time. Enjoy tender, savory chicken enchiladas without the mush!
Ingredients
2 cups cooked shredded chicken breast
12 corn tortillas
28 ounce can red enchilada sauce
2 cups shredded Mexican blend cheese
1 fresh jalapeño, thinly sliced
1/4 cup fresh cilantro, chopped
1/4 cup vegetable oil
Directions
- Preheat oven to 375 degrees F (190 degrees C). Lightly grease a 9×13 inch baking dish.
- Prepare your chicken filling. You can simply use shredded cooked chicken or mix it with a little of the enchilada sauce and a dash of cumin for extra flavor.
- This is the game changer for non-soggy tortillas: Heat the vegetable oil in a medium skillet over medium-high heat. Using tongs, quickly dip each corn tortilla into the hot oil for about 5 to 10 seconds per side, just until it’s softened and pliable but not crispy. This quick dip creates a barrier that prevents the tortilla from absorbing too much sauce and becoming mushy. Place softened tortillas on paper towels to drain excess oil.
- Pour about 1/2 cup of the enchilada sauce into the bottom of your prepared baking dish.
- Dip each softened tortilla into the remaining enchilada sauce to lightly coat both sides.
- Place a line of shredded chicken filling down the center of each tortilla, then sprinkle with a small amount of shredded cheese. Roll up the tortilla tightly and place seam-side down in the baking dish. Repeat with remaining tortillas.
- Once all enchiladas are rolled and arranged, pour the remaining enchilada sauce evenly over the top.
- Sprinkle generously with the remaining shredded cheese.
- Bake for 20 to 25 minutes, or until the cheese is melted and bubbly and the enchiladas are heated through.
- Garnish with fresh sliced jalapeños and chopped cilantro before serving.
Notes
- Quick oil dip prevents soggy tortillas.