We’ve all been there, biting into what promised to be a succulent stuffed mushroom only to be met with a disappointing, watery filling. That frustrating experience drove me to perfect a recipe for truly exceptional Cheesy Stuffed Mushrooms.
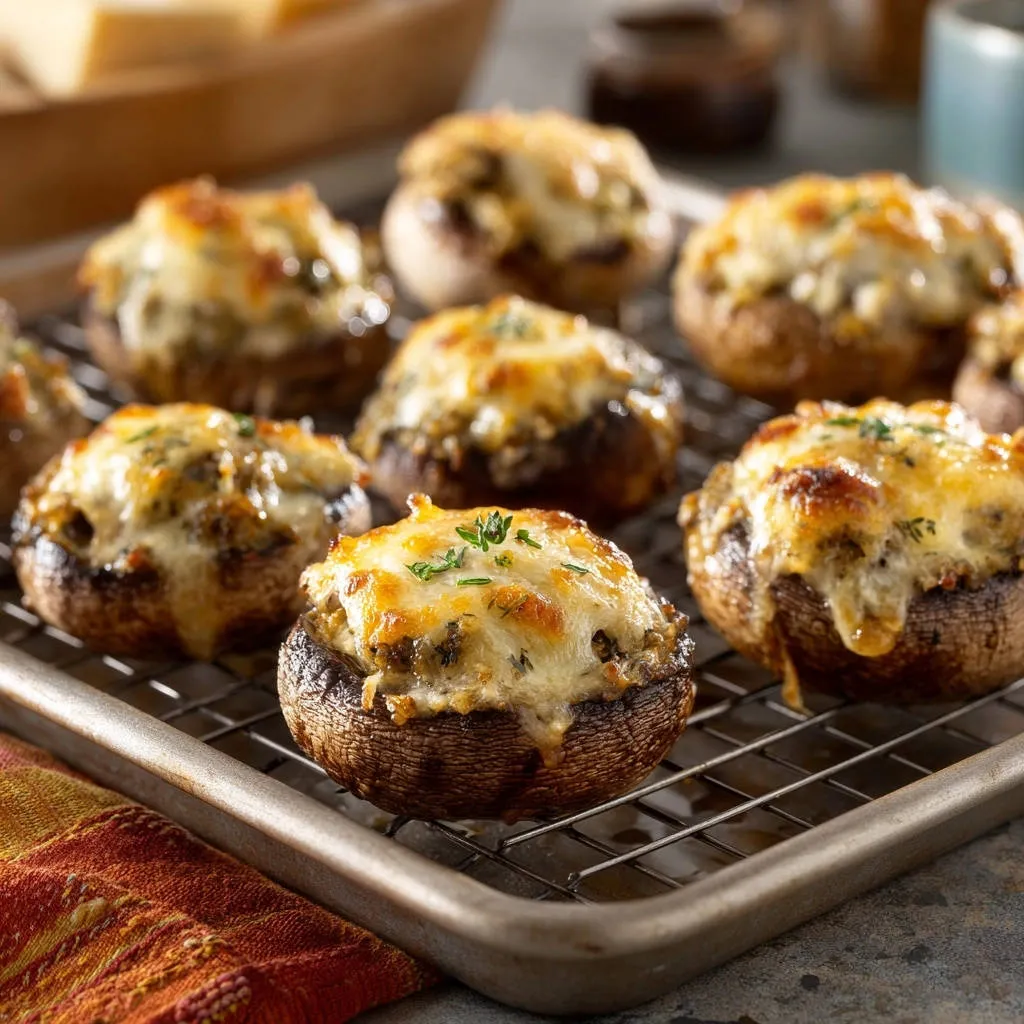
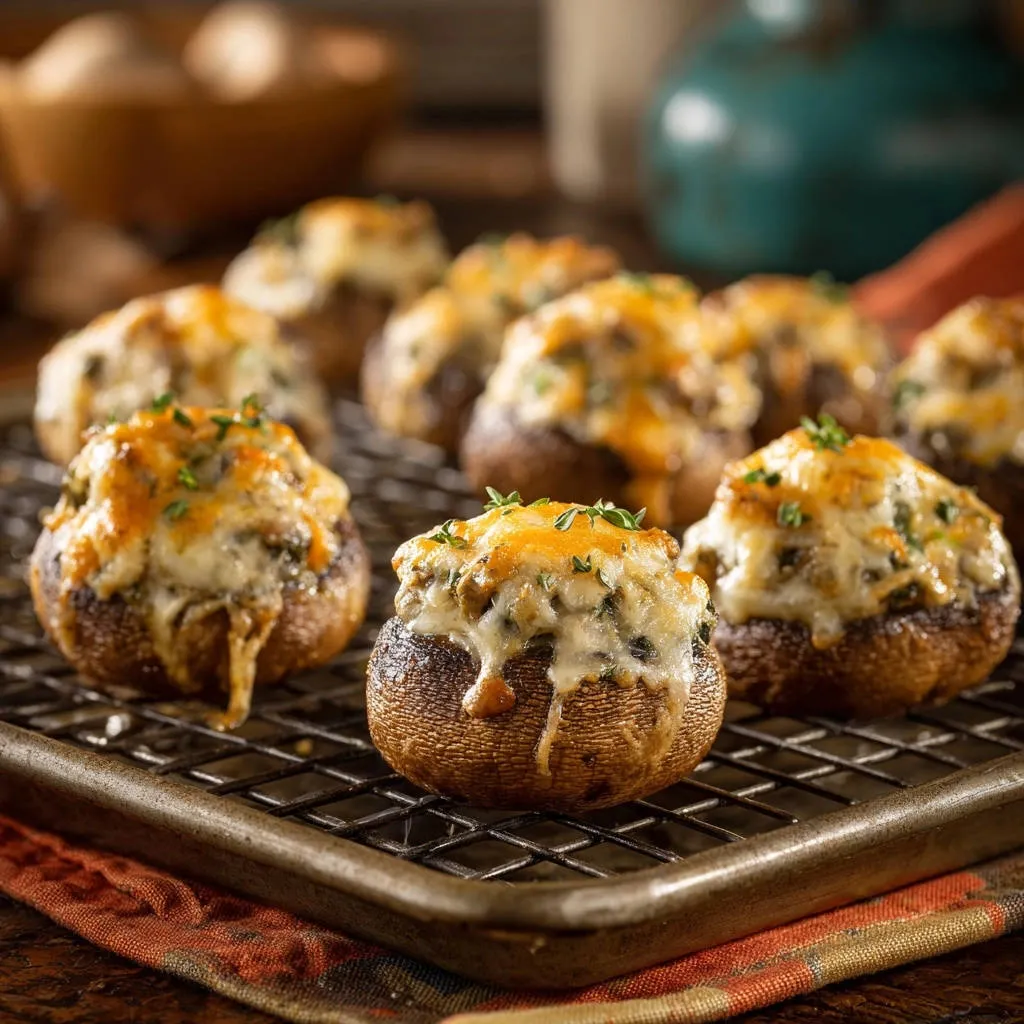
This method guarantees mushrooms that are perfectly firm, brimming with a rich, golden-brown cheesy topping, and absolutely never watery. Prepare to impress your guests, or simply treat yourself, with an appetizer that always delivers on its promise of deliciousness.
Why Our Cheesy Stuffed Mushrooms Will Be Your New Go-To
The Secret to Perfectly Firm, Water-Free Filling
The common culprit behind soggy stuffed mushrooms is excess moisture. Our recipe tackles this head-on with a combination of clever techniques.
From careful mushroom preparation to a unique baking setup, we eliminate the water that can ruin texture and flavor, ensuring a consistently firm and satisfying bite every time.
Golden, Cheesy Perfection Every Time
Imagine tender mushroom caps overflowing with a savory, herbaceous filling, crowned with a golden, bubbly layer of melted cheese. This recipe consistently delivers that dream.
The dual cheese approach creates a rich, complex flavor that’s both comforting and gourmet, making these a standout dish for any occasion.
Effortless Elegance for Any Occasion
While elegant enough for a dinner party, these cheesy stuffed mushrooms are surprisingly simple to prepare, requiring minimal fuss for maximum impact.
They make a fantastic appetizer, a delightful side dish, or even a light lunch. Their versatility ensures they fit seamlessly into any menu.
What Else to Try
If you enjoyed these stuffed mushrooms, you might like these other dishes with similar comforting qualities.
- For a hearty pasta option that features mushrooms, consider this creamy mushroom fusilli bake.
- If you’re looking for another bake with cheesy goodness, this cheesy beef rigatoni bake offers a satisfying meal.
Essential Ingredients for Irresistible Stuffed Mushrooms
Selecting quality ingredients is the foundation of any great dish. Here’s a breakdown of what you’ll need and why each component is crucial for our amazing Cheesy Stuffed Mushrooms.
The Mushroom Base: Cremini vs. Button
This recipe calls for 16 large button or cremini mushrooms, chosen for their ideal size and structure. Cremini mushrooms offer a slightly deeper, earthier flavor and firmer texture, while button mushrooms are milder and readily available.
Large caps provide ample space for generous filling, ensuring a satisfying mushroom-to-filling ratio in every bite.
Flavor Foundations: Aromatics & Herbs
Finely diced onion and minced garlic form the aromatic backbone of our stuffing, providing essential savory depth.
Fresh chopped parsley brightens the entire dish with a vibrant, herbaceous note, lifting the rich flavors of the cheese and mushrooms.
The Cheesy Trifecta: Parmesan & Mozzarella
We use a dynamic duo of cheeses to achieve perfection. Grated Parmesan cheese contributes a sharp, salty, umami kick that deepens the overall flavor profile.
For a similar cheesy experience, explore cheesy garlic swirls that offer a delicious crispy base.
Shredded mozzarella cheese is chosen for its incredible melting properties, creating that irresistible gooey, golden-brown topping that defines a truly great stuffed mushroom.
For similar cheesy delights, explore these crispy pepperoni cheese cups.
Binding & Texture: Breadcrumbs & Olive Oil
Plain breadcrumbs are essential for absorbing any residual moisture from the cooked vegetables, ensuring the filling remains perfectly textured and binds together beautifully.
Olive oil is used to sauté our aromatics and mushroom stems, building a flavorful base while adding a silky richness to the filling.
Gather Your Gear: Essential Tools for Stuffed Mushroom Success
Having the right tools makes all the difference in the kitchen, especially when aiming for perfection. Here are the key pieces of equipment for this recipe.
Baking Sheet & Wire Rack Duo
This combination is absolutely critical for preventing soggy bottoms, a hallmark of our successful stuffed mushroom technique. The wire rack elevates the mushrooms, allowing hot air to circulate freely underneath.
Any moisture released during baking can drip away, rather than pooling and making the mushroom caps soft and unappetizing.
Skillet and Prep Essentials
A medium skillet is needed for sautéing the mushroom stems and aromatics, developing their flavors before they join the filling.
You’ll also need a small spoon for easily scraping out the mushroom gills, a vital step for moisture control.
Crafting Culinary Magic: Your Step-by-Step Guide to Stuffed Mushrooms
Follow these detailed instructions for perfectly golden, cheesy, and never watery stuffed mushrooms.
- Prep for Perfection: Setting Up Your Oven & Pan
Preheat your oven to 375°F (190°C), creating the ideal environment for even baking. Line a baking sheet with parchment paper, then place a wire rack directly on top.
This crucial setup ensures optimal air circulation around each mushroom, which is the primary secret to preventing those undesirable soggy bottoms.
- Mushroom Mastery: Cleaning & De-Sogging Techniques
Gently clean the mushrooms with a damp cloth; resist rinsing them under water, as they are highly absorbent. Carefully remove the stems from each mushroom cap.
Using a small spoon, diligently scrape out the dark gills from the inside of each mushroom cap. This is a critical step to remove excess moisture and prevent the filling from becoming watery.
- Sautéing the Foundation: Stems & Aromatics
Finely chop the reserved mushroom stems to match the texture of your filling. Heat the olive oil in a skillet over medium heat, then add the chopped mushroom stems and diced onion.
Cook, stirring occasionally, for 8 to 10 minutes, until the mushrooms and onions are softened and all their released moisture has completely evaporated. This step is key for a dry, flavorful filling.
Add the minced garlic to the skillet and cook for just another minute until it becomes fragrant. Remove the skillet from the heat to cool slightly.
- Building the Irresistible Filling
In a medium bowl, combine the cooled, cooked mushroom stem and onion mixture, breadcrumbs, grated Parmesan cheese, half of the shredded mozzarella, and the fresh chopped parsley.
Season generously with salt and black pepper to taste, ensuring a balanced flavor. Mix everything very well until all ingredients are evenly combined and the mixture is cohesive.
- Expert Stuffing: Filling Each Cap with Care
Carefully spoon a generous amount of the filling mixture into each mushroom cap. Gently mound the filling slightly, creating an appealing, abundant look.
- Bake to Golden Glory: Initial Cook
Arrange the stuffed mushroom caps on the prepared wire rack on your baking sheet, ensuring they are not touching. Bake for 15 minutes.
Baking on the rack during this initial phase allows air to circulate and any last bit of moisture to escape, guaranteeing a firm texture.
- The Cheesy Finale: Adding the Melted Top
After 15 minutes, remove the mushrooms from the oven. Sprinkle the remaining shredded mozzarella cheese evenly over the tops of all the mushrooms.
Return them to the oven for another 5 to 10 minutes, or until the cheese is beautifully melted, bubbly, and golden brown, and the mushroom caps are tender.
- Serve & Savor: Enjoying Your Creation
Serve your perfectly firm, flavorful, and cheesy stuffed mushrooms immediately. They are best enjoyed hot, straight from the oven.
Chef’s Secrets: Elevating Your Cheesy Stuffed Mushrooms
Achieving truly exceptional stuffed mushrooms goes beyond just following the steps. Here are some expert tips to guarantee perfection every time.
The “No Soggy Bottom” Guarantee: Wire Rack Wisdom
Baking these Cheesy Stuffed Mushrooms on a wire rack is non-negotiable for superior texture. This method promotes 360-degree airflow, allowing moisture to evaporate.
Without the rack, mushrooms sit in their own released liquids, leading to an unappetizingly soft and watery bottom.
Why Gills Must Go: Moisture Control Explained
Mushroom gills, the dark underside lamellae, hold a surprising amount of moisture. Scraping them out is a small step with a huge impact.
Removing the gills dramatically reduces the liquid content, ensuring your filling stays firm and the overall texture of the mushroom remains perfect.
Don’t Rush the Sauté: Evaporating Mushroom Moisture
Patience during the sautéing of the mushroom stems and onions is paramount. Cooking until all visible moisture has evaporated prevents it from leaching into your filling later.
This thorough sautéing concentrates the flavors of the aromatics and creates a dry, rich base for your stuffing.
Flavor Boosters: Customizing Your Filling
While delicious as is, you can personalize the filling. A pinch of red pepper flakes adds a subtle warmth, or a touch of smoked paprika can introduce a deeper, savory note.
For extra richness, a tablespoon of softened cream cheese blended into the filling can make it even more decadent. For another fantastic appetizer option, consider our bacon-wrapped jalapeño poppers!
Cheese Choices: Beyond Mozzarella & Parmesan
Experiment with different cheeses to alter the flavor profile. Gruyere offers a nutty, complex flavor that melts beautifully, while Fontina provides a creamy, slightly earthy note.
For a sharper kick, consider a blend including aged sharp cheddar. Just ensure your chosen cheeses melt well for that ideal gooey topping.
Making the Most of Your Cheesy Stuffed Mushrooms
These versatile treats can enhance various meals and occasions. Here’s how to get the most out of your delicious creations.
Perfect Pairings: What to Serve With Them
Cheesy Stuffed Mushrooms are a fantastic appetizer on their own, but they also shine alongside a variety of main courses. Serve them with roasted chicken, grilled steak, or a simple green salad for a balanced meal.
They also complement other vegetable dishes beautifully; imagine them next to a platter of crispy roasted cauliflower for an incredible side spread.
Storage Solutions: Keeping Them Fresh
To store leftover cooked stuffed mushrooms, allow them to cool completely, then place them in an airtight container in the refrigerator. They will remain fresh for up to 2-3 days.
For best quality, ensure they are stored without excess moisture, possibly by placing a paper towel at the bottom of the container.
Make-Ahead Magic: Prepping for Parties
These mushrooms are ideal for make-ahead preparation. You can clean the mushrooms, chop the stems and aromatics, and even sauté the filling mixture a day in advance.
Store the prepared caps and cooked filling separately in the refrigerator. When ready to bake, simply assemble and proceed with the baking instructions.
Common Challenges & Simple Solutions for Stuffed Mushrooms
Even seasoned cooks can encounter snags. Here are quick fixes for common issues when making Cheesy Stuffed Mushrooms.
Problem: My Mushrooms Are Still Watery!
Solution: The most common cause is insufficient moisture removal. Ensure you are meticulously scraping out the gills from the mushroom caps. Additionally, take your time during the sautéing step to cook down the mushroom stems and onions until all their moisture has completely evaporated.
Always bake them on a wire rack on top of a baking sheet to allow any released moisture to drip away rather than collect.
Problem: The Filling Crumbles Out
Solution: This can happen if the filling is too dry or lacks sufficient binding. Ensure your breadcrumbs are not overly dry, and if necessary, add an extra tablespoon of olive oil or a small amount of softened cream cheese to help bind the mixture.
Mixing thoroughly until the ingredients are well-combined also helps create a cohesive stuffing that holds its shape.
Problem: Mushrooms Are Tough/Rubbery
Solution: Rubbery mushrooms usually indicate overbaking. Keep a close eye on them during the final baking stage. The goal is tender caps and golden cheese, not crispy mushrooms.
Start checking for doneness at the lower end of the recommended baking time to prevent them from becoming tough.
Your Top Questions About Cheesy Stuffed Mushrooms, Answered!
Can I use different types of mushrooms?
Yes, while large button or cremini mushrooms are recommended for their size and texture, you can experiment. Portobello caps can be used for larger, meal-sized stuffed mushrooms, adjusting baking time accordingly.
Smaller shiitake or oyster mushrooms might also work, though they would be harder to stuff and serve as individual bites.
Are Cheesy Stuffed Mushrooms freezer-friendly?
While technically you can freeze them, the texture of the mushrooms can become a bit softer and more watery upon thawing and reheating. For best results, it’s generally recommended to enjoy them fresh.
If you must freeze them, bake them fully, let them cool, then freeze in a single layer before transferring to an airtight container. Reheat from frozen in a moderate oven until warmed through.
How to adapt this recipe for dietary needs (e.g., gluten-free, vegan)?
For a gluten-free version, simply substitute the plain breadcrumbs with your favorite gluten-free breadcrumbs. The rest of the recipe is naturally gluten-friendly.
For a vegan adaptation, replace the cheeses with high-quality dairy-free alternatives that melt well, and use a plant-based oil instead of olive oil if preferred. Nutritional yeast can also add a cheesy flavor.
What’s the best way to reheat leftovers?
Reheat leftover Cheesy Stuffed Mushrooms in a preheated oven at 300°F (150°C) for about 10-15 minutes, or until warmed through and the cheese is bubbly again. This gentle heat prevents the mushrooms from becoming tough.
Avoid reheating in the microwave, as it can make the mushrooms soggy and the cheese rubbery.
Ready to Impress? Share Your Cheesy Stuffed Mushrooms Masterpiece!
With these expert tips and a meticulously crafted recipe, you’re now equipped to create Cheesy Stuffed Mushrooms that are consistently golden, flavorful, and perfectly firm.
Don’t let watery woes dampen your culinary spirit again! Try this recipe and share your impressive results with friends and family – they’re sure to be a hit. Happy cooking!

Stuffed Mushrooms
Course: AppetizerCuisine: AmericanDifficulty: easy4
16 stuffed mushrooms20
minutes35
minutes240
kcal55
minutesTired of watery stuffed mushrooms? This recipe guarantees perfectly firm, flavorful caps bursting with a golden, cheesy filling. Learn the simple tricks to achieve delicious, never-soggy results every time.
Ingredients
16 large button or cremini mushrooms
2 tablespoons olive oil
1/2 small onion, finely diced
2 cloves garlic, minced
1/4 cup plain breadcrumbs
1/4 cup grated Parmesan cheese
1 cup shredded mozzarella cheese
2 tablespoons fresh parsley, chopped
Salt to taste
Black pepper to taste
Directions
- Preheat your oven to 375 degrees Fahrenheit (190 degrees Celsius). Line a baking sheet with parchment paper and place a wire rack on top. This setup is key for preventing soggy bottoms.
- Gently clean the mushrooms with a damp cloth. Do not rinse them under water, as they absorb moisture easily. Carefully remove the stems from the mushroom caps. Using a small spoon, gently scrape out the dark gills from the inside of each mushroom cap. This is a critical step to remove excess moisture.
- Finely chop the mushroom stems. Heat the olive oil in a skillet over medium heat. Add the chopped mushroom stems and diced onion. Cook, stirring occasionally, until the mushrooms and onions are softened and all their released moisture has evaporated. This can take about 8 to 10 minutes.
- Add the minced garlic to the skillet and cook for another minute until fragrant. Remove from heat.
- In a medium bowl, combine the cooked mushroom stem mixture, breadcrumbs, Parmesan cheese, half of the shredded mozzarella, and chopped parsley. Season with salt and black pepper to taste. Mix well until everything is evenly combined.
- Carefully spoon the filling mixture into each mushroom cap, mounding it slightly.
- Arrange the stuffed mushroom caps on the prepared wire rack on the baking sheet. Baking them on a rack allows air to circulate and any remaining moisture to drip away, ensuring they do not get soggy.
- Bake for 15 minutes. Then, remove from the oven, sprinkle the remaining shredded mozzarella cheese over the tops of the mushrooms, and return to the oven for another 5 to 10 minutes, or until the cheese is melted and golden brown and the mushrooms are tender.
- Serve immediately and enjoy your perfectly firm, never watery stuffed mushrooms!
Notes
- Key techniques like scraping gills and baking on a wire rack ensure mushrooms are firm and never watery.