I understand the frustration of a carefully baked sheet cake cracking right when you try to roll it into that elegant spiral. It’s a common baking hurdle, but one I’ve overcome countless times.
This ultimate Chocolate Cream Roll Cake recipe is designed to eliminate those worries, guiding you to a stunning, crack-free dessert every single time. Get ready to impress with its rich chocolate flavor and luxurious cream filling!
The Secret to a Perfect Roll: No More Cracks!
Why Our Method Guarantees Success
The core of this recipe’s success lies in a simple yet revolutionary technique: rolling the cake while it’s still warm, immediately after baking. This crucial step trains the delicate sponge to hold its rolled shape as it cools.
By using a clean kitchen towel or an extra sheet of parchment paper generously dusted with powdered sugar, you provide a non-stick surface that allows for a gentle, uniform roll. This prevents the stiffening that leads to cracks as the cake cools.
For a similar delightful filling experience, explore the Red Velvet Cheesecake Stuffed Cookies.
The Irresistible Flavor Profile
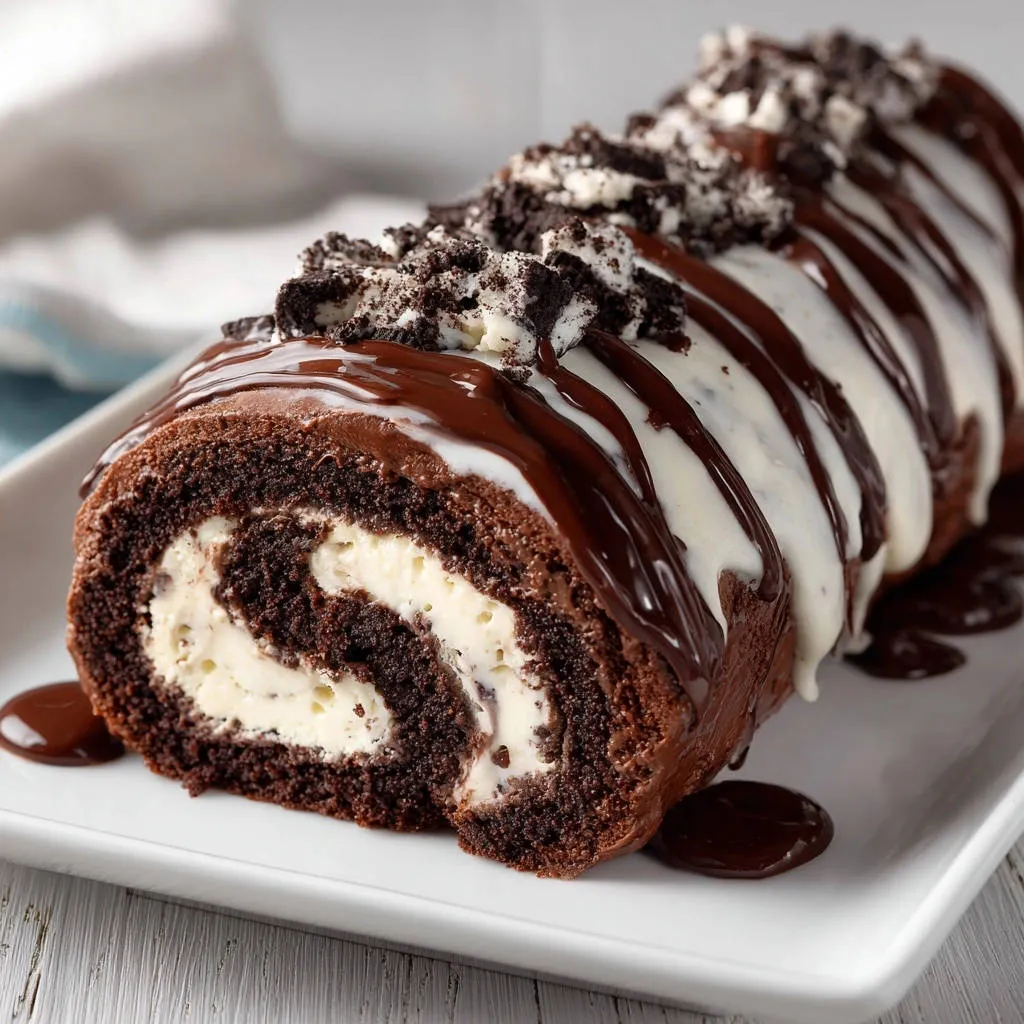
Imagine a tender, intensely chocolatey sponge, light and airy, perfectly balancing the sweetness. It’s generously filled with a cloud-like, subtly sweet vanilla cream, offering a delightful contrast in texture and taste.
The finishing touch of a rich chocolate glaze, artistic white chocolate drizzle, and a sprinkle of crunchy chocolate cookie crumbs elevates this Chocolate Cream Roll Cake to a truly decadent experience.
For another chocolate delight, check out this moist chocolate bundt cake.
Why This Recipe Belongs in Your Baking Arsenal
Beyond its stunning appearance, this Chocolate Cream Roll Cake is surprisingly straightforward, thanks to its foolproof rolling method. It’s ideal for special occasions, holidays, or simply as an impressive weekend treat.
Complementary Creations
Since you’ve mastered this chocolate cream roll cake, consider these recipes for a satisfying meal.
- For a hearty start, try our Fluffy Biscuits and Sausage Gravy, offering a delightful contrast in flavors and textures.
- If you enjoyed the biscuit concept, our Fluffy Biscuits and Sausage Gravy with Crispy Hash Browns adds an extra layer of enjoyment with its perfectly browned potatoes.
You’ll gain confidence in your baking skills, knowing you can achieve professional-looking results without the usual roll cake anxieties. It’s a true showstopper that tastes as incredible as it looks.
The Essential Building Blocks for Your Roll Cake
For the Flexible Chocolate Sponge
Flour, Cocoa Powder, Baking Powder & Salt: These dry ingredients form the structural foundation, ensuring a tender and deeply chocolatey crumb that’s both moist and pliable for rolling.
Eggs (Separated), Granulated Sugar, Milk, Vegetable Oil & Vanilla: Separating the eggs is key; yolks add richness and moisture, while whipped whites provide essential lift and flexibility for a sponge that won’t crack. Milk, oil, and vanilla contribute to the cake’s tender texture and delicious flavor.
For the Cloud-Like Cream Filling
Heavy Cream, Powdered Sugar & Vanilla Extract: The perfect trio for a stable, luxurious, and perfectly sweet whipped cream. Cold heavy cream is paramount for achieving those desirable stiff peaks.
For the Decadent Toppings
Chocolate Chips & Heavy Cream (for Dark Glaze): This combination creates a glossy, rich chocolate drizzle that hardens beautifully, adding both visual appeal and intense chocolate flavor.
White Chocolate Chips & Heavy Cream (for White Glaze): Used for decorative contrast, the white glaze adds a touch of sweetness and allows for artistic flair on your finished cake.
Crushed Chocolate Sandwich Cookies: These provide a delightful textural element and intensify the overall chocolate experience, making each bite even more satisfying.
Tools for a Seamless Roll Cake Experience
Baking & Prep Must-Haves
10×15 inch Jelly Roll Pan & Parchment Paper: This specific pan size ensures your cake bakes to the ideal thinness for rolling. Parchment paper, with an overhang, is critical for easy cake removal and the initial roll.
Wire Rack: Essential for allowing your cake to cool evenly, preventing condensation and ensuring the perfect texture for filling.
Clean Kitchen Towel (or extra Parchment Paper): This is your secret weapon. Using it while rolling the warm cake prevents sticking and trains the cake to maintain its shape without cracking.
Offset Spatula: Indispensable for spreading your batter thinly and evenly, and later, for smoothly applying the cream filling.
Mixing & Whipping Essentials
Mixing Bowls (various sizes): You’ll need separate bowls for dry ingredients, egg yolks, and egg whites to manage your preparations efficiently.
Electric Mixer (Hand or Stand): A powerful mixer is essential for achieving perfectly stiff, glossy egg whites and stable whipped cream. This ensures an airy cake and a firm filling.
Whisk: Ideal for thoroughly combining dry ingredients, preventing lumps and ensuring a uniform mix.
Your Step-by-Step Guide to Roll Cake Mastery
- Prepping Your Pan and Dry Mix:
Preheat your oven to 375°F (190°C) to ensure it’s at the correct temperature when your batter is ready. Line a 10×15 inch jelly roll pan with parchment paper, leaving a generous overhang on the sides for effortless cake handling.
In a small bowl, whisk together the flour, cocoa powder, baking powder, and salt. This pre-mix ensures these dry ingredients are evenly distributed for a consistent crumb.
- Crafting the Rich Chocolate Batter Base:
In a large bowl, beat the egg yolks with 1/4 cup of the granulated sugar until the mixture becomes light, fluffy, and creamy. This forms the foundational richness and color of your chocolate sponge.
Next, gently stir in the milk, vegetable oil, and vanilla extract until fully incorporated. Gradually add the whisked dry ingredients to this wet mixture, mixing only until just combined to prevent overdeveloping the gluten, which can make the cake tough.
- Whipping & Folding the Egg Whites to Perfection:
In a perfectly clean, separate bowl (any grease can inhibit whipping), beat the egg whites until soft peaks begin to form. Gradually add the remaining 1/4 cup granulated sugar, continuing to beat until stiff, glossy peaks are achieved; this creates the airy structure for your cake.
Gently fold about one-third of the whipped egg whites into the chocolate batter to lighten it, then carefully fold in the remaining egg whites until no streaks remain. Overmixing at this stage will deflate the precious air you’ve incorporated, leading to a dense cake.
- Baking to Fluffy, Flexible Doneness:
Pour the prepared batter evenly into your parchment-lined pan and spread it gently with an offset spatula, ensuring a uniform thickness for even baking.
Bake for 12-15 minutes, or until the cake springs back lightly when touched and the edges just begin to pull away from the pan. Avoid overbaking, as a dry cake is prone to cracking during rolling.
- The Critical Warm Roll Technique:
Immediately upon removing the cake from the oven, lay a clean kitchen towel (or a new sheet of parchment paper) over the cake and generously dust it with powdered sugar. Invert the cake onto this sugared surface, then carefully peel off the parchment paper used for baking.
While the cake is still warm, start from a short end and gently roll the cake and the towel/parchment together into a tight log. This crucial step trains the cake to hold its rolled shape as it cools, preventing any cracks when you unroll it later for filling.
Place the rolled cake, seam-side down, on a wire rack and allow it to cool completely to room temperature. Patience here is key; do not attempt to unroll or fill a warm cake.
- Crafting the Velvety Cream Filling:
Once the cake is completely cool, prepare the cream filling: In a medium bowl, beat the very cold heavy cream, powdered sugar, and vanilla extract until stiff peaks form. Cold cream whips best and provides a stable filling.
- Assembling and Re-Rolling Your Cake:
Carefully unroll the cooled cake; it should now lie flat without cracking. Spread the prepared cream filling evenly over the cake, leaving a small border (about 1/2 inch) around the edges.
Gently re-roll the cake, this time without the towel/parchment, into a log. Place it seam-side down on your chosen serving platter.
- Adding the Dazzling Glazes & Crumb Topping:
For the chocolate glaze, combine chocolate chips and 2 tablespoons of heavy cream in a microwave-safe bowl. Microwave in 30-second intervals, stirring well after each, until smooth and glossy. Drizzle this rich glaze artistically over the rolled cake.
Repeat the process for the white glaze, combining white chocolate chips and 2 tablespoons heavy cream, melting and stirring until smooth. Drizzle it decoratively over the cake, creating a beautiful contrast.
Finally, sprinkle the crushed chocolate sandwich cookies evenly over the top of the cake. This adds a delightful crunch and extra chocolatey goodness.
- The Final Chill and Slice:
Refrigerate the completed Chocolate Cream Roll Cake for at least 30 minutes. This chilling time allows the glazes to set firmly and the cream filling to stabilize, ensuring clean, beautiful slices and a superior eating experience.
Expert Tips for Chocolate Cream Roll Cake Perfection
Ingredient Temperature Insights: For the best results, ensure your eggs are at room temperature when separating and whipping; they will achieve greater volume. Conversely, your heavy cream must be very cold for optimal whipping and stability in the filling.
Achieving Stiff, Glossy Egg Whites: Use impeccably clean and grease-free bowls and beaters. Any residual fat can prevent egg whites from whipping to the desired stiff, glossy peaks, which are crucial for the cake’s structure.
Gentle Folding for an Airy Crumb: When incorporating the whipped egg whites into the chocolate batter, use a light hand and a folding motion rather than stirring. This preserves as much air as possible, ensuring a truly flexible and airy sponge.
The Right Bake for a Pliable Cake: Pay close attention to your baking time. Overbaking is the primary reason cakes become dry and crack. The cake should spring back when lightly touched, and its edges should just begin to pull away from the pan, signaling perfect doneness.
Perfecting the Initial Roll (Don’t Skip This!): The immediate warm roll with the towel or parchment is the single most critical step for a crack-free cake. This “memory” for the cake’s shape is established while it’s still pliable. Do not unroll it until it has completely cooled.
Patience is Key: Cooling Completely: Resist the urge to unroll and fill the cake before it’s thoroughly cooled to room temperature. A warm cake will cause the cream filling to melt and may still lead to breakage even after a perfect initial roll.
Troubleshooting Your Chocolate Cream Roll Cake
Why Did My Cake Crack?
Most cracks occur if the cake was overbaked, making it brittle and less pliable. Additionally, failing to roll the cake immediately while it’s still warm, or unrolling it before it’s completely cooled, can also lead to cracking. Ensure you adhere to the baking cues and the crucial warm-rolling step.
My Filling is Too Runny.
The most common reason for runny filling is heavy cream that wasn’t cold enough or wasn’t whipped to stiff peaks. Ensure your heavy cream is very cold, and for extra insurance, you can chill your mixing bowl and beaters for 10-15 minutes before whipping.
Glaze Consistency Issues.
If your glaze is too thick to drizzle, add a tiny bit more heavy cream (1/2 teaspoon at a time) and stir thoroughly until you reach the desired consistency. If it’s too thin, add a few more chocolate chips and gently melt again in short bursts, stirring continuously.
Cake Sticking to Parchment.
Always use good quality parchment paper, ensuring it lies flat in the pan and has sufficient overhang for easy lifting. If you’ve had sticking issues in the past, a very light spray of non-stick baking spray on the parchment before pouring the batter can provide extra insurance.
Serving and Storing Your Delectable Roll Cake
Elegant Presentation Ideas
To elevate your Chocolate Cream Roll Cake, consider garnishing with fresh berries like vibrant raspberries or sliced strawberries, which offer a beautiful color contrast and a touch of tartness. A final dusting of powdered sugar or delicate chocolate curls can add a professional, bakery-worthy finish. Serve this showstopper on a beautiful platter to maximize its visual appeal.
Keeping Your Cake Fresh
To maintain its freshness and delightful texture, store your Chocolate Cream Roll Cake in an airtight container in the refrigerator. It will remain delicious for up to 3-4 days. The cream filling necessitates refrigeration to keep it stable and safe for consumption.
Can I Make This Ahead of Time?
Absolutely! The un-filled, rolled cake (still rolled in its parchment or towel) can be stored in the refrigerator for up to 2 days. For longer storage, you can freeze the rolled cake for up to a month. Thaw it completely in the refrigerator before carefully unrolling and proceeding with the filling and decoration steps.
Frequently Asked Questions About This Roll Cake
Can I use a different size pan?
This recipe is specifically designed for a 10×15 inch jelly roll pan to achieve the perfect cake thickness and flexibility required for a crack-free roll. Using a different pan size would significantly alter the cake’s thickness, requiring extensive adjustments to ingredient quantities and baking time.
Is this recipe difficult for beginners?
While the process of making a roll cake might seem intimidating at first, the explicit instructions and the “no-crack” method in this Chocolate Cream Roll Cake recipe make it surprisingly approachable for beginners. Focusing on the critical warm-rolling step will lead to impressive success.
Can I substitute ingredients?
Some minor ingredient substitutions are possible. For example, you can experiment with different extracts in the cream filling, or use milk chocolate chips for a milder glaze if preferred. However, for core baking ingredients like flour or dairy, research appropriate baking substitutes carefully to maintain the cake’s structure and texture.
How long does it need to chill?
After assembly, the Chocolate Cream Roll Cake needs at least 30 minutes in the refrigerator. This chilling time is crucial for allowing both the glazes and the cream filling to set properly, ensuring that you can achieve clean, beautiful slices when serving.
Share Your Chocolate Cream Roll Cake Masterpiece!
Now that you’re equipped with the secrets to a perfectly rolled, crack-free Chocolate Cream Roll Cake, it’s time to bring this showstopper to life in your own kitchen! Impress your family and friends with its rich chocolate flavor, cloud-like cream, and stunning presentation. For another delightful, crack-free baking project, be sure to try our Easy Strawberry Cream Roll!
We can’t wait to see your creations! Don’t forget to share your photos and experiences in the comments below, or tag us on social media. Happy baking!
Chocolate Cream Roll Cake
Course: DessertCuisine: AmericanDifficulty: medium8
servings40
minutes15
minutes380
kcal180
minutesLearn the simple trick to prevent cracking for a flawless Chocolate Cream Roll Cake. This rich chocolate cake with creamy filling is a total showstopper, easily coming together without any breaks. Enjoy a beautiful and delicious dessert!
Ingredients
For the Chocolate Cake:
1/2 cup all purpose flour
1/4 cup unsweetelocalized cocoa powder
1/2 teaspoon baking powder
1/4 teaspoon salt
3 large eggs, separated
1/2 cup granulated sugar, divided
1/4 cup milk
1/4 cup vegetable oil
1 teaspoon vanilla extract
Powdered sugar for dusting
For the Cream Filling:
1 1/2 cups heavy cream
1/2 cup powdered sugar
1 teaspoon vanilla extract
For the Glaze and Topping:
1/2 cup chocolate chips or chopped chocolate
2 tablespoons heavy cream (for chocolate glaze)
1/2 cup white chocolate chips or chopped white chocolate
2 tablespoons heavy cream (for white glaze)
1/2 cup crushed chocolate sandwich cookies (like Oreos)
Directions
- Preheat your oven to 375°F (190°C). Line a 10×15 inch jelly roll pan with parchment paper, leaving an overhang on the sides.
- In a small bowl, whisk together the flour, cocoa powder, baking powder, and salt.
- In a separate large bowl, beat the egg yolks with 1/4 cup of the granulated sugar until light and creamy. Stir in the milk, vegetable oil, and vanilla extract. Gradually add the dry ingredients to the egg yolk mixture, mixing until just combined.
- In a clean bowl, beat the egg whites until soft peaks form. Gradually add the remaining 1/4 cup granulated sugar and continue beating until stiff, glossy peaks form. Gently fold about one third of the egg whites into the chocolate batter to lighten it, then fold in the remaining egg whites until no streaks remain.
- Pour the batter evenly into the prepared pan and spread with an offset spatula. Bake for 12-15 minutes, or until the cake springs back when lightly touched and the edges just begin to pull away from the sides of the pan.
- Immediately upon removing the cake from the oven, lay a clean kitchen towel or another sheet of parchment paper over the top of the cake and generously dust it with powdered sugar. Invert the cake onto the sugared towel/parchment paper. Carefully peel off the parchment paper that was used for baking. While the cake is still warm, starting from a short end, gently roll the cake and the towel/parchment paper together into a tight log. Place the rolled cake, seam-side down, on a wire rack and let it cool completely to room temperature. This crucial step allows the cake to cool in its rolled shape, preventing it from cracking when you unroll it later for filling.
- Once the cake is completely cool, prepare the cream filling: In a medium bowl, beat the heavy cream, powdered sugar, and vanilla extract until stiff peaks form.
- Carefully unroll the cooled cake. Spread the cream filling evenly over the cake, leaving a small border around the edges.
- Gently re-roll the cake, without the towel/parchment paper this time, into a log. Place it seam-side down on a serving platter.
- For the chocolate glaze, combine chocolate chips and 2 tablespoons heavy cream in a microwave-safe bowl. Microwave in 30-second intervals, stirring in between, until smooth. Drizzle over the cake.
- For the white glaze, combine white chocolate chips and 2 tablespoons heavy cream in a microwave-safe bowl. Microwave in 30-second intervals, stirring in between, until smooth. Drizzle over the cake, creating a decorative pattern.
- Sprinkle the crushed chocolate sandwich cookies over the top of the cake. Refrigerate for at least 30 minutes to set the glazes and filling before slicing and serving.
Notes
- The crucial step is to roll the warm cake with a towel/parchment paper and let it cool completely in that rolled shape to prevent cracking.