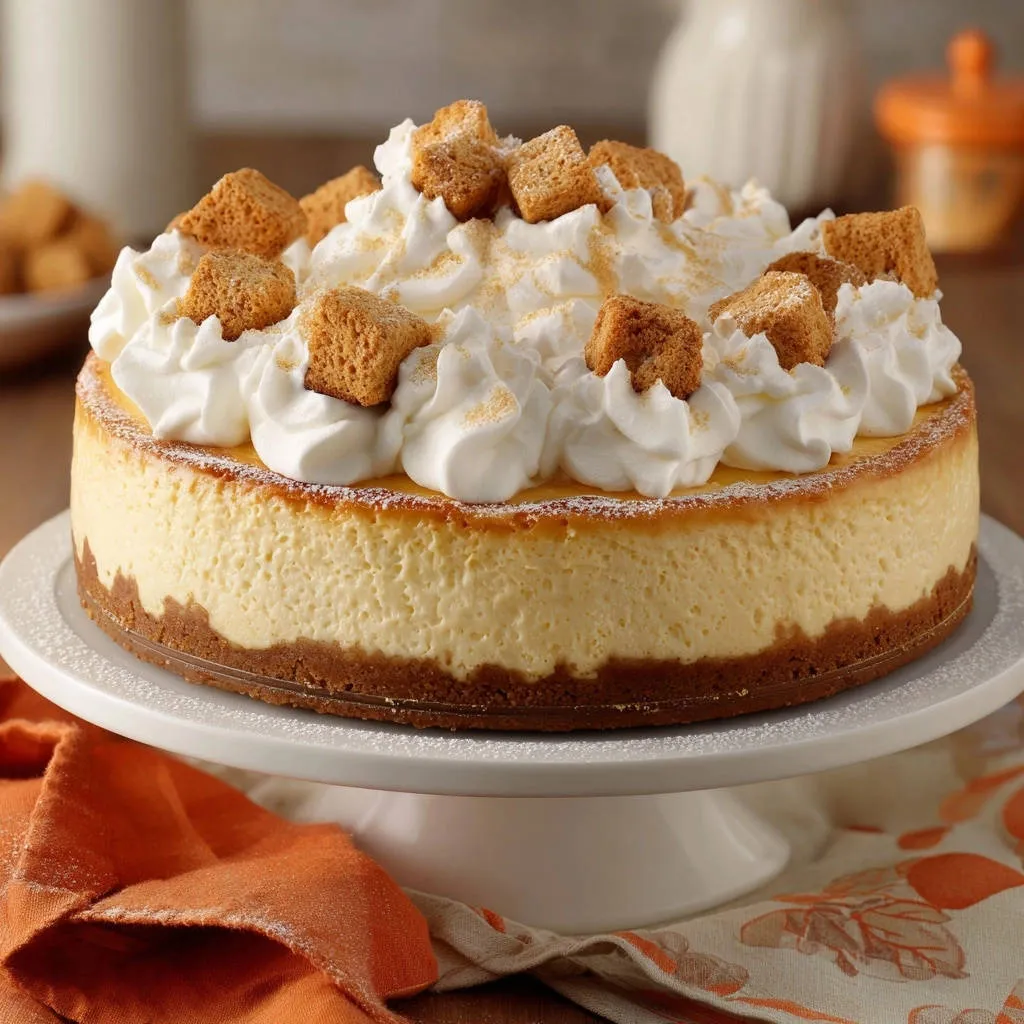
The quest for a perfectly smooth, crack-free Classic Creamy Cheesecake can feel like a culinary Everest. I’ve been there, facing the heartbreaking sight of a beautiful cheesecake splitting as it cooled. But through meticulous testing and a few game-changing techniques, I finally cracked the code to achieve that coveted velvety texture every single time. Get ready to create a showstopping dessert with complete confidence, no fuss, and truly exceptional results.
Unlocking the Secret to Flawlessly Smooth Classic Creamy Cheesecake
This isn’t just another cheesecake recipe; it’s a guide to transforming common baking frustrations into consistent triumphs. We’re focusing on precision, technique, and understanding the ‘why’ behind each step to guarantee your success.
Bidding Farewell to Cracks: Our Foolproof Cooling Method
One of the biggest anxieties in cheesecake baking is the dreaded crack. Our recipe emphasizes a unique, gradual cooling process directly in the turned-off oven. This gentle descent in temperature prevents the sudden shock that causes fissures, allowing your cheesecake to settle beautifully and maintain its pristine surface.
The Velvety Texture You’ve Dreamed Of, Every Time
Achieving that luscious, melt-in-your-mouth creamy texture is paramount for any Classic Creamy Cheesecake. This recipe details precise mixing techniques and the importance of room temperature ingredients. These steps ensure a consistently smooth, rich, and incredibly decadent filling that defines perfection.
No More Soggy Bottoms: The Crust Perfection Secret
A flawless cheesecake begins with a firm, buttery crust – never soggy. We ensure this by properly preparing the springform pan with a robust foil wrap and a brief pre-bake. This creates an impenetrable barrier, protecting your graham cracker base from the water bath and delivering a delightfully crisp foundation.
Effortless Elegance: Showstopping Results with Ease
Despite its impressive appearance, this Classic Creamy Cheesecake recipe is designed for accessibility. By demystifying crucial steps like the water bath and gradual cooling, we simplify the process. You’ll achieve professional-level results with ease, making this the ideal dessert for any occasion.
Gather Your Essentials: The Building Blocks of Classic Creamy Cheesecake
High-quality ingredients are the foundation of any outstanding dessert. Here’s what you’ll need, with insights into their specific roles in creating your perfect cheesecake.
For the Irresistible Graham Cracker Crust
Graham Cracker Crumbs: The classic base for a sweet, slightly spiced foundation.
Granulated Sugar: Adds a touch of sweetness to the crust, enhancing its flavor without overpowering.
Unsalted Butter (melted): Binds the crumbs together, ensuring a firm, rich crust that holds its shape beautifully.
For the Velvety Classic Creamy Cheesecake Filling
Full-Fat Cream Cheese (softened): The star of the show, crucial for the cheesecake’s signature creaminess. Room temperature is key for a lump-free, smooth batter.
Granulated Sugar: Sweetens the rich filling, balancing the tang of the cream cheese and sour cream.
Large Eggs (room temperature): Provide structure and richness to the custard. Incorporating them one at a time is vital to prevent overmixing.
Full-Fat Sour Cream (room temperature): Adds moisture, a delightful slight tang, and contributes significantly to the silky, tender texture of the cheesecake.
For those who enjoy a velvety texture, explore creamy pumpkin swirl cheesecake next.
Vanilla Extract: Enhances the overall flavor profile with its warm, aromatic notes.
All-Purpose Flour (optional): A secret ingredient that significantly helps prevent cracks by stabilizing the batter’s structure without affecting taste or texture.
For the Cloud-Like Whipped Cream Topping & Garnish
Heavy Cream (cold): Whips into a light, airy, and stable topping, offering a delightful contrast to the rich cheesecake.
Powdered Sugar: Sweetens the whipped cream for a delicate balance, dissolving easily for a smooth finish.
Vanilla Extract: Infuses the topping with a warm, comforting aroma and flavor.
Toasted Biscuit or Graham Cracker Pieces: Provides a delightful textural contrast and visual appeal, echoing the crust.
Ground Cinnamon or Nutmeg: A pinch for an aromatic and visually appealing finish.
Your Kitchen Arsenal for Cheesecake Success
Having the right tools makes all the difference in ensuring a seamless baking process and a perfect Classic Creamy Cheesecake.
Essential Bakeware and Mixing Tools
9-Inch Springform Pan: Indispensable for easy release and a perfect, clean presentation without damaging the delicate cheesecake.
Heavy Duty Aluminum Foil: Crucial for protecting the crust and pan during the water bath, preventing any moisture from seeping in.
Large Roasting Pan: Used to create the essential water bath environment, ensuring gentle and even baking.
Electric Mixer (stand or hand-held): Key for achieving a smooth, lump-free cream cheese filling with the right consistency.
Large Mixing Bowls: For combining ingredients efficiently, allowing enough space for thorough mixing without spills.
Wire Rack: For even cooling and air circulation after baking, preventing a soggy bottom from condensation.
Rubber Spatula: Essential for scraping down bowls, ensuring all ingredients are incorporated, and gently folding the batter without overmixing.
Mastering the Method: A Detailed Guide to Classic Creamy Cheesecake
Follow these precise steps to bake a Classic Creamy Cheesecake that boasts a perfect texture and no cracks, every time.
- Preheat and Prepare Your Pan:
Preheat your oven to 325°F (160°C). Lightly grease a 9-inch springform pan. To prevent a soggy crust and protect against water bath leaks, wrap the outside bottom and sides of the springform pan tightly with two layers of heavy-duty aluminum foil.
- Crafting the Graham Cracker Crust:
In a medium bowl, combine the graham cracker crumbs, ¼ cup granulated sugar, and melted butter. Press this mixture firmly and evenly into the bottom of the prepared springform pan. Bake for 10 minutes, then remove from the oven and set aside to cool slightly.
- Whipping the Cream Cheese Base:
In a large bowl, using an electric mixer on medium speed, beat the softened cream cheese until it is completely smooth and creamy, with no lumps. Gradually add 1 ½ cups granulated sugar, beating until just combined and smooth, making sure to scrape down the sides of the bowl as needed. It’s important not to overmix at this stage, as incorporating too much air can contribute to cracks later.
- Folding in the Wet Ingredients:
Reduce the mixer speed to low. Add the eggs one at a time, mixing just until each egg is fully incorporated before adding the next. Stir in the sour cream, vanilla extract, and the optional all-purpose flour until just combined. Exercise extreme caution not to overmix the batter; excessive mixing introduces air bubbles that expand during baking and then collapse, leading to cracks.
- Assembling the Cheesecake:
Carefully pour the prepared cheesecake batter over the cooled graham cracker crust in the springform pan. Gently tap the pan on the counter a few times to release any large air bubbles, which helps create a smooth surface.
- Setting Up the Essential Water Bath:
Place the foil-wrapped springform pan into a larger roasting pan. Carefully pour hot water into the roasting pan until it comes about halfway up the sides of the springform pan. This moist, steamy environment is absolutely critical for even baking and is the key to preventing the cheesecake from cracking.
- Baking to Perfection:
Carefully transfer the roasting pan with the cheesecake to the preheated oven. Bake for 60 to 75 minutes, or until the edges are set and slightly puffed, but the center still jiggles slightly when gently shaken. The internal temperature, when measured with an instant-read thermometer, should be around 150°F (65°C).
- The Crucial Slow Cool Down (In-Oven):
Once baked, turn off the oven but leave the cheesecake inside with the oven door propped open a few inches for at least 1 hour. This slow, gradual cooling prevents temperature shock that is a major cause of cracks, allowing the cheesecake to gently settle and cool evenly.
- Final Cooling and Release:
Remove the cheesecake from the oven and carefully lift it out of the water bath. Gently remove the aluminum foil. Let it cool completely on a wire rack at room temperature for another 1-2 hours. As it cools, gently run a thin knife around the edge of the cheesecake to release it from the pan sides. This prevents tension that can pull on the cooling cheesecake and cause cracks.
- Chilling for Optimal Set:
Once completely cool, cover the cheesecake with plastic wrap and refrigerate for at least 6 hours, or preferably overnight. This extended chilling time is essential for the cheesecake to fully set, firm up, and develop its rich flavor and perfect texture.
- Whipping the Topping and Serving:
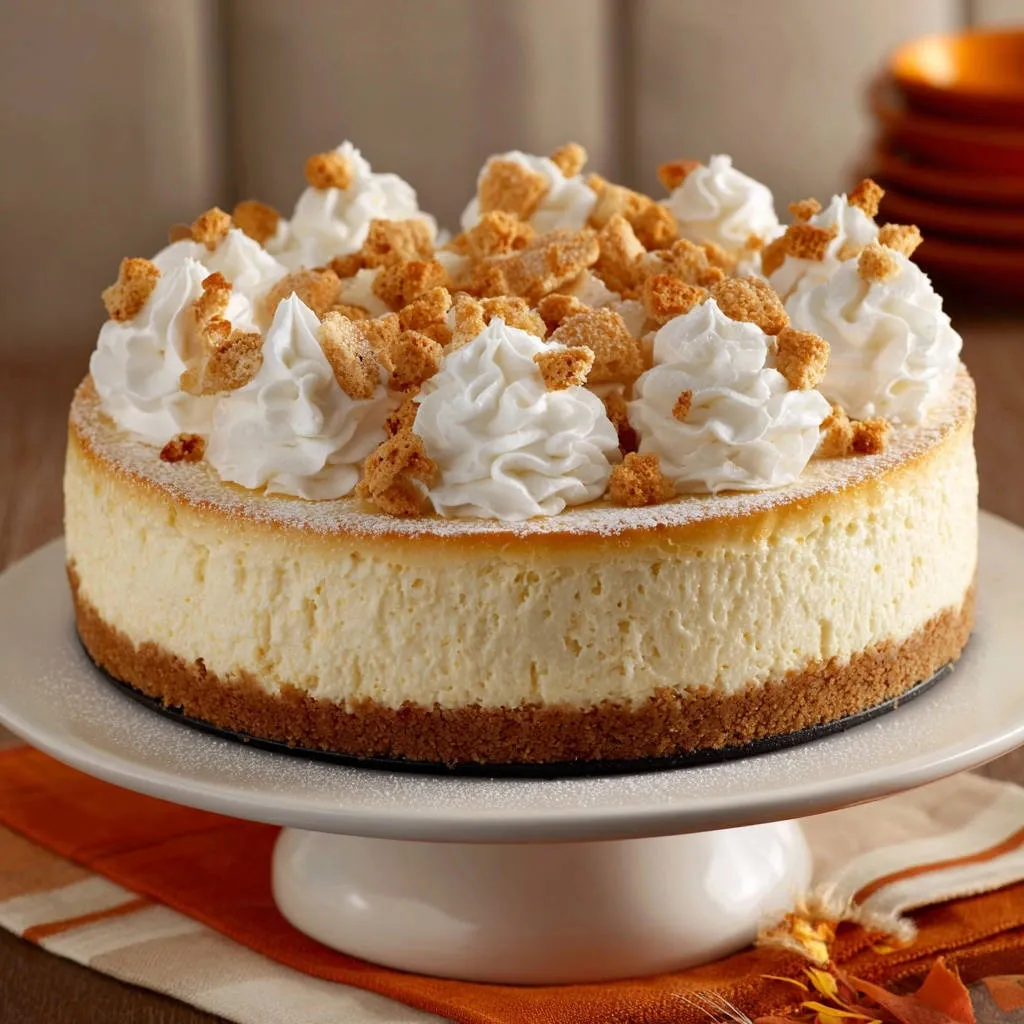
To serve, in a clean, chilled bowl, beat the cold heavy cream, powdered sugar, and 1 teaspoon vanilla extract on high speed until stiff peaks form. Pipe or spread the whipped cream generously over the chilled cheesecake. Finish by sprinkling with toasted biscuit or graham cracker pieces and a delicate dusting of cinnamon or nutmeg for a beautiful garnish.
Chef’s Secrets: Elevate Your Classic Creamy Cheesecake Experience
Unlock the professional touch with these indispensable tips that guarantee a magnificent Classic Creamy Cheesecake.
The Magic of Room Temperature Ingredients: Always ensure your cream cheese, eggs, and sour cream are at room temperature. This is crucial for a smooth, lump-free batter that incorporates air evenly, leading to a velvety texture without overmixing.
Mastering the Mix: Preventing Air Bubbles and Cracks: The cardinal rule of cheesecake is “do not overmix!” Beat the cream cheese and sugar until just smooth, then incorporate eggs and sour cream on low speed until just combined. Excessive mixing introduces too much air, which expands during baking and then collapses, causing cracks.
For those who adore this cheesecake’s velvety texture, you’ll also appreciate the no-leak method for red velvet cheesecake cookies.
The Unsung Hero: Why a Water Bath Matters: Don’t skip the water bath! It creates a moist, steamy environment in the oven, ensuring the cheesecake bakes gently and evenly. This prevents the edges from setting too quickly and cracking, guaranteeing a smooth top.
The Golden Rule of Cooling: Patience Pays Off: The cooling process is as vital as the baking. Gradual cooling in the turned-off oven prevents sudden temperature changes that can shock the cheesecake and cause cracks. Followed by room temperature cooling and finally refrigeration, it ensures a perfectly set dessert.
The Flour Factor: A Subtle but Mighty Addition: While optional, adding a tablespoon of all-purpose flour to your filling provides a slight structural boost. It acts as a binder, subtly strengthening the batter and offering an extra layer of crack prevention without affecting the delicate texture.
The “Run-a-Knife” Technique: After the initial cooling, gently running a thin knife around the edge of the cheesecake before fully chilling releases any tension between the cheesecake and the pan. This simple step further prevents cracks as the cheesecake continues to cool and contract.
Common Cheesecake Conundrums Solved
Even with the best recipes, questions arise. Here are solutions to common challenges faced by cheesecake bakers.
My Classic Creamy Cheesecake Cracked!
Cracks are often caused by overmixing the batter, sudden temperature changes during cooling, or a lack of moisture in the oven. Ensure your ingredients are room temperature, avoid overbeating, and always use a water bath with a gradual cool-down process. For another variation, try our perfect strawberry swirl cheesecake, which uses similar crack-prevention techniques.
Why Is My Crust Soggy?
A soggy crust typically results from water seeping into the pan during the water bath. The solution is to wrap the springform pan tightly with at least two layers of heavy-duty aluminum foil. Also, ensure you pre-bake the crust as directed to create a sturdy barrier.
Help! My Classic Creamy Cheesecake is Dense or Rubbery.
A dense or rubbery texture is usually a sign of overbaking or overmixing. Bake only until the edges are set and the center still has a slight jiggle. Remember to mix the batter minimally after adding eggs and wet ingredients to avoid over-developing gluten and incorporating too much air.
The Center is Still Jiggly (or Too Firm).
A perfectly baked cheesecake should have a slight jiggle in the center when gently shaken, indicating it’s done but not overbaked. If it’s too firm, you’ve likely overbaked it. If it’s too liquidy, extend baking time by 5-10 minutes, checking frequently until it reaches the desired internal temperature of 150°F (65°C).
Enjoying Your Masterpiece: Serving, Storage, & Make-Ahead Tips
Once your Classic Creamy Cheesecake is perfectly set, here’s how to best enjoy and preserve its deliciousness.
Complementary Treats
Round out your dessert experience with these sweet ideas.
- For a cool and creamy indulgence to go with your cheesecake, try this Creamy Copycat Iced Coffee.
- If you’re in the mood for something a little different, these Golden Cottage Cheese Fritters offer a pleasant, slightly savory contrast.
Serving Suggestions That Impress
Beyond our luxurious whipped cream and biscuit crumb topping, consider serving slices with fresh berries, a drizzle of raspberry coulis, or a light dusting of cocoa powder. A cup of coffee or a dessert grape juice makes an excellent accompaniment for this rich dessert.
Storing Your Classic Creamy Cheesecake for Freshness
Once fully chilled, cover your Classic Creamy Cheesecake loosely with plastic wrap or store it in an airtight container. It will stay fresh in the refrigerator for up to 5-7 days. For best results, add the whipped cream topping just before serving to maintain its light texture.
Can I Make This Cheesecake Ahead of Time?
Absolutely! This Classic Creamy Cheesecake is an ideal make-ahead dessert. It requires at least 6 hours of chilling, but it tastes even better when made a day or two in advance, allowing the flavors to fully meld. Prepare it through step 10, then add the topping just before your event.
Your Classic Creamy Cheesecake Questions, Answered
We’ve anticipated your questions to ensure every aspect of your cheesecake journey is covered.
Can I Use Low-Fat Cream Cheese?
While you can use low-fat cream cheese, we highly recommend using full-fat for this Classic Creamy Cheesecake. Full-fat cream cheese provides the rich, velvety texture and decadent flavor that truly define a classic cheesecake. Low-fat versions may result in a firmer, less creamy consistency and potentially impact the overall structure.
Is a Water Bath Absolutely Necessary?
For achieving a perfectly smooth, crack-free Classic Creamy Cheesecake with a custardy texture, a water bath is absolutely necessary. It ensures even, gentle baking, preventing the edges from setting too quickly and the center from cracking. Do not skip this crucial step!
Can I Freeze Classic Creamy Cheesecake?
Yes, Classic Creamy Cheesecake freezes beautifully! To freeze, ensure it’s fully chilled and unfrosted. Wrap individual slices or the whole cheesecake (without topping) tightly in plastic wrap, then a layer of aluminum foil. Freeze for up to 1 month. Thaw in the refrigerator overnight before serving, then add your fresh topping.
What If I Don’t Have a Springform Pan?
While a springform pan is ideal for its easy release and presentation, you can use a regular 9-inch round cake pan lined with parchment paper, leaving an overhang to lift the cheesecake out. Alternatively, a deep pie dish or even individual ramekins can work for mini cheesecakes, adjusting baking times accordingly.
How Do I Know When My Classic Creamy Cheesecake Is Done Baking?
Your Classic Creamy Cheesecake is perfectly done when the edges are set and slightly puffed, but the very center (about a 2-inch diameter) still jiggles slightly when gently shaken. An instant-read thermometer inserted into the center should read around 150°F (65°C), confirming it’s cooked through without being overbaked.
Ready to Bake Your Best Classic Creamy Cheesecake Yet?
Armed with these expert tips and our meticulously detailed recipe, you’re now ready to create a Classic Creamy Cheesecake that will impress everyone who takes a bite. Say goodbye to cracks and dense textures, and hello to a perfectly smooth, velvety dessert every single time. Don’t just bake; create a showstopping masterpiece that truly celebrates the joy of homemade goodness!
We’d love to see your Classic Creamy Cheesecake creations! Share your photos and experiences in the comments below, or explore more of our decadent dessert recipes, like our Decadent Chocolate Chip Cheesecake (No Cracks) for your next baking adventure.
Cheesecake
Course: DessertCuisine: AmericanDifficulty: medium12
servings30
minutes1
hour550
kcal660
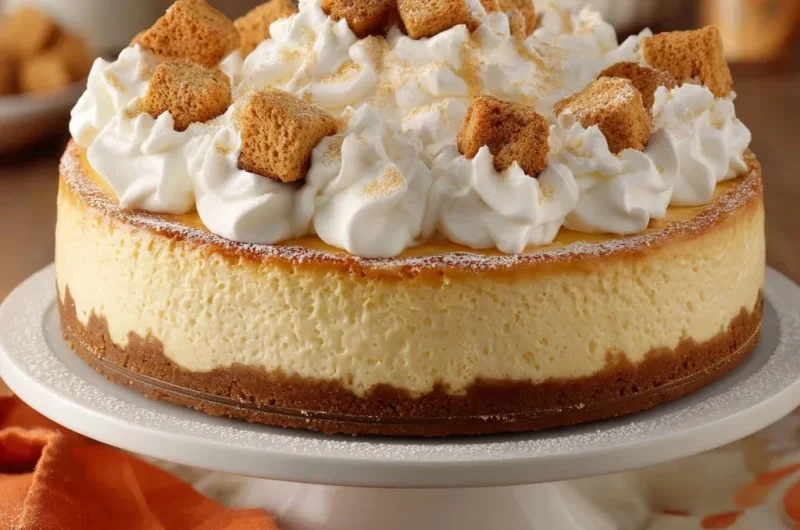
minutesSay goodbye to cracked cheesecakes! This recipe guides you to a perfectly smooth, velvety Classic Creamy Cheesecake every single time. Get ready for showstopping, fuss-free dessert results.
Ingredients
For the Crust:
1 ½ cups graham cracker crumbs
¼ cup granulated sugar
6 tablespoons unsalted butter, melted
For the Filling:
3 (8 ounce) packages cream cheese, full fat, softened to room temperature
1 ½ cups granulated sugar
3 large eggs, room temperature
1 cup sour cream, full fat, room temperature
1 tablespoon vanilla extract
1 tablespoon all purpose flour (optional, but helps prevent cracks)
For the Topping:
1 ½ cups heavy cream, cold
½ cup powdered sugar
1 teaspoon vanilla extract
½ cup small toasted biscuit or graham cracker pieces, for garnish
A pinch of ground cinnamon or nutmeg, for dusting
Directions
- Preheat your oven to 325°F (160°C). Grease a 9 inch springform pan. To prevent a soggy crust and help with the water bath, wrap the outside bottom and sides of the springform pan tightly with two layers of heavy duty aluminum foil.
- For the crust: In a medium bowl, combine the graham cracker crumbs, ¼ cup granulated sugar, and melted butter. Press the mixture firmly into the bottom of the prepared springform pan. Bake for 10 minutes, then remove from oven and let cool slightly.
- For the filling: In a large bowl, using an electric mixer on medium speed, beat the softened cream cheese until smooth and creamy. Gradually add 1 ½ cups granulated sugar, beating until just combined and smooth, scraping down the sides of the bowl as needed. Do not overmix at this stage, as incorporating too much air can lead to cracks.
- Reduce mixer speed to low. Add the eggs one at a time, mixing just until each egg is incorporated. Stir in the sour cream, vanilla extract, and optional all purpose flour until just combined. Be very careful not to overmix the batter. Overmixing introduces air bubbles that will expand and then collapse, causing cracks.
- Pour the cheesecake batter over the cooled crust in the springform pan.
- Prepare a water bath: Place the foil-wrapped springform pan into a larger roasting pan. Carefully pour hot water into the roasting pan until it comes about halfway up the sides of the springform pan. This moist environment is key to preventing cracks.
- Carefully transfer the roasting pan with the cheesecake to the preheated oven. Bake for 60 to 75 minutes, or until the edges are set and slightly puffed, but the center still jiggles slightly when gently shaken. The internal temperature should be around 150°F (65°C).
- To prevent cracks, cooling is crucial: Once baked, turn off the oven but leave the cheesecake inside with the oven door propped open a few inches for at least 1 hour. This slow, gradual cooling prevents temperature shock that causes cracking.
- Remove the cheesecake from the oven and the water bath. Carefully remove the foil. Let it cool completely on a wire rack at room temperature for another 1-2 hours. As it cools, gently run a thin knife around the edge of the cheesecake to release it from the pan sides, preventing tension that can cause cracks.
- Once completely cool, cover the cheesecake with plastic wrap and refrigerate for at least 6 hours, or preferably overnight, to allow it to set fully.
- To serve: In a clean, chilled bowl, beat the heavy cream, powdered sugar, and 1 teaspoon vanilla extract on high speed until stiff peaks form. Pipe or spread the whipped cream generously over the chilled cheesecake. Sprinkle with toasted biscuit or graham cracker pieces and a dusting of cinnamon or nutmeg for garnish.
Notes
- Chilling overnight is crucial for the best set and flavor.