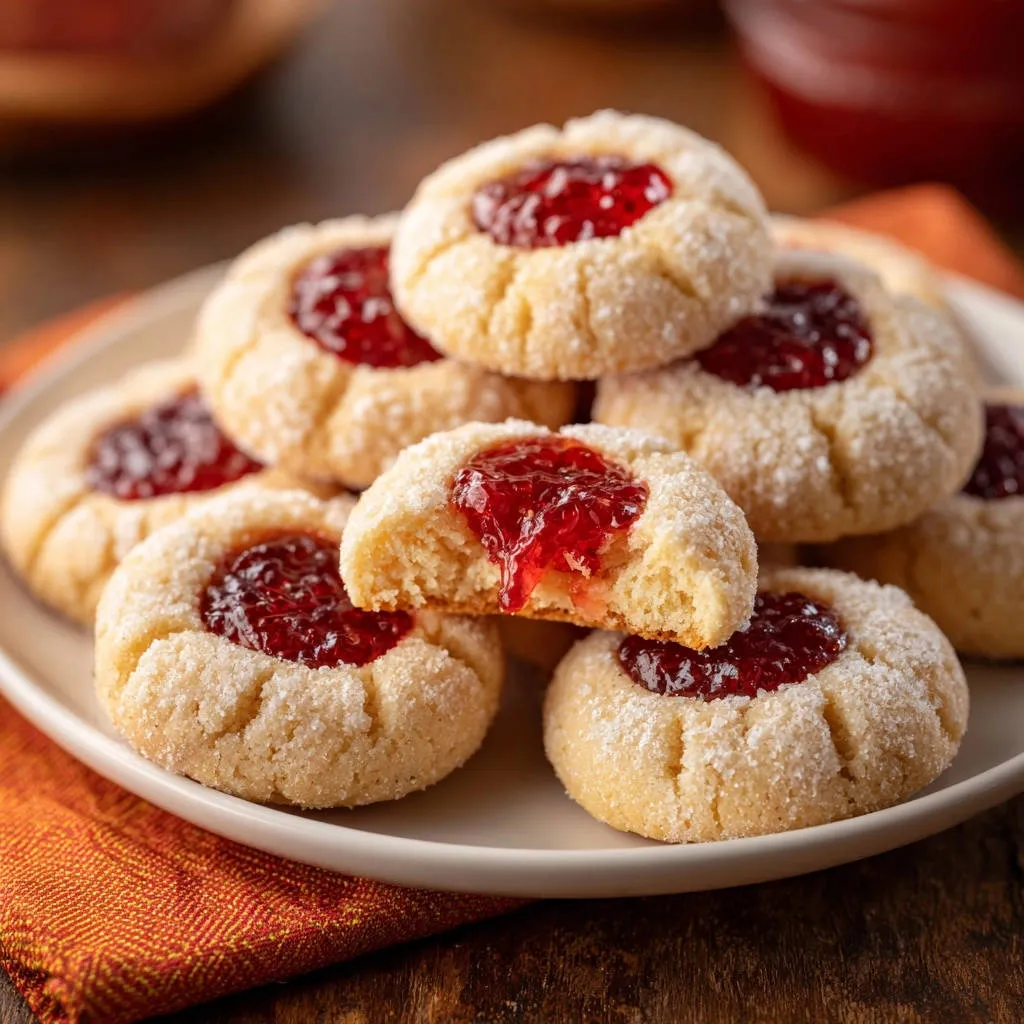
There’s nothing more frustrating than putting in all that effort to bake a batch of beautiful thumbprint cookies, only for them to spread flat on the baking sheet! I’ve been there, struggling to achieve that distinct shape, but I’ve finally cracked the code for perfect Classic Jam Thumbprint Cookies every time.
This reliable method ensures your cookies hold their form beautifully, boasting that classic tender bite and a vibrant jam filling. Get ready to bake a batch of these irresistible homemade jam cookies that will impress everyone.
Say Goodbye to Flat Cookies: Why This Recipe Works Every Time
The Magic of “No Spread” Assurance
Our recipe for Classic Jam Thumbprint Cookies includes a crucial chilling step that solidifies the butter in the dough. This essential technique prevents spreading, ensuring each cookie maintains its perfect round shape and deep jam well during baking.
For consistent shape, explore the no-spread method in glazed raspberry thumbprint cookies.
Achieving that Irresistible Tender Crumb
Careful attention to butter temperature and gentle mixing are paramount in this recipe. These steps prevent overworking the dough, resulting in a wonderfully tender, melt-in-your-mouth crumb that defines a great thumbprint cookie.
Simplified Steps for Baking Success
This guide breaks down the baking process into clear, actionable steps, making it accessible for bakers of all skill levels. We focus on key techniques that guarantee consistent, delicious results with every batch of these buttery shortbread cookies.
Gather Your Essentials: The Building Blocks of Deliciousness
Butter: The Foundation of Flavor and Structure
Unsalted butter provides rich flavor and is crucial for the cookie’s structure. Ensure it’s softened but still cool to the touch; this specific temperature is vital for preventing spread and achieving the ideal texture.
The Sweet Duo: Sugar and Jam
Granulated sugar adds sweetness to the dough and a delightful, sparkling crunch when rolled on the exterior. Your choice of jam, whether classic raspberry or strawberry, adds a burst of fruity flavor and vibrant color to these delightful treats.
The Supporting Cast: Egg Yolk, Vanilla, Flour, and Salt
An egg yolk enriches the dough, contributing to its tender texture. Vanilla extract enhances the overall flavor, while all-purpose flour provides the necessary structure. A touch of salt balances the sweetness, elevating every bite.
Optional Flourish: Powdered Sugar for Dusting
A light dusting of powdered sugar just before serving adds an elegant finish and a subtle extra layer of sweetness. It’s a simple touch that enhances both appearance and taste.
Essential Tools for Your Classic Jam Thumbprint Cookies Baking
Large Mixing Bowls: For combining wet and dry ingredients separately.
Electric Mixer: Handheld or stand mixer is ideal for creaming butter and sugar.
Measuring Cups & Spoons: For accurate ingredient proportions.
Rubber Spatula: For scraping down bowls and gentle mixing.
Plastic Wrap: Crucial for chilling the dough effectively.
Baking Sheets & Parchment Paper: Ensures even baking and prevents sticking.
Small Scoop or Tablespoon: For portioning uniform cookie dough balls.
Wire Rack: For cooling the baked cookies completely.
Baking Perfection: Your Step-by-Step Guide to Classic Jam Thumbprint Cookies
- Cream Butter and Sugar:
In a large mixing bowl, combine the softened butter and 1/2 cup granulated sugar. Beat them together until the mixture is light and fluffy, ensuring proper aeration.
Remember, the butter should be softened but still cool to the touch, not warm or melted, which is paramount for cookie shape.
- Incorporate Wet Ingredients:
Beat in the large egg yolk and the vanilla extract until they are fully combined with the butter mixture, creating a smooth base.
- Add Dry Ingredients Gradually:
In a separate bowl, whisk together the all-purpose flour and salt. Gradually add this dry mixture to the wet ingredients, mixing on low speed only until no dry streaks of flour remain.
It’s vital to stop mixing as soon as the flour is incorporated to avoid overworking the dough, which can lead to tough cookies and undesirable spreading.
- Chill the Dough Thoroughly:
Cover the dough tightly with plastic wrap and refrigerate for a minimum of 1 hour, or ideally, up to overnight. This chilling process is absolutely crucial, solidifying the butter and ensuring your cookies maintain their beautiful round shape and distinct thumbprint during baking.
- Prepare for Baking:
Preheat your oven to 350°F (175°C). Line baking sheets with parchment paper to prevent sticking and aid in even baking.
- Prepare Sugar for Rolling:
Place extra granulated sugar in a shallow bowl; this will be used to coat the cookie dough balls, adding a delightful texture and sparkle.
- Shape and Roll Dough Balls:
Remove the chilled dough from the refrigerator. Roll tablespoon-sized portions of dough into smooth, uniform balls. Roll each ball generously in the granulated sugar until it is evenly coated on all sides.
- Create Indentations:
Place the sugared dough balls about 1 inch apart on the prepared baking sheets. Using your thumb or the back of a small spoon, make a distinct indentation in the center of each cookie. Press firmly enough to create a good well without cracking the edges.
- Fill with Jam:
Fill each indentation with approximately 1/2 teaspoon of your chosen jam. Don’t overfill, as the jam can bubble over during baking.
- Bake to Perfection:
Bake for 12 to 15 minutes, or until the edges are lightly golden. Thanks to the chilling, your cookies will emerge perfectly shaped and tender.
- Cool Before Transferring:
Let the cookies cool on the baking sheets for 5 minutes after baking. This allows them to firm up slightly before you carefully transfer them to a wire rack to cool completely.
- Optional Dusting:
Optionally, dust with powdered sugar just before serving for an extra touch of elegance and sweetness.
Chef’s Secrets for Flawless Classic Jam Thumbprint Cookies
The Golden Rule: Chilling the Dough (And Why It Matters!): This is the most critical step for preventing spread. Cold butter in the dough melts slower, helping the cookies hold their shape. Don’t skip it!
Mastering Butter Temperature for Optimal Texture: “Softened but still cool” means it should yield slightly to pressure but not be greasy or warm. Too soft, and your cookies will spread; too hard, and creaming will be difficult.
The Art of Gentle Mixing: Avoiding Tough Cookies: Overmixing develops gluten, leading to a tough, dry cookie. Mix just until ingredients are combined.
Crafting the Perfect Thumbprint Well: Use consistent pressure. If edges crack, gently smooth them back together before filling. A measuring spoon can create a more uniform well than a thumb.
Choosing Your Jam Wisely: Thicker jams (like good quality preserves or fruit butters) tend to hold their shape better and are less likely to bubble over than runny jellies.
Knowing When Your Cookies Are Done: Look for lightly golden edges. The centers might still look a little soft, but they will firm up as they cool, ensuring that classic tender bite.
Troubleshooting Common Thumbprint Cookie Challenges
Why Did My Cookies Spread Flat?
This is usually due to butter being too soft, dough not being chilled enough, or overmixing the dough. Ensure your butter is cool-soft, chill the dough thoroughly, and mix only until combined.
My Jam Sank or Bubbled Over!
If jam sinks, the indentation wasn’t deep enough, or the jam was too thin. If it bubbled over, you likely overfilled the well. Use a thicker jam and don’t exceed 1/2 teaspoon per cookie.
Cookies Are Too Crumbly or Too Hard.
Too much flour or overbaking can lead to dry, crumbly cookies. Tough cookies often result from overmixing the dough. Always measure flour accurately and watch for those lightly golden edges.
Beyond the Classic: Creative Twists & Serving Ideas
Jam Variations: Explore a Rainbow of Flavors
Beyond raspberry and strawberry, experiment with apricot, fig, or even lemon curd for a delightful twist. Chocolate ganache also makes for an indulgent filling in these easy thumbprint cookies.
Garnishes and Dustings: Elevate Your Presentation
Instead of just powdered sugar, consider a sprinkle of citrus zest (lemon or orange) for brightness. A light drizzle of melted white chocolate can also add elegance and extra flavor.
For a similar burst of citrus, try glazed orange creamsicle cookies next.
Perfect Pairings: What to Serve with Your Cookies
These Classic Jam Thumbprint Cookies pair beautifully with a hot cup of tea or coffee for a cozy treat. They also make a fantastic addition to any dessert platter, especially around the holidays, complementing other Christmas cookies.
More Sweet Baking Ideas
Round out your baking session with these delightful recipes.
- For a breakfast treat that complements the sweet notes of your cookies, consider making fluffy diner-style pancakes, known for their pillowy texture.
- If you enjoyed the process of creating perfect shapes with your cookies, you might also like learning the secret to fluffy golden pancakes.
Planning Ahead: Make-Ahead Tips and Storage Solutions
Can You Prepare Classic Jam Thumbprint Cookie Dough in Advance?
Absolutely! The cookie dough can be made ahead and refrigerated for up to 3 days, or even frozen for up to 3 months. If freezing, wrap it tightly in plastic wrap, then foil.
Storing Baked Classic Jam Thumbprint Cookies for Freshness
Store baked Classic Jam Thumbprint Cookies in an airtight container at room temperature for up to 5 days. Layer them with parchment paper to prevent sticking and keep them fresh.
Freezing Baked Thumbprint Cookies: A Smart Strategy
Baked cookies can be frozen for up to 2 months. Arrange them in a single layer on a baking sheet to freeze solid, then transfer to an airtight container or freezer bag. Thaw at room temperature before serving.
Your Top Classic Jam Thumbprint Cookie Questions Answered
What’s the best type of jam to use for thumbprint cookies?
Thick fruit preserves (like good quality raspberry or strawberry) are ideal as they hold their shape well and provide intense flavor without excess liquid. Avoid runny jellies.
Can I make these Classic Jam Thumbprint Cookies gluten-free?
Yes, you can substitute all-purpose flour with a good quality 1:1 gluten-free baking flour blend that contains xanthan gum. The chilling step becomes even more important for structure.
Why do some recipes use egg whites or nuts for rolling?
Some recipes call for rolling dough in egg whites and then chopped nuts (like pecans or walnuts) before baking. This adds a crunchy, nutty crust, a delicious variation to the classic sugared exterior.
How do I prevent the jam from bubbling over or burning?
Ensure you’re only adding about 1/2 teaspoon of jam to each indentation. If using very watery jam, you can reduce it slightly on the stovetop first to thicken, or dab a tiny bit of cornstarch in the well before filling.
Time to Indulge: Share Your Homemade Classic Jam Thumbprint Cookies!
There’s immense satisfaction in baking a batch of perfect Classic Jam Thumbprint Cookies-those tender, buttery bites cradling a vibrant jewel of fruit. Whether you’re sharing them with loved ones or savoring them yourself, these cookies are a testament to simple, timeless joy.
Don’t hesitate to try this reliable recipe and experience the delight of beautifully shaped, irresistibly delicious thumbprints. We’d love to see your creations! Share your baking success and favorite jam fillings in the comments below.
Jam Thumbprint Cookies
Course: DessertCuisine: AmericanDifficulty: easy4
24-30 cookies30
minutes15
minutes240
kcal60
minutesThis recipe reveals the ultimate trick to bake perfect Classic Jam Thumbprint Cookies that hold their shape. Say goodbye to flat, spread-out cookies and enjoy a tender bite every time with this proven method.
Ingredients
1 cup (2 sticks) unsalted butter, softened but still cool
1/2 cup granulated sugar, plus extra for rolling
1 large egg yolk
1 teaspoon vanilla extract
2 cups all-purpose flour
1/4 teaspoon salt
1/2 cup raspberry or strawberry jam (or your favorite flavor)
Optional: Powdered sugar for dusting
Directions
- In a large mixing bowl, cream together the softened butter and 1/2 cup granulated sugar until light and fluffy. It’s important that your butter is properly softened, but not warm or melted, as this is key to the cookies maintaining their shape.
- Beat in the egg yolk and vanilla extract until well combined.
- In a separate bowl, whisk together the all-purpose flour and salt. Gradually add the dry ingredients to the wet ingredients, mixing on low speed just until combined. Stop mixing as soon as no dry streaks of flour remain to avoid overworking the dough, which can lead to tough cookies and increased spreading.
- The Ultimate Trick to Prevent Spreading: Cover the dough tightly with plastic wrap and refrigerate for at least 1 hour, or up to overnight. This chilling process is absolutely crucial as it solidifies the butter, ensuring your cookies hold their beautiful round shape and distinct thumbprint during baking.
- Preheat your oven to 350°F (175°C). Line baking sheets with parchment paper.
- Place extra granulated sugar in a shallow bowl for rolling.
- Remove the chilled dough from the refrigerator. Roll tablespoon-sized portions of dough into smooth balls. Roll each ball generously in the granulated sugar until evenly coated.
- Place the sugared dough balls about 1 inch apart on the prepared baking sheets. Using your thumb or the back of a small spoon, make a distinct indentation in the center of each cookie. Press firmly enough to create a good well without cracking the edges.
- Fill each indentation with about 1/2 teaspoon of your chosen jam.
- Bake for 12 to 15 minutes, or until the edges are lightly golden. Thanks to the chilling, your cookies will emerge perfectly shaped and tender.
- Let the cookies cool on the baking sheets for 5 minutes before carefully transferring them to a wire rack to cool completely.
- Optionally, dust with powdered sugar just before serving for an extra touch.
Notes
- Chilling the dough is crucial for preventing spreading and achieving the perfect cookie shape.