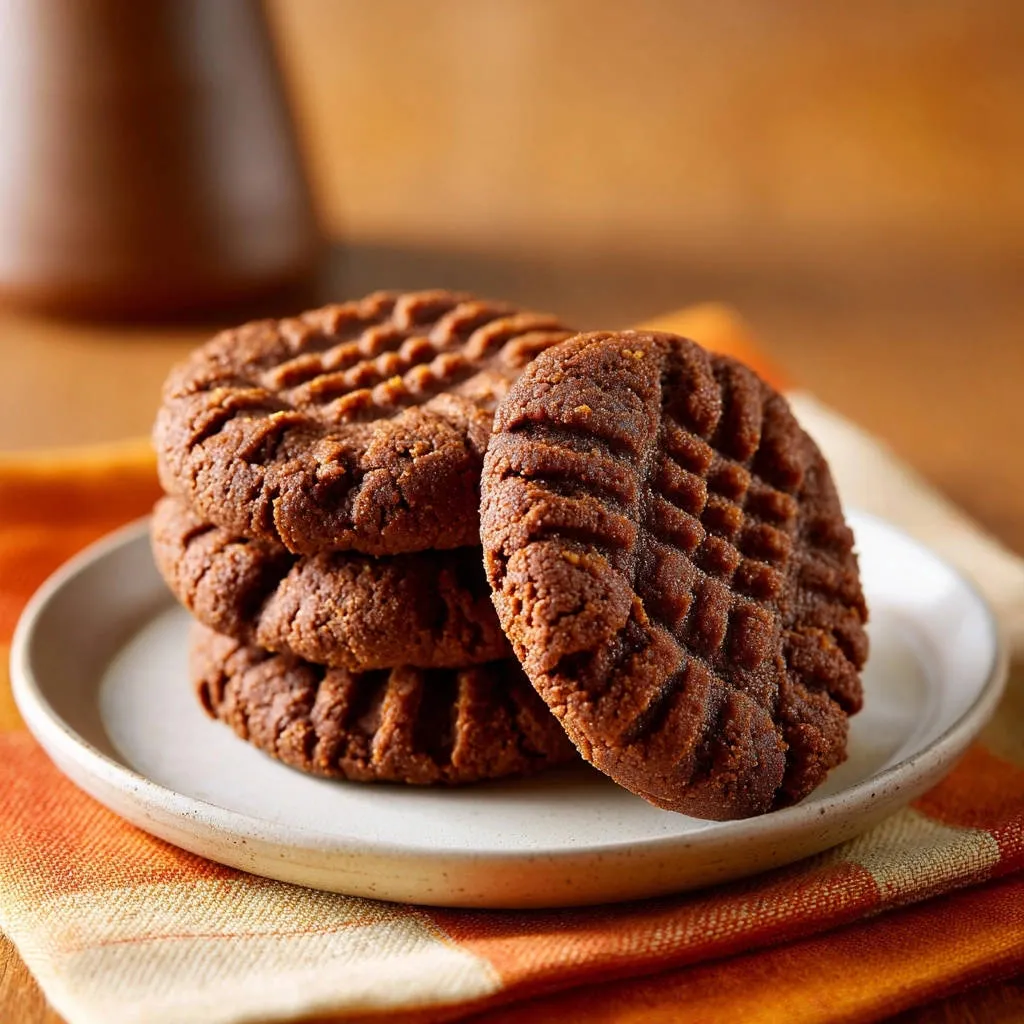
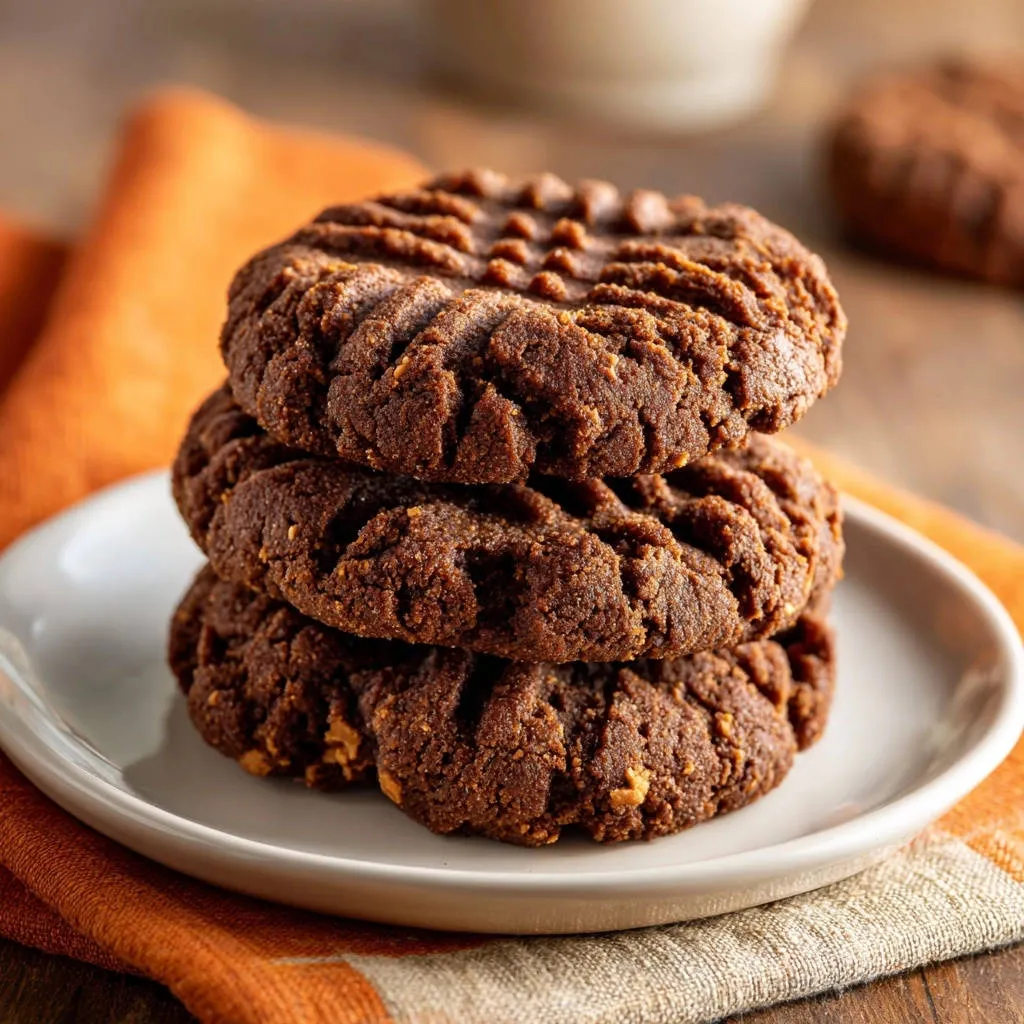
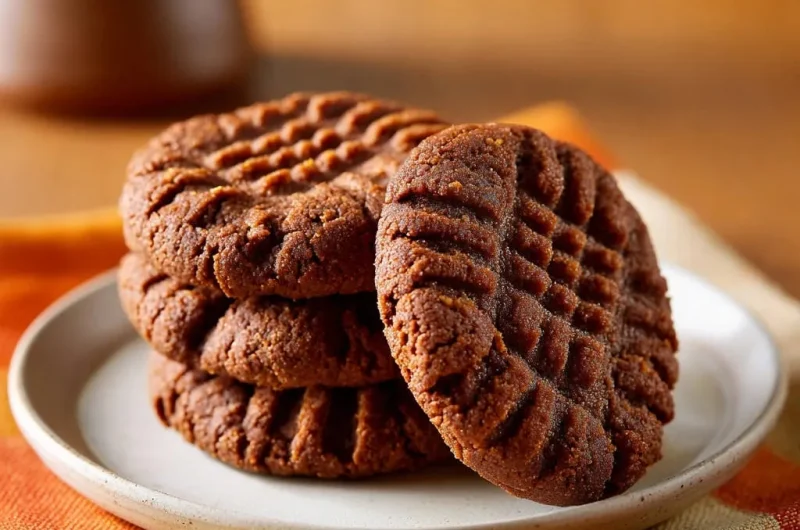
For years, I searched for the elusive perfectly soft and chewy peanut butter cookie, often encountering dry, crumbly disappointments. This quest led me to refine my own recipe, finally cracking the code to those irresistible, melt-in-your-mouth centers that define true Classic Peanut Butter Cookies.
This isn’t just another cookie recipe; it’s a meticulously crafted guide designed to guarantee success, transforming simple ingredients into pure baking joy. Get ready to bake the Classic Peanut Butter Cookies you’ve always dreamed of-soft, full of nutty flavor, and utterly addictive.
Why This Classic Peanut Butter Cookies Recipe Is Your New Go-To
This recipe for Classic Peanut Butter Cookies stands apart because it systematically addresses the common pitfalls of peanut butter cookie baking. It prioritizes texture, ensuring every bite is a delightful balance of soft chewiness and rich, comforting flavor.
We focus on precise techniques and ingredient interactions to prevent dryness and toughness, making these cookies a reliable favorite. You’ll achieve that sought-after perfect texture every time, elevating your homemade cookie game effortlessly.
The Secret to Perfectly Soft & Chewy Centers
The magic lies in a delicate balance of ingredients and keen attention to baking time. We utilize both granulated and brown sugars to control moisture and tenderness, alongside just the right amount of leavening.
Crucially, careful monitoring during baking prevents over-drying, preserving the dough’s inherent softness. These thoughtful choices work in harmony to deliver cookies with an unparalleled soft and chewy texture.
Effortless Baking for Everyone
Despite delivering professional-level results, this recipe remains remarkably straightforward and accessible. Clear instructions guide you through each step, making it perfect for both novice bakers and seasoned pros.
The simple method ensures a stress-free baking experience, allowing you to focus on the joy of creating delicious treats. Enjoy the ease of baking without compromising on quality or flavor.
Essential Ingredients for Your Peanut Butter Cookie Success
Understanding the role of each ingredient is fundamental to baking exceptional Classic Peanut Butter Cookies. Quality components ensure the best flavor and texture every single time.
From fats that provide tenderness to leavening agents that ensure the perfect lift, each element plays a vital part. Let’s explore the essentials that make these cookies truly special.
The Foundation: Butter, Sugars & Creamy Peanut Butter
Softened unsalted butter is crucial for creaming, creating air pockets that contribute to a tender crumb. Granulated sugar adds sweetness and aids in crisping the edges, while packed light brown sugar brings moisture, chewiness, and a subtle caramel note to your cookies.
Creamy peanut butter provides the iconic flavor and additional fat for richness; opt for conventional, non-natural varieties for consistent results. A large egg binds everything together, adding structure and richness to the dough.
Dry Essentials for Structure & Lift: Flour, Leavening & Salt
All-purpose flour forms the structural backbone of the cookie, providing necessary body without making them overly dense. Baking soda acts as our leavening agent, reacting to create the gentle lift and characteristic texture.
Salt is a flavor enhancer, balancing the sweetness and intensifying the deep, nutty notes of the peanut butter. Together, these dry ingredients ensure the perfect spread, chew, and overall appeal.
The Full Ingredient List:
- 1/2 cup (1 stick) unsalted butter, softened
- 1/2 cup granulated sugar
- 1/2 cup packed light brown sugar
- 1/2 cup creamy peanut butter
- 1 large egg
- 1 1/4 cups all purpose flour
- 1/2 teaspoon baking soda
- 1/4 teaspoon salt
Your Baking Toolkit: Essential Gadgets for Perfect Cookies
Having the right tools can make all the difference in your baking journey. Here are the essentials for making classic peanut butter cookies:
Electric Mixer: Ideal for creaming butter and sugars until light and fluffy, ensuring a tender crumb.
Large Mixing Bowls: Necessary for combining wet and dry ingredients separately before bringing them together.
Parchment Paper: Prevents sticking and ensures even baking and easy cleanup.
Baking Sheets: Sturdy, light-colored sheets are key for consistent heat distribution and proper browning.
Wire Cooling Rack: Essential for proper air circulation, allowing cookies to cool completely without becoming soggy.
Measuring Cups & Spoons: Accuracy is vital in baking; precise measurements ensure consistent results.
Fork: For creating that iconic crisscross pattern.
For more intricate decorating like the perfect swirl, explore the no-spread method for glazed raspberry thumbprint cookies.
Crafting Your Classic Peanut Butter Cookies: A Detailed Method
- Prepare for Baking:
Preheat your oven to 375°F (190°C). Line a baking sheet with parchment paper. This simple step ensures a non-stick surface and contributes to more even cooking by preventing hot spots.
- Cream Wet Ingredients:
In a large bowl, use an electric mixer to cream together the softened unsalted butter, granulated sugar, and light brown sugar. Beat until the mixture is light and fluffy, which usually takes about 2 to 3 minutes. This crucial step incorporates air, which is essential for creating a tender, melt-in-your-mouth cookie texture.
- Incorporate Peanut Butter & Egg:
Add the creamy peanut butter and the large egg to your butter and sugar mixture. Continue beating with the electric mixer until all ingredients are well combined and the mixture appears smooth and homogenous. Remember to scrape down the sides of the bowl as needed to ensure everything is fully incorporated.
- Whisk Dry Ingredients:
In a separate, small bowl, thoroughly whisk together the all-purpose flour, baking soda, and salt. Whisking ensures these dry ingredients are evenly distributed, which is particularly important for the leavening agent (baking soda) to work effectively.
- Combine Gently:
Gradually add the whisked dry ingredients to the wet ingredients. Mix on low speed only until just combined. It is critically important not to overmix the dough. Overmixing develops gluten, which can lead to tough, dense cookies instead of the soft and chewy texture we are aiming for.
- Shape & Press:
Roll the dough into uniform 1-inch balls and place them about 2 inches apart on your prepared baking sheet. For that iconic classic peanut butter cookie look, gently press each cookie ball with the tines of a fork in a distinctive crisscross pattern. This also helps with even flattening.
- Bake to Perfection (The Key Step!):
Bake for 8 to 10 minutes. This is arguably the most vital step for achieving perfectly soft and chewy classic peanut butter cookies. You want to pull them out of the oven when the edges are just set and slightly golden, but the centers still look soft and perhaps even a tiny bit underbaked. They will continue to set as they cool!
Overbaking even by a minute or two can quickly transform them from delightfully soft to hard and dry, so watch them closely and trust your instincts.
- Cool Strategically:
Let the cookies cool on the baking sheet for 5 minutes before carefully transferring them to a wire rack to cool completely. This crucial step allows the residual heat to finish cooking them gently without drying them out, effectively locking in that amazing soft and chewy texture.
Mastering Your Bake: Expert Tips for Irresistible Peanut Butter Cookies
Don’t Overmix the Dough: This cannot be stressed enough! Overmixing develops gluten rapidly, leading to tough, dense cookies rather than the desired soft and chewy texture. Mix until just combined, then stop.
Perfectly Softened Butter is Key: Your butter should be pliable to the touch but not melted or greasy. This allows for proper creaming with the sugars, incorporating the necessary air for a light crumb.
Watch the Oven, Not Just the Clock: Every oven varies, so the baking time is a guideline. Look for visual cues: edges that are just set and slightly golden, while the centers still appear soft. When in doubt, err on the side of underbaking for maximum chewiness.
Crucial Cooling Time on the Pan: The initial 5 minutes of cooling on the hot baking sheet are essential. This allows the residual heat to gently complete the cooking process without drying out the cookies, preserving their soft centers.
Uniform Cookie Balls for Even Baking: Using a cookie scoop or weighing your dough balls ensures they are all the same size. This consistency is vital for even baking, meaning no burnt edges or raw centers.
Scrape Down the Bowl: During the creaming and mixing stages, frequently scrape down the sides and bottom of your mixing bowl. This ensures all ingredients are thoroughly incorporated for a consistent dough.
Common Cookie Conundrums: Troubleshooting Your Bake
Why Are My Classic Peanut Butter Cookies Dry and Crumbly?
The most common culprit for dry and crumbly cookies is overbaking. Ensure you’re pulling them out when the edges are just set and the centers still look soft. Too much flour can also contribute; always measure flour by spooning it into the cup and leveling, rather than scooping directly from the bag.
Why Did My Classic Peanut Butter Cookies Spread Too Much?
Excessive spreading can be due to butter that’s too soft or melted, not enough flour, or an oven that’s not hot enough. Ensure your butter is softened but still cool, and your oven is accurately preheated to the specified temperature. Chilling the dough for 30 minutes can also help if spreading is a persistent issue, though not strictly required for this recipe.
My Classic Peanut Butter Cookies Are Too Hard or Tough, What Went Wrong?
Hard or tough cookies often result from overmixing the dough. Once you add the dry ingredients, mix only until they are just combined. Overworking the gluten in the flour leads to a tougher texture. Additionally, overbaking can quickly turn soft cookies into hard ones, so stick to the recommended bake time and visual cues.
Beyond the Classic: Creative Variations for Your Peanut Butter Cookies
Chocolate Chip Peanut Butter Cookies
Elevate the classic by folding in 1/2 to 3/4 cup of chocolate chips (milk, semi-sweet, or dark) when you add the dry ingredients. The combination of peanut butter and chocolate is a timeless favorite that adds extra decadence.
Spice It Up: Cinnamon or Nutmeg Twist
For a subtle warmth, add 1/2 teaspoon of ground cinnamon or a pinch of nutmeg to the dry ingredients. These spices beautifully complement the rich peanut butter flavor, adding another layer of complexity to your classic treat.
Gluten-Free Adaptation
To make these cookies gluten-free, substitute the all-purpose flour with an equal amount of a 1:1 gluten-free baking flour blend that contains xanthan gum. The texture remains remarkably similar, ensuring everyone can enjoy these delightful cookies.
Add a Touch of Crunch: Chopped Peanuts
For those who love extra texture, fold in 1/2 cup of finely chopped roasted peanuts with the dry ingredients. This addition enhances the nutty flavor and provides a satisfying crunch in every bite.
Enjoying Your Freshly Baked Classic Peanut Butter Cookies
Perfect Pairings and Serving Suggestions
These classic peanut butter cookies are delightful on their own, but they truly shine when paired with a cold glass of milk, a warm cup of coffee, or even crumbled over a scoop of vanilla ice cream for a simple dessert. They’re also perfect for lunchboxes or as a comforting after-school treat.
For a different kind of citrusy sweetness, explore orange creamsicle cookies.
Storage & Make-Ahead Tips
Store baked classic peanut butter cookies in an airtight container at room temperature for up to 5-7 days to maintain their freshness and chewiness. For longer storage, you can freeze the baked cookies for up to 2-3 months. Simply thaw at room temperature before serving. You can also prepare the dough ahead of time and chill it for up to 3 days, or freeze dough balls for future baking sessions – just add a few extra minutes to the bake time if baking from frozen.
More Sweet Treats to Explore
Round out your dessert table with these delightful baked goods, perfect for enjoying alongside your peanut butter cookies.
- For a breakfast treat with a similar sweet profile, try these Cinnamon French Toast Stacks, featuring warm spices that complement the nutty notes of peanut butter.
- If you’re craving more nostalgic flavors, whip up a batch of S’mores Pancakes for a fun twist that echoes the comforting sweetness of peanut butter cookies.
Your Top Questions About Classic Peanut Butter Cookies, Answered!
Can I use natural peanut butter for these cookies?
It is generally best to stick to conventional, creamy peanut butter (like Jif or Skippy) for this recipe. Natural peanut butter, which often separates oil, can lead to a drier, more crumbly cookie that spreads differently due to its inconsistent fat content.
Do I have to chill the cookie dough for this recipe?
No, this particular recipe is designed to be baked immediately without chilling the dough. The precise balance of ingredients helps prevent excessive spreading. However, if you’re working in a very warm kitchen or experience spreading, a quick 15-30 minute chill won’t hurt.
How long do these classic peanut butter cookies stay fresh?
When stored properly in an airtight container at room temperature, these classic peanut butter cookies will retain their delightful soft and chewy texture for up to 5 to 7 days. For optimal freshness, enjoy them within the first few days.
Can I make a double batch of the dough?
Absolutely! This recipe doubles beautifully. Just ensure you have a large enough mixing bowl to accommodate the increased volume of ingredients, and follow the steps carefully to avoid overmixing, which is even more critical with larger batches.
Time to Bake! Your Irresistible Classic Peanut Butter Cookies Await
There you have it-the definitive guide to baking classic peanut butter cookies that are truly irresistible. Forget dry and crumbly; this recipe delivers on its promise of perfectly soft, chewy centers with a rich, nutty flavor that will have everyone reaching for another.
We’ve shared the secrets, the tips, and the troubleshooting to ensure your baking success. Now it’s your turn to preheat that oven, gather your ingredients, and fill your home with the comforting aroma of freshly baked goodness. Don’t be afraid to experiment with variations or simply savor the perfect simplicity of the original.
Bake a batch today and rediscover the magic of a truly great cookie. Share your creations with loved ones, or keep them all to yourself-we won’t tell! Happy baking!
Peanut Butter Cookies
Course: DessertCuisine: AmericanDifficulty: easy4
about 2 dozen cookies20
minutes10
minutes240
kcal35
minutesDiscover the secret to perfectly soft and chewy classic peanut butter cookies. This simple method ensures an irresistible texture with a rich peanut butter flavor, making every bite a delight. Say goodbye to dry, crumbly cookies!
Ingredients
1/2 cup (1 stick) unsalted butter, softened
1/2 cup granulated sugar
1/2 cup packed light brown sugar
1/2 cup creamy peanut butter
1 large egg
1 1/4 cups all purpose flour
1/2 teaspoon baking soda
1/4 teaspoon salt
Directions
- Preheat your oven to 375°F (190°C). Line a baking sheet with parchment paper.
- In a large bowl, cream together the softened butter, granulated sugar, and brown sugar with an electric mixer until light and fluffy, about 2 to 3 minutes.
- Add the peanut butter and egg to the butter mixture, beating until well combined and smooth.
- In a separate small bowl, whisk together the flour, baking soda, and salt.
- Gradually add the dry ingredients to the wet ingredients, mixing on low speed until just combined. Be careful not to overmix the dough. Overmixing can lead to tough cookies, and we are aiming for soft and chewy!
- Roll the dough into 1 inch balls and place them about 2 inches apart on the prepared baking sheet. For that classic look, gently press each cookie ball with the tines of a fork in a crisscross pattern.
- Bake for 8 to 10 minutes. This is the absolute key to keeping your cookies soft and chewy. You want to pull them out of the oven when the edges are just set and slightly golden, but the centers still look soft and perhaps even a tiny bit underbaked. They will continue to set as they cool! Overbaking even by a minute or two can make them hard and dry.
- Let the cookies cool on the baking sheet for 5 minutes before transferring them to a wire rack to cool completely. This crucial step allows the residual heat to finish cooking them gently without drying them out, locking in that amazing soft and chewy texture.
Notes
- Don’t overbake; remove when edges are set and centers are still soft. Cooling on the baking sheet for 5 minutes is essential for perfect texture.