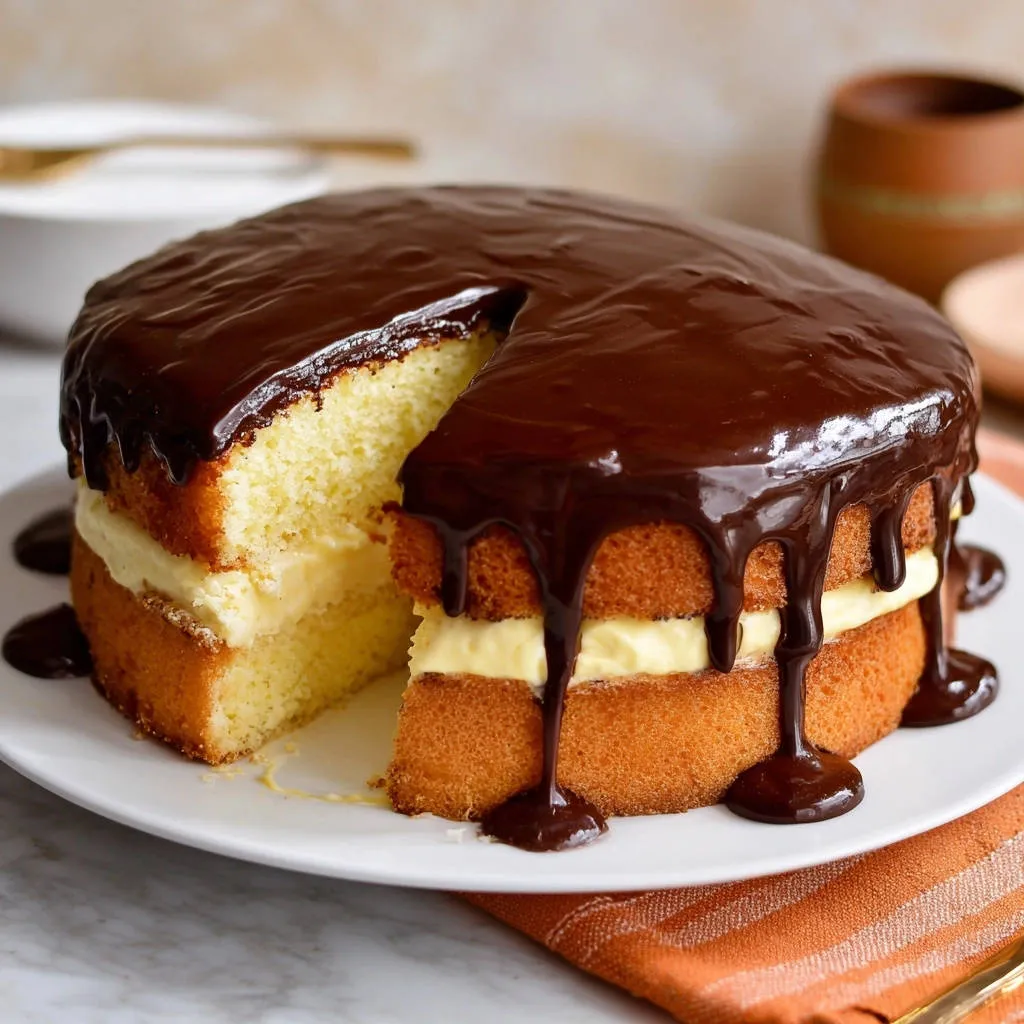
I used to dread the moment of cutting into a beautiful layer cake, fearing the inevitable dry crumb-a common heartbreak when making a true Classic Yellow Layer Cake with Chocolate Glaze.
This recipe, however, is the solution; it incorporates a simple, yet highly effective “moisture lock” technique that guarantees a tender, soft crumb every single time.
My method ensures the cake remains incredibly moist for days, perfectly complementing the rich vanilla filling and glossy chocolate ganache finish.
For an equally rich chocolate experience, consider this moist chocolate bundt cake with its foolproof pan release.
The “Moisture Lock” Technique: Why This Yellow Cake Never Tastes Dry
The Power of Five Minutes: Maximizing Air and Volume
Extended creaming, specifically for a full five minutes, is the secret weapon against dry cake. This process thoroughly incorporates a vast amount of air into the softened butter and sugar structure.
These tiny air bubbles expand rapidly during baking, resulting in a lighter, higher-volume cake with a finer crumb that is structurally capable of retaining moisture much longer than traditionally mixed batters.
Avoiding the Gluten Trap: Understanding Overmixing
Overmixing flour activates gluten excessively, leading to a tough, elastic texture that actively fights moisture retention and feels heavy.
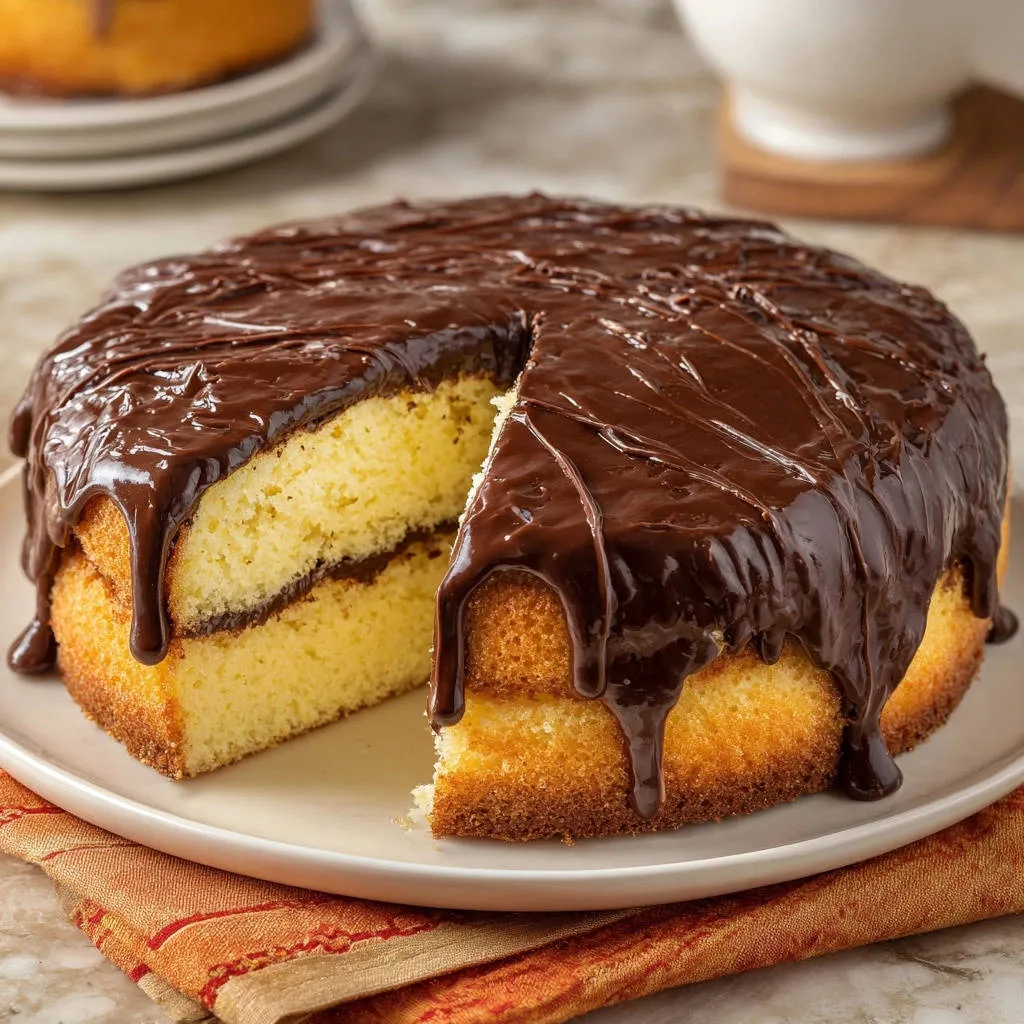
By alternating the wet and dry ingredients in three stages, you ensure they emulsify without stressing the gluten strands. Stop mixing the very moment the last streak of flour disappears, even if the batter looks slightly shaggy.
Setting the Stage for Success: Essential Tools and Preparation
The Non-Negotiable Prep: Greasing, Flour, and Parchment
Preparing your pans correctly is essential for preventing the cake layers from sticking and tearing during release.
Thoroughly grease the two 8-inch round cake pans with softened butter or baking spray, then dust generously with all-purpose flour, tapping out all the excess.
Critically, line the bottom of each pan with a parchment paper round. This simple step guarantees a flawless, flat release onto the wire rack.
Equipment Checklist for Layer Cake Assembly
- Stand Mixer or Hand Mixer: Necessary for achieving the critical five-minute creaming process for volume and stability.
- Wire Cooling Rack: Essential for allowing air to circulate around the baked layers to prevent steaming and subsequent gumminess.
- Offset Spatula: The best tool for spreading the chilled pastry cream filling and guiding the ganache glaze over the edges.
- Heatproof Saucepan and Whisk: Required for the constant whisking needed when cooking the pastry cream base.
Building the Best Bite: The Ingredients That Matter Most
The Foundation: Key Ingredients for the Tender Yellow Cake
Room temperature ingredients are non-negotiable for a smooth, stable emulsion. Cold eggs or butter prevent proper mixing and result in a dense, low-volume cake.
Buttermilk is preferred for its acidity, which reacts with the baking soda to provide excellent lift and contribute a distinctly tender, delicate texture to the crumb.
If you don’t have buttermilk, whole milk soured with one teaspoon of white vinegar or lemon juice (rested for 5 minutes) is a reliable substitute.
Crafting the Luxurious Center: Pastry Cream Essentials
We rely heavily on large egg yolks, not whole eggs, for the rich golden color and unctuous, velvety mouthfeel of a classic pastry cream.
Flour and sugar provide the necessary structure and thickening power. Precise measuring here is critical to ensure the filling sets up firm enough to support the top layer.
Achieving a Mirror Glaze: Mastering the Chocolate Ganache
Use high-quality semi-sweet chocolate-such as a reputable baking bar-chopped finely for quick, even melting and maximum shine.
Our specific ratio of 8 ounces of chocolate to 3/4 cup of heavy cream is crucial for achieving a thick, glossy ganache that holds its shape but still drips beautifully when poured.
For more on perfecting chocolate glazes, explore chocolate glazed pistachio layer cake.
Classic Yellow Layer Cake with Chocolate Glaze: A Detailed Baking Roadmap
Part 1: The Moist Cake Batter (Steps 1-4 from Recipe)
- Perfecting the Creaming Process:
After combining the dry ingredients, focus your attention on the butter and sugar. Cream these until the mixture is visibly lightened in color and tripled in volume.
Use medium speed for a full five minutes, scraping down the bowl regularly. This extended beating builds the foundational structure for superior moisture retention.
- Incorporating Eggs and Flavoring:
Beat the eggs into the creamed mixture one at a time, ensuring each egg is fully emulsified before adding the next.
This staggered addition prevents the batter from breaking or becoming oily. Add the vanilla extract and mix briefly to distribute the flavor evenly.
- Executing the Alternating Mixing Method:
Begin and end with the dry ingredients. Add one third of the flour mixture, mix on the lowest speed until just combined, then add half the buttermilk.
Repeat the pattern: flour, buttermilk, then the final flour addition. Stop the mixer immediately once the last streaks of flour disappear to prevent toughness.
- Baking and Cooling Protocols:
Divide the batter evenly between the prepared pans; baking time is 28 to 32 minutes, or until the cake sides pull away slightly from the pan and a toothpick is clean.
Allow the layers to rest in the hot pan for exactly 10 minutes. This important resting period allows the internal structure to stabilize before you invert them onto a wire rack to cool completely.
Part 2: Cooking the Creamy Vanilla Filling (Steps 5-7 from Recipe)
- Preparing the Pastry Cream Base:
Whisk the dry ingredients (sugar, flour, salt) in a medium saucepan. In a separate bowl, whisk the egg yolks until smooth.
To prevent curdling, slowly pour the whole milk into the whisked yolks while continuously whisking; this tempers the eggs before they meet direct heat.
- Thickening the Cream and Finishing Touches:
Cook the entire mixture over medium heat, whisking constantly and vigorously, paying close attention to the bottom corners of the pan where scorching can occur.
Once the mixture thickens significantly and reaches a slow boil, reduce the heat and cook for one full minute. This step ensures the starches fully activate for maximum setting power.
- Chilling for Stability:
After stirring in the butter and vanilla, transfer the pastry cream to a clean bowl and immediately press plastic wrap directly onto the surface of the cream.
This prevents a rubbery “skin” from forming during cooling. Chill the filling for a minimum of two hours until it is completely firm, scoopable, and ready to layer.
Part 3: The Glossy Chocolate Glaze (Step 8 from Recipe)
- Infusing the Chocolate:
Place the finely chopped chocolate in a heatproof bowl. Heat the heavy cream until you see small bubbles just starting to form around the perimeter-do not allow it to boil rapidly.
Pour the hot cream over the chocolate immediately and let it stand undisturbed for five minutes. This allows the heat to transfer evenly and start the melting process.
- Achieving “Drip” Consistency:
Gently whisk the mixture, starting from the center and spiraling outward, until the ganache is entirely smooth and glossy. Avoid aggressive whisking, which can introduce too much air.
Let the ganache sit for about 15 minutes, stirring occasionally. The final texture must be thick but pourable-perfect for creating those attractive, controlled drips down the side of the Classic Yellow Layer Cake with Chocolate Glaze.
Part 4: Assembling the Classic Yellow Layer Cake (Step 9 from Recipe)
- Layering and Glazing for Presentation:
Place the first cake layer on your serving plate. Spread the chilled, firm pastry cream evenly across the surface using an offset spatula.
Secure the second cake layer on top, then begin pouring the thickened ganache over the center. Use the back of a spoon to gently nudge the glaze toward the edges.
This technique controls the length of the drips for a professional finish. Allow the glaze to set slightly for 15 minutes before attempting to slice the cake.
Baking Science and Chef Tips: Troubleshooting Your Classic Layer Cake
Why Did My Cake Sink in the Middle? (And How to Fix It)
Sinking is most often caused by oven temperature being too low, which leads to slow rising and subsequent collapse, or by insufficient baking time.
Ensure your oven thermometer is accurate, as internal oven temperatures often vary significantly from the dial setting. Avoid opening the oven door before the 25-minute mark, as the temperature shock can instantly deflate the fragile structure.
How to Ensure Even Layers and Prevent Domed Tops
For truly uniform layers, use a kitchen scale to measure the batter exactly into each prepared pan before baking.
To minimize doming, soak insulated baking strips (available online) in water, wring them out, and wrap them around the outside of the pans.
The strips regulate the temperature, ensuring the edges don’t set faster than the center. If necessary, use a long serrated knife to gently level the cooled cake layers before assembly.
Dealing with a Granulated or Oily Batter
If your butter/sugar mixture appears separated, oily, or granulated, it indicates your ingredients were likely too cold, preventing proper emulsification during the creaming stage.
To fix this, mix in one tablespoon of the dry flour mixture on low speed. The flour acts as a stabilizing agent and helps the fats and liquids re-emulsify into a smooth batter.
Presentation and Preservation: Serving and Storing Your Masterpiece
Optimal Slicing and Serving Techniques
For clean, professional slices, chill the finished cake for 20 to 30 minutes before cutting; this allows the glaze and filling to firm up properly.
Dip a long, sharp slicing knife into hot water, wipe it completely clean, and make one single, decisive cut. Repeat this hot-water technique for every slice to maintain a pristine presentation.
Storage Life and Freezing the Cake Layers
Because this yellow layer cake contains a dairy-rich pastry cream filling, it must be stored in an airtight container in the refrigerator.
The assembled cake will remain fresh and delightfully moist for up to 4 days. Always bring slices back to room temperature for 30 minutes before serving for the best texture and flavor release.
Unfrosted cake layers can be wrapped tightly in plastic wrap and foil, then frozen for up to two months. Thaw them overnight in the refrigerator before proceeding with the filling.
Can I Make the Components Ahead of Time?
The pastry cream is ideal for making ahead; it requires chilling and can be stored in the refrigerator, covered, for up to 3 days.
The ganache can also be made a day in advance and will firm up significantly. Gently reheat it over a double boiler until it reaches the desired thick, pourable consistency for glazing.
Frequently Asked Questions About Classic Yellow Layer Cake
Can I substitute the buttermilk with a milk and acid alternative?
Absolutely. If you don’t have buttermilk on hand, you can easily create a substitute by combining 1 cup of whole milk with 1 tablespoon of white vinegar or lemon juice.
Stir the mixture briefly and let it stand at room temperature for five to ten minutes until it visibly curdles and thickens. Use this mixture in place of the required buttermilk quantity.
Why did my chocolate ganache seize or become grainy?
Seizing occurs when a tiny amount of liquid, often steam or condensation, is introduced to the melted chocolate, causing the cocoa solids to clump instantly.
To rescue grainy or stiff ganache, stir in 1 teaspoon of boiling water or hot cream, mixing rapidly and vigorously until the emulsion returns and the glaze becomes perfectly smooth again.
Can this cake batter be used to make cupcakes?
Yes, this rich yellow cake batter yields delicious and tender cupcakes. Fill liners about two-thirds full to account for the lift from the baking soda.
Bake at 350°F (175°C) for a shorter period, usually 18 to 22 minutes. Adjust the amount of pastry cream filling used if you plan to inject or pipe it into the centers of the cupcakes.
Ready to Bake Your Ultimate Classic Yellow Layer Cake with Chocolate Glaze?
Achieving a perfect, tender Classic Yellow Layer Cake with Chocolate Glaze is no longer a challenge-it’s a guarantee when you master the critical moisture lock technique explained here.
Complementary Treats
Round out your meal with these sweet ideas that go well with cake.
- For a delightful breakfast or brunch addition, consider these fluffy diner-style pancakes, offering a soft texture to complement the cake.
- If you’re after another light and airy treat, these fluffy golden pancakes provide a similar soft bite that pairs well.
Focus on the five-minute creaming time and the minimal mixing at the end, and you will be rewarded with the softest, most delicious celebratory cake imaginable.
Gather your ingredients and enjoy the process of creating this timeless dessert; your guests will certainly be asking for the secret!
Yellow Layer Cake
Course: DessertCuisine: AmericanDifficulty: medium10
to 12 servings45
minutes40
minutes550
kcal180
minutesStop worrying about dry cakes! This foolproof method uses simple tweaks, like extended creaming and proper mixing, to ensure a tender, moist yellow cake every single time. Filled with creamy vanilla pastry cream and topped with a decadent chocolate ganache glaze.
Ingredients
For the Moist Yellow Cake:
2 and 1/2 cups all purpose flour
1 and 1/2 cups granulated sugar
1 teaspoon baking soda
1/2 teaspoon salt
1 cup (2 sticks) unsalted butter, softened to room temperature
3 large eggs, at room temperature
1 cup buttermilk, whole milk, or plain yogurt thinned with milk
2 teaspoons pure vanilla extract
For the Creamy Vanilla Filling (Pastry Cream):
1/2 cup granulated sugar
1/4 cup all purpose flour
1/4 teaspoon salt
2 large egg yolks
1 cup whole milk
1 tablespoon unsalted butter
1 teaspoon vanilla extract
For the Chocolate Ganache Glaze:
8 ounces good quality semi-sweet chocolate, chopped
3/4 cup heavy cream
Directions
- Prepare the Cake Pans and Oven. Preheat your oven to 350 degrees F. Grease and flour two 8-inch round cake pans. Line the bottoms with parchment paper rounds for easy release.
- Address the Pain Point (The Moisture Lock): In a large bowl, whisk together the flour, baking soda, and salt. Set aside. In a separate bowl, cream the softened butter and sugar using an electric mixer on medium speed until the mixture is very light and fluffy. This creaming process should take a full 5 minutes. This extended mixing is the secret to a high-volume, tender cake that stays moist.
- Combine Wet Ingredients: Beat the eggs in one at a time, mixing well after each addition. Add the vanilla extract and mix briefly.
- Alternate the Wet and Dry: Slowly add one third of the dry ingredients to the butter mixture, mixing on low speed until just combined. Add half of the buttermilk, mixing until just incorporated. Repeat with another third of the dry ingredients, the remaining buttermilk, and finally the last of the dry ingredients. Mix only until the last streaks of flour disappear. Overmixing past this point is what leads to tough, dry cake.
- Bake: Divide the batter evenly between the two prepared pans. Bake for 28 to 32 minutes, or until a wooden toothpick inserted into the center comes out clean. Let the cakes cool in the pans for 10 minutes before inverting them onto a wire rack to cool completely.
- Prepare the Filling: While the cakes cool, prepare the pastry cream. In a medium saucepan, whisk the sugar, flour, and salt. In a separate bowl, whisk the egg yolks. Gradually whisk in the milk until combined. Add the milk and yolk mixture to the saucepan.
- Cook the Filling: Cook over medium heat, whisking constantly, until the mixture thickens significantly and comes to a slow boil. Reduce the heat and cook for 1 minute longer, stirring rapidly. Remove from heat and stir in the butter and vanilla. Transfer the mixture to a bowl, press plastic wrap directly onto the surface (to prevent a skin from forming), and chill for at least 2 hours until firm.
- Prepare the Ganache: Place the chopped chocolate in a heatproof bowl. Heat the heavy cream in a small saucepan over medium heat until it just begins to simmer around the edges. Pour the hot cream immediately over the chocolate. Let stand for 5 minutes, then gently whisk until the mixture is smooth and glossy. Let the ganache sit for about 15 minutes, stirring occasionally, until it reaches a thick, pourable, drip consistency.
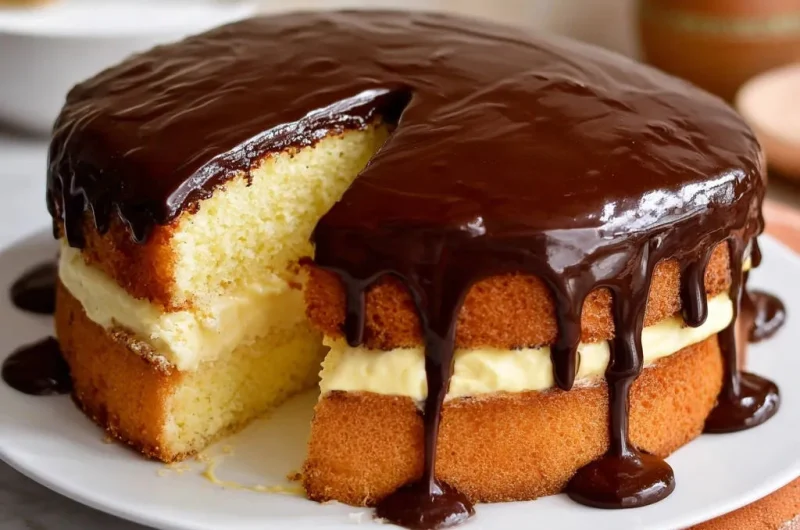
- Assemble the Cake: Place one cake layer on your serving plate. Spread the chilled vanilla filling evenly over the top. Place the second cake layer on top. Pour the thickened ganache over the center of the cake, gently nudging it toward the edges so that it drips down the sides, just like the image. Let the glaze set slightly before serving.
Notes
- Do not skip the 5-minute extended creaming step; this is critical for moisture lock.