We’ve all been there: you envision a perfect, elegant dinner, but halfway through baking, the delicious filling of your stuffed chicken breast oozes out, leaving a disappointing mess. I’ve refined this recipe for Golden Stuffed Chicken Breast with a simple, ingenious trick that ensures all that gooey goodness stays exactly where it belongs-inside! Get ready to create a truly show-stopping dish that looks and tastes like it came from a gourmet kitchen, every single time.
Beyond Basic: Why This Stuffed Chicken Breast Stands Out
The “No-Leak” Promise: Gooey Filling, No Mess
The core innovation of this recipe lies in its meticulous sealing technique, reinforced by a robust breading. This combination creates an impenetrable barrier, guaranteeing your decadent cheese and tangy cranberry remain perfectly contained.
A Symphony of Flavors: Sweet, Savory, and Tangy
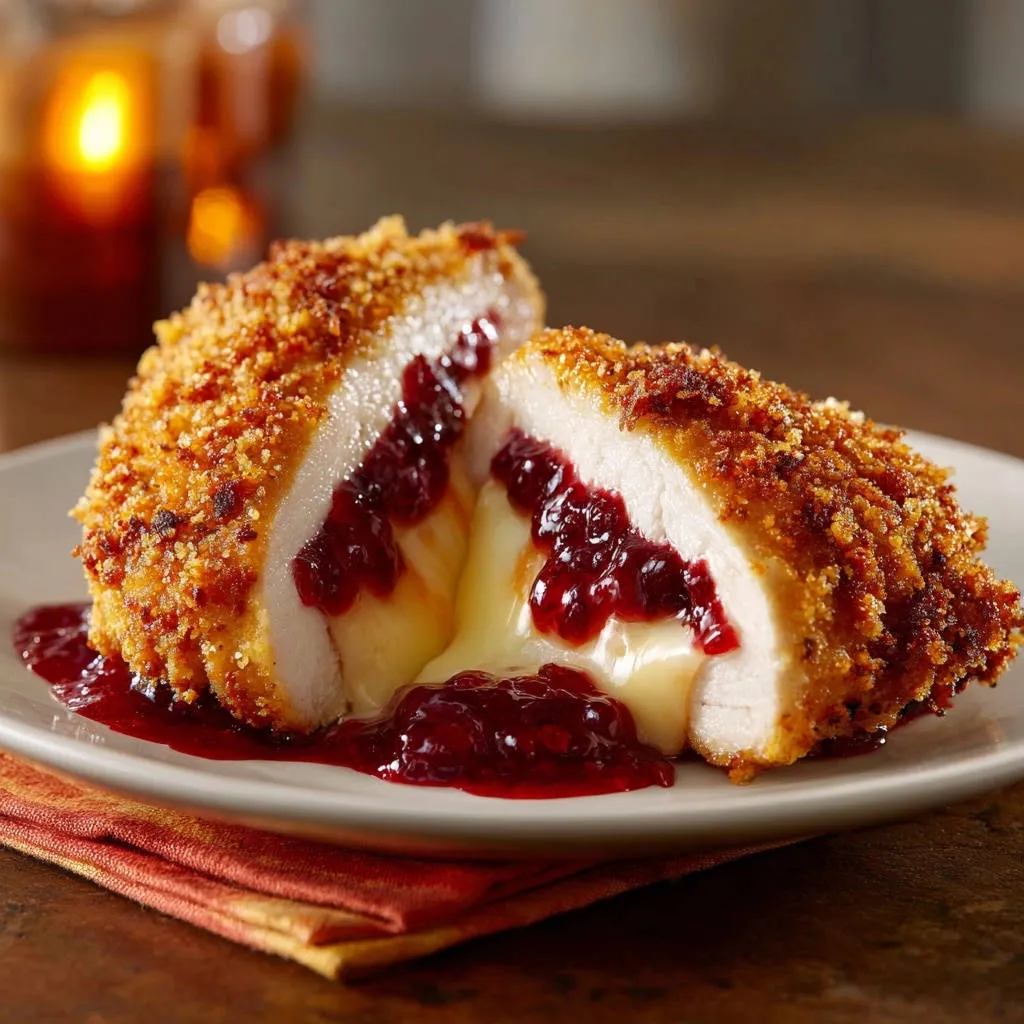
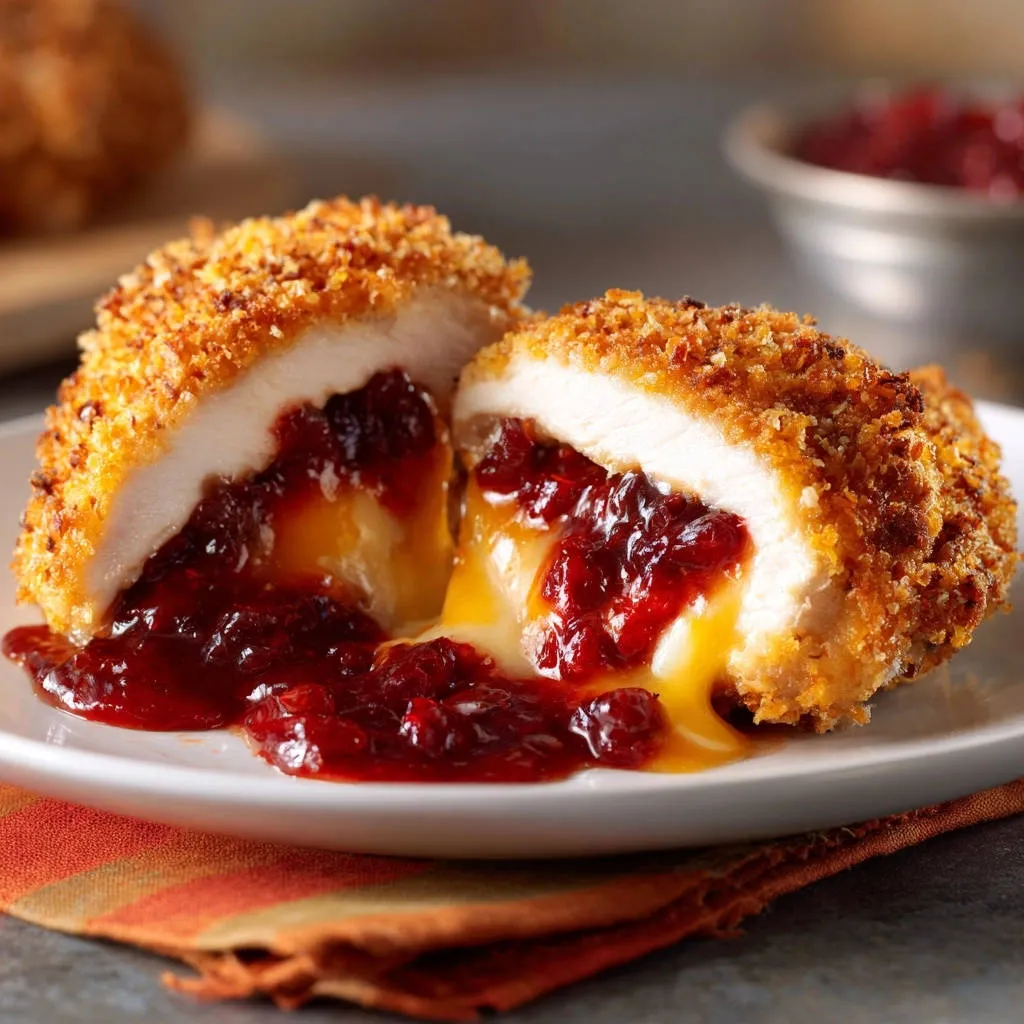
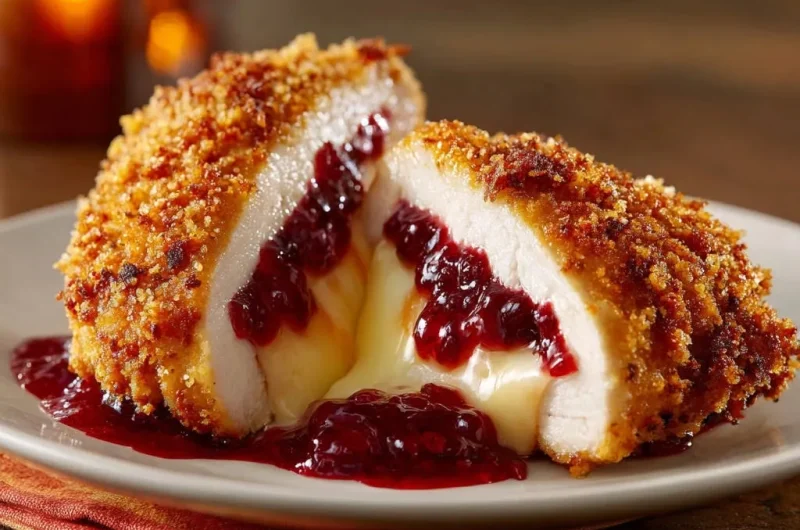
Imagine the creamy, rich notes of melted Brie mingling with bright, tart cranberry sauce, all encased in juicy chicken and a crisp golden crust. This unexpected pairing elevates a simple chicken breast into an extraordinary culinary experience.
For another take on these sweet and tart flavors, check out these cranberry apple chicken salad cups.
Impressive Yet Accessible: A Show-Stopping Meal for Any Skill Level
While the final presentation is undeniably elegant, the steps to achieve this perfection are surprisingly straightforward. With clear guidance and a few expert tips, anyone can master this impressive dish, perfect for both weeknight dinners and special occasions.
Gather Your Culinary Tools: Essential Equipment for Success
Meat Mallet or Rolling Pin
Crucial for achieving an even thickness, ensuring uniform cooking and a perfect canvas for stuffing without tearing.
Oven-Safe Skillet
Allows for seamless transfer from stovetop searing to oven baking, minimizing cleanup and maintaining consistent heat.
Shallow Dishes for Breading
Essential for an organized and efficient breading station, leading to a perfectly coated chicken parcel with ease.
Kitchen Twine or Wooden Toothpicks
Your secret weapon for securely sealing the chicken, preventing any precious filling from escaping during cooking.
Instant-Read Thermometer
Ensures your chicken is cooked to perfection and safe to eat, without the risk of over-drying, delivering juicy results every time.
The Building Blocks of Flavor: Inside Your Golden Stuffed Chicken Breast
The Star: Boneless, Skinless Chicken Breasts
Choose fresh, evenly sized boneless, skinless chicken breasts for the best results. Pounding them thinly creates the ideal uniform wrapper, ensuring even cooking and a consistent, tender texture.
The Gooey Heart: Choosing Your Melting Cheese
Brie offers a rich, buttery melt that’s wonderfully decadent, while mozzarella provides classic stringy satisfaction. Both are excellent choices for their ability to become perfectly gooey and contained without becoming watery during baking.
The Tangy Twist: Cranberry Sauce or Relish
This unexpected, vibrant addition cuts beautifully through the richness of the cheese and chicken. It adds a delightful sweet-tart burst, elevating the overall flavor profile of the Golden Stuffed Chicken Breast.
For another sweet and tart chicken option, consider these cranberry orange chicken thighs.
The Crispy Coat: Panko Perfection
Panko breadcrumbs are absolutely key to achieving that signature golden, extra-crispy exterior. Their light, airy structure holds up beautifully through searing and baking, providing superior crunch compared to standard breadcrumbs.
Flavor Foundation: Salt, Pepper, Flour, Egg, Oil
Simple seasonings like salt and pepper enhance the natural taste of the chicken from within. The all-purpose flour and beaten egg create the essential adhesive layers for the panko, while a neutral vegetable oil ensures a golden, even sear and delicious crispy finish.
Your Path to Golden Stuffed Chicken Breast Perfection: A Detailed Guide
Prepare the Chicken: Pounding for Perfection
Place each boneless, skinless chicken breast between two pieces of plastic wrap. Using a meat mallet or rolling pin, pound them evenly thin, aiming for about 1/4 to 1/2 inch thick.
This crucial step creates a uniform thickness for even cooking, ensuring tenderness throughout. It also provides a wider surface for effective stuffing and sealing, preventing bulges or thin spots.
Season both sides of the pounded chicken generously with salt and black pepper. This initial seasoning ensures flavor penetrates deep into the meat, laying a strong foundation for taste.
Stuff the Chicken: Building the Flavor Core
Carefully place one piece of your chosen soft melting cheese in the center of each flattened chicken breast. Follow this by layering 2 tablespoons of cranberry sauce or relish directly on top of the cheese.
Centering the filling precisely is important for successful sealing later on, ensuring an even distribution of flavor in every bite.
Seal the Filling: The No-Leak Golden Stuffed Chicken Breast Secret
Carefully fold one side of the chicken over the filling, then fold the other side over, ensuring all edges meet to completely encase the cheese and cranberry sauce.
Tuck in the ends tightly to create a compact, sealed package. This meticulous folding technique is your primary defense against any delicious filling escaping.
Secure the seam and any open ends with kitchen twine or a few wooden toothpicks. This tight seal is absolutely crucial for preventing any gooey deliciousness from escaping during cooking, ensuring a perfect Golden Stuffed Chicken Breast.
Set Up Your Breading Station: Efficiency is Key
Prepare three shallow dishes or plates for an organized breading process. Place 1/2 cup all-purpose flour in the first dish. Pour the large beaten egg into the second dish. Fill the third dish with 1 cup panko breadcrumbs.
An organized breading station makes the process clean, efficient, and ensures each chicken parcel receives a complete and even coat, which is vital for both flavor and sealing.
Bread the Chicken: The Crispy, Protective Layer
Dredge each stuffed chicken parcel first in the flour, shaking off any excess. This initial flour layer helps the beaten egg adhere more effectively to the chicken’s surface.
Then, dip the floured parcel into the beaten egg, allowing any extra to drip off. The egg acts as the perfect glue, binding the crispy panko to the chicken.
Finally, thoroughly coat with panko breadcrumbs, pressing gently to ensure an even, thick layer all around. This robust panko coating acts as an extra barrier against leaks and promises a beautifully crispy, golden crust.
Sear to Golden Perfection: Locking in Flavor and Shape
Heat the 2 tablespoons vegetable oil in an oven-safe skillet over medium-high heat. Ensure the oil is shimmering and hot before carefully placing the breaded chicken into the pan.
Sear for 3-4 minutes per side, until the chicken is deeply golden brown and beautifully crispy. This quick sear adds incredible depth of flavor and texture to your Golden Stuffed Chicken Breast.
This initial sear is vital: it locks in the breading, helps solidify the chicken’s shape, and further prevents leaks, all while developing an irresistible crust.
Finish Cooking in the Oven: Melty Goodness Awaits
Transfer the skillet with the seared chicken directly to a preheated oven at 375F (190C). Bake for 15-20 minutes, or until the chicken is completely cooked through.
The internal temperature should reach 165F (74C) in the thickest part of the chicken. At this point, the cheese inside will be beautifully melted and gooey, perfectly contained and ready to burst with flavor!
Rest and Serve: The Final Touch
Carefully remove the skillet from the oven. Let the golden stuffed chicken rest for a few minutes before removing the kitchen twine or toothpicks.
Resting allows the juices to redistribute throughout the meat, ensuring a tender, moist, and flavorful chicken. Slice and serve immediately to fully enjoy that perfectly contained, cheesy cranberry goodness!
Chef’s Secrets: Elevate Your Golden Stuffed Chicken Breast Game
Don’t Skimp on Pounding
Achieving an even 1/4 to 1/2 inch thickness is paramount for your stuffed chicken. Chicken that is too thick won’t cook evenly or seal well, while chicken pounded too thin might tear, compromising the “no-leak” promise.
Master the Art of Sealing
The tighter you fold and secure the chicken, the less likely any delicious filling is to escape. Take your time with this crucial step, as it is truly the recipe’s namesake “secret” for a perfect Golden Stuffed Chicken Breast.
Temperature Matters: Room Temp Chicken, Hot Oil
Allowing chicken to come closer to room temperature for 15-20 minutes before cooking promotes more even cooking. Always ensure your oil is hot before searing for a crisp, golden crust, not a soggy one.
Experiment with Cheese and Jam Combinations
While Brie and cranberry are fantastic, don’t be afraid to try other delicious variations. Consider cream cheese with chives and crispy bacon, or sharp cheddar with a sweet apple chutney for a different spin on your stuffed chicken breast.
Round Out Your Meal
Complement your Golden Stuffed Chicken Breast with these delicious recipes.
- For a warm, cheesy starter that echoes the brie in your chicken, try these Cranberry Pecan Baked Brie Bites.
- To add a fresh, vibrant element alongside your stuffed chicken, consider this Harvest Kale and Apple Salad for a crisp contrast.
Resting is Not Optional
Just a few minutes of resting after cooking allows the juices to settle back into the meat. This ensures a tender, incredibly moist, and flavorful bite, making all the difference in the final texture.
Troubleshooting Common Stuffed Chicken Breast Challenges
Problem: My Filling Oozed Out!
Solution: The primary culprit is often an incomplete seal. Ensure you’ve pounded the chicken thin enough to fully wrap the filling, and always secure all seams and ends tightly with twine or toothpicks. Don’t rush the breading stage, as the panko also contributes to creating a strong barrier.
Problem: The Breading Isn’t Crispy Enough
Solution: This can be due to the oil not being hot enough during searing, or insufficient breading. Ensure your oil is shimmering before adding the chicken, and press the panko firmly to create a thick, even coat. Avoid overcrowding the pan, which can lower oil temperature.
Problem: The Chicken is Dry
Solution: Overcooking is usually the cause of dry chicken. Use an instant-read thermometer to pull the chicken from the oven precisely when it reaches 165F (74C). Also, ensure you pound the chicken to a consistent thickness for truly even cooking.
Problem: Chicken Cooked Unevenly
Solution: Inconsistent thickness of the chicken breast is the most common reason for uneven cooking. Thoroughly pound the chicken to an even 1/4 to 1/2 inch thickness across the entire breast. This guarantees all parts cook at the same rate for perfect results.
Perfect Pairings: What to Serve with Your Golden Stuffed Chicken Breast
Creamy Mashed Potatoes
A classic, comforting choice, creamy mashed potatoes perfectly complement the rich chicken and tangy cranberry. Their smooth texture provides a lovely contrast to the crispy breading. For an extra decadent side, consider our amazing creamy potato gratin.
Roasted Asparagus or Green Beans
For a lighter, yet incredibly flavorful option, roasted vegetables add a touch of freshness and a vibrant splash of color to your plate. Our recipe for crispy roasted cauliflower offers a similar delightful crunch and savory depth.
Wild Rice Pilaf
A nutty and aromatic wild rice pilaf provides a sophisticated side that beautifully absorbs the delicious pan juices from the chicken. Its texture and flavor add another layer of complexity to the meal.
Simple Garden Salad with Vinaigrette
A crisp, refreshing garden salad dressed with a bright vinaigrette can perfectly cut through the richness of the dish. It offers a delightful palate cleanser and a welcome lightness.
Storing & Making Ahead: Enjoying Your Golden Stuffed Chicken Breast Later
Storing Cooked Golden Stuffed Chicken Breast
Leftovers can be stored in an airtight container in the refrigerator for up to 3-4 days. Always allow the chicken to cool completely before storing to prevent condensation, which can make the breading soggy.
Reheating for Optimal Flavor
To reheat, bake in a preheated oven at 350F (175C) until warmed through, about 15-20 minutes. This method helps the breading re-crisp, preserving texture. While microwaving is possible, it may result in a softer crust.
Can You Make Golden Stuffed Chicken Breast Ahead?
Yes, you can prepare and bread the chicken parcels up to 24 hours in advance. Store them uncovered on a plate in the refrigerator. This allows the breading to dry slightly, leading to an even crispier crust when it’s time to cook.
Frequently Asked Questions About Golden Stuffed Chicken Breast
Can I use different types of cheese for the filling?
Absolutely! While Brie and mozzarella are fantastic, feel free to experiment with other good melting cheeses like provolone, Swiss, or even a herbed cream cheese. Just ensure it’s a cheese that melts well without completely disappearing or becoming too watery.
What if I don’t have panko breadcrumbs?
Standard fine breadcrumbs can be used as a substitute, but the texture will be noticeably less crispy and lighter. For the best results and that signature crunch, panko is highly recommended. You could also make your own by toasting stale bread and processing it into coarse crumbs.
Can I air fry this recipe instead of baking?
Yes, you can! To air fry, preheat your air fryer to 375F (190C). Cook for approximately 15-20 minutes, flipping halfway through, or until the internal temperature reaches 165F (74C) and the crust is beautifully golden brown. You may need to adjust cooking time based on your specific air fryer model.
Is this recipe freezer-friendly?
While cooked chicken can be frozen, the quality of the breading and cheese filling might suffer slightly upon reheating, becoming less crisp or gooey. It’s truly best enjoyed fresh. If freezing, do so after cooking, and reheat from frozen in the oven for the most acceptable results.
How can I make this gluten-free?
To make this recipe gluten-free, simply substitute the all-purpose flour with a high-quality gluten-free all-purpose flour blend. Additionally, ensure you use gluten-free panko breadcrumbs. The cooking method remains the same, ensuring a delicious outcome for everyone.
Ready to Impress? Share Your Golden Stuffed Chicken Breast Masterpiece!
Now that you’re armed with the “no-leak secret” and all the expert tips, you’re ready to create a truly spectacular Golden Stuffed Chicken Breast. This dish isn’t just a meal; it’s an experience, guaranteed to bring smiles and compliments around your dinner table with its stunning presentation and incredible flavors.
We encourage you to try this recipe, make it your own, and share your culinary triumphs with us. Happy cooking, and prepare to delight!
Stuffed Chicken Breast
Course: Main CourseCuisine: AmericanDifficulty: easy2
servings30
minutes25
minutes750
kcal55
minutesSay goodbye to messy, oozing fillings with this Golden Stuffed Chicken Breast recipe! A clever sealing technique ensures the gooey cheese and tart cranberry sauce stay perfectly contained. Enjoy a crispy, golden crust and a delicious, flavorful center every single time.
Ingredients
2 boneless, skinless chicken breasts
4 ounces soft melting cheese (like Brie or mozzarella), cut into 2 equal pieces
1/4 cup cranberry sauce or relish
1/2 teaspoon salt
1/4 teaspoon black pepper
1/2 cup all-purpose flour
1 large egg, beaten
1 cup panko breadcrumbs
2 tablespoons vegetable oil (or similar neutral oil)
Directions
- Prepare the chicken: Place each chicken breast between two pieces of plastic wrap. Using a meat mallet or rolling pin, pound them evenly thin, about 1/4 to 1/2 inch thick, to create a good wrapping surface. Season both sides of the pounded chicken with salt and pepper.
- Stuff the chicken: Place one piece of cheese in the center of each flattened chicken breast, followed by 2 tablespoons of cranberry sauce on top of the cheese.
- Seal the filling (the no-leak secret): Carefully fold one side of the chicken over the filling, then fold the other side over, ensuring all edges meet to completely encase the cheese and cranberry sauce. Tuck in the ends to create a compact, sealed package. Secure the seam and any open ends with kitchen twine or a few wooden toothpicks. This tight seal is crucial for preventing any filling from escaping during cooking.
- Set up breading station: Prepare three shallow dishes. Put flour in the first, the beaten egg in the second, and panko breadcrumbs in the third.
- Bread the chicken: Dredge each stuffed chicken parcel first in the flour, shaking off any excess. Then dip it into the beaten egg, allowing any extra to drip off. Finally, thoroughly coat with panko breadcrumbs, pressing gently to ensure an even, thick layer that acts as an extra barrier against leaks and provides a crispy crust.
- Sear the chicken: Heat the vegetable oil in an oven-safe skillet over medium-high heat. Carefully place the breaded chicken into the hot oil and sear for 3-4 minutes per side, until golden brown and crispy. This initial sear locks in the breading and helps solidify the chicken’s shape, further preventing leaks.
- Finish cooking: Transfer the skillet to a preheated oven at 375F (190C). Bake for 15-20 minutes, or until the chicken is cooked through (internal temperature 165F/74C) and the cheese is beautifully melted and gooey.
- Rest and serve: Carefully remove the skillet from the oven. Let the chicken rest for a few minutes before removing the twine or toothpicks. Slice and serve immediately to enjoy that perfectly contained, cheesy cranberry goodness!
Notes
- The key to perfectly contained filling is ensuring a tight seal with kitchen twine or toothpicks during the stuffing process.