The biggest disappointment in baking is biting into a chocolate bar that looks rich but has a dry, crumbly center.
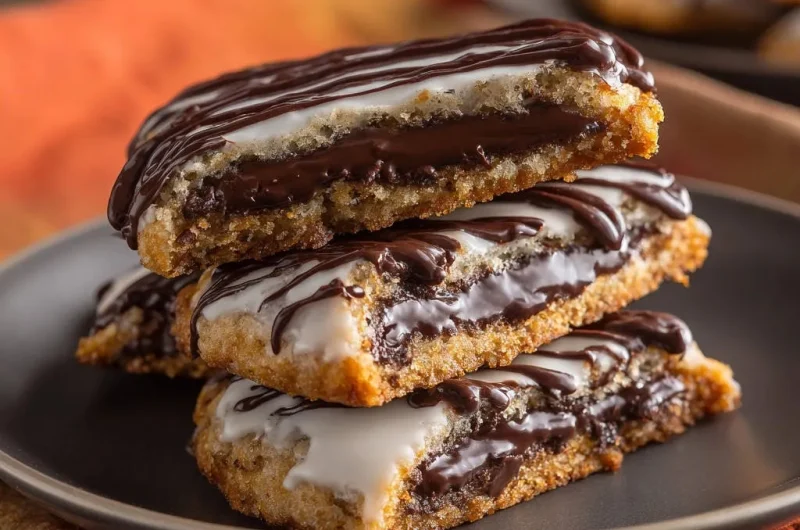
After years of testing, I finally perfected the formula to lock in permanent moisture, ensuring these Homemade Double Chocolate Fudge Bars are gooey, thick, and perfectly fudgy every single time.
For even more intensely rich results, explore fudgy cocoa brownies.
This recipe is the gold standard for decadent, satisfying chocolate treats, guaranteeing that desired yielding center.
For another great approach to preventing a less-than-ideal texture, check out this method for herb crusted baked cod.
The Gooey Gold Standard: Why This Double Chocolate Bar Never Crumbles
The Filling Formula: Mastering Moistness with Condensed Milk
The structure of the filling is the make-or-break element. Standard chocolate ganache, while delicious, often sets too hard or crystallizes after cooling, yielding a tough bar rather than soft fudge.
Our specific combination of heavy cream and sweetened condensed milk lowers the overall moisture evaporation rate during baking. The high sugar content in the condensed milk acts as a crucial humectant, permanently bonding with the water molecules.
This precise ratio ensures the chocolate filling remains thick and unctuous, retaining that signature, yielding gooey texture long after the bars have fully cooled.
Perfect Portability: A Dessert for Every Occasion
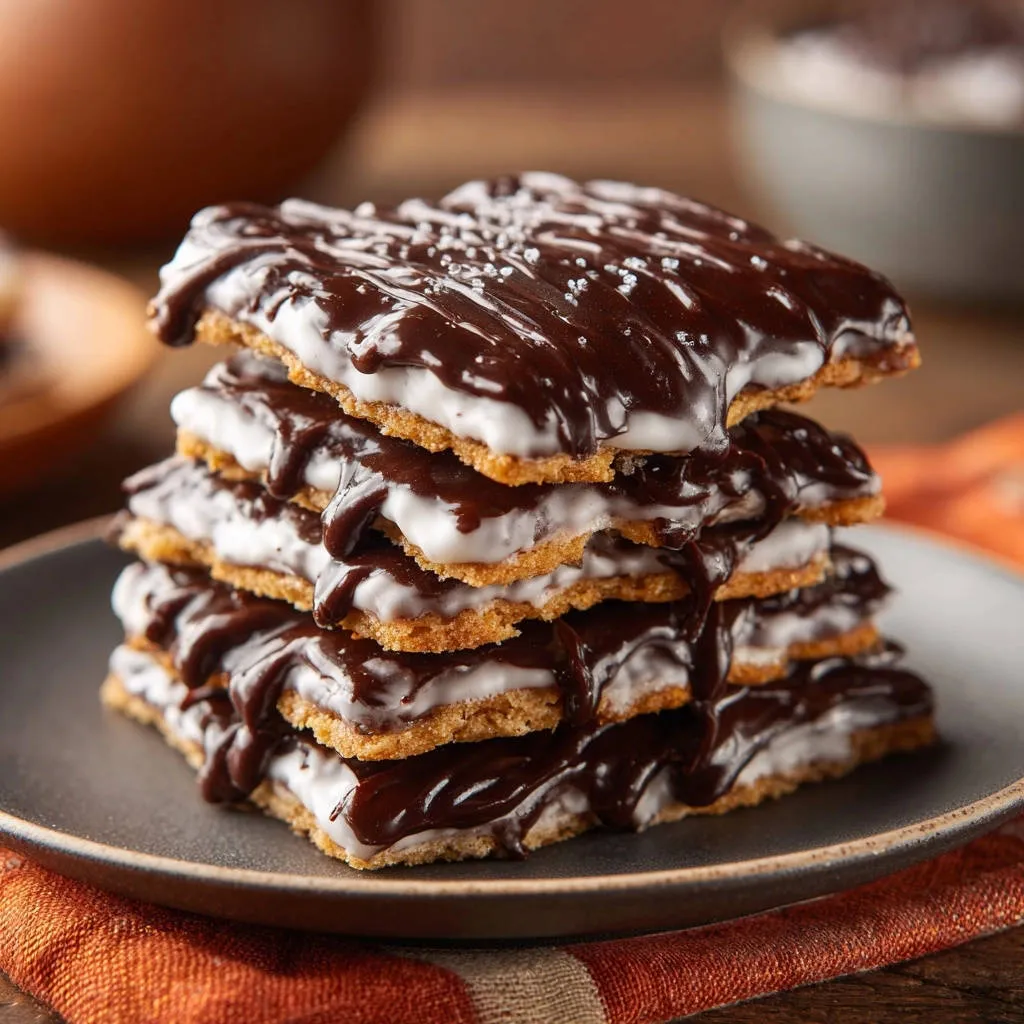
Bars inherently offer superior transport and presentation compared to loose cookies or fussy cakes. They are sturdy, uniform, and stackable, making them ideal for gatherings.
When chilled and sliced cleanly, these Homemade Double Chocolate Fudge Bars make perfect handheld portions for potlucks or lunchboxes.
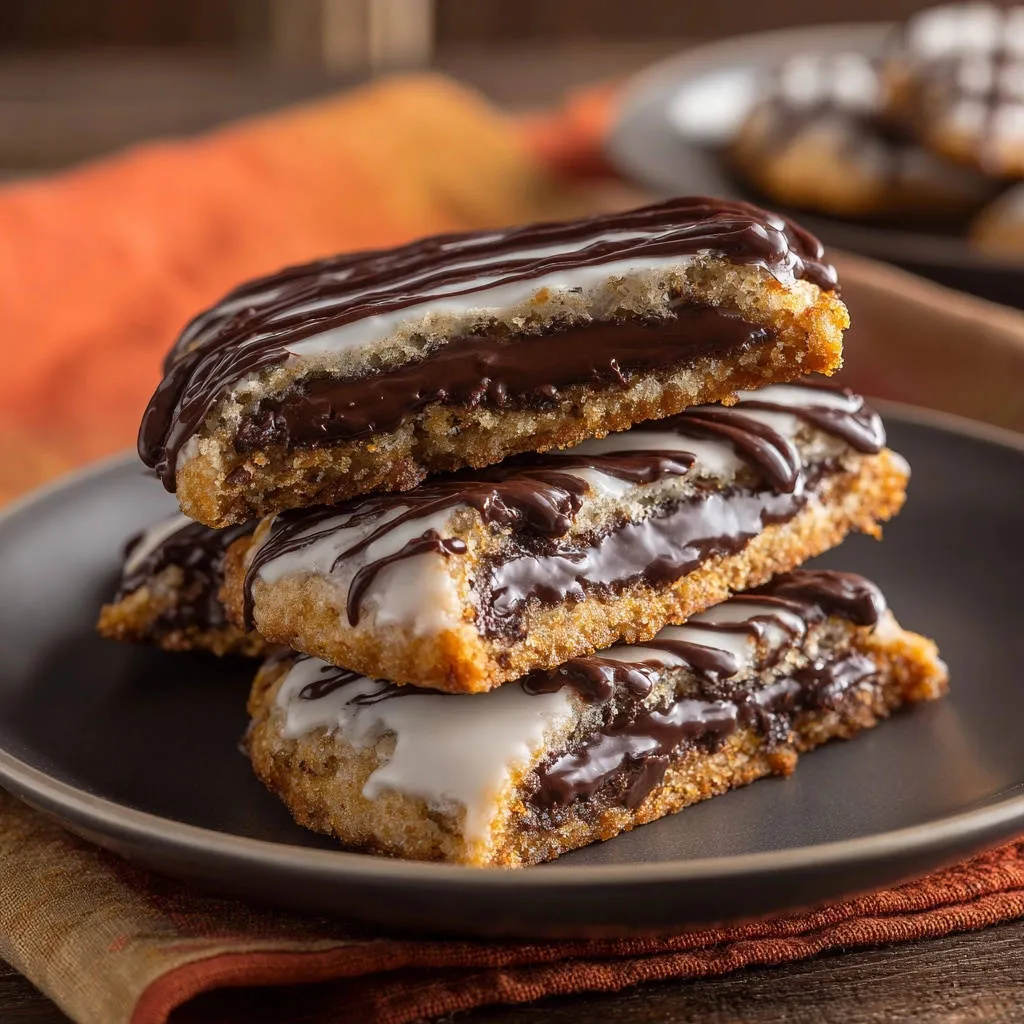
The layered construction-chewy crust, rich fudge core, and dual glaze-provides a complex and highly satisfying eating experience that simple brownies lack.
Gathering Your Flavor Arsenal: Key Components of the Fudge Bar
Building the Base: Achieving the Perfect Crumb
The base utilizes standard pantry items, but quality and preparation are crucial to achieving a tender crumb and the desired chewiness.
Softened Butter and Brown Sugar: The foundation for richness and chew. Using packed brown sugar adds depth of flavor, caramel notes, and critical moisture to the cookie-like crust.
The Dry Ratio: Ensuring the base has structure without becoming tough. Whisking the flour, baking soda, and salt together guarantees even lift and flavor distribution before adding the wet ingredients.
The Decadent Fudge Core: Chocolate, Cream, and the Secret Stabilizer
The choice of chocolate dictates the final flavor intensity, which is why semisweet chips are recommended; they provide richness without overwhelming bitterness.
Heavy cream adds luxurious smoothness and fat content, crucial for emulsification, while the sweetened condensed milk works as the essential stabilizer.
This specific combination prevents the chocolate from solidifying completely, locking in the perpetually fudgy centers we are aiming for.
The Finishing Touch: Dual Glaze Layers
The white glaze provides a satisfying sweetness and a slight vanilla counterpoint to the deep double chocolate filling, enhancing the overall flavor profile.
The chocolate drizzle, made silky smooth and shiny with a touch of coconut oil, adds visual polish, defining decorative stripes, and a subtle textural variation.
Essential Equipment for Streamlined Fudge Bar Success
8×8 Inch Baking Pan: This size is essential for achieving the correct bar thickness and ensures the bake time listed is accurate for setting the edges without drying out the center.
Parchment Paper Slings: A non-negotiable step for clean removal and professional slices. The overhang acts as handles, allowing you to lift the entire chilled batch out cleanly.
Electric Mixer (Hand or Stand): Necessary for properly creaming the softened butter and brown sugar. Thorough creaming incorporates necessary air, leading to a much fluffier, less dense crust base.
Baking Brilliance: Step-by-Step Guide to Homemade Double Chocolate Fudge Bars
Phase 1: Prepping the Crust and Oven
Step 1: Preheat and Line. Preheat your oven to 350°F (175°C) and prepare the pan, ensuring the parchment paper overhangs the edges on at least two sides.
Step 2: Creaming the Wet Ingredients. Beat the softened butter and packed brown sugar in a large bowl until the mixture is light and airy. This crucial step incorporates necessary air for a tender crust texture.
Step 3: Forming the Base. Gradually incorporate the dry ingredients, mixing on low speed only until a dough just forms. Press exactly two-thirds of this dough firmly and evenly into the bottom of the prepared pan.
Phase 2: Whipping Up the Star Filling
Step 4: Melting the Chocolate Trio. In a heatproof bowl, combine the chocolate chips, heavy cream, and butter. Microwave in short 30-second bursts, stirring until the mixture is completely melted and glossy smooth.
Step 5: Incorporating the Stabilizer. Vigorously stir in the sweetened condensed milk until the filling is uniform and has that signature ‘shiny’ look. This ensures the stabilizer is fully integrated before pouring.
Phase 3: Assembly, Bake Time, and the Doneness Test
Step 6: Layering the Crumble. Pour the prepared fudge filling evenly over the pressed crust, spreading gently. Crumble the remaining one-third of the dough loosely and evenly over the top of the filling.
Step 7: The Crucial First Bake (DO NOT OVERBAKE). Bake for only 22-25 minutes. The edges should be set and lightly golden, but the center MUST look soft, slightly sunken, and lightly jiggly when nudged.
Overbaking is the single greatest error; excess time in the oven solidifies the magic fudge filling into a hard, dry center.
Phase 4: Glazing and Finishing
Step 8: Cooling and Vanilla Glaze Application. Cool the bars completely in the pan on a wire rack before attempting to glaze. Applying glaze to warm bars causes it to melt and thin out.
Step 9: Adding the Decorative Drizzle. Melt the remaining chocolate with coconut oil for shine and flow. Drizzle using a small spoon or piping bag for controlled lines over the set white glaze.
Step 10: Chill and Slice. Chilling for at least 30 minutes is mandatory to fully set the gooey filling and the glazes, making for clean, professional-looking cuts every single time.
Chef’s Secrets: Ensuring Your Fudge Bars Are Irresistibly Gooey
Temperature Control is King: Ensure your oven temperature is accurate by using an oven thermometer. If the temperature is too high, the bars will cook too fast, leading to evaporation and a dry fudge layer.
The Foil Tent Trick: If you notice the crumble topping browning too quickly before the center has had time to set, loosely tent the pan with aluminum foil for the remaining bake time.
Clean Cuts Every Time: For bakery-worthy edges, dip your sharp knife in very hot water and wipe it completely dry between each cut. This technique melts the chocolate momentarily, allowing the blade to glide through cleanly.
Gluten-Free Swap: For a successful gluten-free base in your Homemade Double Chocolate Fudge Bars, substitute an equal amount of a good quality 1:1 gluten-free baking blend that contains xanthan gum.
Troubleshooting Your Bars: Common Problems and Quick Fixes
Problem: My Filling Set Rock Hard After Cooling
This is almost always due to overbaking. Ensure you remove the bars from the oven precisely at the 22-25 minute mark when the center is still visibly jiggly and soft.
Remember, carryover heat continues the cooking process even after removal. Another culprit could be too little heavy cream in the filling; always measure liquids precisely.
Problem: The Crumble Topping is Too Dense
You may have overmixed the base dough initially, which activates too much gluten. Mix only until the dry ingredients are just incorporated, and stop as soon as the dough holds together.
When crumbling the remaining dough over the fudge, use your fingers lightly; avoid squeezing or packing the clumps, as this makes the topping tough.
Beyond the Recipe: Creative Twists and Best Storage Practices
Flavor Boosters and Swaps
Mocha Fudge Bars: Add 1 teaspoon of high-quality espresso powder to the dry ingredients for the base, or include a teaspoon of instant coffee dissolved in the heavy cream for the filling.
Nutty Crunch: Sprinkle finely chopped walnuts, pecans, or almonds directly over the top of the melted fudge filling before adding the final crumble layer for texture.
Spiced Perfection: Add a generous pinch of cinnamon, or half a teaspoon of ground cardamom, to the dry ingredients of the crust for a subtle, warming complexity.
Storage and Make-Ahead Magic
These Homemade Double Chocolate Fudge Bars store exceptionally well at room temperature in an airtight container for up to 4 days, or chilled for up to a week.
For optimal freshness, separate the bars with small squares of parchment paper to prevent sticking and maintain the integrity of the glaze.
To freeze, cut the cooled, unglazed bars into slices, wrap each tightly in plastic wrap, and store them in a freezer-safe container for up to 3 months. Thaw them overnight in the refrigerator before applying the glazes.
Quick Answers to Common Questions About Fudge Bars
Can I Substitute Evaporated Milk for Sweetened Condensed Milk?
No, these ingredients are not interchangeable in this specific recipe. Sweetened condensed milk is extremely thick, highly refined, and sugary, which is essential for stabilizing the fudge filling and maintaining its unique, moist texture.
Evaporated milk is thinner, unsweetened, and would simply dilute the filling, resulting in a runny layer that fails to set properly.
How Do I Know When the Bars Are Finished Baking?
Look for lightly golden edges that pull away slightly from the pan and a set crumble topping. The center should still appear soft and slightly jiggly when the pan is gently nudged.
If a toothpick inserted into the center comes out clean, or if the center feels firm to the touch, you have unfortunately already overbaked them, and the fudge will harden upon cooling.
Do I Have to Use Two Different Glazes?
While the dual glazes enhance visual appeal and flavor complexity, you absolutely do not have to use both. You can simplify the recipe by using just the vanilla glaze, or simply dusting the cooled bars heavily with powdered sugar.
Ready to Delight? Share Your Double Chocolate Masterpiece
Armed with the secret to that perfectly gooey center, you are ready to create the most decadent Homemade Double Chocolate Fudge Bars your friends and family have ever tasted.
Whether for a holiday party, a casual weekend treat, or just a Tuesday afternoon craving, this technique delivers maximum chocolate impact with zero risk of a dry disappointment.
Give it a try, master the short bake time, and let us know which delicious flavor variation you decide on!
Happy Baking!
More Sweet Ideas
If you have a sweet tooth, consider these other delightful treats to round out your dessert table.
- For a breakfast or brunch that feels like a special occasion, try these Cinnamon French Toast Stacks with Crispy Edges.
- Bring a taste of the campfire indoors with these fun S’mores Pancakes, offering a fluffy texture with familiar sweet notes.
Chocolate Fudge Bars
Course: DessertCuisine: AmericanDifficulty: medium4
12-16 bars20
minutes25
minutes450
kcal180
minutesThese decadent bars feature a buttery brown sugar base and a rich, stabilized chocolate fudge center guaranteed to stay moist and gooey. Topped with a creamy vanilla glaze and a dark chocolate drizzle, they are the ultimate chocolate indulgence.
Ingredients
For the Base:
1 1/2 cups All-Purpose Flour
1/2 teaspoon Baking Soda
1/4 teaspoon Salt
1/2 cup Unsalted Butter, softened
3/4 cup Brown Sugar, packed
1 large Egg
1 teaspoon Vanilla Extract
For the Fudge Filling:
1 cup Semisweet Chocolate Chips
1/4 cup Heavy Cream
2 tablespoons Unsalted Butter
1/4 cup Sweetened Condensed Milk
For the Glazes:
1 1/2 cups Powdered Sugar
3 tablespoons Milk
1/2 teaspoon Vanilla Extract
1/4 cup Semisweet Chocolate Chips (for drizzle)
1 teaspoon Coconut Oil or Neutral Vegetable Oil (for drizzle)
Directions
- Prepare the Base: Preheat your oven to 350 degrees F. Line an 8×8 inch baking pan with parchment paper, leaving an overhang on the sides for easy removal.
- Mix Dry Ingredients: In a medium bowl, whisk together the flour, baking soda, and salt. Set aside.
- Cream Wet Ingredients: In a large bowl, use a hand mixer or stand mixer to beat the softened butter and brown sugar until light and fluffy, about 2 minutes. Beat in the egg and vanilla extract until just combined.
- Combine: Gradually add the dry ingredients to the wet ingredients, mixing on low speed until a thick dough forms. Press about two-thirds of this dough evenly into the bottom of the prepared pan.
- Create the Gooey Filling (THE KEY TECHNIQUE): In a heatproof bowl, combine the 1 cup chocolate chips, heavy cream, and 2 tablespoons butter. Microwave in 30 second intervals, stirring well between each, until completely melted and smooth. Stir in the sweetened condensed milk until the mixture is uniform and shiny. This specific ratio of condensed milk and heavy cream stabilizes the chocolate and prevents it from setting too hard or drying out during the quick bake, ensuring a permanent gooey texture.
- Assemble and Bake: Pour the chocolate filling evenly over the crust in the pan. Crumble the remaining one-third of the dough over the top of the chocolate filling.
- First Bake: Bake for 22 to 25 minutes. The edges of the bar should be set and lightly golden, but the center should still look very soft and slightly sunken. Do not overbake! This prevents the filling from solidifying into hard fudge. Remove from the oven and let cool completely in the pan on a wire rack before glazing.
- Apply Vanilla Glaze: Whisk together the powdered sugar, milk, and vanilla extract until smooth. Drizzle or spread the white glaze generously over the cooled bars. Allow the glaze to set for about 15 minutes.
- Apply Chocolate Drizzle: Melt the remaining 1/4 cup chocolate chips with the coconut oil until smooth. Using a spoon or piping bag, drizzle the melted chocolate over the white glaze in decorative stripes.
- Chill and Cut: Let the bars chill in the refrigerator for at least 30 minutes to firm up the layers before slicing into bars.
Notes
- Do not overbake; the center should still look very soft when removed. Bars require significant cooling and chilling time before slicing.