Most white chicken chili recipes suffer from a common identity crisis. You expect a hearty, stick-to-your-ribs meal, but you end up with a thin, translucent soup where the ingredients sink to the bottom of the bowl. It’s frustrating when the flavor is there, but the texture feels watery and uninspired.
For a similarly rich experience, try this creamy chicken chili next.
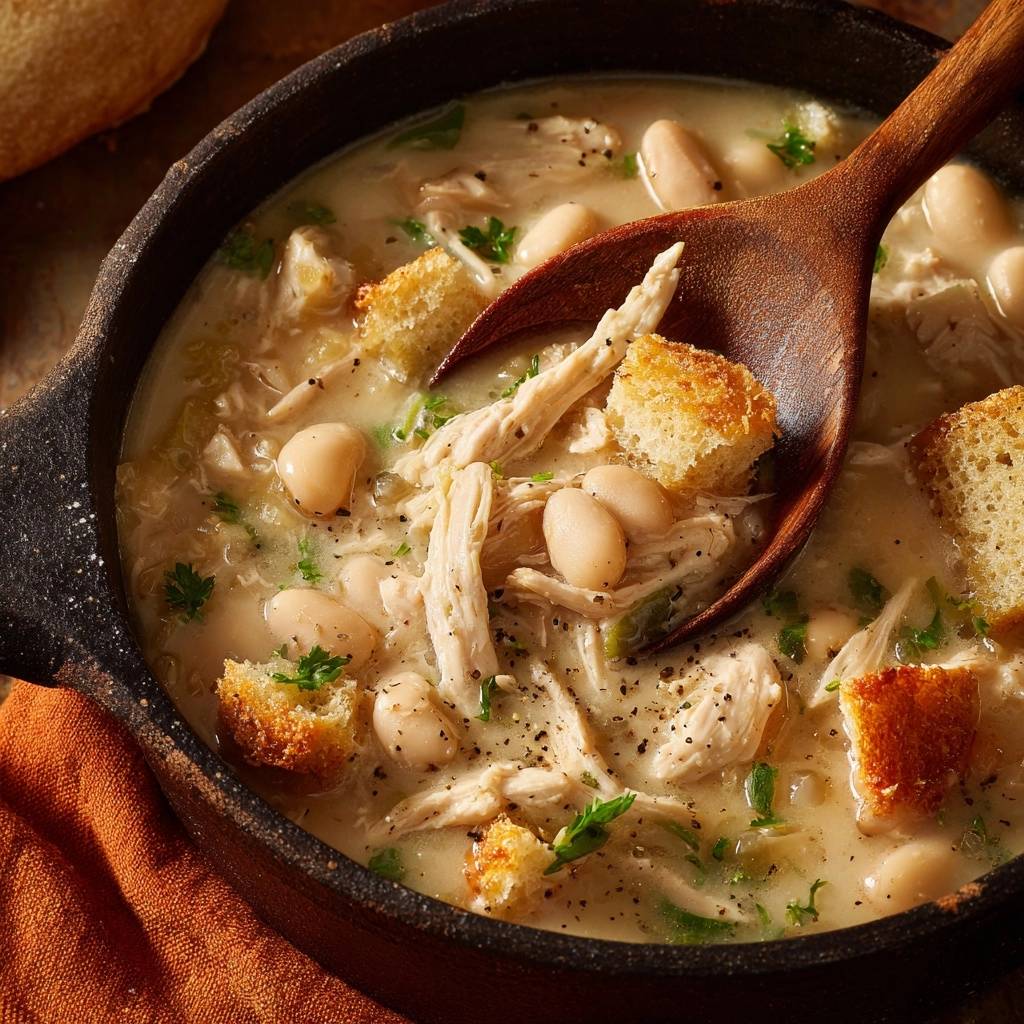
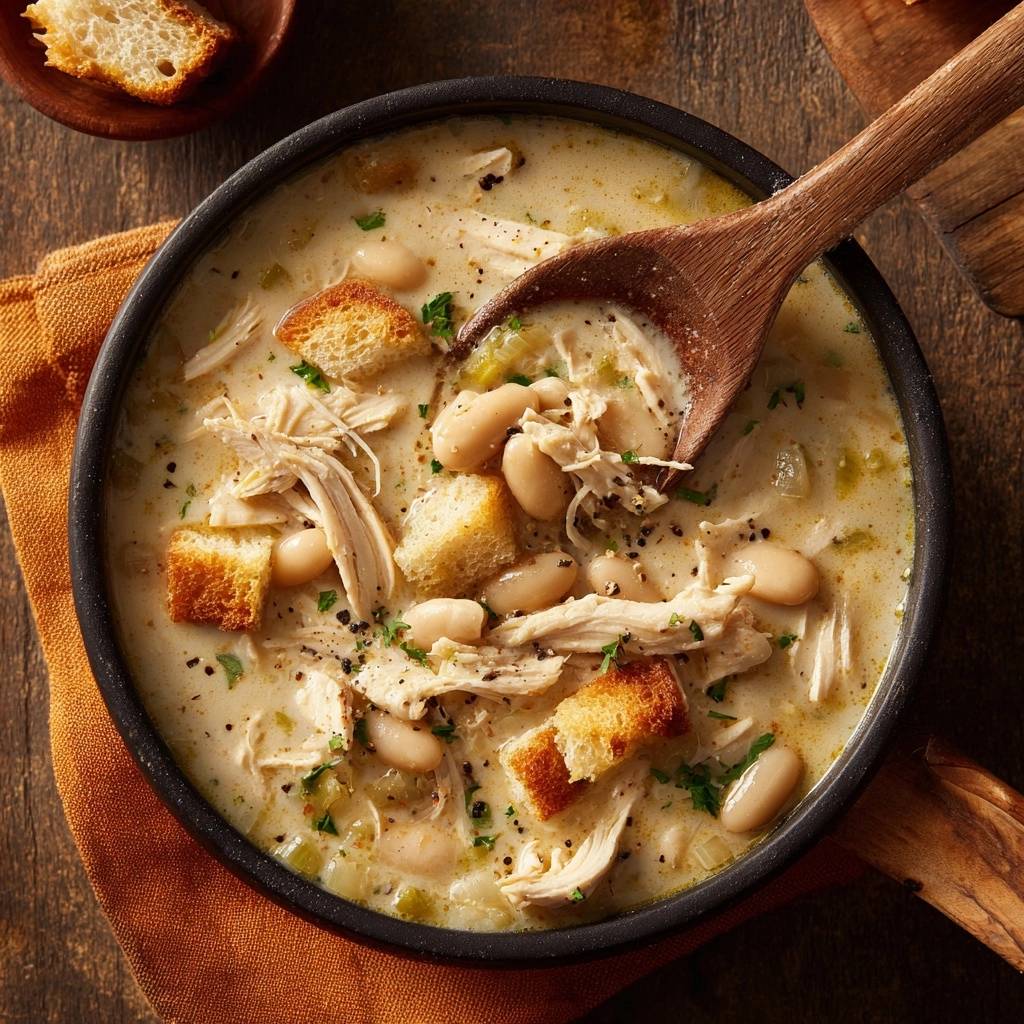
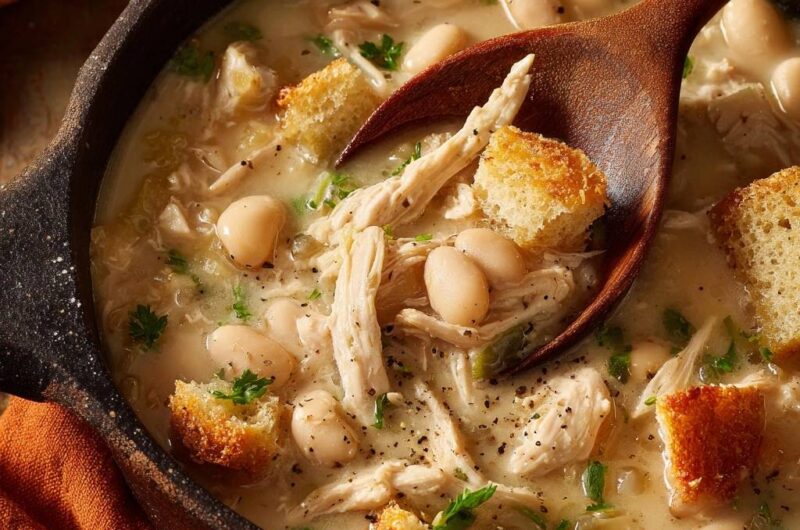
The goal of this recipe is to achieve a rich, opaque, and velvety body that clings to every strand of shredded chicken. We aren’t just relying on a splash of cream to do the heavy lifting. Instead, we use a strategic approach to viscosity that ensures your spoon stands tall and your toppings stay right on the surface where they belong.
The secret lies in a dual-thickening strategy that combines a classic light roux with the “Bean Mash Method.” By pulverizing a portion of the cannellini beans into a smooth paste, we release natural starches that bond with the chicken broth. This creates a professional-grade thickness without making the dish feel heavy or overly floury.
For a different twist on creamy chicken, try this delightful creamy chicken orzo soup.
The Anatomy of a Non-Watery White Chili
Creating a thick poultry-based stew is actually more scientific than it looks. Unlike beef-based chilis, which benefit from the heavy collagen and fats found in red meat, chicken broth is naturally thin and lean. Without intervention, the liquid remains watery regardless of how long you simmer it.
To fix this, we focus on building layers of viscosity. The “Bean Mash Method” is our primary tool here. When you mash cannellini beans, you’re creating a natural thickener that mimics the effect of a heavy cream reduction but with much more structural integrity. These starches act as a bridge between the fats and the liquids.
Why Traditional Recipes Often Fall Flat
Standard “dump and heat” recipes usually fail because they don’t account for the excess moisture in canned beans and the lack of body in store-bought broth. If you just toss everything into a pot, the result is a clear liquid with floating bits. It lacks that “skyscraper” build where the chili has actual height and density.
Furthermore, many home cooks rely solely on dairy for thickness. While cream adds richness, it doesn’t actually provide structural body. If the base isn’t thickened before the cream goes in, you just end up with a thin, milky soup rather than a true, velvety chili.
Essential Components for the Perfect Creamy White Chicken Chili
Quality ingredients are the foundation of this dish. I always recommend Cannellini beans over Great Northern beans. Cannellini beans have a much creamier, fluffier interior, which makes them the perfect candidate for mashing into our thickening paste.
The chicken itself also plays a role in the texture. Instead of dicing the meat into cubes, shred it into long, thin strands. These strands act like a net, catching the thickened sauce and ensuring that every bite is saturated with flavor. It creates a much more cohesive mouthfeel than chunky pieces of meat.
Selecting the Right Poultry Base
Using pre-cooked chicken, like a rotisserie chicken or poached breasts, is a major time-saver that actually improves the dish. Since the chicken is already tender, you only need a short simmer to marry the flavors. This prevents the meat from becoming rubbery or dry, which often happens when raw chicken is boiled in the broth.
Always reach for low-sodium chicken broth. This gives you total control over the salt levels. As the chili simmers and reduces, the flavors concentrate. If you start with a high-sodium broth, the final result might end up unpleasantly salty by the time it reaches the desired thickness.
The Spice Profile: Beyond Heat
We use a blend of ground cumin, dried oregano, and a touch of cayenne pepper to create a warm, earthy foundation. The key is to “bloom” these spices in the butter and oil during the initial stages. This process releases the fat-soluble flavor compounds, creating a deeper taste that cuts through the richness of the heavy cream.
Cumin provides that classic chili aroma, while the oregano adds a subtle herbal note. The cayenne isn’t there to make it “hot” but rather to provide a back-of-the-throat warmth that balances the creamy elements. If you like more heat, you can always scale up the cayenne later.
The Dual-Thickening Technique: Roux and Mash
This is the technical heart of the recipe. We start with a light roux made from equal parts butter and flour. This provides an initial opaque base and a silky mouthfeel. However, a roux alone can sometimes feel “pasty” if you use too much, which is why we supplement it with the bean mash.
Looking for More?
To complement your creamy white chicken chili, consider these comforting soup recipes.
- For a smooth, vibrant starter, try the creamy roasted tomato soup, offering a bright contrast to the chili’s richness.
- If you enjoy a velvety texture, the creamy roasted cauliflower soup provides a similar smooth consistency and satisfying warmth.
By mashing one cup of the beans, you create a thick, starchy slurry. When this paste hits the simmering broth, it dissolves and creates a suspension. This suspension is what gives the chili its hearty, “clingy” quality. It also acts as a stabilizer, preventing the heavy cream from breaking or curdling when it’s added at the end.
Step-by-Step: Building the Chili Base
Start by sautéing your finely diced onions and minced garlic in a mixture of olive oil and butter. You aren’t looking for browning or caramelization here. You want the onions to become soft and translucent, which provides a sweet, aromatic base without darkening the “white” aesthetic of the chili.
Once the aromatics are soft, sprinkle the flour over them. Stir this constantly for about two minutes. You want to cook out the raw flour taste, but keep the roux pale. If it starts to turn brown, it will change the flavor profile and the color of your final dish.
Integrating the Green Chiles and Aromatics
After the roux is set, stir in the canned green chiles and your spices. The chiles add a necessary acidity that brightens the entire pot. This acidity is crucial because it balances the heavy cream and butter, preventing the chili from feeling too “one-note” or heavy on the palate.
Stir the spices for just a minute until you can really smell the cumin. This quick toast ensures the flavors are vibrant. Be careful not to let the garlic burn during this step, as bitter garlic will ruin the delicate creaminess of the sauce.
Executing the Bean Mash Method
Take one cup of your rinsed cannellini beans and put them in a small bowl. Use a fork or a potato masher to crush them until they form a smooth, thick paste. It doesn’t have to be perfectly uniform, but the smoother it is, the better it will integrate into the broth.
When you add the chicken broth to the pot, do it slowly while whisking. Once the liquid is in, stir in that bean paste. You’ll notice the broth immediately turns from a clear liquid to a rich, opaque base. This is the moment the “soup” officially becomes “chili.”
The Simmer: Developing Body and Flavor
Let the chili simmer uncovered for 15 to 20 minutes. This window is the “sweet spot” where the starches from the flour and beans fully hydrate and expand. The evaporation that occurs during an uncovered simmer further concentrates the flavors and thickens the texture.
Keep the heat at a gentle simmer rather than a rolling boil. High heat can cause the chicken strands to toughen and might even cause the bean starches to scorch at the bottom of the pot. A few lazy bubbles breaking the surface is exactly what you’re looking for.
The Finishing Touch: Tempering the Cream
Before adding the heavy cream, turn the heat down to low. If you add cold cream to a boiling pot, it can sometimes grain out or separate. By lowering the temperature, you ensure a perfectly silky finish. Stir the cream in slowly and watch the color turn to a beautiful, milky white.
Once the cream is incorporated, add your fresh parsley. The parsley provides a pop of color and a fresh, grassy finish that lightens the dish. Taste it now and add your salt and cracked black pepper. Don’t be shy with the pepper; the black flecks look beautiful against the white base.
Troubleshooting Common Texture Issues
If your chili still feels a bit thin after the simmer, don’t panic. You can simply mash another half-cup of beans and stir them in. Alternatively, let it simmer for another five minutes. The thickness will also increase slightly as the chili cools in the bowl.
If the chili becomes too thick (which can happen if it sits for a while), just splash in a little extra chicken broth or a tablespoon of water. This will loosen the sauce without diluting the flavor too much. Always adjust your seasoning after adding more liquid.
Elevating the Presentation with Buttery Sourdough Croutons
Texture contrast is what makes a meal memorable. While the chili is soft and creamy, these sourdough croutons provide a necessary “crunch factor.” Sourdough is the best choice here because its natural tanginess cuts through the richness of the dairy.
Toss your sourdough cubes in a pan with melted butter over medium heat. Toast them until they are golden brown and crisp on all sides. Because our chili is so thick, these croutons will sit proudly on top of the bowl rather than getting soggy and sinking immediately.
Flavor Variations and Dietary Adjustments
If you want a bit more kick, you can add finely diced serrano peppers along with the onions. For those who prefer a tangier finish, try swapping the heavy cream for full-fat sour cream or even a thick Greek yogurt. Just be sure to stir these in at the very end over very low heat to prevent curdling.
You can also add more vegetables if you like. Corn kernels or diced bell peppers work beautifully in this base. Just remember that adding more watery vegetables might require a slightly longer simmer to maintain that signature thick consistency.
Make-Ahead Strategies and Storage Logistics
This chili is actually better the next day. As it sits in the fridge, the starches continue to hydrate and the spices meld together. It will thicken significantly when cold, so you may need to add a splash of broth when reheating it on the stove.
To store, let the chili cool to room temperature before transferring it to an airtight container. It will stay fresh in the refrigerator for up to three days. Because of the roux base, this chili actually freezes better than most dairy-based soups, as the flour helps stabilize the emulsion. It can be frozen for up to two months.
Expert Tips for the Ultimate Batch
For the best results, use a heavy-bottomed pot or a Dutch oven. These vessels distribute heat more evenly, which prevents the thick bean base from sticking to the bottom. Also, always use “cracked” black pepper rather than fine powder for a better visual contrast and a more rustic flavor.
Wait until the very last second to add the fresh parsley. Heat destroys the volatile oils in fresh herbs, so adding them at the end preserves their bright flavor and vibrant green color. This small detail makes a huge difference in the final presentation.
Frequently Asked Questions
Can I use dried beans instead of canned?
Yes, you can use dried cannellini beans, but you must soak and cook them completely before starting this recipe. One and a half cups of dried beans will yield roughly the same amount as two 15-ounce cans. Ensure they are very tender so they mash easily into a smooth paste.
How do I make this in a slow cooker?
To adapt this for a slow cooker, reduce the chicken broth by one cup, as there is less evaporation. Sauté the onions, garlic, and flour in a pan first to create the roux, then whisk in a bit of broth before adding everything to the slow cooker. Cook on low for 4-6 hours, adding the cream and parsley at the very end.
Is there a gluten-free alternative for the roux?
You can omit the flour and butter roux and instead use a cornstarch slurry. Mix two tablespoons of cornstarch with two tablespoons of cold water and stir it into the simmering broth. Combined with the bean mash method, this will still provide a very thick and opaque result.
Why is my chili gray instead of white?
A gray or muddy color usually happens if the roux is over-toasted or if the spices are scorched. It can also happen if you use dark chili powder instead of cumin and cayenne. To keep it bright white, keep your heat moderate and use the specified light-colored spices.
Can I freeze this chili?
Yes, this chili freezes quite well. The flour in the roux acts as a stabilizer for the dairy, which prevents the sauce from separating too much upon thawing. Store it in a freezer-safe bag or container for up to two months. Thaw it in the fridge overnight before reheating gently on the stove.
What if I don’t have sourdough for the croutons?
While sourdough is the top choice for its flavor, any crusty bread like a French baguette or Italian loaf will work. The key is to toast them in plenty of butter until they are very crisp so they provide that essential textural contrast to the creamy chili.
White Chicken Chili
Course: Main CourseCuisine: AmericanDifficulty: easy6
servings15
minutes30
minutes385
kcal45
MinutesThis white chicken chili stands out from thin soups by using a roux base and the Bean Mash Method. Combined with shredded chicken, green chiles, and heavy cream, it creates a thick, opaque chili perfect for serving with buttery sourdough croutons.
Ingredients
2 cans (15 oz each) Cannellini beans, drained and rinsed
3 cups cooked chicken, shredded into long strands
4 cups low-sodium chicken broth
1 tablespoon olive oil
2 tablespoons unsalted butter
2 tablespoons all-purpose flour
1 small white onion, finely diced
2 cloves garlic, minced
1 can (4 oz) chopped green chiles
1 teaspoon ground cumin
1/2 teaspoon dried oregano
1/4 teaspoon cayenne pepper
Salt and cracked black pepper to taste
1/2 cup heavy cream (or full-fat sour cream)
1/4 cup fresh parsley, roughly chopped
2 cups thick-cut sourdough bread cubes, toasted in butter until golden brown
Directions
- In a large pot or Dutch oven, heat the olive oil and butter over medium heat. Add the onion and garlic, sautéing until translucent and fragrant (about 5 minutes).
- Sprinkle the flour over the onions and stir constantly for 1-2 minutes to create a light roux. This ensures the base is opaque and rich, matching the visual density of the image.
- Add the green chiles, cumin, oregano, and cayenne pepper. Stir for 1 minute to toast the spices and release their oils.
- To solve the watery sauce problem: Take 1 cup of the drained Cannellini beans and place them in a small bowl. Use a fork or potato masher to crush them into a smooth, thick paste.
- Slowly pour the chicken broth into the pot, whisking constantly to incorporate the roux without lumps. Stir in the mashed bean paste until fully dissolved into the liquid.
- Add the remaining whole beans and the shredded chicken to the pot.
- Bring the mixture to a gentle simmer. Let it cook uncovered for 15 to 20 minutes. The combination of the roux and mashed beans will thicken the broth significantly as it reduces.
- Reduce heat to low. Stir in the heavy cream and half of the fresh parsley. Season generously with salt and cracked black pepper.
- Serve immediately in bowls. Top with the remaining fresh parsley and the buttery toasted croutons, which will sit high on the surface of the thickened chili.
Notes
- To achieve the perfect texture, ensure you mash one full cup of beans into a smooth paste before adding to the broth. This creates a natural body that prevents the chili from being translucent.