For years, the idea of perfectly cooked duck breast felt daunting. Achieving that elusive crispy skin without drying out the meat seemed like a culinary magic trick, but I’ve finally cracked the code to making restaurant-quality Pan-Seared Orange Glazed Duck Breast right in your home kitchen.
This recipe transforms an intimidating cut into an effortless gourmet experience, promising tender, juicy duck with incredibly crisp, golden skin, all bathed in a vibrant citrus glaze. Prepare to impress yourself and anyone lucky enough to share this meal!
Why This Pan-Seared Orange Glazed Duck Breast Recipe Belongs in Your Favorites
The Secret to Unrivaled Crispy Skin, Every Time
The common challenge of rubbery duck skin is overcome here by a methodical, gentle approach. We utilize a precise scoring technique combined with a slow, cold-pan render to coax out every bit of fat, resulting in a skin that shatters with satisfying crispness.
For a similar bright flavor, try these cranberry orange chicken thighs.
Achieving Juicily Tender Meat: A Culinary Revelation
Beyond the skin, the method ensures the duck meat remains succulent and tender, never dry or tough. By carefully managing cooking temperatures and including a crucial resting period, every slice is moist and bursting with flavor, delivering a truly luxurious texture.
Effortless Elegance: Restaurant Quality at Home
Despite its sophisticated appearance, this Pan-Seared Orange Glazed Duck Breast recipe relies on simple, accessible techniques. It’s perfect for elevating a weeknight meal or dazzling guests on a special occasion, proving that gourmet dining doesn’t require complex skills.
Gather Your Essentials: Ingredients for Pan-Seared Orange Glazed Duck Breast
The Star of the Show: Selecting Your Duck Breast
Duck Breast (10-12 ounces): The foundation of this dish, ensuring high-quality, plump duck breast is key. Look for generous fat coverage on the skin for optimal rendering and flavor.
Crafting the Zesty Orange Glaze
Large Orange: Both zest and juice are crucial. Freshly grated zest provides intense aromatic oils, while the juice forms the bright, tangy base for the glaze. Always choose fresh, ripe oranges for the best flavor.
Honey or Maple Syrup: Adds natural sweetness and body to the glaze. Honey offers a floral note, while maple syrup provides a richer, earthier sweetness, allowing you to tailor the flavor subtly.
Apple Cider Vinegar: A touch of acidity brightens the glaze and balances the sweetness from the honey or maple. It also cuts through the richness of the duck, creating a harmonious flavor profile.
Simple Seasonings and Accompaniments
Salt and Black Pepper: Essential for generously seasoning the duck, enhancing its natural savory flavors. Apply liberally to both the skin and meat sides for comprehensive seasoning.
Mixed Greens: Provides a fresh, light counterpoint to the rich duck. A simple bed of peppery arugula or a delicate spring mix offers a wonderful textural and flavor contrast.
Extra Orange Slices (for garnish): Elevates presentation and reinforces the citrus theme. A few fresh slices add a pop of color and an inviting aroma to the finished plate.
Gear Up for Pan-Seared Orange Glazed Duck Breast Success: Essential Tools
Sharp Knife: Indispensable for scoring the duck skin precisely without cutting into the meat. This precision is important for maximizing fat rendering and preventing the skin from shrinking.
Oven-Safe Skillet (Cast Iron or Stainless Steel): Crucial for the initial searing and optional oven finish. These materials offer superior heat retention and even cooking, which are vital for a perfect sear.
Small Saucepan: For effortlessly simmering and thickening the vibrant orange glaze. Its size is perfect for concentrating the flavors quickly and efficiently.
Meat Thermometer (Optional but Recommended): For ensuring perfect doneness, especially for medium-rare duck breast. This tool is your best friend in preventing overcooking and guaranteeing juicy results.
Heatproof Bowl: For collecting that precious rendered duck fat. This “liquid gold” is a culinary treasure with many secondary uses, such as roasting vegetables.
Cutting Board: Essential for both resting and neatly slicing the cooked duck breast. A good board helps contain juices and provides a stable surface for precise cuts.
Your Path to Pan-Seared Orange Glazed Duck Breast Perfection: A Detailed Guide
Prepare the Duck Breast:
Use a sharp knife to score the skin of the duck breast in a crosshatch pattern, making sure not to cut into the meat. This creates channels for fat to render efficiently and prevents the skin from seizing up during cooking.
Pat the duck breast very dry with paper towels on both sides. Moisture is the enemy of crispy skin, so ensure it’s thoroughly dry for the best results.
Season generously with salt and pepper on both the skin and meat sides. Don’t be shy; proper seasoning is fundamental to developing deep, delicious flavor in the duck.
Start in a Cold Pan:
Place the duck breast, skin side down, into a cold, dry oven-safe skillet (cast iron or stainless steel works best). There’s no need to add any oil, as the duck will render its own fat abundantly.
Slow Render the Fat:
Turn the heat to medium-low. Cook the duck breast, skin side down, for 10-15 minutes. This slow cooking allows the fat to gradually render out, which is the key to achieving incredibly crispy skin and a tender breast.
Periodically pour off any rendered fat into a heatproof bowl. Save this “liquid gold” for amazing roasted potatoes or other delicious uses, adding incredible depth of flavor.
Increase Heat and Crisp:
Once most of the fat has rendered and the skin is deeply golden brown and perfectly crisp, increase the heat to medium-high. Continue cooking skin side down for another 2-3 minutes to ensure maximum crispness and a beautiful, caramelized color.
Sear the Meat Side (Stovetop or Oven):
Flip the duck breast to the meat side. Cook for 3-5 minutes on the stovetop, depending on desired doneness. For medium-rare, aim for an internal temperature of 130 degrees Fahrenheit.
Alternatively, if your skillet is oven-safe, transfer it to a preheated 400°F (200°C) oven for 5-7 minutes instead of searing on the stovetop. This provides more even cooking for the meat side, especially for thicker breasts.
Rest the Duck:
Transfer the cooked duck breast to a cutting board and let it rest for at least 5-10 minutes before slicing. This step is absolutely crucial for allowing the juices to redistribute, keeping the meat incredibly tender and juicy.
While the duck rests, proceed to make the vibrant orange glaze.
Make the Orange Glaze:
In a small saucepan, combine the orange juice, orange zest, honey or maple syrup, and apple cider vinegar.
Bring to a simmer over medium heat and cook for 5-7 minutes, stirring occasionally. The sauce should thicken slightly to a syrupy consistency, coating the back of a spoon.
Slice and Serve:
Slice the rested duck breast into thick pieces against the grain. Slicing against the grain ensures maximum tenderness with every bite, making the duck incredibly easy to enjoy.
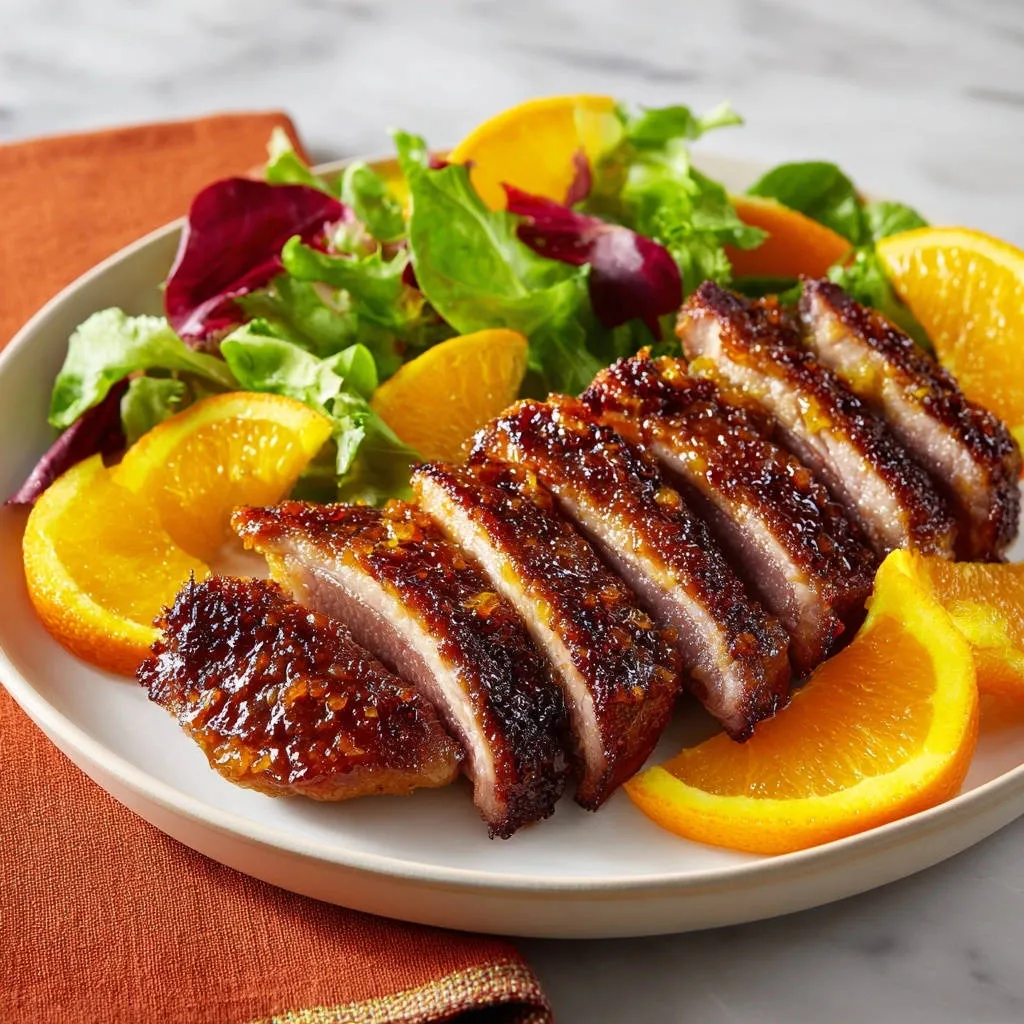
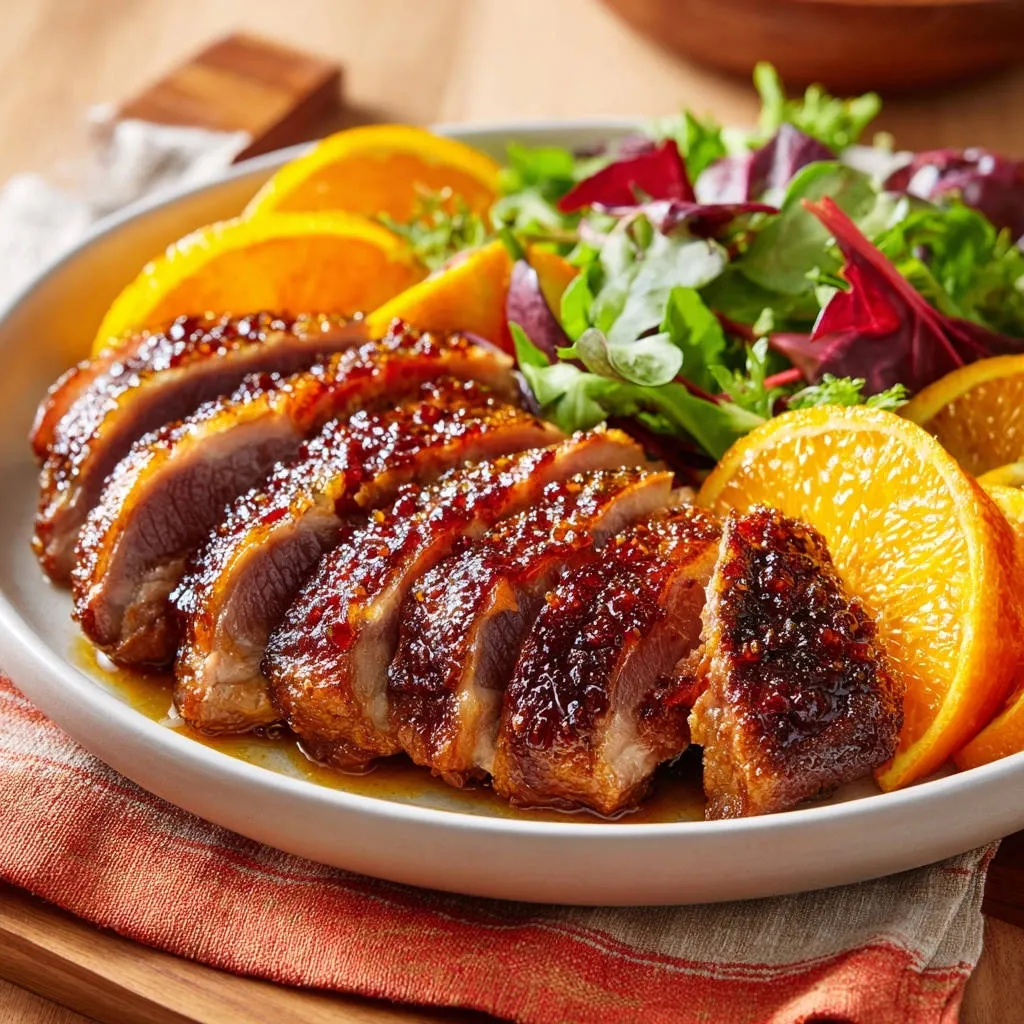
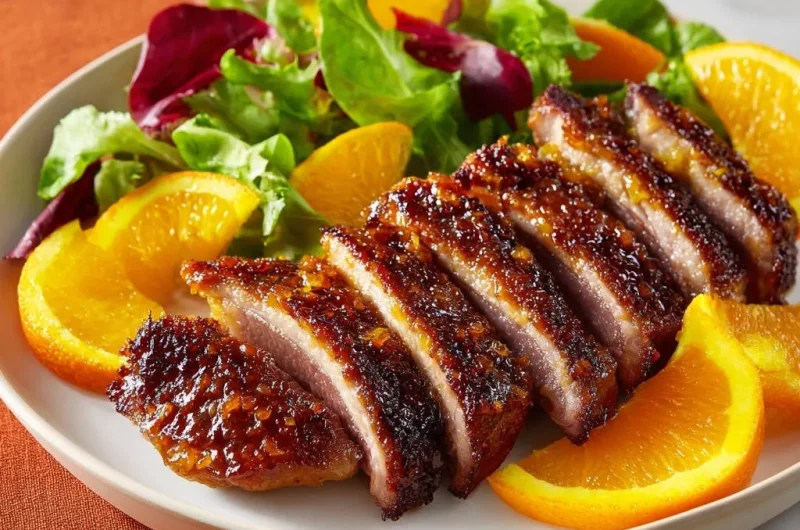
Arrange the sliced Pan-Seared Orange Glazed Duck Breast on plates with fresh mixed greens and extra orange slices for a beautiful presentation. Drizzle generously with the warm orange glaze and serve immediately to enjoy the perfect harmony of flavors and textures.
Pro Tips for Unforgettable Pan-Seared Orange Glazed Duck Breast
The Art of Scoring for Maximum Crispness
Score Deep, But Not Too Deep: Aim to cut through the fat layer without touching the meat. This allows the fat to render completely while maintaining the duck’s integrity, preventing dry spots and ensuring uniform crispness.
Why a Cold Pan Changes Everything
The Gradual Render Advantage: Starting in a cold pan slowly heats the fat, giving it more time to render out before the muscle seizes up. This process leads to far crispier skin and less grease, setting this Pan-Seared Orange Glazed Duck Breast apart.
The Golden Rule: Don’t Skip Resting
Preserving Juiciness: Resting allows the internal temperature to equalize and juices to redistribute throughout the meat, preventing them from escaping when you slice. This ensures every bite is succulent and flavorful, a hallmark of perfectly cooked duck.
Temperature is Key: Hitting Medium-Rare (or your preference)
Precision with a Thermometer: For medium-rare (130-135°F / 54-57°C), remove the duck a few degrees early as it will continue to cook as it rests. A meat thermometer is your best friend here, guaranteeing ideal doneness without guesswork.
Don’t Waste That Liquid Gold (Duck Fat!)
Versatile Culinary Treasure: Collect and store the rendered duck fat! It’s fantastic for roasting potatoes, searing vegetables, or even making flaky pie crusts. It adds incredible, savory flavor to anything it touches, making it a valuable kitchen staple.
Solving Common Pan-Seared Orange Glazed Duck Breast Hurdles
Problem: Rubbery Skin or Dry Meat?
Solution: The most common culprits are insufficient scoring, not drying the skin enough, or cooking at too high a heat initially. Ensure your scoring is deep enough to penetrate the fat, pat the skin very dry with paper towels, and always start in a cold pan on medium-low heat to slowly render the fat. For dry meat, double-check your internal temperature and ensure adequate resting time before slicing.
Problem: Glaze Not Thickening?
Solution: Ensure your saucepan is at a steady simmer and give it enough time. The glaze relies on evaporation to thicken, so a rolling boil is not necessary, but consistent simmering is key. If after 7-10 minutes it’s still too thin, you can add a tiny cornstarch slurry (1/2 tsp cornstarch mixed with 1 tsp cold water) to thicken it quickly, stirring constantly until it reaches the desired syrupy consistency.
Serving & Enjoying Your Pan-Seared Orange Glazed Duck Breast
Elegant Serving Suggestions Beyond Mixed Greens
While mixed greens offer a beautiful contrast, consider serving your Pan-Seared Orange Glazed Duck Breast with creamy polenta, roasted root vegetables (perfect for using that saved duck fat!), a wild rice pilaf, or a simple potato gratin. The rich duck pairs wonderfully with earthy or slightly sweet sides, creating a truly balanced meal.
Complementary Dishes
Serve your duck breast with these dishes that bring out its best qualities.
- For a refreshing contrast to the rich duck, consider the Harvest Apple and Walnut Salad, featuring crisp apples and crunchy nuts.
- The sweet and spicy notes of the Hot Honey Jalapeño Cornbread offer a delightful counterpoint to the savory duck.
Storing Leftovers & Reheating Tips
Store any leftover duck breast and orange glaze separately in airtight containers in the refrigerator for up to 3 days. To reheat, gently warm the duck slices in a pan on medium-low heat or in a low oven (around 300°F/150°C) until just warmed through to avoid drying it out. Reheat the glaze gently in a small saucepan, adding a splash of water if needed.
Make-Ahead Magic: Preparing the Glaze in Advance
The orange glaze can be made up to 2-3 days in advance and stored in the refrigerator. Gently reheat it on the stovetop over low heat, adding a splash of water or orange juice if it’s too thick, just before serving. This simple step makes meal prep even smoother for entertaining or busy weeknights.
Your Top Questions About Pan-Seared Orange Glazed Duck Breast Answered
Can I use different types of duck breast?
While this recipe is written for Pekin duck breast, you can adapt it for Moulard duck breast, which is typically larger and meatier. You might need to adjust cooking times slightly, particularly for the searing and oven finishing steps, to achieve your desired internal temperature and the perfect crispy skin.
What if I don’t have an oven-safe skillet?
No problem at all! After searing the skin side to perfection and the meat side for 3-5 minutes on the stovetop, you can simply transfer the duck breast to a baking sheet to finish in a preheated 400°F (200°C) oven for 5-7 minutes. This achieves the same goal of cooking the meat through evenly.
Can I make the orange glaze ahead of time?
Absolutely! The orange glaze can be prepared up to 2-3 days in advance and stored in an airtight container in the refrigerator. Gently reheat it on the stovetop over low heat just before serving. If it has thickened too much in the fridge, you can add a small splash of orange juice or water to reach the desired pouring consistency.
Are there other citrus glaze variations?
Certainly! While orange is a classic pairing for Pan-Seared Orange Glazed Duck Breast, you can experiment with other citrus fruits. A lemon-thyme glaze, a grapefruit-rosemary reduction, or even a vibrant lime-ginger glaze would offer exciting variations. Just remember to adjust the honey or maple syrup to balance the tartness of your chosen citrus.
For a similarly bright citrus note, consider these sticky orange lime chicken thighs.
Ready to Create Your Own Pan-Seared Orange Glazed Duck Breast Masterpiece?
With these techniques and expert tips, you’re now fully equipped to conquer any hesitation and create a truly spectacular Pan-Seared Orange Glazed Duck Breast. Impress your guests, elevate your weeknight dinner, and savor the rich, juicy meat paired with that incredibly crispy, flavorful skin and vibrant, sweet-tart glaze. We’d love to see your culinary creations!
Don’t forget to share your experience in the comments below, or explore more of our pan-seared dishes and gourmet recipes for your next cooking adventure!
Duck Breast
Course: Main CourseCuisine: AmericanDifficulty: medium1
servings15
minutes20
minutes550
kcal45
minutesUnlock the secret to perfect crispy-skinned, juicy pan-seared duck breast with this foolproof recipe. A simple technique ensures restaurant-quality results every time, drizzled with a sweet and tangy orange glaze. Impress your guests with this elegant and delicious main course.
Ingredients
1 duck breast, about 10-12 ounces
1 large orange, zest and juice separated, plus extra slices for garnish
1 tablespoon honey or maple syrup
1 teaspoon apple cider vinegar
1/2 teaspoon salt, plus more to taste
1/4 teaspoon black pepper, plus more to taste
2 cups mixed greens
Directions
- Prepare the duck breast: Use a sharp knife to score the skin of the duck breast in a crosshatch pattern, making sure not to cut into the meat. Pat the duck breast very dry with paper towels on both sides. Season generously with salt and pepper on both the skin and meat sides.
- Start in a cold pan: Place the duck breast, skin side down, into a cold, dry oven-safe skillet (cast iron or stainless steel works best). Do not add any oil, the duck will render its own fat.
- Slow render the fat: Turn the heat to medium-low. Cook the duck breast, skin side down, for 10-15 minutes. This slow cooking allows the fat to gradually render out, making the skin incredibly crispy. Periodically pour off any rendered fat into a heatproof bowl (save it for amazing roasted potatoes!).
- Increase heat and crisp: Once most of the fat has rendered and the skin is deeply golden brown and perfectly crisp, increase the heat to medium-high. Continue cooking skin side down for another 2-3 minutes to ensure maximum crispness.
- Sear the meat side: Flip the duck breast to the meat side. Cook for 3-5 minutes, depending on desired doneness (for medium-rare, aim for an internal temperature of 130 degrees Fahrenheit). If your skillet is oven-safe, you can transfer it to a preheated 400 degree Fahrenheit oven for 5-7 minutes instead of searing on the stovetop.
- Rest the duck: Transfer the cooked duck breast to a cutting board and let it rest for at least 5-10 minutes before slicing. This is crucial for keeping the meat tender and juicy. While the duck rests, make the glaze.
- Make the orange glaze: In a small saucepan, combine the orange juice, orange zest, honey or maple syrup, and apple cider vinegar. Bring to a simmer over medium heat and cook for 5-7 minutes, stirring occasionally, until the sauce has thickened slightly to a syrupy consistency.
- Slice and serve: Slice the rested duck breast into thick pieces against the grain. Arrange on plates with mixed greens and orange slices. Drizzle generously with the warm orange glaze and serve immediately.
Notes
- Save rendered duck fat for roasting potatoes or other cooking.