I used to face the ultimate baking heartbreak: crafting what I hoped would be a perfect batch of chocolate cookies, only to find them dry and crumbling. Through countless attempts, I finally unlocked the secret to consistently soft, chewy, and beautifully crinkled Peppermint Chocolate Crinkle Cookies. This recipe ensures every bite delivers that delightful moistness and festive mint chocolate flavor, making those dry cookie disappointments a distant memory.
You’ll find these cookies incredibly easy to master, transforming simple ingredients into a show-stopping treat perfect for any holiday gathering or cozy night in.
For a similar decadence, explore salted molten lava brownie cookies.
The Secret to Soft, Chewy, and Perfectly Crinkled Cookies
Achieving that ideal balance of a tender interior and a crisp, crinkled exterior requires more than just ingredients; it demands a precise technique. Our method focuses on key steps that guarantee a superior cookie experience every time.
For those who adore this rich flavor, explore the red velvet cheesecake stuffed cookies which offer a delightful treat.
Why Our Recipe Stands Out
This recipe for Peppermint Chocolate Crinkle Cookies is specifically designed to eliminate dryness, ensuring a soft and chewy texture from the first bite to the last. We emphasize ingredient quality and crucial timing to achieve this consistent moistness.
It’s an easy cookie recipe that consistently delivers bakery-quality results, making you confident in your holiday baking.
The Magic of the Crinkle: A Visual Delight
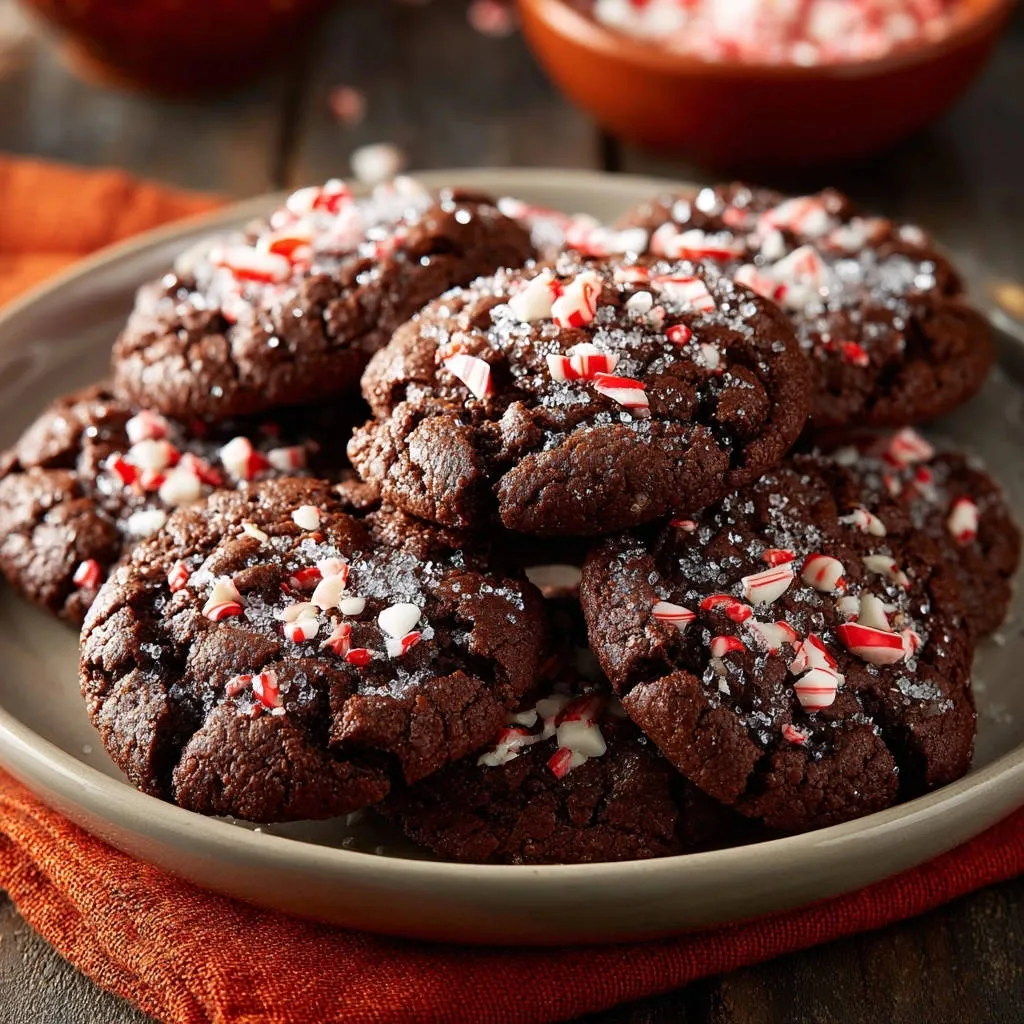
The distinctive crinkled top is a hallmark of these festive cookies, created by a generous coating of granulated sugar. As the cookies bake, the dough expands, causing the sugar to crack and form those appealing fissures.
This visual appeal, coupled with the contrast of the dark chocolate against the white sugar and red candy cane flecks, makes them truly irresistible.
Gathering Your Delicious Arsenal: Essential Ingredients for Success
Every great cookie starts with quality ingredients. Here’s a closer look at what you’ll need and why each element is crucial for our Peppermint Chocolate Crinkle Cookies.
The Dry Foundation: Flour, Cocoa, & Leavening
All-purpose flour provides the essential structure for your cookies, while unsweetened cocoa powder delivers that deep, rich chocolate flavor without added sweetness.
Baking soda acts as a leavening agent, helping the cookies rise and achieve their desired texture. A touch of salt balances the sweetness and enhances the overall flavor profile.
Sweetness & Structure: Butter, Sugars, & Eggs
Softened unsalted butter is vital for proper creaming, incorporating air and contributing to a tender crumb. The combination of granulated sugar and light brown sugar is key to chewiness; brown sugar adds moisture and a subtle caramel note.
Two large eggs bind the ingredients together, adding richness and moisture, crucial for preventing dry, tough cookies.
The Peppermint Kick: Extracts & Candy Canes
Vanilla extract enhances the chocolate flavor, while peppermint extract introduces the signature cool, minty notes, making these the ultimate mint chocolate flavor cookies.
Finally, crushed candy canes provide both a lovely texture and a burst of vibrant peppermint, essential for a truly festive cookie recipe.
Equipping Your Kitchen: Must-Have Tools for Baking
Having the right tools simplifies the baking process and helps ensure consistent results. These essentials will make your journey to perfect Peppermint Chocolate Crinkle Cookies smooth and enjoyable.
Mixing Essentials
Medium and Large Bowls: You’ll need separate bowls for dry and wet ingredients to ensure thorough mixing.
Whisk: Essential for aerating and combining your dry ingredients evenly.
Electric Mixer: A stand mixer or hand mixer is indispensable for creaming butter and sugars, creating that light and fluffy base.
Baking & Cooling Gear
Parchment Paper: Lining your baking sheets prevents sticking and makes cleanup a breeze, ensuring your cracked top cookies lift off perfectly.
Baking Sheets: Flat baking sheets allow for even heat distribution, critical for consistent cookie baking.
Wire Rack: Necessary for cooling cookies completely, preventing them from becoming soggy on the bottom.
Cookie Scoop: Using a 1-inch cookie scoop ensures uniform size, leading to even baking and beautiful presentation for your homemade cookies.
Your Journey to Perfect Peppermint Chocolate Crinkle Cookies: The Method
Let’s walk through each step, integrating expert tips to guarantee your Peppermint Chocolate Crinkle Cookies are exceptional, never dry, and always perfectly crinkled.
Prep & Dry Mix
Start by preheating your oven to 350°F (175°C) and lining two baking sheets with parchment paper; this preparation ensures a smooth baking process. In a medium bowl, thoroughly whisk together the all-purpose flour, unsweetened cocoa powder, baking soda, and salt.
Whisking these dry ingredients well disperses the leavening and salt, preventing pockets of unmixed ingredients in your final cookie.
Creaming for Texture: The Fluffy Secret
In a large bowl, using an electric mixer, cream together the softened unsalted butter, 1 1/2 cups granulated sugar, and light brown sugar until the mixture is light and fluffy.
This process takes about 2 to 3 minutes and is crucial for incorporating air, which contributes to the cookies’ soft and tender texture. It’s the foundation for a truly chewy chocolate cookie.
Wet Ingredients & Careful Combining
Beat in the eggs one at a time, ensuring each egg is fully incorporated before adding the next. Stir in the vanilla extract and peppermint extract until they are well combined throughout the mixture.
Next, gradually add the dry ingredient mixture to the wet ingredients. Mix on low speed just until combined; be careful not to overmix the dough, as excess mixing develops gluten too much, leading to tough, dry cookies.
Fold in the Festive Crush
Gently stir in half of the crushed candy canes into the dough. This step adds a delightful crunch and a vibrant burst of peppermint flavor directly into the cookie base.
Distribute them evenly without overworking the dough to maintain its delicate structure.
The Crucial Chill: Why We Do It
For optimal results and to help prevent excessive spreading, chill the cookie dough in the refrigerator for at least 30 minutes. This vital step solidifies the fats in the butter, preventing your holiday baking from spreading too thin.
Chilling also allows the flavors to meld and contributes significantly to a chewier cookie texture, a hallmark of excellent crinkle cookies.
The Crinkle Coating: Sugar Rolling Technique
Place the remaining 1/2 cup of granulated sugar in a shallow dish. Scoop the chilled dough into 1-inch balls, ensuring uniform size for even baking.
Roll each dough ball thoroughly in the granulated sugar until it is completely coated. This generous layer of sugar not only creates the beautiful crinkled effect as they bake but also helps to lock in moisture, ensuring a soft interior.
Baking for Perfection: The “Never Dry” Rule
Place the sugar-coated dough balls about 2 inches apart on your prepared baking sheets. Bake for 10 to 12 minutes.
The absolute key to ensuring these Peppermint Chocolate Crinkle Cookies are never dry and always chewy is to remove them from the oven when the edges are set but the centers still look slightly soft and puffy. They will continue to set as they cool, retaining their moist interior.
Post-Bake Finishing & Cooling
Immediately after removing the cookies from the oven, gently sprinkle the remaining crushed candy canes over the warm cookies. The residual warmth will help them adhere, adding a fresh burst of mint and a vibrant visual.
Allow the cookies to cool on the baking sheets for 5 minutes before carefully transferring them to a wire rack to cool completely. This crucial resting period allows them to firm up without drying out, maintaining their perfect chewy texture.
Beyond the Recipe: Master Your Crinkle Cookies with These Secrets
Elevate your holiday baking with these expert tips and variations, transforming your Peppermint Chocolate Crinkle Cookies into truly unforgettable treats.
Achieving the Perfect Crinkle
Double Sugar Roll: For an extra pronounced crinkle, try rolling the dough balls first in granulated sugar, then again in powdered sugar. The powdered sugar creates a beautiful, stark contrast as the cracks appear.
Cold Dough is Key: Ensure your dough is properly chilled. Cold dough spreads slower, giving the sugar coating more time to crack effectively during baking.
Preventing Dry, Tough Cookies
Mind the Mixer: Overmixing develops gluten, leading to tough cookies. Mix only until ingredients are just combined, especially after adding flour.
Watch the Clock: Pay close attention to the baking time (10-12 minutes) and visual cues. The “centers slightly soft” rule is your best friend for moist, chewy chocolate cookies.
Cool Correctly: The initial 5 minutes on the hot baking sheet is critical. It allows the cookies to set without overbaking, preserving their soft centers.
Flavor Enhancements & Variations
White Chocolate Swirl: Stir in 1/2 cup of white chocolate chips with the candy canes for a creamier texture and contrasting sweetness.
Citrus Twist: A quarter teaspoon of orange extract can add a bright, unexpected note that complements both chocolate and peppermint wonderfully.
Espresso Boost: Adding 1 teaspoon of instant espresso powder to the dry ingredients will deepen the chocolate flavor without making it taste like coffee.
Ingredient Substitutions for Dietary Needs
Gluten-Free: Use a 1:1 gluten-free baking flour blend with xanthan gum. You might need to add an extra tablespoon or two of liquid if the dough seems too dry.
Dairy-Free: Substitute unsalted butter with a high-quality dairy-free butter alternative. Ensure it’s softened to the same consistency as regular butter for creaming.
Egg Substitute: For egg-free options, a “flax egg” (1 tablespoon ground flaxseed meal mixed with 3 tablespoons water, rested for 5 minutes per egg) can work, though it may slightly alter the cookie’s texture and chewiness.
Troubleshooting Your Bake: Solving Crinkle Cookie Challenges
Even expert bakers encounter hiccups. Here’s how to address common issues to ensure your Peppermint Chocolate Crinkle Cookies turn out perfectly every time.
My Cookies Are Spreading Too Much!
Excessive spreading often indicates the dough wasn’t cold enough; always chill for at least 30 minutes, or even longer if your kitchen is warm. Ensure your butter wasn’t too soft when creaming, as overly warm butter can lead to flatter cookies.
Accurate flour measurement is also important; too little flour means a looser dough. Using a kitchen scale for flour offers the most precise results.
Why Aren’t My Cookies Crinkling?
A lack of crinkles usually stems from insufficient sugar coating. Make sure each dough ball is heavily and completely coated in granulated sugar. The sugar is what creates those signature cracks.
Dough that’s too wet or an oven temperature that’s too low might also hinder crinkle formation. Ensure your oven is accurately calibrated using an oven thermometer.
Cookies Turned Out Dry and Hard
The most common culprits for dry cookies are overmixing the dough and overbaking. Mix the flour in just until combined, then stop.
Adhere strictly to the baking instructions to remove cookies when centers are slightly soft. Also, ensure you follow the cooling steps, letting them firm up on the sheet before transferring, to maintain that crucial moisture.
Maximizing Enjoyment: Make Ahead, Storage, & Serving
These Peppermint Chocolate Crinkle Cookies are fantastic fresh, but with proper planning and storage, you can enjoy them for days.
Can You Make the Dough Ahead?
Absolutely! You can prepare the cookie dough up to 3 days in advance and store it tightly wrapped in the refrigerator. This allows flavors to deepen even further.
For longer storage, scoop the dough balls, roll them in sugar, then freeze them on a baking sheet until solid before transferring to an airtight container for up to 2 months. Bake from frozen, adding a minute or two to the baking time.
Keeping Your Crinkle Cookies Fresh
Store baked Peppermint Chocolate Crinkle Cookies in an airtight container at room temperature for up to 5 days. To maintain their signature chewiness, you can place a slice of bread in the container; the cookies will absorb moisture from the bread.
For truly amazing chewy spiced molasses cookies, similar storage techniques also work wonders to lock in freshness.
Creative Ways to Serve
These festive cookies are perfect on their own with a mug of creamy copycat iced coffee or hot cocoa. Arrange them on a holiday dessert platter alongside other treats like classic shortbread fingers for an impressive spread.
They also make wonderful edible gifts, beautifully packaged for friends and family during the holiday season.
More Sweet Treats to Try
Since you’re enjoying these peppermint chocolate crinkle cookies, explore more delightful chocolate and baked goods.
- For a breakfast treat with campfire flavors, consider making these S’mores Pancakes, offering a fun twist on a classic.
- If you love the idea of a freshly baked treat, these Chocolate Sprinkle Donuts provide a satisfying cocoa flavor without the grease.
Your Peppermint Chocolate Crinkle Cookies Questions Answered
Here are answers to some common questions that arise when baking these delightful mint chocolate cookies.
Can I use natural cocoa powder instead of unsweetened?
While natural cocoa powder can be used, it’s generally less acidic than unsweetened Dutch-process cocoa. This might slightly alter the color and the way the baking soda reacts, potentially resulting in a slightly different texture or less rise. For the intended deep color and texture, unsweetened (Dutch-process) cocoa is preferred.
What if I don’t have peppermint extract?
If peppermint extract is unavailable, you could substitute it with a smaller amount of pure mint extract, though the flavor profile will be slightly different (more like spearmint). Alternatively, you can omit it and rely solely on the crushed candy canes for mint flavor, or add a touch of almond extract for a different dimension.
How can I make these gluten-free?
To make these gluten-free, substitute the all-purpose flour with a high-quality 1:1 gluten-free baking flour blend that contains xanthan gum. No other major adjustments should be needed, but always check the specific blend’s recommendations as some might require minor liquid adjustments.
Can I freeze baked Peppermint Chocolate Crinkle Cookies?
Yes, you can absolutely freeze baked Peppermint Chocolate Crinkle Cookies. Once completely cooled, place them in a single layer on a baking sheet and freeze until solid. Then transfer them to an airtight, freezer-safe container or bag for up to 3 months. Thaw at room temperature for an hour before serving for best results.
Ready to Bake? Share Your Peppermint Chocolate Crinkle Cookies Joy!
Now that you’re armed with all the secrets, it’s time to create your own batch of perfectly soft, chewy, and beautifully crinkled Peppermint Chocolate Crinkle Cookies. This recipe promises a truly delightful experience for your taste buds and a festive treat for any occasion.
Don’t hesitate to dive into this easy cookie recipe and share the minty chocolate joy with everyone you love. Happy baking!
Peppermint Chocolate Crinkle Cookies
Course: DessertCuisine: AmericanDifficulty: medium4
about 3 dozen cookies30
minutes10
minutes350
kcal60
minutesDiscover the secret to perfectly soft and chewy peppermint chocolate crinkle cookies. With a beautiful crinkled top and festive candy cane crunch, these cookies are easy to make moist and delightful every time.
Ingredients
1 3/4 cups all-purpose flour
3/4 cup unsweetened cocoa powder
1 teaspoon baking soda
1/2 teaspoon salt
1 cup (2 sticks) unsalted butter, softened
1 1/2 cups granulated sugar
1/2 cup packed light brown sugar
2 large eggs
1 teaspoon vanilla extract
1/2 teaspoon peppermint extract
1 cup crushed candy canes, divided
1/2 cup granulated sugar, for rolling
Directions
- Preheat your oven to 350F (175C). Line two baking sheets with parchment paper. In a medium bowl, whisk together the flour, cocoa powder, baking soda, and salt. Set this aside.
- In a large bowl, using an electric mixer, cream together the softened butter, 1 1/2 cups granulated sugar, and light brown sugar until the mixture is light and fluffy. This takes about 2 to 3 minutes and helps incorporate air for a better texture.
- Beat in the eggs one at a time, ensuring each egg is fully incorporated before adding the next. Stir in the vanilla extract and peppermint extract until well combined.
- Gradually add the dry ingredient mixture to the wet ingredients. Mix on low speed just until combined. Be careful not to overmix the dough, as excess mixing can develop gluten too much and lead to tough, dry cookies.
- Stir in half of the crushed candy canes into the dough.
- For optimal results and to help prevent excessive spreading, chill the cookie dough in the refrigerator for at least 30 minutes. This step helps the flavors meld and contributes to a chewier cookie by solidifying the fats.
- Place the remaining 1/2 cup of granulated sugar in a shallow dish. Scoop the chilled dough into 1-inch balls. Roll each dough ball thoroughly in the granulated sugar until it is completely coated. This layer of sugar not only creates the beautiful crinkled effect but also helps to lock in moisture during baking.
- Place the sugar-coated dough balls about 2 inches apart on your prepared baking sheets. Bake for 10 to 12 minutes. The absolute key to ensuring these cookies are never dry and always chewy is to remove them from the oven when the edges are set but the centers still look slightly soft and puffy. They will continue to set as they cool, retaining their moist interior.
- Immediately after removing the cookies from the oven, gently sprinkle the remaining crushed candy canes over the warm cookies. The warmth will help them adhere.
- Allow the cookies to cool on the baking sheets for 5 minutes before carefully transferring them to a wire rack to cool completely. This crucial step allows them to firm up without drying out, maintaining their perfect chewy texture.
Notes
- Chilling dough prevents spreading and enhances flavor. Do not overmix for tender cookies.