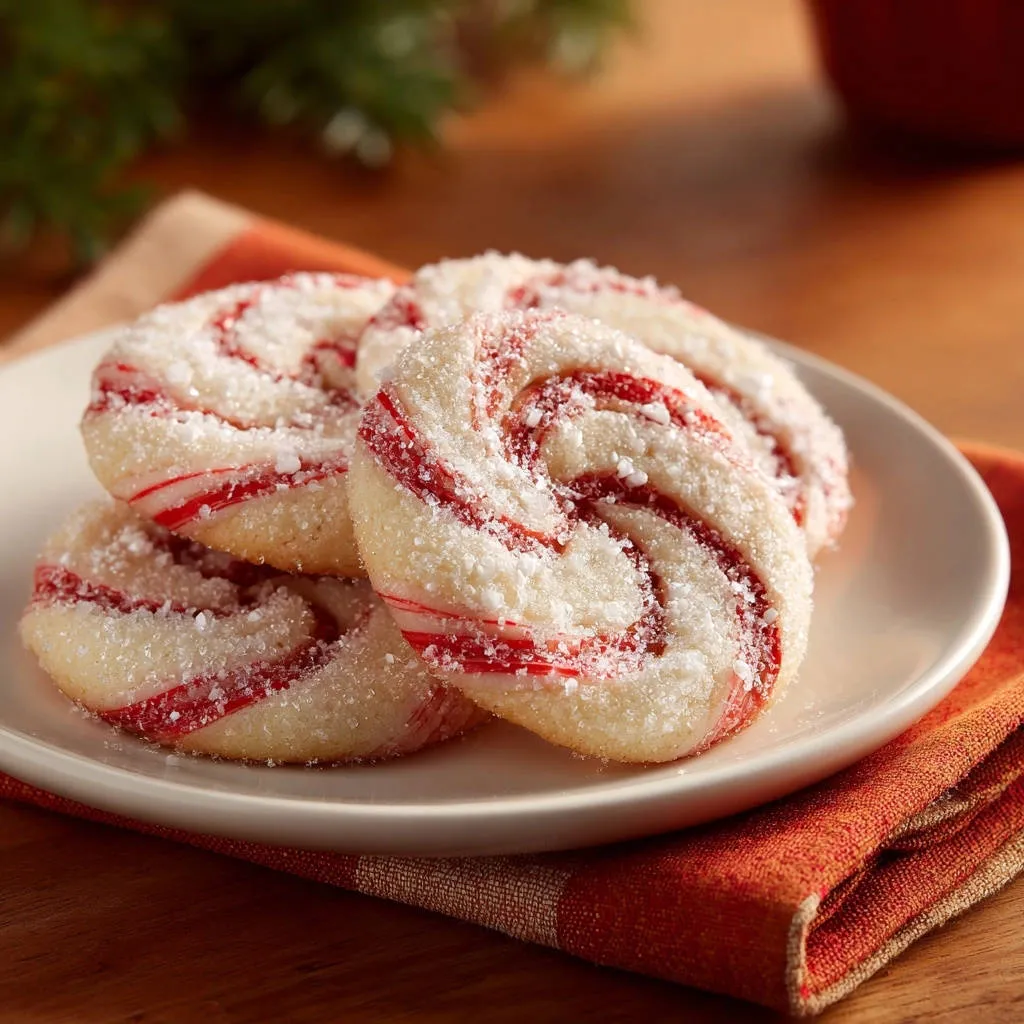
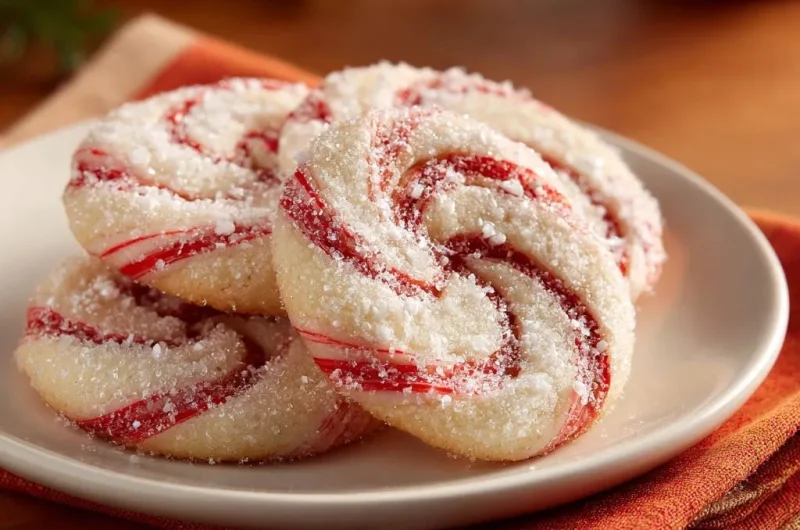
There’s nothing quite like the festive magic of perfectly crafted Peppermint Swirl Cookies, yet achieving those crisp, vibrant spirals can often feel like a true baking enigma.
I know the frustration of swirls turning muddy or losing their definition during handling.
But through much experimentation, I’ve discovered the precise techniques to ensure your Peppermint Swirl Cookies emerge bakery-perfect, with distinct, breathtaking patterns every single time.
Why This Peppermint Swirl Cookies Recipe is Your Holiday Go-To
This recipe isn’t just about delicious holiday cookies; it’s about empowerment in the kitchen.
It provides clear, actionable steps that demystify the art of creating stunning, consistent swirls.
The Secret to Consistently Defined, Vibrant Swirls
The core of this recipe lies in its strategic double-chilling method.
This critical technique prevents color bleeding and ensures your dough is perfectly firm for shaping and slicing, guaranteeing sharp, vibrant peppermint swirls that truly pop.
Effortless Elegance: Impress Without the Stress
Forget the anxiety of complex cookie designs; this guide breaks down the process into manageable, logical stages.
You’ll create impressive, bakery-quality Peppermint Swirl Cookies with confidence, making them ideal for holiday gatherings or thoughtful homemade gifts.
Gather Your Gear: Essential Tools for Swirl Success
Having the right tools ready makes the baking process smooth and enjoyable.
These essentials will help you achieve precision and perfection in your Peppermint Swirl Cookies.
Mixing & Prepping Essentials
An electric mixer, either stand or hand-held, is crucial for creaming butter and sugar to the ideal light and fluffy consistency.
You’ll need various mixing bowls for both wet and dry ingredients, along with standard measuring cups and spoons for accurate proportions.
Plastic wrap is indispensable for chilling the dough, ensuring it remains pliable and protected.
Baking & Finishing Touches
Reliable baking sheets, lined with parchment paper, prevent sticking and promote even baking.
A sturdy rolling pin is essential for achieving uniform dough thickness, which is key to consistent swirls.
A very sharp, non-serrated knife will give you clean, defined slices of your chilled dough log.
Finally, a wire rack is necessary for cooling your festive cookies completely, preventing sogginess.
Unpacking the Flavors: Key Ingredients for Peppermint Perfection
Each ingredient in these Peppermint Swirl Cookies plays a vital role in their taste and texture.
Understanding their purpose helps you achieve the perfect festive treat.
Flour & Leavening: The Foundation
All-purpose flour provides the necessary structure for the cookies, ensuring they hold their shape beautifully.
Baking powder acts as the leavening agent, giving the cookies a delicate lift without making them cakey.
Butter & Sugar: The Heart of Sweetness
Unsalted butter, softened to room temperature, is paramount for a tender crumb and rich flavor.
Creaming it properly with granulated sugar creates air pockets, contributing to a light and fluffy cookie texture.
The Iconic Peppermint & Vanilla Blend
High-quality peppermint extract delivers that signature cool, refreshing mint flavor that defines these holiday cookies.
Vanilla extract balances the intensity of the peppermint, adding a warm, aromatic depth to the overall profile.
Bringing the Color: Red Gel Food Coloring
Red gel food coloring is superior to liquid coloring because it provides vibrant, concentrated color without adding excess moisture to the dough.
This ensures your red swirls are bright and distinct, perfectly contrasting the white dough.
The Festive Finishing Touch: Coarse Sugar or Crushed Peppermint
A coating of coarse sugar adds a delightful sparkle and a pleasant crunch to the cookie’s exterior.
Alternatively, crushed peppermint candies provide an extra burst of minty flavor and a beautiful, classic holiday look.
For another delightful fruit option, consider the glazed raspberry thumbprint cookies.
Your Step-by-Step Journey to Perfect Peppermint Swirl Cookies
Follow these detailed steps carefully, paying close attention to the chilling times, to create stunning Peppermint Swirl Cookies.
- Step 1: Prep Dry Ingredients
In a medium bowl, thoroughly whisk together the all-purpose flour, baking powder, and salt.
This essential step ensures these dry leavening agents and seasonings are evenly distributed, preventing pockets of unmixed ingredients and promoting a uniform cookie texture.
- Step 2: Cream Butter & Sugar
In a large bowl, using an electric mixer, cream together the softened unsalted butter and granulated sugar until the mixture is light and fluffy.
This process incorporates air, which is crucial for achieving a tender, melt-in-your-mouth cookie texture.
Next, beat in the large egg until fully incorporated, followed by the vanilla extract and peppermint extract, mixing just until everything is well combined.
- Step 3: Combine Wet & Dry Mixtures
Gradually add the prepped dry ingredients to the wet ingredients in the large bowl, mixing on low speed until just combined.
Stop mixing as soon as a soft, cohesive dough forms; overmixing develops gluten, which can lead to tough, less tender cookies.
- Step 4: Divide and Color the Dough
Carefully divide the freshly made dough into two equal halves.
Leave one half plain, as this will be your white swirl layer, and set it aside.
To the second half, add red gel food coloring, mixing thoroughly until the color is uniform and vibrant.
- Step 5: The First Crucial Chill (The Key to Sharp Swirls!)
This is a fundamental step for achieving beautifully defined swirls: wrap each ball of dough separately in plastic wrap and chill them in the refrigerator for at least 30 minutes.
Chilling firms the dough, making it significantly less sticky and much easier to handle without the colors bleeding into each other during rolling.
- Step 6: Roll Out the Dough Rectangles
Once chilled, lightly flour your work surface to prevent sticking.
Roll out the plain dough into a precise 10×12 inch rectangle, aiming for an even thickness of about 1/4 inch across the entire sheet.
Repeat this process with the red dough, ensuring it is rolled to the exact same size and thickness as the plain dough.
- Step 7: Layer the Doughs Together
Carefully lift and lay the red dough rectangle directly on top of the plain dough rectangle, aligning the edges perfectly.
Gently press the two layers together with your hands or a rolling pin to ensure they adhere, creating a unified two-tone sheet.
- Step 8: Form the Tight Dough Log
Starting from one of the long sides, carefully begin to roll the layered dough tightly into a log.
As you roll, gently press to eliminate any air pockets, ensuring the log is consistently tight throughout its length to prevent gaps and maintain optimal swirl definition.
- Step 9: The Second Essential Chill (Ensuring Perfect Slices)
This second chill is absolutely crucial for clean, crisp swirls: wrap the formed dough log tightly in plastic wrap and return it to the refrigerator for at least 2 hours, or even longer until it is very firm.
This prolonged chill prevents the dough from squishing when sliced, allowing you to achieve perfectly intact, well-defined peppermint swirls.
- Step 10: Prepare for Baking
When you’re ready to bake, preheat your oven to 375 degrees F (190 degrees C).
Line your baking sheets with parchment paper, which ensures the cookies don’t stick and cook evenly.
- Step 11: Coat the Dough Log (Optional)
Remove the firm dough log from the refrigerator.
For an extra festive touch and texture, you can lightly brush the log with water or a whisked egg white, then roll it evenly in coarse sugar or finely crushed peppermint candies to coat the exterior.
- Step 12: Slice the Cookies
Using a very sharp knife, slice the chilled dough log into uniform 1/4-inch thick rounds.
Carefully place the sliced cookies about 1 inch apart on the prepared baking sheets, giving them enough room to bake evenly.
- Step 13: Bake to Golden Perfection
Bake the cookies for 8 to 10 minutes, or until the edges appear lightly golden.
It’s vital not to overbake these peppermint swirl cookies, as they will continue to firm up as they cool, retaining their tender texture.
- Step 14: Cool and Enjoy!
Allow the freshly baked cookies to cool on the baking sheets for a few minutes immediately after removing them from the oven.
Then, carefully transfer them to a wire rack to cool completely, ensuring a firm and crisp finish.
The Double-Chill Advantage: Achieving Impeccable Peppermint Swirls
The success of bakery-style Peppermint Swirl Cookies hinges on two distinct chilling phases, each serving a critical purpose.
These steps are non-negotiable for achieving perfect results.
First Chill: Why Dough Firmness Matters for Rolling
The initial 30-minute chill makes the dough significantly less sticky and more manageable.
This firmness is crucial for rolling out uniform rectangles and layering them precisely without the colors bleeding together, setting the stage for beautiful spirals.
Second Chill: Locking in the Swirl for Clean Slices
The longer, 2-hour chill transforms the entire dough log into a solid, firm cylinder.
This rigidity is absolutely essential for slicing; it prevents the dough from squishing under the knife, ensuring each cookie slice boasts perfectly round, distinct, and impeccably defined peppermint swirls.
Chef’s Corner: Pro Tips for Peppermint Swirl Cookie Success
Elevate your Peppermint Swirl Cookies from good to extraordinary with these expert tips.
Temperature Matters: Softened Butter, Chilled Dough. Ensure your butter is truly softened for proper creaming, which incorporates essential air for tender cookies.
Equally important are the two chilling stages; firm dough is the secret to clean swirls and easy handling.
Don’t Overmix the Dough! Once the flour is added, mix only until the ingredients are just combined and a soft dough forms.
Overmixing develops gluten, which can result in tough, dense cookies rather than light and tender ones.
The Art of Rolling: Even Thickness is Key. Take your time rolling out both doughs to consistent 1/4-inch thickness.
Uniformity ensures even baking and means every slice from your log will have a beautifully proportioned swirl.
Sharp Knife for Clean Cuts. Use a very sharp, non-serrated chef’s knife to slice the chilled log.
A clean, decisive cut prevents the dough from dragging or squishing, giving you perfectly round cookies with crisp, distinct peppermint swirl edges.
Perfecting the Peppermint Coating. If coating, brush the log lightly with water or egg white just before rolling in coarse sugar or crushed peppermints.
This creates a sticky surface that helps the coating adhere beautifully, adding texture and sparkle.
Watch the Bake Time Closely. These cookies bake quickly! Look for lightly golden edges as your cue that they are done.
Overbaking will result in dry, hard cookies, while pulling them slightly early ensures a soft, tender center, as they continue to set on the hot baking sheet.
Solving Common Woes: Peppermint Swirl Cookies Troubleshooting Guide
Even experienced bakers encounter challenges, but with these solutions, your Peppermint Swirl Cookies will be flawless.
My Swirls Look Muddy or Blurred
This usually happens if the dough wasn’t sufficiently chilled before rolling and layering. Ensure both dough halves are firm from their first chill.
Also, avoid overworking the dough, which can warm it up and cause colors to bleed; work quickly and efficiently.
The Dough is Too Sticky to Roll
Your dough likely needs more chilling time to firm up; return it to the refrigerator for another 15-30 minutes.
Ensure your work surface is lightly floured, but don’t add too much extra flour, as this can make the cookies tough.
Cookies Are Spreading Too Much
This can occur if your butter was too warm when creamed, or if the dough log wasn’t chilled long enough for its second rest.
Always measure accurately, and make sure your oven temperature is precise – a cooler oven can cause excessive spreading.
My Cookies Are Too Hard or Dry
The most common culprit here is overbaking. Keep a close eye on your cookies during the last few minutes in the oven.
They should be only lightly golden at the edges; they will firm up considerably as they cool on the wire rack.
Enjoying & Storing Your Peppermint Swirl Cookies Masterpiece
Once cooled, your beautiful Peppermint Swirl Cookies are ready to be savored.
Serving Suggestions: Perfect Pairings
These festive treats are heavenly alongside a steaming mug of hot cocoa or your favorite coffee.
Arrange them on a holiday platter with other delightful cookies, such as these classic shortbread fingers, for a truly impressive spread.
Storing for Optimal Freshness
Store your baked Peppermint Swirl Cookies in an airtight container at room temperature for up to 5-7 days.
For more ideas on keeping baked goods fresh, explore these glazed orange creamsicle cookies.
To maintain their crispness and fresh flavor, you can place a slice of bread in the container; it helps absorb excess moisture.
Can I Make These Ahead? Freezing Options
Yes, these cookies are excellent for making ahead!
You can freeze the raw, unsliced dough log, tightly wrapped in plastic and then foil, for up to 2-3 months.
Thaw slightly in the refrigerator before slicing and baking as usual, or bake directly from frozen, adding a minute or two to the bake time.
Baked cookies can also be frozen for up to 1 month; thaw at room temperature before serving.
Your Top Peppermint Swirl Cookies Questions Answered
Here are some frequently asked questions to help you master these delightful holiday cookies.
Can I Use Different Flavor Extracts?
Absolutely! While peppermint is classic, you can experiment with other holiday flavors.
Consider almond extract for a delicate nuttiness, or a hint of orange zest for a brighter profile, similar to some of our soft spiced glazed cookies.
Are There Gluten-Free Alternatives for This Recipe?
Yes, you can often adapt this recipe using a 1:1 gluten-free all-purpose flour blend.
Look for blends that contain xanthan gum for best results, as this helps with dough structure, though slight adjustments to liquid or chill time might be needed.
What Kind of Red Food Coloring is Best?
Gel food coloring is highly recommended for its concentrated pigment.
It delivers a vibrant red without thinning the dough’s consistency, which liquid food coloring can do.
How Can I Crush Peppermint Candies Easily?
Place your peppermint candies in a zip-top bag and seal it, removing as much air as possible.
Then, use a rolling pin or the flat side of a meat mallet to gently crush them until they reach your desired consistency, from fine dust to small chunks.
Can I Make Smaller or Larger Cookies?
You can certainly adjust the size! For smaller cookies, roll your dough rectangles to 8×10 inches and slice 1/8-inch thick.
For larger cookies, keep the 10×12 inch rectangle but slice 1/2-inch thick, adjusting baking times accordingly – smaller cookies will bake faster, larger ones slower.
Your Peppermint Swirl Cookies Journey Begins Now!
There’s immense satisfaction in creating something both beautiful and delicious, and these Peppermint Swirl Cookies deliver on both fronts.
With this expert guide, you’re now equipped to bake a batch of stunning, festive cookies that will impress everyone.
Don’t wait, bake up a batch today and spread some holiday cheer that tastes as good as it looks!
More Sweet Treats to Try
These cookies are a delightful treat on their own, but if you’re looking for more baking inspiration, consider these complementary recipes.
- For a different kind of morning delight, explore the secrets to making fluffy diner-style pancakes that are wonderfully pillowy.
- If you loved the texture in these cookies, you might also enjoy the techniques for achieving fluffy golden pancakes for a light and airy breakfast.
Peppermint Swirl Cookies
Course: DessertCuisine: AmericanDifficulty: medium4
about 4 dozen cookies40
minutes10
minutes450
kcal180
minutesAchieve stunning, bakery-quality peppermint swirl cookies every time with this expert recipe. Key chilling steps ensure crisp, vibrant spirals and prevent colors from bleeding or losing definition during preparation. Enjoy a festive and delicious dessert that looks as good as it tastes.
Ingredients
2 and 1/2 cups all-purpose flour
1 teaspoon baking powder
1/2 teaspoon salt
1 cup (2 sticks) unsalted butter, softened
1 cup granulated sugar
1 large egg
1 teaspoon vanilla extract
1 teaspoon peppermint extract
Red gel food coloring
1/4 cup coarse sugar or crushed peppermint candies for coating
Directions
- In a medium bowl, whisk together the flour, baking powder, and salt. Set aside.
- In a large bowl, using an electric mixer, cream together the softened butter and granulated sugar until light and fluffy. Beat in the egg, then the vanilla extract and peppermint extract until well combined.
- Gradually add the dry ingredients to the wet ingredients, mixing on low speed until just combined and a soft dough forms. Do not overmix.
- Divide the dough in half. Leave one half plain. Add red gel food coloring to the second half, mixing until the color is uniform.
- This is the key to sharp swirls: Wrap each ball of dough separately in plastic wrap and chill in the refrigerator for at least 30 minutes. This firms the dough, making it less sticky and easier to handle without the colors bleeding.
- Once chilled, on a lightly floured surface, roll out the plain dough into a 10×12 inch rectangle, about 1/4 inch thick. Repeat with the red dough, rolling it to the same size and thickness.
- Carefully lay the red dough rectangle directly on top of the plain dough rectangle. Gently press them together.
- Starting from one long side, carefully roll the layered dough tightly into a log. Press gently to eliminate air pockets as you roll. Ensure the log is consistently tight to prevent gaps and maintain the swirl definition.
- Crucially, wrap the dough log tightly in plastic wrap and chill again in the refrigerator for at least 2 hours, or until very firm. This second chill prevents the dough from squishing when sliced, keeping your swirls perfectly intact.
- Preheat your oven to 375 degrees F (190 degrees C). Line baking sheets with parchment paper.
- Remove the chilled dough log from the refrigerator. If desired, brush the log lightly with water or a whisked egg white, then roll it in the coarse sugar or crushed peppermint candies to coat evenly.
- Using a sharp knife, slice the log into 1/4 inch thick rounds. Place the sliced cookies about 1 inch apart on the prepared baking sheets.
- Bake for 8 to 10 minutes, or until the edges are lightly golden. Do not overbake.
- Let the cookies cool on the baking sheets for a few minutes before transferring them to a wire rack to cool completely.
Notes
- For the sharpest swirls, ensure your dough is well-chilled before rolling; this makes it easier to handle and prevents colors from bleeding too much. Lightly flour your surface when rolling, but avoid adding too much extra flour to the dough itself, as this can make the cookies tough.