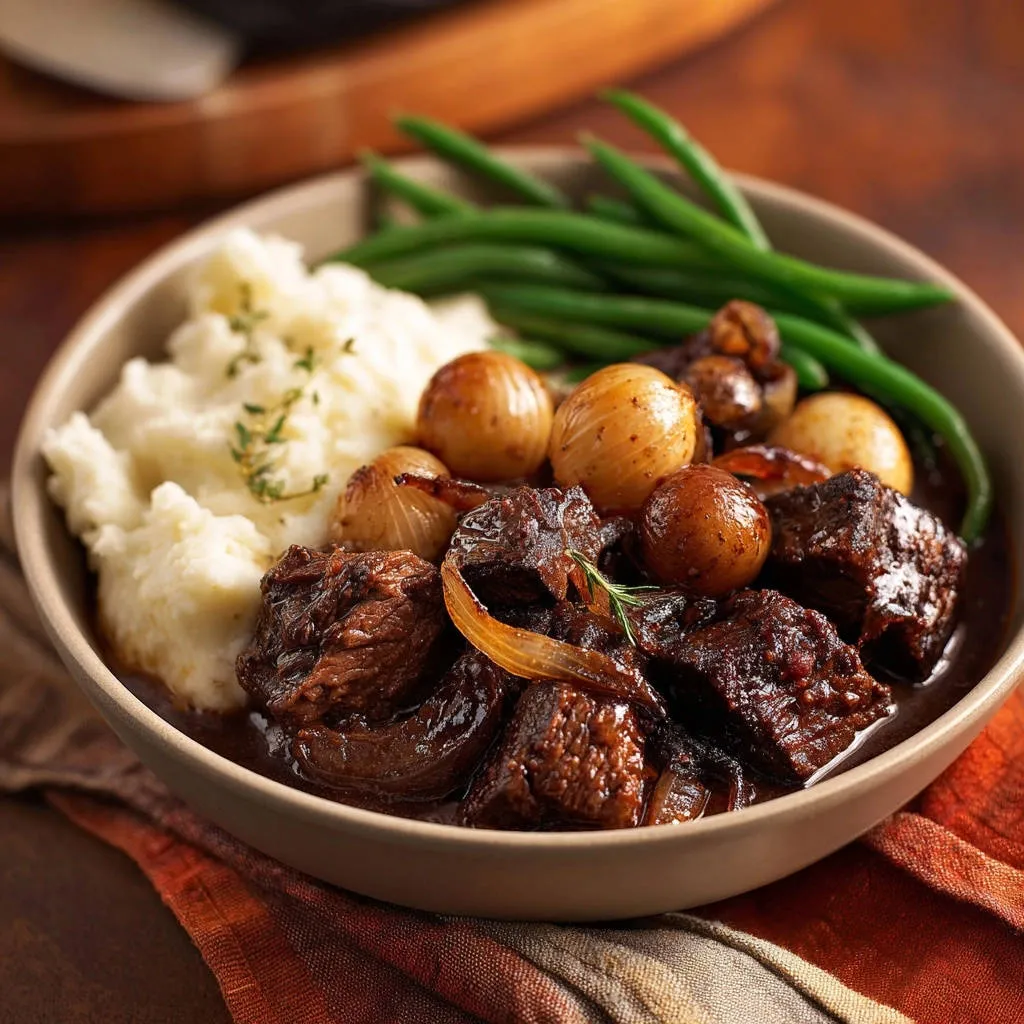
I used to struggle with dry, chewy meat whenever I attempted stew, but I finally cracked the code for truly fork-tender results. This recipe for Rich Braised Beef Stew relies on a non-negotiable double-sear and a precise braising temperature, delivering a depth of flavor that defines cold-weather comfort.
Trust this method, and you will achieve succulent, falling-apart beef and the most profoundly rich gravy every single time.
The Tenderness Secret: Why This Rich Braised Beef Stew Recipe Works
Solving the Tough Meat Dilemma
Beef chuck is full of tough connective tissue called collagen, which, if cooked quickly, tightens up and makes the meat chewy.
For a similar depth of flavor and tender beef, consider slow-braised beef and white bean stew.
Our method specifically avoids this by utilizing low, moist heat for an extended period, allowing that collagen to slowly dissolve and convert into luscious, lubricating gelatin.
The Non-Negotiable Step: Achieving the Deep Flavor Sear
Searing the beef intensely in small batches creates the Maillard reaction, developing hundreds of complex flavor compounds that cannot be replicated later.
This deep, caramelized crust is critical; it forms a protective layer on the meat and significantly contributes to the final color and richness of the finished gravy.
The Magic of Low and Slow: Temperature Control in Braising
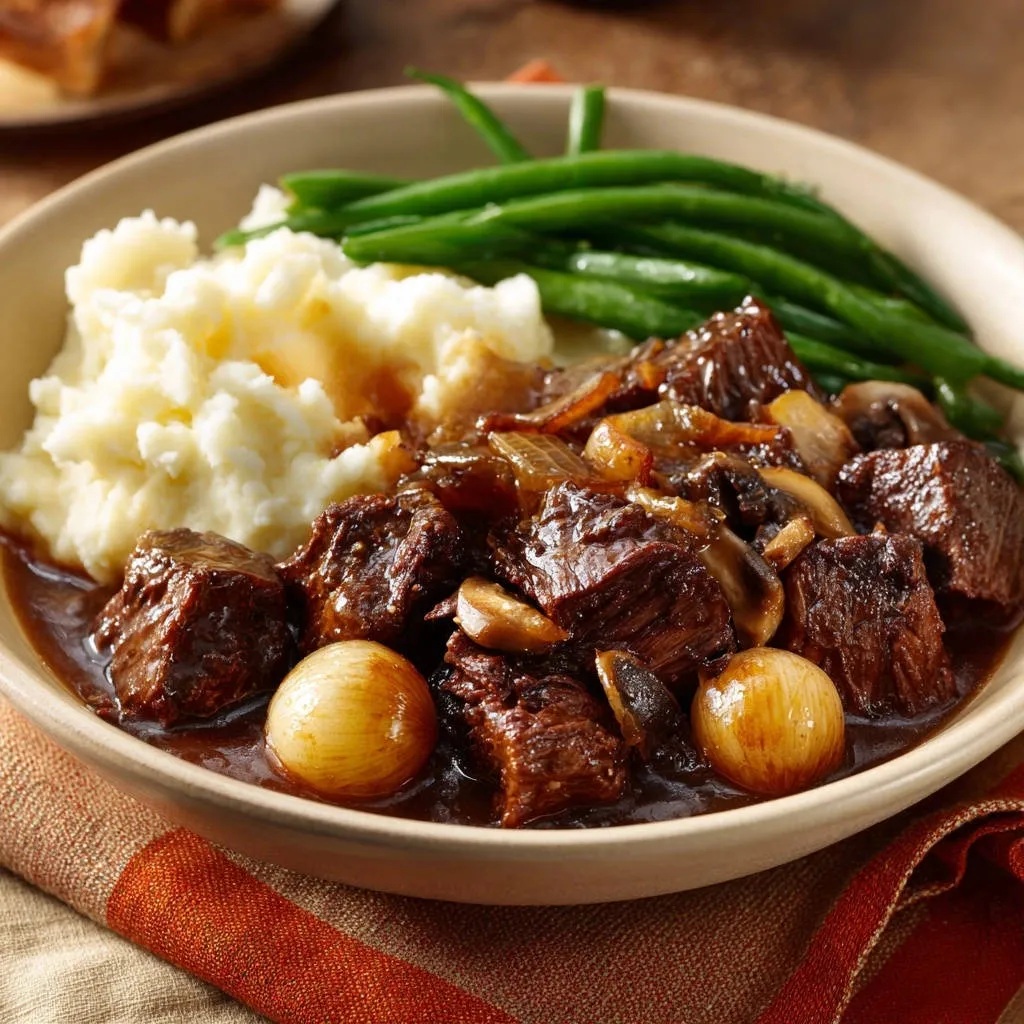
We use a 325°F oven braise because this moderate temperature provides gentle, pervasive heat for the conversion of collagen to gelatin.
The goal is a slow, steady transformation; high heat would cause the liquid to boil too vigorously, drying out the meat before it has a chance to fully tenderize.
Preparation is Key: Essential Tools and Mise En Place
Why a Dutch Oven Is Essential for Perfect Braising
A heavy, enameled cast-iron Dutch oven is critical because it retains heat exceptionally well and minimizes temperature fluctuations.
This thermal stability ensures the liquid remains at a gentle, barely simmering state throughout the braise, maximizing the collagen breakdown process.
Your Prep Checklist: Patting Dry and Cubing Correctly
Patting Dry: This is the most crucial preparation step, as any surface moisture prevents the necessary deep sear needed for rich flavor development. Dry beef equals instant caramelization, while wet beef simply steams.
Consistent Cubes: Cutting the beef into consistent 1.5-inch cubes ensures that all pieces finish cooking at exactly the same time. Uniformity prevents some pieces from drying out while others remain tough.
Building Blocks of Comfort: Understanding Your Ingredients
The Protein Power: Choosing the Right Cut of Chuck
Beef chuck, specifically from the shoulder, is the perfect cut for braising due to its high concentration of connective tissue and internal marbling.
This internal structure renders down beautifully, coating the muscle fibers in natural gelatin and keeping the braised meat incredibly moist.
For even more tender results, learn how to achieve maximum tenderness in short ribs.
Aromatics and Base: Onion, Garlic, and Tomato Paste
Sautéing the sliced yellow onion until soft provides a subtle sweetness that balances the savory richness of the stew.
The tablespoon of tomato paste must be stirred into the fat and cooked until it darkens slightly; this essential step concentrates the sugars and acids, unlocking deep, rich umami flavor.
Liquid Gold: Selecting the Best Beef Broth
Always choose low-sodium beef broth or stock, allowing you complete control over the final seasoning profile.
Since the liquid reduces slightly during the long braise, using standard broth often results in an overly salty final dish that cannot be easily fixed.
The Late Additions: Pearl Onions and Cremini Mushrooms
These flavorful vegetables are added during the final cooking phase to prevent them from becoming overly soft or disintegrating during the long braise.
This precise timing ensures the pearl onions and cremini mushrooms retain a pleasant, slightly firm texture and concentrated flavor, adding essential contrast to the tender meat.
From Prep to Pot: Mastering the Braising Method
-
The Initial Dredge: Preparing and Coating the Beef
The thin flour coating aids the Maillard reaction during searing and provides a slight starch base that helps naturally thicken the final gravy.
Always shake off the excess flour aggressively before searing; too much coating will make your stew gluey rather than thick and velvety.
-
Searing for Maximum Flavor and Texture Depth
Heat your Dutch oven over medium-high heat with the mix of olive oil and butter, which combines a high smoke point with rich flavor.
This step is critical: Never overcrowd the pot or the moisture released will lower the temperature, causing the meat to steam instead of developing that dark, caramelized crust.
-
Creating the Aromatic Foundation (Steps 3 & 4)
Reduce the heat and cook the sliced onions gently, using their moisture and the remaining butter to scrape up all the dark brown bits (the fond) stuck to the pot bottom.
Once the onions soften, stir in the minced garlic and tomato paste for exactly one minute until they smell fragrant and the paste has slightly deepened in color.
-
The Low Simmer and Combining the Liquids
Return all the seared beef to the pot, pour in the measured beef broth, and add the dried thyme and bay leaf.
Bring the liquid up to a full simmer, then immediately reduce the heat to maintain only the gentlest, slowest bubble before covering the pot tightly.
-
The Hands-Off Braise: Oven Time and Temperature (Step 5)
Place the tightly covered Dutch oven in an oven preheated to 325°F for the initial 2 hours and 30 minutes.
The oven provides consistent, even heat from all sides, which is far superior to stovetop cooking for achieving consistent tenderness in every piece of meat.
-
The Final Push: Adding the Fresh Vegetables (Step 6)
After the initial 2.5 hours, stir in the pearl onions and cremini mushrooms, cover the pot again, and continue the braise.
The stew is done when the beef yields completely when pressed lightly with a fork, indicating it is absolutely fork-tender and falling apart with no resistance.
-
Finishing and Final Seasoning (Step 7)
Before serving, be sure to remove and discard the bay leaf.
The gravy will have concentrated its flavor during the cook time, so taste it now and adjust the balance with small pinches of salt and black pepper as needed until the flavor pops.
Chef’s Secrets and Troubleshooting Your Stew
Maximizing Maillard: The Art of Searing Batches
If your Dutch oven is smaller, you can use two smaller frying pans simultaneously to sear the beef more quickly.
Alternatively, sear one batch, transfer it to a separate bowl, and ensure you wipe the pan out briefly between batches if the fond begins to burn before adding the next batch.
Thickening the Gravy (If Too Thin After Braising)
If the final gravy is too thin for your liking, you have two simple options for adjustment.
You can remove the lid and simmer the stew uncovered for the last 15 to 20 minutes to allow natural evaporation to reduce and concentrate the liquid.
Alternatively, create a slurry of one tablespoon of cornstarch mixed with two tablespoons of cold water; stir this into the hot, simmering gravy until it thickens instantly.
The Power of Salt: Seasoning Throughout the Process
Layering your seasoning is the key to deep, complex flavor that characterizes a great braise.
Always season the meat before flouring, season the onions when you sauté them, and then taste and adjust the final gravy heavily at the very end.
Troubleshooting: Help! My Beef Is Still Tough After 3 Hours
If the beef is tough, it simply needs more time, not higher heat; toughness is a sign that the collagen has not fully dissolved yet.
Continue braising the stew, fully covered, for additional 30- to 45-minute increments until the meat offers absolutely no resistance when pulled apart with a fork.
What to Enjoy Alongside
Round out your meal with these comforting additions that complement the hearty flavors of your braised beef stew.
- For perfectly tender, savory bread to soak up the stew’s juices, consider making these Garlic Cheddar Chive Drop Biscuits.
- To create a truly satisfying plate, pair your stew with these Creamy Garlic Mashed Potatoes and Gravy for an extra layer of richness.
Perfect Pairings: What to Serve with Rich Braised Beef Stew
Beyond Mashed Potatoes: Creative Serving Bases
Creamy mashed potatoes are classic, but consider serving the stew over soft, buttery polenta for a luxurious texture.
Wide egg noodles are excellent for soaking up the generous gravy, as is a warm bed of steaming white rice or farro.
Don’t forget thick slices of crusty, artisan bread; they are perfect for mopping up every last drop of the rich sauce.
Complementary Sides and Garnishes
The recommended steamed green beans offer a necessary freshness and color contrast to the hearty brown stew.
Finish the dish with a generous sprinkle of fresh parsley for a vibrant, clean note that brightens the richness.
A light, slightly acidic winter salad, dressed simply with vinaigrette, can also serve well to cut through the intense savory notes.
Grape juice and Drink Pairings
The deep, savory notes of this braised meat pair beautifully with a robust red grape juice, such as a full-bodied sparkling grape juice.
For sparkling water drinkers, a heavy Stout or a rich Porter provides complementary, caramelized notes that stand up well to the strength of the stew.
Make-Ahead Tips and Frequently Asked Questions (FAQ)
Can I make Rich Braised Beef Stew ahead of time?
Absolutely. Stews are famously better the next day, as the resting time allows the herbs and meat juices to fully meld together into a deeper flavor profile.
Cool the stew completely, refrigerate overnight, and then reheat gently on the stovetop or in the oven until piping hot.
How long does leftover stew last in the refrigerator?
When stored promptly in an airtight container, the leftover stew will safely last for 3 to 4 days in the refrigerator.
Can I freeze braised beef stew?
Yes, this Rich Braised Beef Stew freezes very well due to its low moisture fat content.
Ensure it is fully cooled before transferring it to freezer-safe bags or containers, where it can be stored for up to three months; note that the texture of the cremini mushrooms may become slightly softer upon thawing.
Can I make this recipe in a slow cooker?
You can adapt this recipe for the slow cooker, but you must complete the critical searing and sautéing steps (Steps 1-3) on the stovetop first.
Transfer the seared meat, aromatics, broth, and herbs to the slow cooker insert and cook on the low setting for 6 to 8 hours, adding the vegetables in the final hour.
Ready to Impress? Share Your Rich Braised Beef Stew Masterpiece!
By paying close attention to the initial deep sear and trusting the precise low-and-slow braising method, you are guaranteed to achieve the perfect, fall-apart meat and profoundly rich gravy.
This definitive method for Rich Braised Beef Stew is a guarantee of warmth, comfort, and culinary success. Try this ultimate recipe tonight and let us know how your meal turned out!
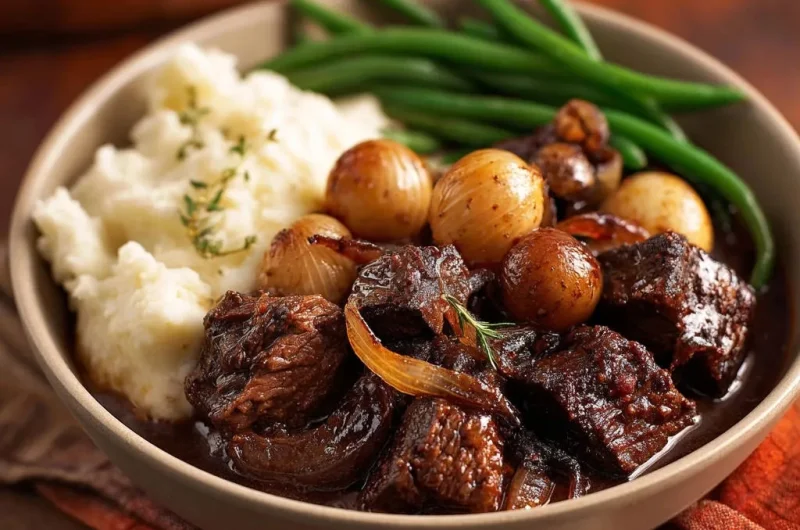
Braised Beef Stew
Course: Soups-StewsCuisine: AmericanDifficulty: medium6
servings20
minutes3
hours650
kcal200
minutesIf there is one dish that screams cozy comfort, it’s this deeply flavored beef stew. This method perfects the tenderness, resulting in melt-in-your-mouth beef every single time. The crucial searing step locks in flavor depth before the low and slow braise.
Ingredients
2.5 pounds beef chuck, cut into 1.5 inch cubes
1/4 cup all-purpose flour
1 teaspoon salt, plus more for seasoning
1/2 teaspoon black pepper, plus more for seasoning
2 tablespoons olive oil
4 tablespoons butter, divided
1 large yellow onion, sliced
3 cloves garlic, minced
1 tablespoon tomato paste
4 cups beef broth, low sodium
1 teaspoon dried thyme
1 bay leaf
1 cup pearl onions, peeled
1 cup cremini mushrooms, halved
For serving: Mashed potatoes and steamed green beans
Directions
- Prepare the Beef: Pat the beef cubes completely dry using paper towels. This step is non-negotiable for tender beef. In a shallow dish, combine the flour, 1 teaspoon salt, and 1/2 teaspoon pepper. Toss the beef cubes until they are lightly coated. Shake off excess flour.
- The Tenderness Secret Sear: Heat a large Dutch oven or heavy pot over medium-high heat. Add the olive oil and 2 tablespoons of butter. Once shimmering, sear the beef in small, single-layer batches. Do not overcrowd the pot or the meat will steam instead of sear. Sear each batch for 3 to 4 minutes per side until deeply browned and caramelized. This dark crust is critical for flavor depth and the eventual tenderness of the meat. Remove the browned beef and set aside.
- Build the Base: Reduce the heat to medium. Add the remaining 2 tablespoons of butter, the sliced yellow onion, and cook until softened, about 5 minutes, scraping up any browned bits from the bottom of the pot. Stir in the minced garlic and tomato paste and cook for 1 minute until fragrant.
- Deglaze and Combine: Return the seared beef to the pot. Pour in the beef broth. Add the dried thyme and bay leaf. Bring the liquid up to a simmer, then reduce the heat immediately to low. The goal is a gentle bubble, just barely simmering.
- Braise Low and Slow: Cover the Dutch oven tightly and place it in an oven preheated to 325 degrees F. Braise for 2 hours and 30 minutes.
- Add Vegetables: After 2 hours and 30 minutes, stir in the pearl onions and mushrooms. Cover again and continue to braise for another 30 to 45 minutes, or until the beef is absolutely fork-tender and falling apart with no resistance.
- Finish and Serve: Remove the bay leaf. Taste the gravy and adjust seasonings (salt and pepper) as needed. Serve the rich braised beef and gravy immediately over creamy mashed potatoes, alongside steamed green beans.
Notes
- Serve over creamy mashed potatoes alongside steamed green beans.