
There is nothing more disappointing than anticipating dense, chewy chocolate chip bars only to pull out a pan of dry, crumbly cake squares. I dedicated years to solving this common baking dilemma, and the resulting recipe for these Ultimate Layered Chocolate Chip Bars guarantees that perfect, ultra-fudgy texture every single time.
This method leverages specific ingredients and anti-cakey techniques that control moisture and inhibit gluten development, transforming your basic bar recipe into an exceptional treat.
The Anti-Cakey Secret: Why This Recipe Guarantees Fudgy Success
The Power of Melted Butter and Brown Sugar
Using melted butter instead of creamed butter is the primary defense against cakey bars because it inhibits aggressive gluten development in the flour.
For similar chewy results, explore creamy lemon crumble bars.
When combined with the high ratio of packed light brown sugar, this mixture maximizes moisture retention, yielding a deeply chewy texture rather than a fluffy crumb.
The Essential Fat Booster: Why the Extra Yolk Matters
The addition of one large egg yolk is critical for achieving that signature dense, fudgy structure.
This yolk provides extra emulsifiers and a concentrated boost of fat without introducing excess liquid, adding richness and necessary binding power to the bars.
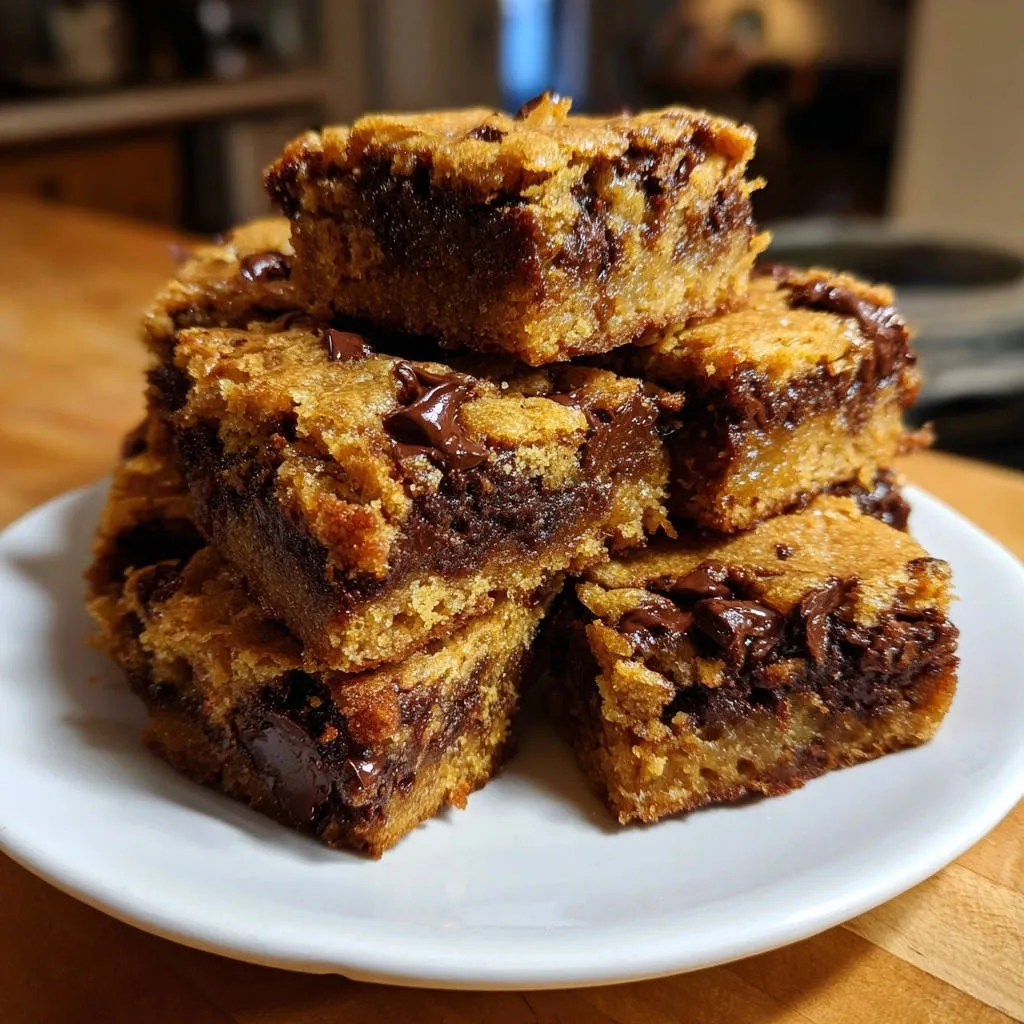
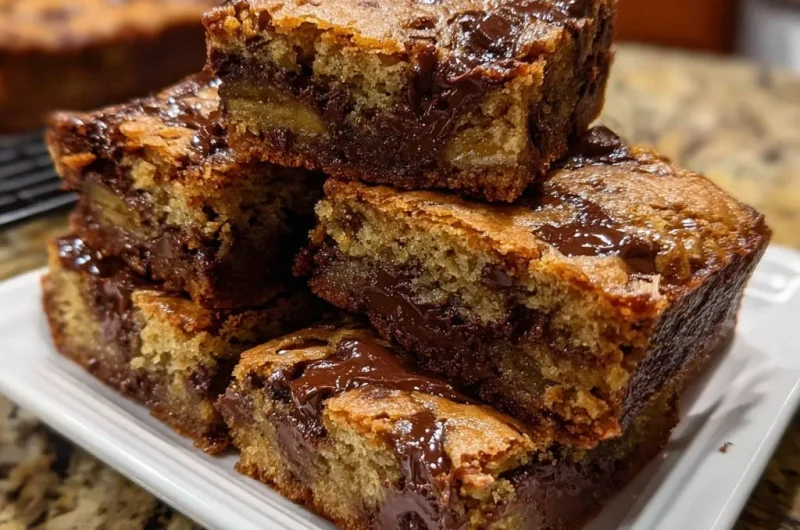
The Fudgy Core: Designing the Melted Dark Chocolate Center
The unique center layer of melted, high-quality dark chocolate is the defining factor for the ultimate fudgy outcome.
This dense, rich layer acts as an essential barrier, preventing the cookie dough base from drying out during the baking process and ensuring the center remains incredibly soft and ultra-dense.
Building Blocks of Perfection: Essential Ultimate Layered Chocolate Chip Bars Ingredients
Perfecting the Sugar Blend
We use a specific 2:1 ratio of packed light brown sugar to granulated sugar to maximize chewiness and moisture.
Brown sugar contains molasses, which is hydroscopic-meaning it attracts and holds onto water, crucial for a truly dense, chewy bar.
Choosing Your Chocolate: Quality Matters Here
You need semi-sweet chips for mixing into the dough and scattering on top for classic flavor and appearance.
However, the 4 ounces of dark chocolate for the center must be high-quality chopping chocolate, as this ensures a smooth melt and a stable, richly flavored fudgy core.
For a similar rich chocolate experience, explore frosted dark chocolate toffee cookies.
The Simple Structure Providers
All-purpose flour forms the structure, but its quantity must be exact; scoop and level gently to avoid compacting the flour.
Baking powder is used instead of baking soda to provide only a slight lift, ensuring the bars stay dense and do not become overly airy or cakey.
Preparing Your Kitchen: Essential Equipment for Layered Bars
Using the correct equipment is vital for the structure and clean removal of these dense treats.
The 9×13 Inch Baking Pan: This specific size is crucial for achieving the intended thick, high layer of batter. Using a smaller pan will require substantial baking time adjustments.
Parchment Paper Overhang: Stress the importance of the overhang, as it acts as handles allowing you to lift the entire set bar out of the pan cleanly for easy slicing.
Wire Cooling Rack: Essential for preventing a soggy bottom layer during the required long cooling period. Air circulation underneath stops condensation from forming.
Mastering the Method: A Detailed Guide to Ultimate Layered Chocolate Chip Bars
The Prep Work: Preheat your oven to 350 degrees F immediately. Line the 9×13 pan with parchment paper, ensuring there is a significant overhang on two opposite sides.
Creating the Anti-Cakey Base: Combine the melted, warm butter with both the brown and granulated sugars in a large bowl. Whisk for about one minute until the mixture is uniform and slightly shiny.
Do not attempt to whisk until it becomes light or fluffy; the goal here is only to combine, leveraging the melted butter to keep the structure dense.
Incorporating Wet Ingredients: Beat in the two whole eggs and the critical extra egg yolk one at a time, followed by the vanilla extract.
Mix only until the eggs are just incorporated. Overmixing at this stage begins to develop gluten structure, which we are actively trying to inhibit for a fudgy bar.
Integrating Dry Ingredients: In a separate small bowl, whisk together the flour, baking powder, and salt before adding them gradually to the wet mixture.
Use a spatula to fold the dry ingredients in, stopping the moment the last visible streaks of flour disappear. This step is your major defense against developing a cakey texture.
Pressing the Bottom Layer: Stir 3/4 cup of the chocolate chips into the finished dough. Take exactly half of the dough mixture and press it firmly and evenly into the base of the prepared pan.
Lightly flour your fingertips or use the back of a measuring cup to ensure the dough is tightly packed, especially into the corners.
The Fudgy Center Creation: Melt the 4 ounces of dark chocolate in 30-second intervals until completely smooth, stirring well between each heating cycle.
Pour this liquid, melted chocolate immediately and carefully over the pressed dough base, spreading lightly to cover the entire first layer without tearing the dough beneath it.
The Top Layer Drop: Drop small, evenly spaced spoonfuls of the remaining cookie dough mixture over the melted chocolate layer.
Gently spread these drops to mostly cover the chocolate, using a light touch to avoid dragging the two layers together. Sprinkle the rest of the chocolate chips over the top layer.
The Critical 60 Minutes: Baking and Cooling for Fudgy Perfection
Achieving the Perfect Underbake: Knowing When to Pull Them
Bake for 28 to 32 minutes at 350°F. The most important visual cue is that the edges of the bars should look set and lightly golden brown.
The very center, however, must still look slightly soft, glossy, and noticeably unset. Waiting for a clean toothpick will guarantee dry bars, as they continue to cook significantly as they cool.
The Essential Cooling Period: Setting the Fudgy Structure
The Ultimate Layered Chocolate Chip Bars require a minimum of 2 hours cooling time, remaining entirely in the pan on a wire rack.
This extended rest allows the high fat content and melted dark chocolate core to solidify and stabilize into the promised ultra-dense, chewy structure, ensuring they are not soft or mushy when cut.
Baking Confidence: Common Ultimate Layered Chocolate Chip Bars Issues Solved
Problem: My bars came out dry and crumbly.
This almost always stems from two related issues: overmixing the flour, which develops too much gluten, or overbaking the bars in the oven.
Next time, stop mixing the moment flour disappears, pull the bars when the center still looks wet, and always trust the anti-cakey secret of underbaking.
Problem: The center chocolate layer looks messy or ran into the base.
This means your melted chocolate was likely too hot, or your base layer was not firmly packed.
Ensure your melted chocolate is only warm, not piping hot, and use firm pressure when setting the bottom dough layer to create a stable foundation.
Problem: My bars won’t cut cleanly.
Incomplete cooling is the number one culprit; they must be fully cool to room temperature before attempting to slice.
For pristine squares, use the parchment paper handles to lift the chilled bars out, then cut with a large, sharp knife warmed under hot water and wiped clean between each slice.
Serving, Storing, and Sharing Your Ultimate Layered Chocolate Chip Bars
Creative Serving Suggestions and Pairings
Serve these rich, dense treats slightly warm with a scoop of vanilla bean ice cream for an elevated à la mode dessert.
A light sprinkle of flaky sea salt immediately after baking or a dusting of finely ground espresso powder enhances the deep chocolate notes beautifully.
Best Practices for Airtight Storage and Shelf Life
Stored in an airtight container at room temperature, these dense bars maintain their quality and fresh taste for 4 to 5 days.
More Chocolatey Goodness
If you’re craving more chocolatey baked treats, consider these complementary recipes.
- For a similar satisfying chew, try these homemade chocolate chip granola bars that never crumble, perfect for a snack.
- For a different breakfast or brunch indulgence that also features warm spices, check out these cinnamon French toast stacks with crispy edges.
They can also be frozen for up to 3 months; cut the bars first, wrap tightly in plastic wrap, then store in a freezer bag, thawing overnight at room temperature before serving.
Can I Prepare the Dough Ahead of Time?
Yes, the dough base (without the chocolate chips mixed in) can be made 24 hours ahead of time and stored tightly covered in the refrigerator.
Allow the chilled dough to sit at room temperature for 30 minutes before pressing and layering, as cold dough will be very stiff and difficult to handle.
Ultimate Layered Chocolate Chip Bars FAQs
Can I make these bars in a different size pan?
While a 9×13 inch pan is ideal for the thickness, you can use an 8×8 inch square pan, but you must increase the baking time significantly, likely by 8 to 12 minutes.
Monitor the internal temperature closely, but be aware that the density of the final product will be much greater, requiring even more cooling time.
Is it okay to skip the melted dark chocolate center layer?
Absolutely not. Skipping the melted dark chocolate layer defeats the purpose of making the Ultimate Layered Chocolate Chip Bars.
That fudgy core is the critical structural element that locks in moisture and prevents the entire bar from turning into a standard, less-dense cookie bar.
How do I know when to stop mixing the dry ingredients?
The key visual cue is the complete disappearance of the dry flour streaks-no more than 30 seconds of gentle folding should be required.
Finish the mixing by hand with a spatula to ensure you don’t accidentally activate gluten by using an electric mixer beyond the initial incorporation of the wet ingredients.
Ready to Impress? Bake Your Ultimate Layered Chocolate Chip Bars Today!
Armed with these expert techniques-from the melted butter base to the essential dark chocolate core-you are guaranteed to achieve baking success.
Forget dry, crumbly squares; follow these steps precisely to unlock the dense, chewy, and deeply fudgy texture that makes these Ultimate Layered Chocolate Chip Bars truly exceptional.
Gather your ingredients and experience the satisfying reward of the perfect bar treat that sets a new standard for home baking.
Chocolate Chip Bars
Course: DessertCuisine: AmericanDifficulty: medium18
bars (9×13 pan)20
minutes30
minutes350
kcal120
minutesThis recipe guarantees ultra-dense, chewy chocolate chip bars with a perfect, fudgy texture every time. Using melted butter, an extra egg yolk, and a hidden dark chocolate center, these bars defy the dry, cakey pitfalls of traditional recipes.
Ingredients
1 cup (2 sticks) unsalted butter, melted
1 cup packed light brown sugar
1/2 cup granulated sugar
2 large eggs
1 large egg yolk (This is essential for fudginess!)
1 tablespoon vanilla extract
2 cups all-purpose flour
1 teaspoon baking powder
1/2 teaspoon salt
1 cup semi-sweet chocolate chips, divided
4 ounces high-quality dark chocolate, chopped (for the center layer)
Directions
- Preparation: Preheat your oven to 350 degrees F. Line a 9×13 inch baking pan with parchment paper, leaving an overhang on the sides for easy removal later.
- The Butter Base (Anti-Cakey Step 1): In a large mixing bowl, combine the melted butter, brown sugar, and granulated sugar. Whisk for about 1 minute until well combined and slightly shiny. The melted butter inhibits gluten development and promotes chewiness over cakey structure.
- Wet Ingredients: Beat in the 2 whole eggs and the extra egg yolk one at a time, followed by the vanilla extract. Mix until just combined; do not overmix. The extra yolk adds necessary fat and richness for a fudgy texture.
- Dry Ingredients: In a separate bowl, whisk together the flour, baking powder, and salt. Gradually add the dry ingredients to the wet ingredients, mixing only until the flour streaks disappear. Overmixing develops too much gluten, leading to a cakey bar.
- First Layer: Stir 3/4 cup of the chocolate chips into the dough. Press half of the cookie dough mixture evenly into the bottom of the prepared pan. Use lightly floured fingertips or the back of a spoon to pack the dough firmly into the pan corners.
- The Fudgy Center Layer (The Anti-Cakey Secret): Place the 4 ounces of chopped dark chocolate in a microwave-safe bowl. Microwave in 30-second intervals, stirring until completely smooth and melted. Pour this melted chocolate mixture immediately over the dough base in the pan, spreading it lightly to cover the first layer. This rich, heavy layer is the core of the fudgy center and prevents the bars from drying out.
- Top Layer: Drop spoonfuls of the remaining cookie dough mixture over the melted chocolate layer. Gently spread the top layer as best you can to mostly cover the chocolate, leaving some small gaps is okay. Sprinkle the remaining chocolate chips over the top.
- Baking and Cooling (Anti-Cakey Step 2): Bake for 28 to 32 minutes. The edges should look set and lightly golden brown, but the very center should still look slightly soft and glossy. Do not wait for a clean toothpick; slightly underbaking is essential for a fudgy bar.
- Finish: Remove from the oven and allow the bars to cool completely in the pan on a wire rack for at least 2 hours before lifting them out using the parchment paper overhang and cutting into squares. This extended cooling period allows the center to set up into that ultra-dense, chewy texture.
Notes
- Do not overmix the batter. Slightly underbake the bars and allow them to cool completely (at least 2 hours) for the necessary dense, fudgy texture.