There’s nothing quite like the aroma of gingerbread baking, but I used to dread the moment my beautifully cut gingerbread shapes melted into amorphous blobs. Through years of holiday baking, I’ve perfected a recipe for Adorable Gingerbread Stars that consistently bakes up crisp, perfectly shaped, and ready for your most creative decorating. This foolproof guide ensures your festive cookies maintain their stunning definition, making them the star of any holiday gathering.
Why These Adorable Gingerbread Stars Will Be Your New Holiday Tradition
The “No Spreading” Secret: Crisp Stars, Every Bake!
This recipe’s greatest triumph is its unwavering commitment to maintaining shape. No more frustrating misshapen cookies!
The secret lies in a critical chilling step that firms up the butter in the dough, preventing any unwanted spreading in the oven.
You’ll achieve clean, crisp edges every time, ideal for precise and beautiful decoration.
For perfectly shaped cookies, consider trying the no-spread method in glazed raspberry thumbprint cookies.
A Symphony of Spices: Flavor That Delights
Beyond their charming appearance, these gingerbread cookies boast a perfectly balanced spice profile. A blend of ground ginger, cinnamon, and cloves creates a warm, inviting aroma and flavor.
It’s the classic taste of the holidays, comforting and utterly delicious, making these treats truly special.
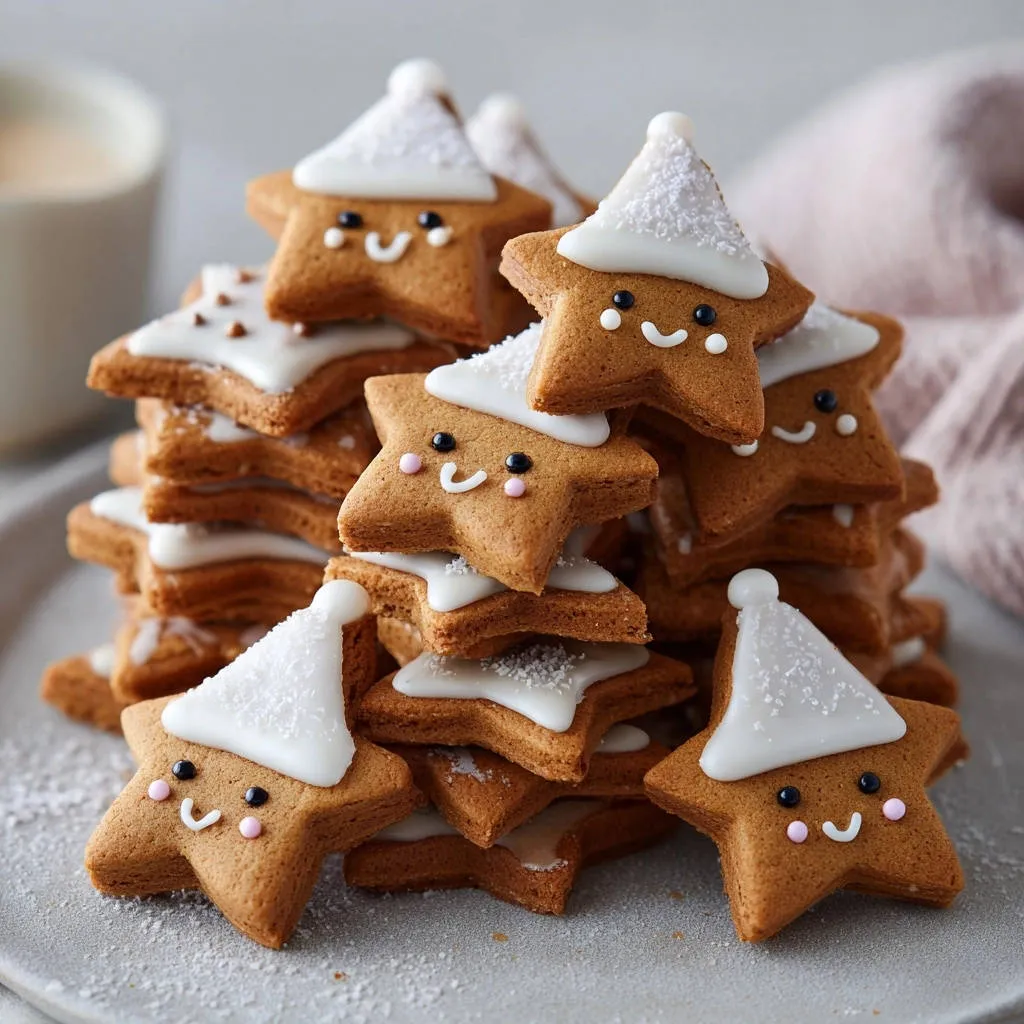
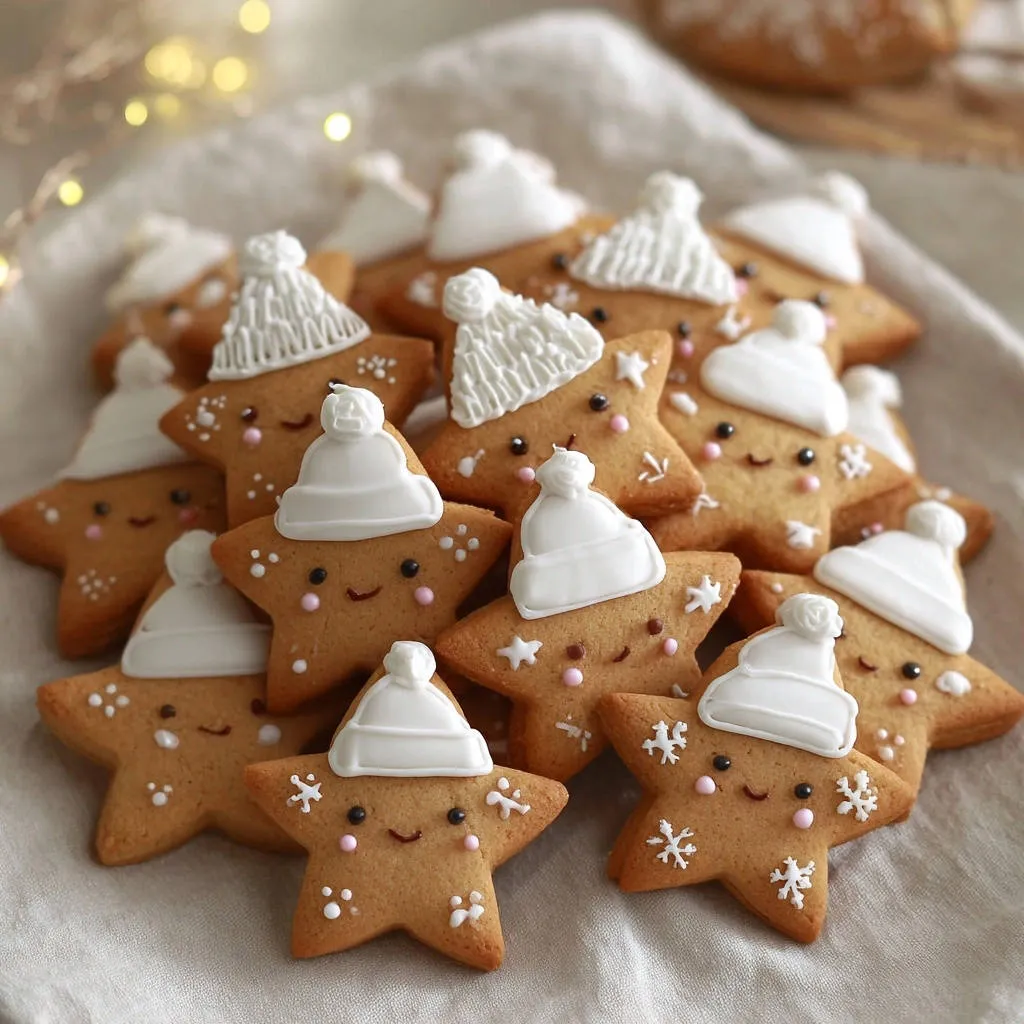
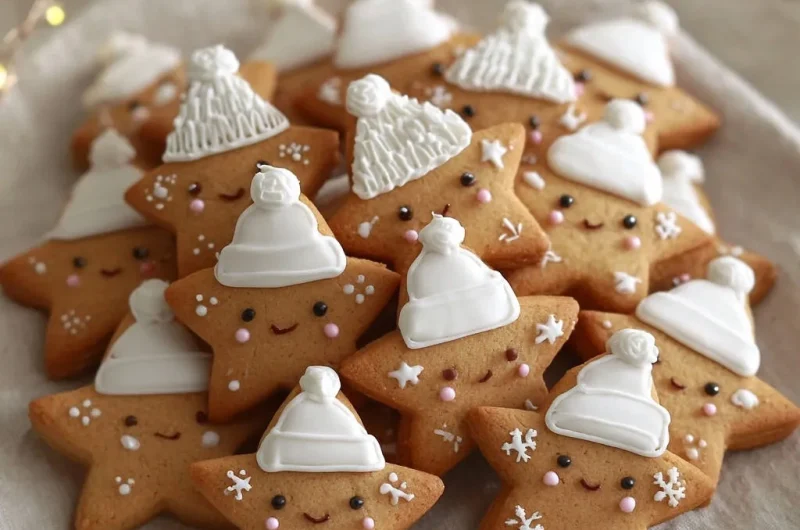
Joyful Decorating: Fun for All Ages
These sturdy, perfectly shaped stars are a blank canvas for creativity. Decorating them is a joyful activity, perfect for engaging family and friends during the festive season.
From simple royal icing hats to intricate facial features, these cookies invite imaginative flourishes and create cherished holiday memories.
Your Baking Toolkit for Star-Shaped Success
Essential Kitchen Gadgets
Mixing Bowls (various sizes): Necessary for separating wet and dry ingredients and for mixing the dough.
Electric Mixer (stand or hand-held): Crucial for creaming butter and sugar until light and fluffy, ensuring a tender cookie.
Measuring Cups and Spoons: Accurate measurements are key for consistent results in baking these gingerbread stars.
Spatulas: For scraping down bowls and gently folding ingredients, minimizing overmixing.
Specialized Gear for Perfect Cut-Outs & Decoration
Star-Shaped Cookie Cutters: The namesake of our Adorable Gingerbread Stars, allowing for precise, festive shapes. Use various sizes for visual interest.
Parchment Paper: Essential for lining baking sheets, preventing sticking, and aiding in easy cleanup. It also helps with even baking.
Rolling Pin: For rolling out the dough to a consistent 1/4 inch thickness, ensuring even baking and perfectly crisp cookies.
Piping Bags with Small Round Tips (e.g., Wilton #2 or #3): Indispensable for detailed royal icing work, like piping hats, eyes, and smiles.
Toothpicks: A simple yet effective tool for fine detailing, fixing mistakes, or drawing tiny features on your decorated cookies.
The Building Blocks of Flavor: Ingredients for Perfectly Spiced Stars
The Dough’s Foundation: Flour & Leavening
All-purpose flour: Provides the structural backbone for these cut-out cookies. Proper measurement is crucial for preventing a tough or too-soft dough.
Baking soda: Acts as a leavening agent, contributing to a subtle lift and tender crumb. It works in conjunction with the acidic molasses.
Sweetness, Moisture, and Richness: Butter, Sugars, Molasses, Egg, Vanilla
Unsalted butter (softened): Adds rich flavor and tenderness to the dough. Softening ensures it creams properly with sugar, incorporating air.
Packed light brown sugar: Contributes to a moist, chewy texture and a lovely caramel note that complements the spices.
Dark molasses: The quintessential ingredient for gingerbread, providing its signature deep flavor, rich color, and incredible moisture. Do not substitute light molasses for the full effect.
Large egg: Acts as a binder, helping to hold the dough together, and adds richness and a bit of moisture.
Vanilla extract: Enhances all the other flavors, adding a fragrant, warm undertone that rounds out the spice blend.
The Warming Spice Blend: Ginger, Cinnamon, Cloves & Salt
Ground ginger, ground cinnamon, ground cloves: This trio creates the quintessential warming, aromatic gingerbread flavor. Ensure your spices are fresh for the most vibrant taste.
Salt: A crucial flavor enhancer, balancing the sweetness and intensifying the complexity of the spices in these holiday treats.
For the Icing: Sweet Finish & Vibrant Hues
Powdered sugar: The base for our smooth royal icing, dissolving easily to create a beautiful, pipeable consistency.
Milk or water: Used to thin the icing to the perfect pipeable consistency. Start with the smaller amount and add gradually for control.
White, pink, and black food coloring gels: Gels provide vibrant, opaque colors without adding excess liquid, perfect for creating distinct features and hats on your Adorable Gingerbread Stars.
From Dough to Dazzling: Crafting Your Adorable Gingerbread Stars
Preparing Your Mixes: Dry and Wet Foundations
In a medium bowl, whisk together the flour, ground ginger, ground cinnamon, ground cloves, salt, and baking soda. Whisking ensures these dry ingredients are evenly distributed, leading to a consistent cookie texture.
In a large bowl, use an electric mixer to beat the softened butter and brown sugar together until they are light and fluffy. This creaming process incorporates air, contributing to a tender cookie.
Next, add the molasses, egg, and vanilla extract to the butter mixture, beating until they are well combined. The mixture will be rich and fragrant.
Combining and Chilling: The Dough’s Transformation
Gradually add the dry ingredient mixture to the wet ingredients, mixing on low speed until just combined and a soft dough forms. It’s important not to overmix, as this can develop gluten and result in tough cookies.
This next step is absolutely crucial for perfect, no-spread gingerbread cookies. Divide the dough into two equal portions, flatten each into a disk, wrap tightly in plastic wrap, and refrigerate for at least 2 hours, or up to overnight. This firms up the butter, ensuring your star shapes hold beautifully in the oven.
Rolling, Cutting, and Baking to Golden Perfection
Preheat your oven to 350°F (175°C) and line baking sheets with parchment paper. This preparation ensures even baking and prevents sticking.
On a lightly floured surface, roll out one disk of chilled dough to about 1/4 inch thickness. Use your star-shaped cookie cutter to cut out shapes, then carefully transfer them to the prepared baking sheets, leaving about an inch between each. Re-roll any scraps quickly to prevent warming the dough too much.
Bake for 8 to 10 minutes, or until the edges are lightly golden and the centers are set. The cookies will firm up more as they cool, so avoid overbaking.
Cooling for Optimal Decoration
Let the cookies cool on the baking sheets for 5 minutes before carefully transferring them to a wire rack. This initial cooling on the sheet helps them firm up enough to prevent breakage.
Allow the spiced stars to cool completely on the wire rack. Cooling fully is essential; decorating warm cookies will cause the royal icing to melt or smudge.
Mastering the Icing Consistency
While the cookies cool, prepare the royal icing. In a small bowl, whisk together the powdered sugar and 3 tablespoons of milk or water until smooth. Add more liquid, a tiny bit at a time, until you reach a pipeable consistency that holds its shape without being too stiff or runny.
For opaque white hats, mix in a small amount of white food coloring gel. This helps achieve a bright, clean look against the warm gingerbread base.
The Art of Decoration: Hats, Faces, and Festive Flourishes
Transfer about two-thirds of the white icing to a piping bag fitted with a small round tip. Use this to pipe the hat shapes onto the completely cooled cookies, allowing the icing to set for at least 30 minutes before adding more details.
Divide the remaining white icing into two small bowls. In one, add a tiny drop of pink food coloring for the cheeks. In the other, add a tiny drop of black food coloring for the eyes and smile.
Using fine-tipped piping bags or even toothpicks for intricate work, add the adorable facial features and any additional snowflake details to your Adorable Gingerbread Stars.
For more vibrant confectionery creations, explore frosted dark chocolate toffee cookies.
Final Touches: Setting for Lasting Beauty
Let the decorated cookies set completely for several hours, or ideally, overnight. This allows the royal icing to harden fully, preventing smudging and ensuring your beautiful designs last.
Once fully set, you can safely store these charming creations in an airtight container, ready to delight.
Baker’s Secrets: Elevating Your Gingerbread Star Game
The Science of the Chill: Why It’s Non-Negotiable
Chilling the dough isn’t just a suggestion; it’s the bedrock of perfectly shaped Adorable Gingerbread Stars. Cold butter is stable butter, and that stability prevents your cookies from spreading into indistinct blobs during baking.
This essential step ensures your intricate star shapes remain crisp and defined, delivering the visual appeal you desire. Don’t rush it!
Rolling Out Like a Pro: Even Thickness for Even Baking
Achieving a consistent 1/4-inch thickness is key for uniformly baked cookies. Use a rolling pin with adjustable guides, or place two wooden dowels of the desired thickness on either side of your dough as a guide.
Flour your surface and rolling pin sparingly. Too much flour can dry out the dough, while too little will cause sticking.
Don’t Overbake! Signs of a Perfectly Baked Cookie
Gingerbread cookies can go from perfectly done to dry and hard very quickly. Look for lightly golden edges and centers that appear set but might still feel slightly soft to the touch.
Remember, they will continue to firm up as they cool on the baking sheet and wire rack.
Icing Hacks for Beginners: From Piping Bags to Toothpicks
If you’re new to piping, practice on a piece of parchment paper first. Don’t overfill your piping bags; work with small amounts for better control.
For tiny details like eyes or blush, a simple toothpick dipped in icing works wonders. It provides incredible precision for those charming facial features.
Creative Flourishes & Flavor Variations
Consider adding a teaspoon of orange or lemon zest to the dough for a brighter, citrusy note that complements the spices beautifully. A pinch of ground cardamom can also add an exotic warmth.
Beyond royal icing, you can drizzle melted white chocolate, dust with edible glitter, or add small candy details to your finished cookies.
Solving Common Cookie Conundrums: Troubleshooting Tips
My Gingerbread Stars are Spreading in the Oven!
This is almost always due to insufficient chilling. Ensure your dough has been refrigerated for at least two hours, or even overnight, to thoroughly firm up the butter.
Working on a warm counter or with over-floured dough can also cause spreading. Try working with one dough disk at a time, keeping the other chilled, and use minimal flour for rolling.
The Dough is Too Sticky or Crumbly to Roll.
If your dough feels too sticky, try adding a tablespoon of flour at a time until it’s more manageable, then re-chill briefly. Excessive stickiness often means the butter is too warm.
For crumbly dough, add 1/2 to 1 teaspoon of milk or water, kneading gently until it comes together. Avoid adding too much liquid, as this can make the cookies tough.
My Royal Icing Won’t Set or is Too Runny.
If your icing is too runny, gradually whisk in more powdered sugar until it reaches a thick, pipeable consistency that holds its shape.
Icing that won’t set might be in a very humid environment, or it simply needs more time. Move the decorated cookies to a drier spot and allow ample drying time, typically several hours or overnight.
The Baked Cookies are Too Hard or Too Soft.
Hard cookies are usually a sign of overbaking. Reduce your baking time by a minute or two next time and focus on the visual cues of lightly golden edges.
If your cookies are too soft or chewy, they might be underbaked. Ensure the centers are set, and they’ve had sufficient time to cool completely before storing, as warmth can trap moisture.
Plan Ahead & Preserve: Storage, Freezing, and Serving Ideas
Keeping Your Adorable Gingerbread Stars Fresh
Undecorated gingerbread stars can be stored in an airtight container at room temperature for up to one week. Layer them with parchment paper to prevent sticking.
Once decorated with royal icing, store the fully set cookies in an airtight container at room temperature for up to 5 days. Ensure the icing is completely dry before stacking gently, separated by parchment paper.
Make-Ahead Magic: Dough & Baked Cookies
The prepared gingerbread dough can be refrigerated for up to 3 days, making it perfect for holiday prep. For longer storage, wrap the dough disks tightly and freeze for up to 3 months.
Baked, undecorated cookies also freeze beautifully for up to 3 months. Thaw them completely at room temperature before decorating to ensure the icing adheres well.
Creative Ways to Enjoy Your Stars
Beyond being delicious on their own, these Adorable Gingerbread Stars make fantastic garnishes for festive desserts like apple pie or trifles. They can also serve as charming edible gift tags for holiday presents.
Arrange them on a tiered cake stand for an impressive display, or pair them with a warm mug of cocoa or spiced cider for a cozy treat. They are also perfect for cookie exchanges!
Your Adorable Gingerbread Stars Questions, Answered!
Can I make these gingerbread stars gluten-free?
Yes, you can substitute the all-purpose flour with a 1:1 gluten-free baking flour blend that contains xanthan gum. You might need to add a tiny bit more liquid, like a teaspoon of milk, if the dough feels too dry.
What’s a good substitute if I don’t have dark molasses?
While dark molasses provides the signature color and depth of flavor, light molasses can be used, though the cookies will be lighter in color and have a milder taste. Maple syrup or honey can also be used as a last resort, but they will significantly alter the flavor and may cause the cookies to spread more due to their different sugar content.
How far in advance can I decorate these cookies?
You can decorate these gingerbread stars up to 3-5 days before you plan to serve or gift them. Just ensure the royal icing is completely dry and set before storing them in an airtight container to prevent smudging.
Can I use different cookie cutter shapes?
Absolutely! This versatile gingerbread dough works beautifully with various cookie cutter shapes like hearts, trees, or traditional gingerbread people. Adjust baking times slightly for very large or very small cutters.
Are these cookies suitable for gifting?
Yes, these Adorable Gingerbread Stars are perfect for gifting! Their sturdy nature and ability to hold their shape, combined with beautiful decoration, make them an ideal edible present. Stack them carefully with parchment paper in pretty tins or clear cello bags.
Share the Sparkle: Your Adorable Gingerbread Stars Await!
Embrace the Holiday Spirit with Every Delicious Bite
Creating these Adorable Gingerbread Stars is more than just baking; it’s an invitation to embrace the magic of the holiday season. The satisfaction of pulling perfectly shaped, fragrant cookies from the oven and transforming them into edible art is truly special.
More Sweet and Savory Ideas
To complement your Adorable Gingerbread Stars, consider these warming dishes.
- For a hearty meal before or after your baking, try this Slow-Simmered Beef Stew, pairing well with the comforting spices in gingerbread.
- Start your day with these Cinnamon French Toast Stacks, offering a similar warm spice profile to your gingerbread creations.
May these beautiful spiced stars bring warmth, joy, and delicious memories to your home and loved ones this festive season.
Join Our Baking Community!
We absolutely adore seeing your culinary creations! Once you’ve baked and decorated your own batch of Adorable Gingerbread Stars, we invite you to share your photos and experiences.
Leave a comment below to tell us about your baking adventures, or tag us on social media. Happy baking!
Gingerbread Stars
Course: BakingCuisine: AmericanDifficulty: medium4
2-3 dozen cookies45
minutes8
minutes350
kcal180
minutesTransform your holiday baking with these adorable gingerbread stars that hold their shape perfectly in the oven. This recipe shares a simple trick to prevent spreading, ensuring crisp edges and beautifully defined cut-outs. Easy to decorate, these cookies are a festive delight for any occasion.
Ingredients
3 cups all purpose flour
1 tablespoon ground ginger
1 teaspoon ground cinnamon
1/2 teaspoon ground cloves
1/2 teaspoon salt
1 teaspoon baking soda
1/2 cup unsalted butter, softened
1/2 cup packed light brown sugar
1/2 cup dark molasses
1 large egg
1 teaspoon vanilla extract
2 cups powdered sugar
3 to 4 tablespoons milk or water
White food coloring gel (optional, for opaque icing)
Pink food coloring gel (for cheeks)
Black food coloring gel (for eyes)
Directions
- In a medium bowl, whisk together the flour, ground ginger, ground cinnamon, ground cloves, salt, and baking soda. Set aside.
- In a large bowl, using an electric mixer, beat the softened butter and brown sugar together until light and fluffy.
- Add the molasses, egg, and vanilla extract to the butter mixture, beating until well combined.
- Gradually add the dry ingredient mixture to the wet ingredients, mixing on low speed until just combined and a soft dough forms. Do not overmix.
- Divide the dough into two equal portions. Flatten each portion into a disk, wrap tightly in plastic wrap, and refrigerate for at least 2 hours, or up to overnight. This critical chilling step firms up the butter in the dough, which prevents the cookies from spreading in the oven and helps them maintain their crisp star shape.
- Preheat your oven to 350 degrees Fahrenheit (175 degrees Celsius). Line baking sheets with parchment paper.
- On a lightly floured surface, roll out one disk of chilled dough to about 1/4 inch thickness. Use a star-shaped cookie cutter to cut out shapes. Carefully transfer the cut-out stars to the prepared baking sheets, leaving about an inch between each cookie. Re-roll any scraps.
- Bake for 8 to 10 minutes, or until the edges are lightly golden and the centers are set. The cookies will firm up more as they cool.
- Let the cookies cool on the baking sheets for 5 minutes before transferring them to a wire rack to cool completely.
- While the cookies cool, prepare the royal icing. In a small bowl, whisk together the powdered sugar and 3 tablespoons of milk or water until smooth. Add more milk or water, a tiny bit at a time, until you reach a pipeable consistency that holds its shape. For opaque white hats, mix in a small amount of white food coloring gel.
- Transfer about two-thirds of the white icing to a piping bag with a small round tip. Use this to pipe the hat shapes onto the completely cooled cookies. Allow the icing to set for at least 30 minutes.
- Divide the remaining white icing into two small bowls. In one, add a tiny drop of pink food coloring for the cheeks. In the other, add a tiny drop of black food coloring for the eyes and smile. Using fine-tipped piping bags or toothpicks, add the facial features and any additional snowflake details.
- Let the decorated cookies set completely for several hours or overnight before storing them in an airtight container.
Notes
- Ensure full cookie cooling before decorating. Allow icing to set completely for several hours or overnight for best results.