I remember my first attempts at making cheesy pull-apart rolls-often ending in a frustratingly dry dough or cheese that simply refused to get perfectly gooey. It was a journey of trial and error until I uncovered the precise methods that guarantee success.
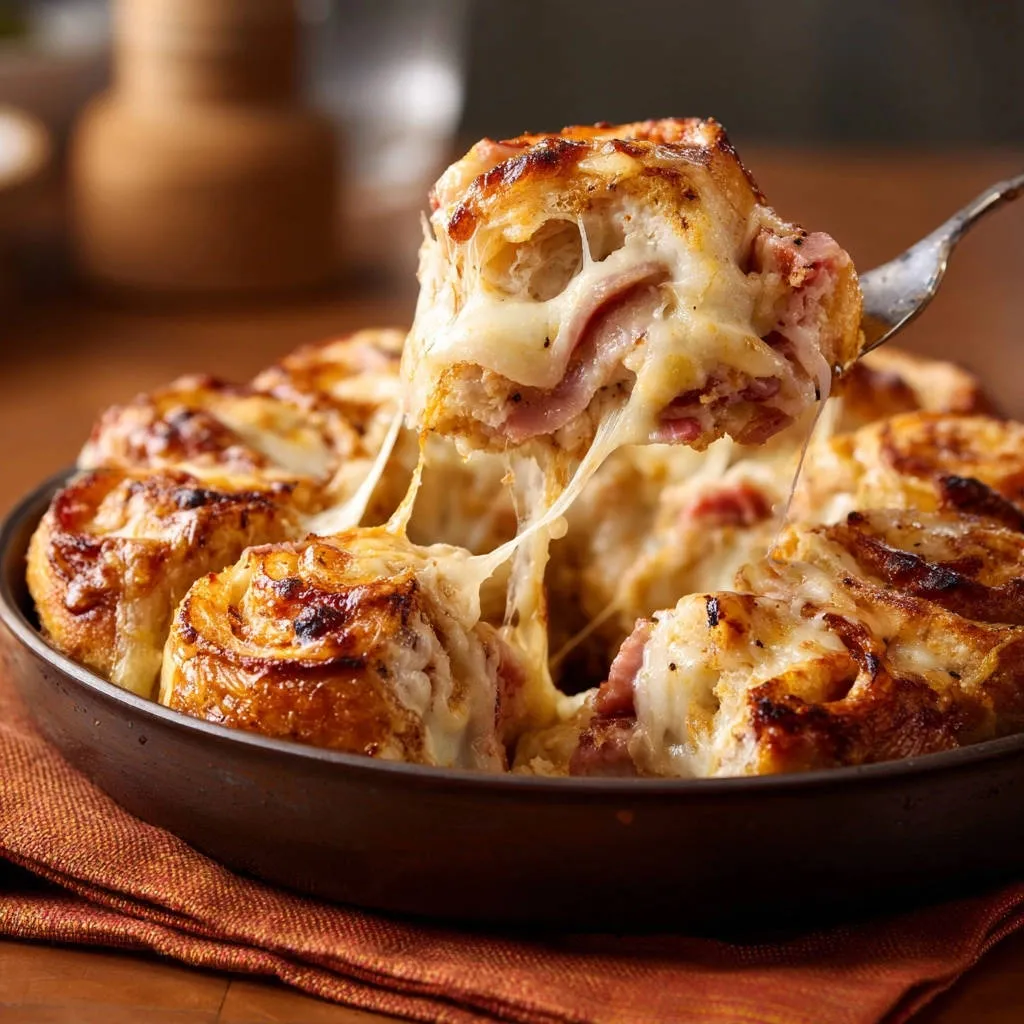
This recipe for Cheesy Pull-Apart Rolls changes everything, promising a batch that’s unbelievably soft, exceptionally melty, and bursting with savory flavor every single time. Get ready to impress with these crowd-pleasing, irresistible treats.
The Secret to Unbelievably Soft & Melty Cheesy Pull-Apart Rolls
The ‘Never Dry’ Promise: Butter and Foil Secrets
Many recipes leave rolls dry, but ours prevents this with two crucial techniques. A generous brushing of herbed melted butter before baking infuses moisture and flavor directly into the dough.
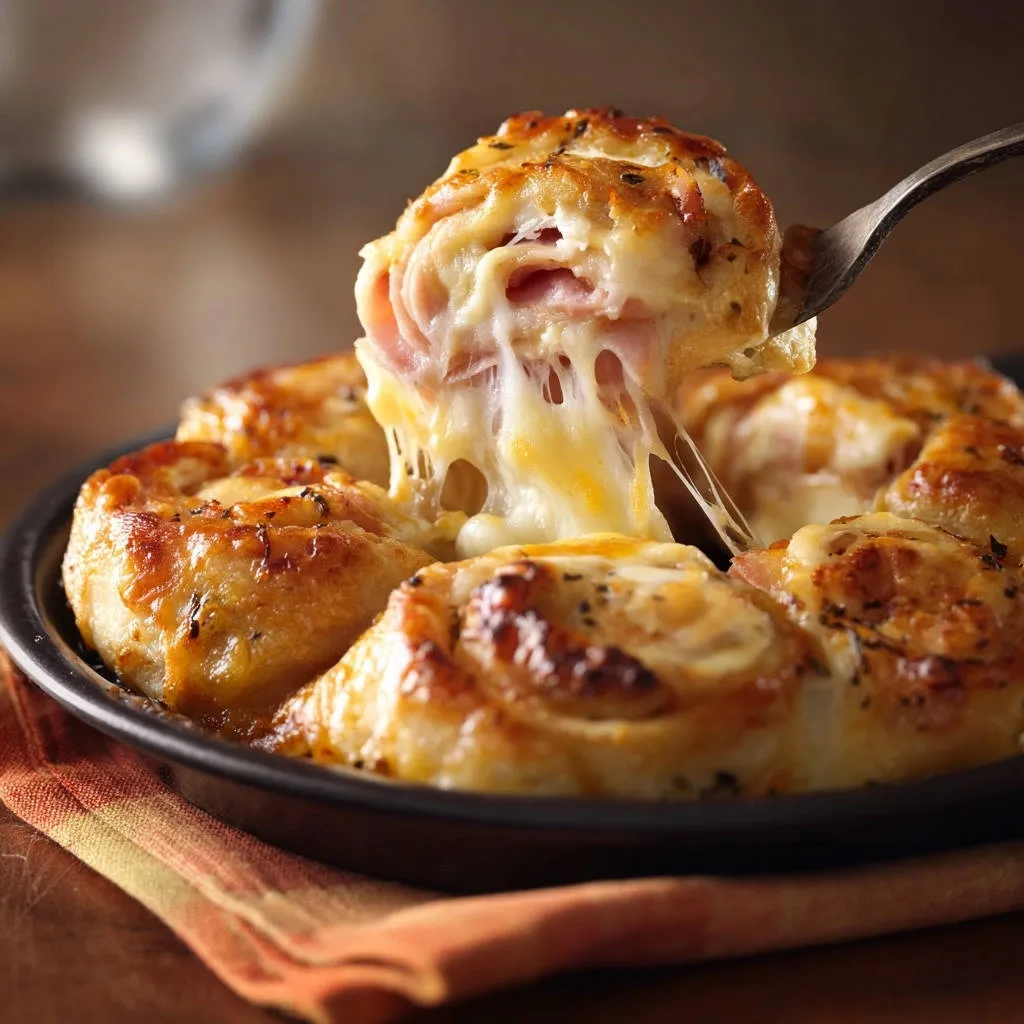
Crucially, loosely covering the rolls with foil during the final bake creates a steamy environment. This ingenious trick ensures the cheese melts into wonderfully gooey strands, while the dough remains incredibly soft and never dries out.
Flexible Dough Options for Every Baker
Whether you’re a seasoned baker or prefer convenience, this recipe offers versatility. Choose between refrigerated crescent roll dough for a flaky, buttery texture or refrigerated pizza dough for a heartier, chewier bite.
Both options yield fantastic results, allowing you to tailor the texture to your preference or simply use what’s readily available.
Beyond Basic: Our Signature Turkey & Mozzarella Filling
These aren’t just plain cheese rolls; they’re packed with savory goodness. Thinly sliced deli turkey breast provides a flavorful protein layer, perfectly complementing the rich, melty mozzarella.
The two-stage cheese addition is another secret. It ensures maximum meltiness without any over-browning, delivering that ultimate gooey experience in every pull.
Building Flavor: Your Cheesy Pull-Apart Rolls Ingredient List
The Foundation: Dough Choices
Our recipe offers flexibility with dough, impacting the final texture. Refrigerated crescent roll dough provides a light, flaky, and buttery foundation, typical of classic crescent rolls.
Alternatively, a pound of refrigerated pizza dough creates a denser, chewier roll with a more substantial bite. Choose based on your preference for flakiness versus a breadier texture.
Savory Heart: Turkey & Cheese
For the filling, 1/2 pound of thinly sliced deli turkey breast adds a wonderful savory depth. Opt for a good quality, low-sodium variety for the best flavor balance.
We use 1.5 cups of shredded mozzarella, divided, for its excellent melting properties and mild flavor. Low-moisture, part-skim mozzarella is ideal, as it melts beautifully without releasing too much water, ensuring perfectly gooey strands without making the rolls soggy.
Aromatic Boosters: Butter & Spices
The melted butter mixture is key to both flavor and a golden crust. 1/4 cup of melted butter carries the savory notes of 1/2 teaspoon garlic powder and 1/2 teaspoon dried parsley (or Italian seasoning).
This blend not only adds a rich, aromatic layer but also helps the rolls achieve a beautiful golden-brown color and keeps the dough incredibly moist from the outside in.
Gear Up for Gooey Goodness: Essential Tools
Baking Dish Must-Haves
A 9-inch round baking dish is specified for perfect pull-apart spacing and even baking. A ceramic or glass dish works beautifully, retaining heat for a consistent bake.
If you don’t have a round dish, a similarly sized square baking dish can be used, ensuring the rolls are snuggled closely to each other for that classic pull-apart effect.
Smart Prep Gadgets
Sharp Knife or Dental Floss: For cutting the dough log into uniform slices, a sharp knife yields clean cuts. Unflavored dental floss offers an even cleaner, non-stick alternative for slicing delicate dough.
Small Bowl and Pastry Brush: You’ll need a small bowl to combine the melted butter and seasonings. A pastry brush is essential for evenly coating the rolls with the flavorful butter mixture, ensuring every surface gets a golden, savory glaze.
Your Path to Perfection: A Detailed Guide for Cheesy Pull-Apart Rolls
- Prep Your Workspace and Oven:
Begin by preheating your oven to 375°F (190°C). This ensures the oven is at the correct temperature for immediate, even baking once the rolls are ready.
Lightly grease a 9-inch round baking dish. This crucial step prevents sticking and allows the cheesy pull-apart rolls to release easily after baking.
- Unroll and Shape the Dough:
Unroll the crescent dough (do not separate triangles) or pizza dough onto a lightly floured surface. A lightly floured surface prevents the dough from sticking during handling.
If using crescent dough, gently press the seams together to form a rectangle, approximately 10×14 inches. For pizza dough, roll it out to a similar size, aiming for uniform thickness for even baking.
- Layering the Delicious Fillings:
Arrange the sliced turkey breast evenly over the entire surface of the dough, leaving a small border around the edges. This ensures every bite will have a savory component.
Sprinkle 1 cup of the shredded mozzarella cheese over the turkey, distributing it evenly. Finish with a light seasoning of black pepper to taste, adding a subtle warmth.
- Rolling and Slicing with Precision:
Starting from one long side, carefully roll the dough up tightly to create a log. A tight roll helps the slices maintain their shape and keeps the filling secure.
Using a sharp knife or unflavored dental floss, cut the log into 12 equal slices, each about 1 inch thick. Precision here ensures uniform roll size and even baking.
- Arranging for Optimal Expansion:
Arrange the sliced rolls, cut side up, in the prepared baking dish. Nestle them close but leave a small gap between each roll.
These small gaps are vital, allowing the dough to expand beautifully during baking without crowding, resulting in perfectly puffed and separated rolls.
- The Golden Butter Brush: Flavor & Moisture:
In a small bowl, combine the 1/4 cup melted butter, 1/2 teaspoon garlic powder, and 1/2 teaspoon dried parsley (or Italian seasoning). Stir well to integrate the flavors.
Brush this mixture generously over the tops and sides of the arranged rolls. This buttery layer is crucial for keeping the rolls moist, adding a rich savory flavor, and developing a beautiful golden crust.
- First Bake: Puffing Up to Perfection:
Place the baking dish in the preheated oven and bake for 15-20 minutes. Watch for the rolls to puff up noticeably and just begin to turn a light golden brown.
This initial bake sets the dough and starts the cooking process, building structure before the final cheese melt.
- The Gooey Cheese Reveal: Staged Addition:
Remove the dish from the oven after the first bake. Now, sprinkle the remaining 1/2 cup of mozzarella cheese evenly over the top of the rolls.
This staged addition is a master trick: it prevents the cheese from overbrowning too early in the baking process, ensuring it melts into a perfectly gooey, golden layer.
- Foil-Wrapped Finish: Melty Magic:
Loosely cover the baking dish with aluminum foil. The foil should dome slightly to avoid touching the cheese, preventing it from sticking.
Return to the oven and bake for another 10-15 minutes, or until the cheese is completely melted and bubbly, and the rolls are deeply golden brown underneath. The foil creates a steamy environment, guaranteeing incredibly gooey cheese and soft dough.
- The Crucial Resting Period:
Once baked to perfection, remove the dish from the oven and let it stand for 5 minutes before serving. This brief rest is essential.
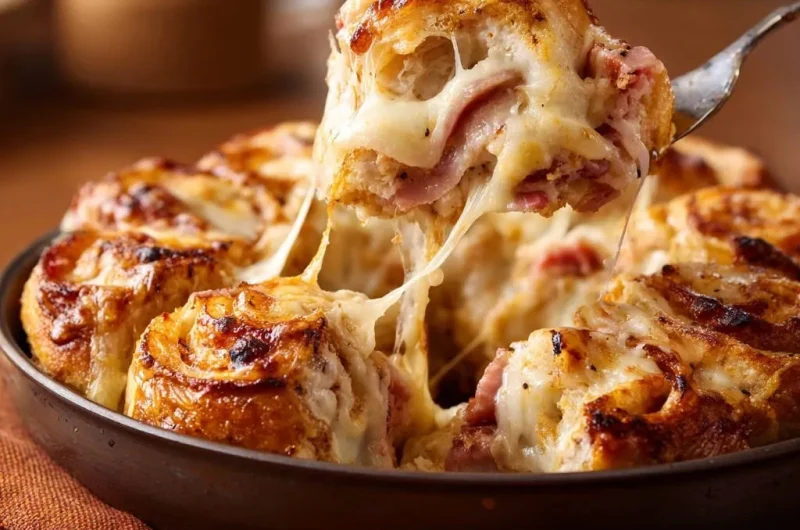
It allows the molten cheese to set slightly, making the rolls much easier to pull apart while still maintaining their irresistible, warm, and melty texture. Dig in and enjoy!
Mastering the Bake: Expert Tips for Flawless Pull-Apart Rolls
Dough Handling & Shaping Wisdom
Chill Your Dough: For easier handling and cleaner cuts, ensure your refrigerated dough is still cool. Overly warm dough can become sticky and difficult to manage.
Even Pressure for Rolling: When rolling out pizza dough or pressing crescent seams, apply even, gentle pressure. This prevents thin spots which can lead to dry or tough areas in the final roll.
Floss for Perfect Slices: For perfectly round and even slices, unflavored dental floss is your best friend. Slide it under the log, cross the ends over the top, and pull to cut cleanly through the dough and filling.
Cheese Melting Magic
Grate Your Own: While pre-shredded cheese is convenient, grating a block of mozzarella yourself melts more smoothly. Pre-shredded often contains anti-caking agents that can hinder a truly gooey melt.
Layer Strategically: Don’t skip the two-stage cheese addition! It’s the secret to cheese that’s perfectly melted and bubbly without burning on top, ensuring maximum gooeyness inside and out.
Room Temperature Cheese: Allowing the shredded cheese to come to room temperature for about 15-20 minutes before adding can promote a slightly faster and more uniform melt.
Achieving That Golden Finish
Know Your Oven: Ovens can vary widely. If your rolls are browning too quickly, consider reducing the temperature slightly or shortening the baking time. An oven thermometer can be a great investment.
Visual Cues Over Time: While times are a guide, trust your eyes. Look for deeply golden-brown rolls underneath the cheese and puffed-up dough, indicating they are fully cooked through.
Prevent Overbaking: Overbaking is the main culprit for dry rolls. As soon as the cheese is bubbly and the rolls are golden, they’re ready. A few extra minutes can turn perfectly soft into disappointingly stiff.
Solving Common Challenges: Get Your Rolls Right Every Time
Why Are My Rolls Dry or Stiff?
The most common reason for dry or stiff rolls is overbaking. Keep a close eye on them, especially during the first bake, and remove them as soon as they’re lightly golden.
Ensure you generously brush the butter mixture over all the rolls; this barrier helps seal in moisture. Additionally, check your oven temperature for accuracy, as a too-hot oven can quickly lead to dryness.
Cheese Not Melty or Over-Browned?
If your cheese isn’t perfectly melty, it might be due to insufficient baking time or the foil not being sealed well enough to create a steamy environment. Extend the foil-covered baking by a few minutes if needed.
Conversely, if the cheese is over-browned, you might have skipped the foil step or baked it for too long uncovered. The two-stage addition and foil cover are crucial for ideal melt and color.
Rolls Sticking to the Dish?
Sticking typically occurs if the baking dish wasn’t adequately greased. Ensure you lightly coat the entire inside surface of the dish with butter or cooking spray.
Allowing the rolls to rest for the full 5 minutes after baking helps the cheese set slightly, making them much easier to separate from the dish and each other without tearing.
Maximizing Enjoyment: Serving, Storing, & Reheating
Creative Serving Suggestions
These savory pull-apart rolls are incredibly versatile. Serve them as an appetizer with a side of warm marinara sauce or a creamy ranch dip for dipping.
Round Out Your Meal
These cheesy rolls pair wonderfully with hearty mains and comforting soups.
- For a satisfying main, consider this creamy cheesy chicken and rice bake, which brings similar comfort-food vibes.
- A bowl of creamy tomato tortellini soup offers a lovely contrast to the richness of the rolls.
They make an excellent side dish for a casual weeknight meal, perhaps alongside a hearty bowl of soup or a fresh salad. You could even pair them with other cheesy delights like our homemade cheesy garlic bombs for an ultimate comfort food spread!
If you enjoy savory sides, you’ll also appreciate these ham and cheddar biscuits.
Make-Ahead and Freezing Tips
To make ahead, prepare the rolls up to step 6 (arranged in the dish and brushed with butter). Cover tightly with plastic wrap and refrigerate for up to 24 hours before baking.
You can also freeze unbaked rolls: arrange slices on a baking sheet, freeze until solid, then transfer to a freezer-safe bag. Bake from frozen at 375°F (190°C) for 30-35 minutes, adding cheese as directed, until golden and bubbly.
Best Practices for Leftovers
Store any leftover cheesy pull-apart rolls in an airtight container at room temperature for up to 1-2 days, or in the refrigerator for up to 3-4 days. For best results, reheat them gently.
Reheat in a preheated oven at 300°F (150°C) for about 10-15 minutes, or until warmed through and the cheese is gooey again. A quick warm-up in an air fryer can also crisp them up beautifully.
Your Top Cheesy Pull-Apart Rolls Questions Answered
Can I Substitute the Meat Filling?
Absolutely! The beauty of these rolls is their adaptability. You can easily substitute the turkey with other deli meats like thinly sliced ham, or even cooked crumbled bacon for a smoky flavor twist.
For a vegetarian option, try sautéed mushrooms, spinach, or roasted red peppers. Just ensure any vegetable additions are well-drained to avoid excess moisture.
Is There a Dairy-Free Option for the Cheese?
Yes, you can certainly try a dairy-free version. Look for refrigerated crescent roll dough or pizza dough that is certified dairy-free.
For the cheese, use your favorite brand of shredded plant-based mozzarella. Be aware that melting properties can vary significantly between dairy-free cheeses, so choose a brand known for good meltability.
How Long Do These Rolls Stay Fresh?
These Cheesy Pull-Apart Rolls are best enjoyed fresh from the oven, ideally within an hour or two. At room temperature, they will maintain their quality for about 1-2 days if stored in an airtight container.
When refrigerated in an airtight container, they can stay fresh for up to 3-4 days. For longer storage, refer to our freezing tips.
Ready to Share? Your Cheesy Pull-Apart Rolls Await!
There’s something truly magical about pulling apart these warm, gooey, cheesy rolls, especially when shared with loved ones. They are a testament to how simple ingredients, combined with a few expert techniques, can create an unforgettable dish.
So, gather your ingredients, follow this guide, and prepare for rave reviews. If you enjoy this, you might also love our recipe for classic cheesy pull-apart bread, perfect for expanding your cheesy repertoire. Don’t forget to share your creations and tell us your favorite part of these delectable Cheesy Pull-Apart Rolls!
If you’re keen on more cheesy goodness, check out this cheesy sausage spinach cornbread.
Cheesy Pull-Apart Rolls
Course: AppetizerCuisine: AmericanDifficulty: easy4
12 rolls15
minutes30
minutes350
kcal50
minutesDiscover the secret to making perfectly soft and unbelievably melty cheesy pull-apart rolls. These easy-to-make rolls feature turkey and mozzarella baked to gooey perfection, ideal for any gathering or a delicious snack.
Ingredients
2 tubes (8 oz each) refrigerated crescent roll dough OR 1 lb refrigerated pizza dough
1/2 lb sliced turkey breast (deli style)
1.5 cups shredded mozzarella cheese, divided
1/4 cup melted butter
1/2 teaspoon garlic powder
1/2 teaspoon dried parsley (or Italian seasoning)
Black pepper, to taste
Directions
- Preheat your oven to 375F (190C). Lightly grease a 9-inch round baking dish.
- Unroll the crescent dough (do not separate triangles) or pizza dough onto a lightly floured surface. If using crescent dough, gently press seams together to form a rectangle, about 10×14 inches. If using pizza dough, roll it out to a similar size.
- Layer the sliced turkey breast evenly over the dough. Sprinkle 1 cup of the shredded mozzarella cheese over the turkey. Season lightly with black pepper.
- Carefully roll the dough up tightly from one long side to the other, creating a log.
- Using a sharp knife or unflavored dental floss, cut the log into 12 equal slices (about 1 inch thick).
- Arrange the slices, cut side up, in the prepared baking dish. Leave a small gap between each roll to allow for expansion.
- In a small bowl, combine the melted butter, garlic powder, and dried parsley. Brush this mixture generously over the tops and sides of the arranged rolls. This butter layer is key to helping the rolls stay moist and develop a beautiful golden crust without drying out the interior.
- Bake for 15-20 minutes, or until the rolls are puffed and just beginning to turn golden brown.
- Remove the dish from the oven. Sprinkle the remaining 1/2 cup of mozzarella cheese evenly over the top of the rolls. This staged addition prevents the cheese from overbrowning too early.
- Loosely cover the baking dish with aluminum foil. Return to the oven and bake for another 10-15 minutes, or until the cheese is completely melted and bubbly and the rolls are deeply golden brown underneath the foil. The foil creates a steamy environment, ensuring the cheese melts into wonderfully gooey strands while keeping the dough soft and preventing the tops from becoming too crisp.
- Remove from oven and let stand for 5 minutes before serving. This brief rest allows the cheese to set slightly, making the rolls easier to pull apart while maintaining their irresistible, melty texture.
Notes
- Brushing with butter, staged cheese addition, and foil baking are key to perfect results.