There’s nothing more disappointing than slicing into a beautiful pie, only to find a sad, soggy bottom. I’ve faced this heartbreak countless times with creamy desserts, but I finally mastered the secret to a perfectly crisp crumb crust that stands up to the most luscious fillings in this Chocolate Coconut Dream Pie.
This recipe isn’t just about incredible flavor; it’s engineered for structural integrity, guaranteeing a perfectly sliceable, truly satisfying dessert every single time. Get ready to experience your ultimate Chocolate Coconut Dream Pie without any fear of mushy bottoms.
For a similar chocolatey treat with a crisp crust, consider these caramel chocolate cheesecake bars.
Why This Chocolate Coconut Dream Pie Ends Soggy Crust Woes
The Secret Weapon: Our Pre-Baked, Fortified Crust
The core innovation in this Chocolate Coconut Dream Pie is our technique for building an impenetrable crust. We firmly press the graham cracker mixture, creating a dense, protective barrier against moisture migration from the filling.
The crucial pre-bake step then transforms this barrier into a fortified seal. This slight bake sets the crumbs, making them significantly more resistant to becoming soggy, even under a rich, creamy chocolate filling.
Unforgettable Flavor and Texture in Every Bite
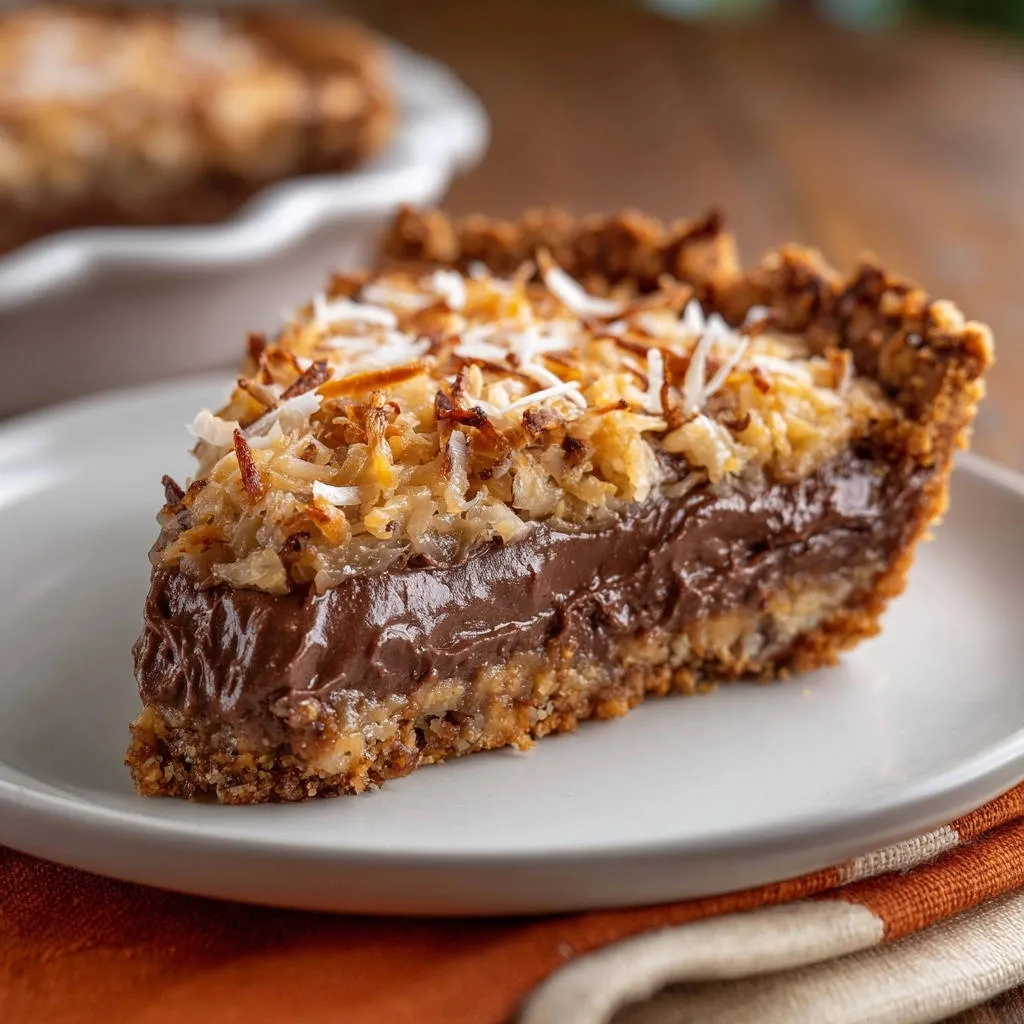
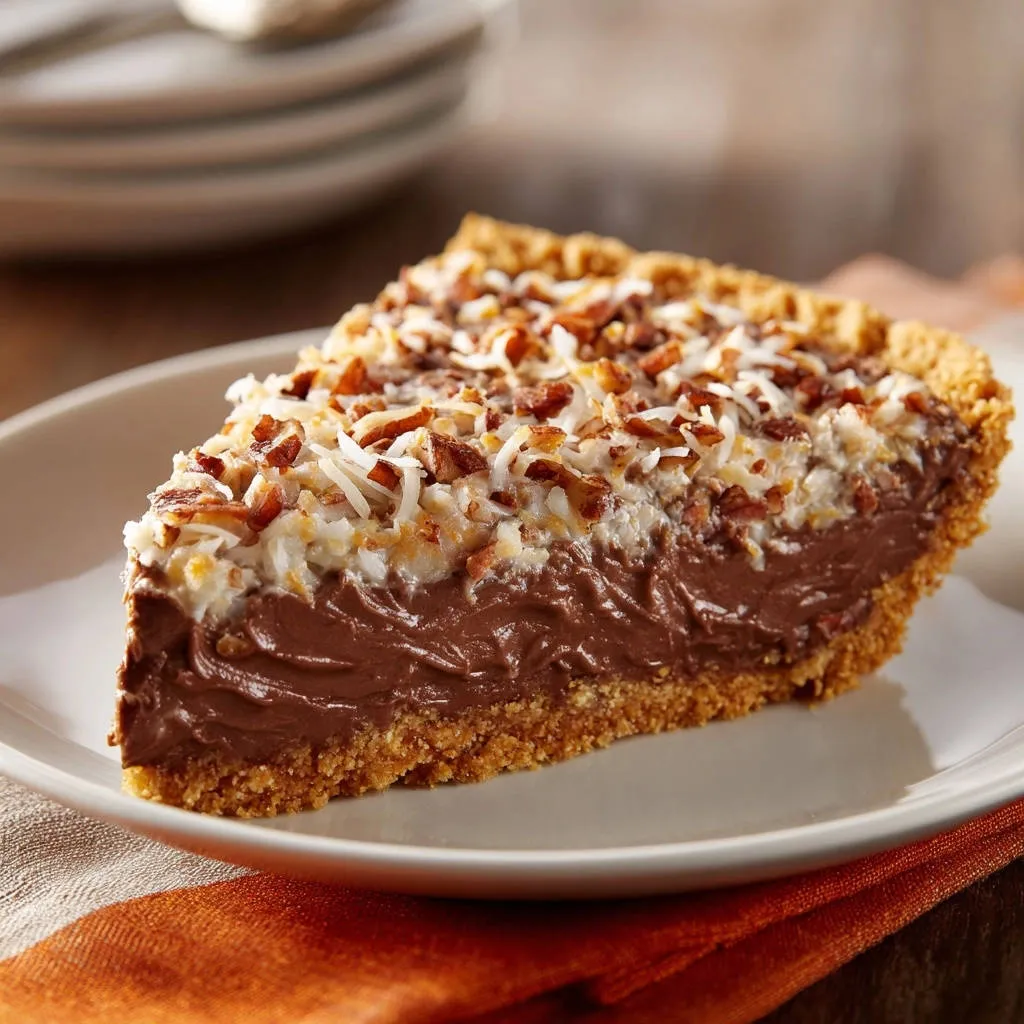
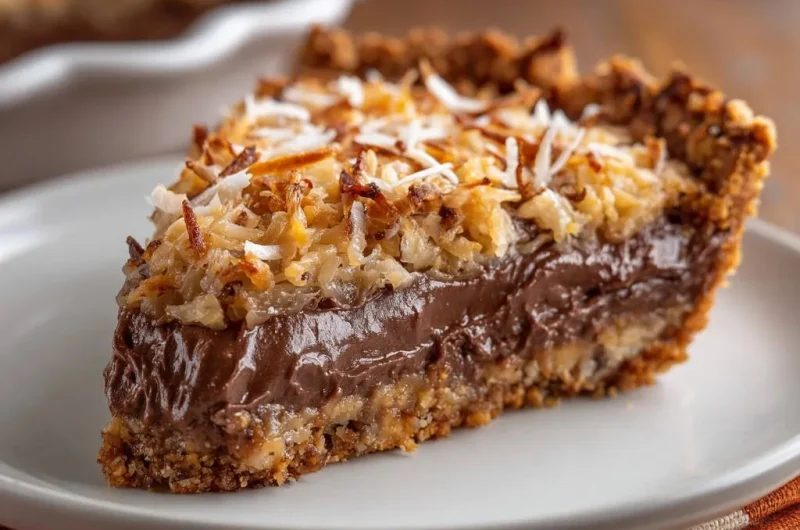
Imagine the delightful contrast of a crisp, buttery graham cracker crust giving way to an intensely rich, velvety smooth chocolate filling. It’s an irresistible combination.
The crown of golden, toasted coconut adds not only a beautiful aroma but also a fantastic chewiness and a final layer of tropical sweetness that balances the deep chocolate perfectly. Each bite of this Chocolate Coconut Dream Pie is a symphony of textures and flavors.
For another satisfyingly crunchy texture, explore chocolate toffee cream pie.
Perfect for Any Occasion (or Just Because!)
This Chocolate Coconut Dream Pie is a true crowd-pleaser, making it ideal for holidays, potlucks, or family gatherings. Its impressive appearance and universally loved flavors guarantee smiles all around.
Yet, it’s also easy enough to whip up for a simple weeknight treat, transforming an ordinary evening into something special. It’s truly a versatile dessert for any moment.
The Essential Building Blocks for Your Dream Pie
For the Sturdy Crumb Base
We select each ingredient for the crust to ensure stability and flavor.
Graham Cracker Crumbs: Provide the signature flavor and fine, sandy texture for the base. Ensure they are finely crushed for optimal pressing.
Granulated Sugar: Adds a touch of sweetness and helps bind the crumbs together, creating a firmer crust.
Unsalted Butter, Melted: Crucial for binding the crumbs and imparting rich flavor. Unsalted butter allows you to control the overall saltiness of the pie.
Crafting the Velvety Chocolate Center
The filling is a carefully balanced blend for ultimate creaminess and chocolate depth.
Granulated Sugar: Sweetens the rich cocoa and balances the bitterness, ensuring a perfectly palatable chocolate flavor.
Cocoa Powder: Provides the intense chocolate flavor. Opt for unsweetened natural cocoa powder for the best depth.
Cornstarch: Our primary thickening agent. It creates a smooth, stable, and firm pudding that sets beautifully without a starchy taste.
Salt: A small amount of salt is vital; it enhances and deepens the chocolate flavor, preventing the pie from tasting flat.
Whole Milk: The foundation for creaminess. Whole milk provides the necessary fat content for a truly decadent and rich texture.
Large Egg Yolks: Add richness, color, and act as a secondary thickener, contributing to the filling’s luxurious, silky mouthfeel.
Unsalted Butter, Cut into Pieces: Stirred in at the end, it adds a glossy sheen, extra richness, and contributes to the smooth texture of the cooked filling.
Vanilla Extract: A classic pairing with chocolate, vanilla rounds out the flavors and adds aromatic complexity.
The Golden, Aromatic Coconut Topping
The topping adds a delightful textural and flavor contrast.
More Chocolate Delights
If you’re craving more rich chocolate creations, check out these other recipes.
- For a different chocolate cake format, consider this moist chocolate bundt cake, which also features a chocolate base.
- If you appreciate layered chocolate desserts, this double chocolate layer cake offers a similar deep chocolate flavor profile.
Shredded Sweetened Coconut: Its natural sweetness and texture are perfect for toasting. Toasting brings out its aromatic, nutty flavors, creating a golden, irresistible crunch.
(Optional) If you prefer less sweetness, unsweetened shredded coconut can be used, though the overall sugar balance of the pie may shift slightly.
Gather Your Gear: Essential Tools for Pie Perfection
Having the right tools ready makes the process smooth and enjoyable for creating this Chocolate Coconut Dream Pie.
9-inch Pie Plate: Essential for shaping your pie and achieving the perfect slice presentation.
Medium Bowl: For combining crust ingredients and whisking egg yolks.
Medium Saucepan: The ideal vessel for preparing the chocolate filling, ensuring even heating.
Whisk: Crucial for lump-free dry ingredients and smooth filling consistency, especially during cooking and tempering.
Electric Mixer (optional, for pressing): While not strictly necessary for the recipe, it aids in thoroughly mixing graham cracker crumbs. A flat-bottomed glass or measuring cup can assist in pressing the crust firmly.
Wire Rack: For cooling the pre-baked crust completely, which prevents condensation and maintains crispness.
Small Bowl: Specifically for whisking and tempering the egg yolks.
Spatula: Useful for smoothing the filling and spreading coconut on the baking sheet.
Baking Sheet: Necessary for toasting the shredded coconut evenly.
Your Path to a Flawless Chocolate Coconut Dream Pie
- Preheat and Prepare:
Set your oven to 350 degrees Fahrenheit (175 degrees Celsius), ensuring it’s at the correct temperature for even baking of your crust.
- Combine Crumb Ingredients:
In a medium bowl, thoroughly combine the graham cracker crumbs and sugar for the crust.
Pour in the melted butter and mix exceptionally well until every crumb is uniformly moistened. This even distribution is essential for a consistent, strong crust structure.
- Press and Bake to Perfection:
Press the crumb mixture very firmly into the bottom and up the sides of a 9-inch pie plate. This critical firm compression creates a dense, protective barrier against moisture.
For the anti-soggy bottom secret, bake this crust for 8-10 minutes until it’s lightly golden and fragrant. This crucial baking step creates a fortified seal that will stand up to even the creamiest fillings.
Remove the pre-baked crust from the oven and let it cool completely on a wire rack before proceeding to prevent any condensation from forming.
- Whisk Dry Ingredients:
While the crust cools, begin the chocolate filling. In a medium saucepan, whisk together the granulated sugar, cocoa powder, cornstarch, and salt until no lumps remain.
Starting with a lump-free dry mixture is crucial for achieving a perfectly smooth, silky filling later.
- Gradually Add Milk:
Gradually whisk in the whole milk until the mixture is completely smooth and uniform.
Adding the milk slowly helps prevent new lumps from forming and ensures a consistent base for cooking.
- Thicken Over Heat:
Cook the mixture over medium heat, whisking constantly. Continue until it visibly thickens to a pudding-like consistency and comes to a gentle boil.
Continue to boil and whisk for an additional 1 minute; this ensures the cornstarch fully activates and creates a very stable, thick pudding that will set beautifully.
- Temper the Egg Yolks:
In a small bowl, whisk the egg yolks. Temper the yolks by slowly pouring about ½ cup of the hot chocolate mixture into the yolks, whisking continuously.
This gradual heating prevents the egg yolks from scrambling when introduced to the main hot mixture.
- Combine and Finish Filling:
Pour the tempered yolk mixture back into the saucepan with the remaining chocolate filling, whisking vigorously to combine everything evenly.
Continue to cook for one more minute over medium heat, whisking constantly, until the filling is very thick and glossy.
Remove from heat and stir in the 2 tablespoons of butter and 1 teaspoon of vanilla extract until they are fully melted and the filling is smooth.
- Fill the Crust:
Carefully pour the hot chocolate filling into the cooled, pre-baked crust.
Smooth the top with a spatula for an even and aesthetically pleasing surface.
- Toast the Coconut:
Spread the shredded coconut evenly on a baking sheet. Toast it in your preheated oven (or a toaster oven) for 5-7 minutes, stirring occasionally.
Keep a very close eye on the coconut as it browns quickly and can go from perfectly golden to burnt in a matter of seconds.
Allow the toasted coconut to cool completely before using it to prevent it from melting into the chocolate filling.
- Chill for Perfection:
Chill the pie in the refrigerator for at least 4 hours, or preferably overnight.
This extended chill is paramount for the filling to set completely and for the anti-soggy crust to bond perfectly, ensuring easy, clean, and beautiful slicing.
- Serve and Enjoy:
Before serving, sprinkle the cooled toasted coconut evenly over the top of the pie, adding a final touch of flavor and texture.
Slice your perfectly structured, utterly delicious Chocolate Coconut Dream Pie and enjoy every satisfying bite!
Phase 1: Constructing the Anti-Soggy Crust
Phase 2: Mastering the Rich Chocolate Filling
Phase 3: Assembling and Toasting Your Topping
Phase 4: The Crucial Chill for Ultimate Set
Chef’s Secrets: Elevate Your Chocolate Coconut Dream Pie Experience
Perfecting Your Crust Pressing Technique
For an ultra-dense and even crust, use the bottom of a flat-bottomed glass or a dry measuring cup. Press the crumbs firmly and uniformly into the bottom and up the sides of the pie plate. This creates an impenetrable, moisture-resistant barrier that is key to the anti-soggy crust.
Whisking Wisdom for a Lump-Free Filling
Constant and thorough whisking is your best friend throughout the filling preparation. Especially as the cornstarch activates and thickens, continuous motion prevents lumps from forming and ensures a silky-smooth texture. Don’t stop stirring!
The Art of Tempering Egg Yolks
When tempering the egg yolks, always add the hot liquid slowly to the yolks in a thin stream while whisking vigorously. This gradual temperature increase gently brings the yolks up to temperature, preventing them from scrambling and ensuring they integrate smoothly into the filling.
Achieving Golden Coconut Perfection
Toasted coconut can quickly go from golden to burnt. Always toast it on a baking sheet, stirring every 2-3 minutes, and watch it like a hawk. Remove it from the oven immediately once it reaches your desired golden brown, then let it cool completely on the baking sheet.
Why Chilling is Non-Negotiable
The long chilling period is not just for setting; it’s vital for the structural integrity of the entire pie. It allows the chocolate filling to fully firm up, ensures the crust-filling bond is secure, and prevents the dreaded soggy bottom, making for perfect, clean slices.
Enhancing Chocolate Flavor
For an even deeper, more complex chocolate taste, consider adding a tiny pinch (about ¼ teaspoon) of instant espresso powder to the dry cocoa mixture. It subtly amplifies the chocolate notes without imparting any discernible coffee flavor, elevating your Chocolate Coconut Dream Pie.
Common Challenges & Smart Solutions for Your Pie
Why is My Crust Still Soggy?
Sogginess in your crust often stems from either insufficient pressing or under-baking the initial crust. It is critical to press the graham cracker mixture very firmly into the pie plate to create a dense barrier.
Ensure you bake the crust for the full recommended 8-10 minutes until it’s lightly golden and fragrant. This pre-baking step creates the essential fortified seal that truly resists moisture.
Filling Not Setting Firmly?
If your filling remains too soft, it usually indicates that the cornstarch didn’t fully activate or wasn’t cooked long enough at the proper temperature. You must ensure the mixture comes to a gentle boil and continues to boil, whisking constantly, for a full minute.
This boiling time is necessary for the cornstarch to properly thicken and stabilize the Chocolate Coconut Dream Pie filling.
Burnt Coconut Woes?
Toasted coconut has a narrow window between perfectly golden and burnt. The key to success is vigilance: keep a very close eye on it, stir frequently every 2-3 minutes, and remove it from the oven as soon as it achieves a light, even golden brown.
Pie Cracks After Chilling?
Cracks can sometimes appear on the surface of your Chocolate Coconut Dream Pie if it cools too rapidly or if it’s moved excessively before it has completely set. To mitigate this, ensure the pie cools gradually, ideally undisturbed, in the refrigerator.
Serving Suggestions & Storing Your Delicious Creation
Presenting Your Masterpiece
This Chocolate Coconut Dream Pie is spectacular on its own, but you can enhance its presentation and flavor with a few simple additions. A generous dollop of freshly whipped cream provides a lovely contrast in texture and richness.
For an extra touch, sprinkle a few chocolate shavings or a light dusting of cocoa powder over the whipped cream. A small side of fresh raspberries or sliced strawberries can also add a delightful tart counterpoint.
Storing Leftovers for Lasting Freshness
Any leftover Chocolate Coconut Dream Pie should be stored tightly covered with plastic wrap in the refrigerator. This will keep it fresh and prevent it from absorbing any unwanted odors from other foods.
Properly stored, your delicious pie will maintain its quality for up to 3-4 days, ready for another delightful slice.
Make-Ahead Magic: Plan Your Pie Perfectly
This Chocolate Coconut Dream Pie is an ideal make-ahead dessert, perfect for stress-free entertaining. You can fully prepare it the day before you plan to serve it.
Allowing it to chill overnight provides the optimal time for the filling to set completely and for the flavors to meld beautifully. Remember to add the toasted coconut just before serving for the best texture and freshness.
Your Chocolate Coconut Dream Pie Questions, Answered!
Can I use a store-bought crust?
While you certainly can use a store-bought graham cracker crust for convenience, it won’t offer the same anti-soggy bottom protection as our recipe’s pre-baked, fortified crust. To improve its resistance to moisture, we strongly recommend pre-baking any store-bought graham cracker crust for 8-10 minutes.
What if I don’t have whole milk?
You can substitute 2% milk, but be aware that the chocolate filling for your Chocolate Coconut Dream Pie might be slightly less rich and creamy due to the lower fat content. We do not recommend using skim milk, as it will significantly compromise the luxurious texture and decadence of the filling.
Can I make this pie gluten-free?
Absolutely! To make this Chocolate Coconut Dream Pie gluten-free, simply replace the regular graham cracker crumbs with a certified gluten-free brand. The remaining ingredients in the recipe are naturally gluten-free, ensuring a delicious and safe dessert for those with gluten sensitivities.
How do I know when the filling is fully set?
After the recommended chilling time (at least 4 hours, and ideally overnight), the chocolate filling should be firm to the touch. When you gently move the pie plate, the filling should no longer jiggle significantly; it should feel solid, similar to a very firm pudding.
Can I use unsweetened coconut?
You can use unsweetened shredded coconut for the topping if you prefer. However, sweetened coconut typically provides a better flavor balance with the rich chocolate filling. If you opt for unsweetened, you might consider slightly increasing the sugar in the crust or the chocolate filling to compensate for the difference in sweetness.
Ready to Indulge? Share Your Chocolate Coconut Dream Pie Success!
You now possess the secrets to crafting a truly exceptional Chocolate Coconut Dream Pie – one that boasts a perfectly crisp crust, a rich chocolate filling, and an irresistible toasted coconut topping. No more soggy crust disappointment, just pure pie perfection!
We encourage you to embark on this delicious baking adventure. Your kitchen will be filled with the most delightful aromas, and your taste buds are in for a treat.
Once you’ve experienced the triumph of this ultimate Chocolate Coconut Dream Pie, we’d love to hear about it! Share your successes and insights with us.
Chocolate Coconut Pie
Course: DessertCuisine: AmericanDifficulty: medium1
pie (8-10 servings)40
minutes30
minutes450
kcal360
minutesSay goodbye to soggy bottoms with this incredible Chocolate Coconut Dream Pie. Featuring a perfectly crisp graham cracker crust, a luscious, rich chocolate filling, and a delightful topping of golden toasted coconut. This pie holds up beautifully for a truly dreamy dessert experience.
Ingredients
For the Crust:
1 ½ cups graham cracker crumbs
¼ cup granulated sugar
½ cup unsalted butter, melted
For the Chocolate Filling:
¾ cup granulated sugar
¼ cup cocoa powder
¼ cup cornstarch
¼ teaspoon salt
2 ½ cups whole milk
2 large egg yolks
2 tablespoons unsalted butter, cut into pieces
1 teaspoon vanilla extract
For the Topping:
1 ½ cups shredded sweetened coconut
Directions
- Preheat your oven to 350 degrees Fahrenheit (175 degrees Celsius).
- In a medium bowl, combine the graham cracker crumbs and sugar for the crust. Pour in the melted butter and mix well until all crumbs are moistened.
- Press the crumb mixture very firmly into the bottom and up the sides of a 9-inch pie plate. This crucial step creates a dense, protective barrier against moisture. For the anti-soggy bottom secret, bake this crust for 8-10 minutes until lightly golden and fragrant. This slight bake creates a fortified seal that stands up to even the creamiest fillings. Remove from oven and let cool completely on a wire rack.
- While the crust cools, prepare the chocolate filling. In a medium saucepan, whisk together the sugar, cocoa powder, cornstarch, and salt until no lumps remain. Gradually whisk in the milk until smooth.
- Cook the mixture over medium heat, whisking constantly, until it thickens and comes to a gentle boil. Continue to boil and whisk for 1 minute to ensure the cornstarch fully activates and creates a very stable, thick pudding.
- In a small bowl, whisk the egg yolks. Temper the yolks by slowly pouring about ½ cup of the hot chocolate mixture into the yolks, whisking constantly. Then, pour the tempered yolk mixture back into the saucepan with the remaining chocolate filling, whisking vigorously.
- Continue to cook for another minute over medium heat, whisking constantly, until the filling is very thick and glossy. Remove from heat and stir in the 2 tablespoons of butter and vanilla extract until melted and smooth.
- Pour the hot chocolate filling into the cooled, pre-baked crust. Smooth the top with a spatula.
- For the topping, spread the shredded coconut evenly on a baking sheet. Toast in the preheated oven (or a toaster oven) for 5-7 minutes, stirring occasionally, until golden brown. Keep a close eye on it as coconut toasts quickly! Let cool completely.
- Chill the pie for at least 4 hours, or preferably overnight, to allow the filling to set completely and for the crust to bond perfectly. This extended chill is key to locking in the anti-soggy bottom and achieving perfect sliceability.
- Before serving, sprinkle the cooled toasted coconut over the top of the pie. Slice and enjoy your perfectly structured, utterly delicious pie!
Notes
- The secret to a perfectly crisp crust and set filling lies in the pre-bake and extended chilling time.