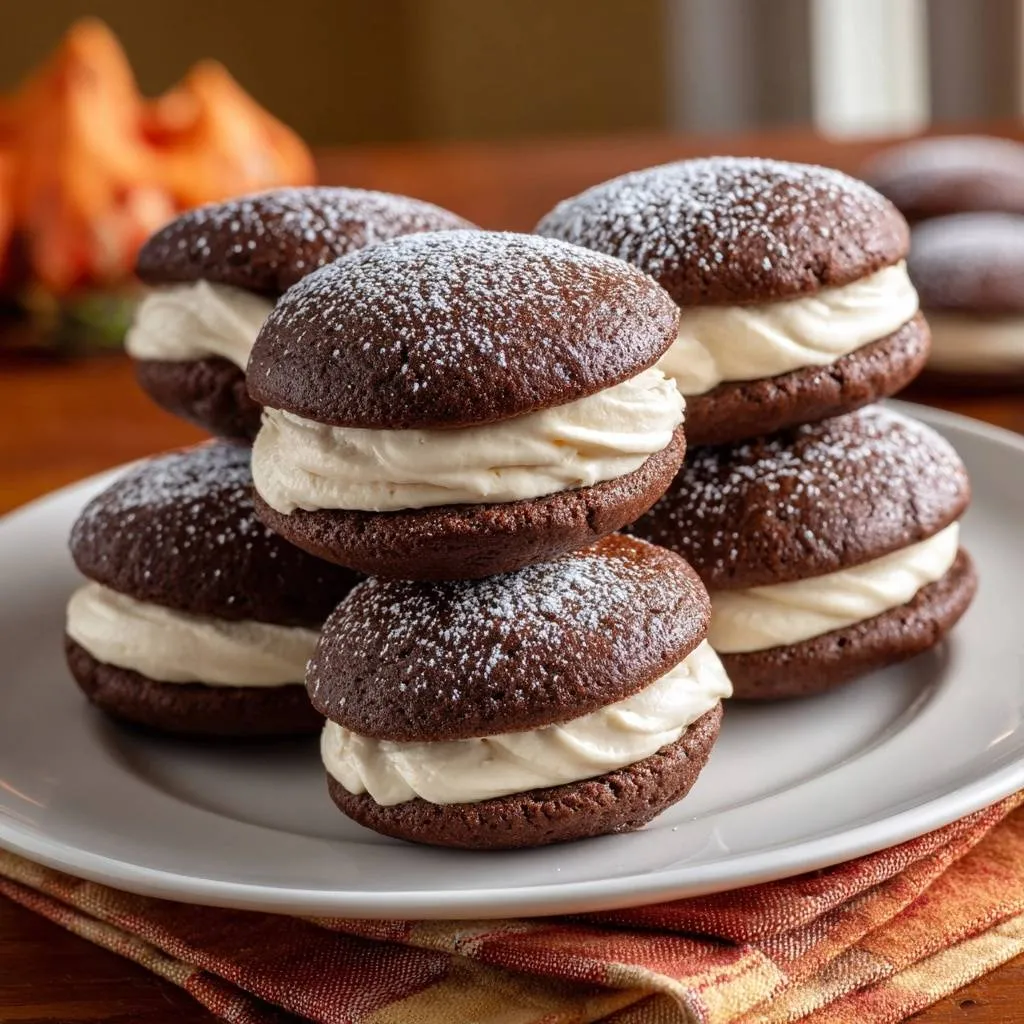
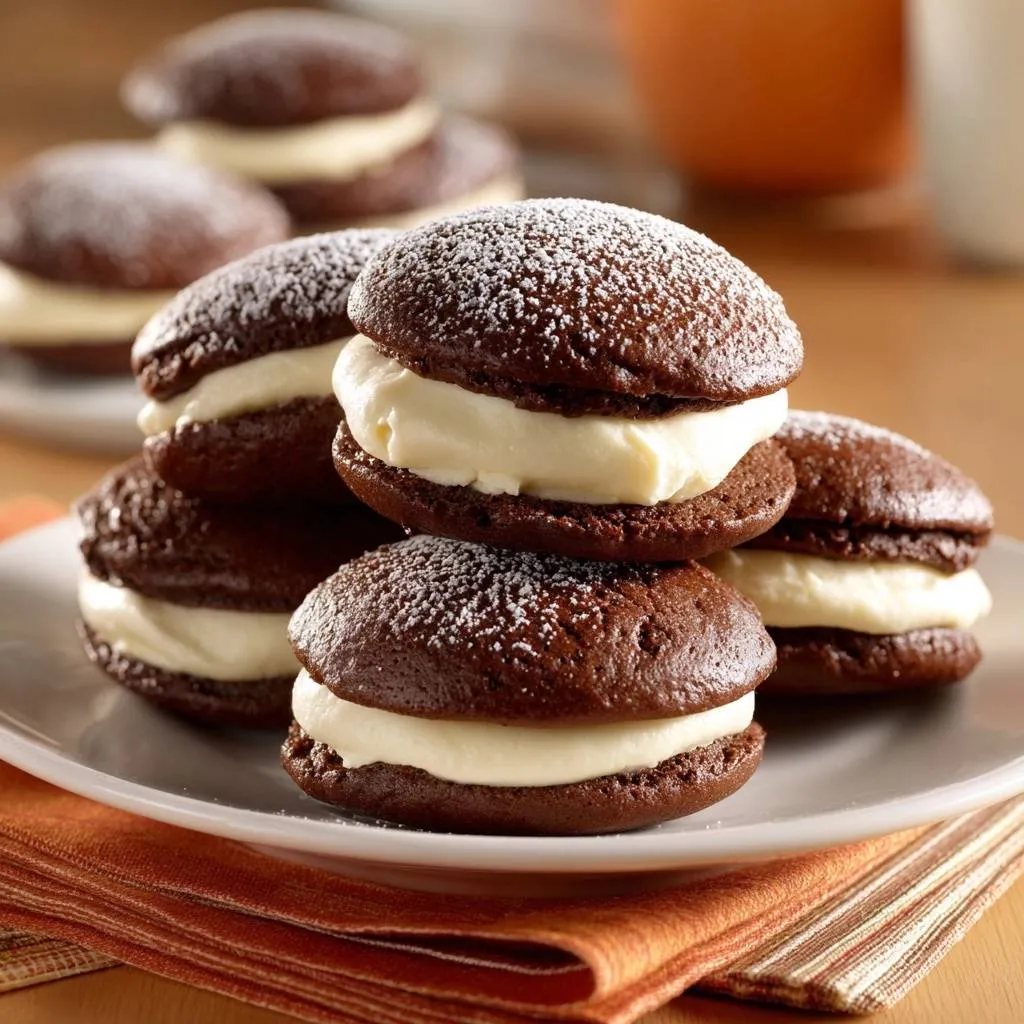
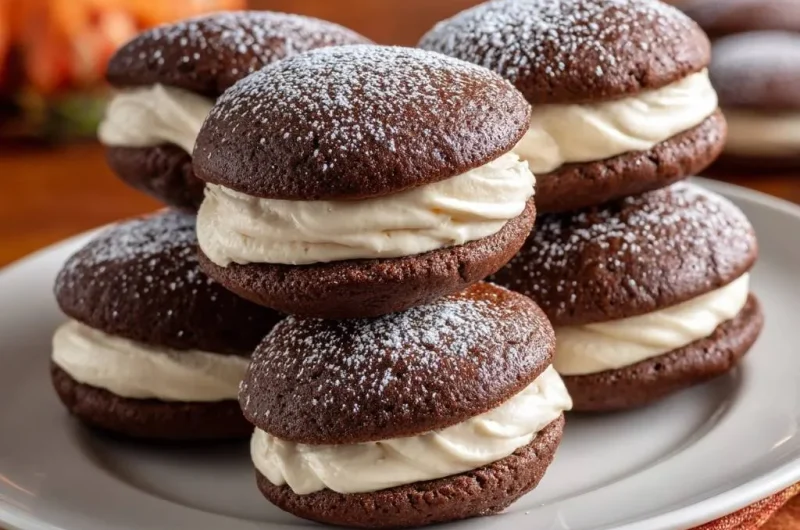
Remember those whoopie pies from childhood bake sales? They promised soft chocolate bliss but often turned out flat and disappointing. This chocolate whoopie pies recipe changes everything with a simple chill step that delivers tall, bakery-style domes every time.
However, most home bakers skip that key fridge time. Therefore, their pies spread thin in the oven. You won’t face that issue here because the batter firms up perfectly.
For another chocolate treat with a similar depth of flavor, explore frosted dark chocolate toffee cookies.
The secret lies in chilling the scooped mounds for 20 minutes. It locks in the butter’s structure so your chocolate whoopie pies rise high and stay moist. Plus, hot water blooms the cocoa for that deep, fudgy flavor you crave.
Chocolate Whoopie Pies Ingredients Breakdown
Core Dry Components for Structure
Start with 2 cups all-purpose flour. It gives your chocolate whoopie pies the right chew without toughness. In addition, 1/2 cup unsweetened cocoa powder delivers intense chocolate taste, but natural cocoa works best here since it reacts with baking soda.
Don’t swap for Dutch-processed cocoa. It lacks acidity, so your pies won’t lift properly. Meanwhile, 1 teaspoon baking soda pairs with buttermilk for perfect rise, and 1/2 teaspoon salt balances the sweetness.
For high-altitude baking, add an extra 2 tablespoons flour and reduce baking soda to 3/4 teaspoon. This prevents over-leavening and keeps domes intact.
Key Wet Ingredients for Moisture
Buttermilk brings acidity that activates baking soda for lift in chocolate whoopie pies. Regular milk won’t cut it since it lacks tang, leading to flat results. Use 1 cup at room temperature for smooth mixing.
Next, 1/2 cup hot water blooms the cocoa. It unlocks deep flavor and color, making every bite fudgy. The egg binds everything, while 1 cup granulated sugar and 1/2 cup softened butter cream to fluffy peaks.
Always soften butter, don’t melt it. Melted butter makes batter too liquid, causing spread. Beat it with sugar for 2 minutes until pale for airy texture.
Vanilla Filling Essentials
Softened 1/2 cup butter forms the base. Beat it creamy before adding 2 cups powdered sugar, which includes cornstarch for smoothness in your chocolate whoopie pies filling. One teaspoon vanilla adds cozy flavor.
Heavy cream, 2-3 tablespoons, creates spreadable consistency. It holds better than milk, which can make filling weepy. For dairy-free, try coconut cream, but chill it first for stability.
Shortening swaps in if you need dairy-free, but butter tastes richer. Beat until light and fluffy for that perfect sandwich.
Science of Tall Chocolate Whoopie Pies
Batter Chemistry for Dome Formation
Baking soda reacts with buttermilk’s acids to release carbon dioxide bubbles. This leavens your chocolate whoopie pies batter quickly for tall domes. Hot water activates cocoa tannins, enhancing fudgy moisture without gumminess.
However, overmixing develops gluten in flour. Therefore, mix just until combined to avoid tough, flat pies. The batter looks thin at first, but it transforms in the oven.
Fold gently at the end. You’ll see it smooth out into glossy mounds ready for chilling.
Chill Step’s Role in Preventing Spread
Chilling firms the butterfat globules in the batter. When you bake, less melting happens upfront, so chocolate whoopie pies hold shape and dome up tall. Without it, they spread wide and low.
In tests, unchilled pies measure 1/2 inch high, while chilled ones hit 1 inch. That’s double the height for sandwiching. Refrigerate sheets for exactly 20 minutes, no more.
Pro tip: If your kitchen’s warm, chill longer. This step guarantees bakery results every time.
Equipment Choices for Chocolate Whoopie Pies
Best Baking Sheets and Liners
Grab heavy aluminum half-sheets. They conduct heat evenly, preventing warped, uneven chocolate whoopie pies. Thin cookie sheets buckle and cause hot spots.
Parchment paper beats silicone mats for crisp bases. It allows slight browning without sticking. Line sheets fully for easy release.
For a similar smooth texture, check out these glazed orange creamsicle cookies.
Mixing Tools for Fluffy Batter
A stand mixer creams butter and sugar fastest for airy chocolate whoopie pies batter. Hand mixers work too, but take longer. Aim for pale, fluffy results.
Use a spring-loaded scoop for 2-tablespoon mounds. It ensures uniform size, so all pies bake evenly. A piping bag shines for neat filling later.
Step-by-Step Chocolate Whoopie Pies Assembly
Prepping Dry and Wet Mixtures
Preheat oven to 375°F and line sheets with parchment. Whisk flour, cocoa, baking soda, and salt in one bowl. In another, beat softened butter and sugar until fluffy, about 2 minutes.
Add egg and vanilla, then beat smooth. Stir in buttermilk and hot water; the batter thins but smells richly chocolatey. Gradually mix in dries until just combined. Stop here to avoid toughness.
More Chocolate Temptations
If you enjoyed these chocolate whoopie pies, you might also like these other chocolate creations.
- For a richer chocolate experience, consider making a moist chocolate bundt cake that promises an easy release from the pan.
- If you’re in the mood for something sweet and comforting, try these cinnamon french toast stacks, offering a different kind of baked goodness.
Chilling and Scooping Batter Mounds
Scoop 2-tablespoon mounds, spacing 2 inches apart. The batter spreads a bit, but chilling prevents disaster. Slide sheets into fridge for 20 minutes until firm.
If batter’s too thin, chill the bowl first. This step locks in domes for your chocolate whoopie pies, turning soft cakes into stackable perfection.
Baking to Spring-Back Perfection
Bake 10-12 minutes until tops spring back when touched. Rotate sheets halfway for even heat. They’ll smell chocolatey and pull from parchment edges.
Cool on sheets 5 minutes, then racks. This sets structure without sogginess in chocolate whoopie pies cakes.
Creamy Filling and Sandwiching
Beat butter creamy, then add powdered sugar, vanilla, and 2 tablespoons cream. Whip to fluffy peaks, adding more cream if stiff. It smells like vanilla dreams.
Spread or pipe onto flat sides of half the cooled pies. Top with others gently. Dust with powdered sugar for that bakery finish on chocolate whoopie pies.
Avoiding Flat Chocolate Whoopie Pies Mistakes
Overmixing and Batter Deflation
Overmixing builds gluten, making chocolate whoopie pies tough and flat. Mix on low speed and fold by hand at the end. You’ll get tender results.
Symptoms include dense texture. Fix next time by stopping when flour disappears.
Oven Temperature and Timing Errors
375°F ensures quick lift before spreading. Too low, and pies flatten; too high dries them. Use an oven thermometer always.
Underbake for gooey centers, but overbake leads to cracks. Check at 10 minutes.
Filling Too Runny or Stiff Fixes
Room-temp butter prevents graininess. If runny, add powdered sugar; if stiff, more cream. Beat 3-4 minutes for spreadable fluff.
Humidity softens filling, so chill briefly before using on chocolate whoopie pies.
Flavor Twists on Chocolate Whoopie Pies
Swaps for Mocha or Mint Versions
Add 1 teaspoon espresso powder to batter for mocha depth in chocolate whoopie pies. Or stir 1/4 teaspoon peppermint extract into filling for minty coolness.
Upgrade to black cocoa for darker color. Keep ratios same for reliable domes.
Add-Ins for Texture Variety
Fold in 1/2 cup chocolate chips or chopped nuts to batter before chilling. They add crunch to soft chocolate whoopie pies.
Mix berry puree into filling for seasonal pop. Sprinkle sea salt flakes on top for contrast.
Make-Ahead Strategies for Chocolate Whoopie Pies
Freezing Components Separately
Flash-freeze baked cakes on a sheet, then bag for 3 months. Thaw before filling. Filling freezes well in a piping bag; thaw overnight.
Store airtight to prevent freezer burn on chocolate whoopie pies.
Batch Baking and Storage Longevity
Chill dough up to 24 hours for fresh-baked taste. Assembled pies last 3 days fridge. Microwave 5 seconds to revive softness.
Pairing Ideas for Chocolate Whoopie Pies
Beverage Matches from Coffee to Tea
Bold roast coffee cuts through chocolate richness. Chai tea adds spice warmth. Cold almond milk lightens it up.
Occasion Sides and Platters
Pair with fruit platters at parties. Add ice cream scoops for sundaes. Fall apple slices bring crisp contrast to chocolate whoopie pies.
Troubleshooting Chocolate Whoopie Pies Issues
Why Pies Spread Too Much
Skipping chill or soft butter causes spread. Always fridge 20 minutes and use softened butter. Bake immediately after for domed chocolate whoopie pies.
Altitude Adjustments
At high elevations, cut baking soda to 3/4 teaspoon and add 2 tablespoons flour. Test a small batch first.
Filling Not Holding Shape
Chill filling 10 minutes or use less cream. High humidity softens it, so store assembled pies cool.
Cakes Too Dry or Dense
Check buttermilk freshness; old stuff lacks acidity. Avoid overbaking, and measure flour by spooning, not scooping.
Chocolate Whoopie Pies FAQ
Can I Use Cake Flour Instead?
Cake flour makes tender chocolate whoopie pies but weakens structure, risking flats. Blend 1 1/2 cups all-purpose with 1/2 cup cake flour for balance. Domes hold, texture softens.
How Long Do They Stay Fresh?
Room temp up to 2 days in airtight container. Fridge 5 days; freezer 2 months. Thaw at room temp and dust fresh powdered sugar to revive.
Dairy-Free Chocolate Whoopie Pies Possible?
Yes, use plant-based buttermilk (almond milk plus vinegar), vegan butter, and coconut cream. Chill vegan filling extra for stability. Domes form perfectly.
Why Add Hot Water to Batter?
Hot water blooms cocoa, releasing rich flavor and color compounds. It ensures fudgy, moist chocolate whoopie pies without bitterness. Cold water leaves flat taste.
Scaling Recipe for Crowds?
Double ingredients safely; yields 24 pies. Bake in batches to avoid crowding. Chill each sheet separately for uniform domes on big batches of chocolate whoopie pies.
Chocolate Whoopie Pies
Course: DessertCuisine: AmericanDifficulty: medium24
whoopie pies30
minutes12
minutes250
kcal60
MinutesFlat whoopie pies are a total buzzkill, but this recipe fixes it with one foolproof chill step that locks in perfect domes every time. Soft chocolate cakes sandwich creamy vanilla filling for fall-ready bliss.
Ingredients
2 cups all-purpose flour
1/2 cup unsweetened cocoa powder
1 teaspoon baking soda
1/2 teaspoon salt
1 cup buttermilk
1 large egg
1/2 cup unsalted butter, softened
1 cup granulated sugar
1 teaspoon vanilla extract
1/2 cup hot water
For the filling:
1/2 cup unsalted butter, softened
2 cups powdered sugar
1 teaspoon vanilla extract
2-3 tablespoons heavy cream
Directions
- Preheat oven to 375 degrees F. Line baking sheets with parchment paper.
- In a bowl, whisk flour, cocoa, baking soda, and salt.
- In another bowl, beat butter and sugar until fluffy, about 2 minutes. Add egg and vanilla, beat until smooth.
- Stir in buttermilk and hot water (this blooms the cocoa for deep flavor and moisture). Gradually mix in dry ingredients until just combined. Do not overmix.
- Scoop 2-tablespoon mounds of batter onto prepared sheets, spacing 2 inches apart. For the no-flat secret: chill sheets in fridge for 20 minutes. This firms the batter, prevents spreading, and guarantees tall, domed pies.
- Bake 10-12 minutes until tops spring back. Cool on sheets 5 minutes, then transfer to wire rack to cool completely.
- For filling, beat butter until creamy. Gradually add powdered sugar, vanilla, and 2 tablespoons cream. Beat until light and spreadable, adding more cream if needed.
- Spread or pipe filling on flat sides of half the pies. Top with remaining pies. Dust with extra powdered sugar. Store in airtight container up to 3 days.
Notes
- Chill the batter sheets for 20 minutes before baking to prevent spreading and ensure tall, domed pies. Store in an airtight container for up to 3 days.