I remember the frustration of baking what I hoped would be delightful Classic Snowball Cookies, only for them to turn out disappointingly dry and crumbly. After years of testing and perfecting, I’ve finally unlocked the secret to that elusive melt-in-your-mouth texture. This recipe guarantees irresistible, tender, and perfectly powdered cookies every single time.
Beyond Basic: The Secret to Truly Tender Snowball Cookies
This isn’t just another recipe; it’s a guide to transforming a simple butter cookie into an unforgettable culinary experience. We’re focusing on precise techniques and high-quality ingredients to achieve a superior texture.
For more ideas on thumbprint cookies, check out glazed raspberry thumbprint cookies.
Why “Dry and Crumbly” is a Thing of the Past
Many common pitfalls, like overmixing or overbaking, can quickly lead to dry and crumbly snowball cookies. Our method meticulously addresses these issues, ensuring your cookies retain their moisture and delicate structure.
We prioritize gentle handling and precise baking times to prevent a tough, dry outcome. This focus on technique is what elevates our Classic Snowball Cookies above the rest.
The Unbeatable Texture: Our Recipe’s Promise
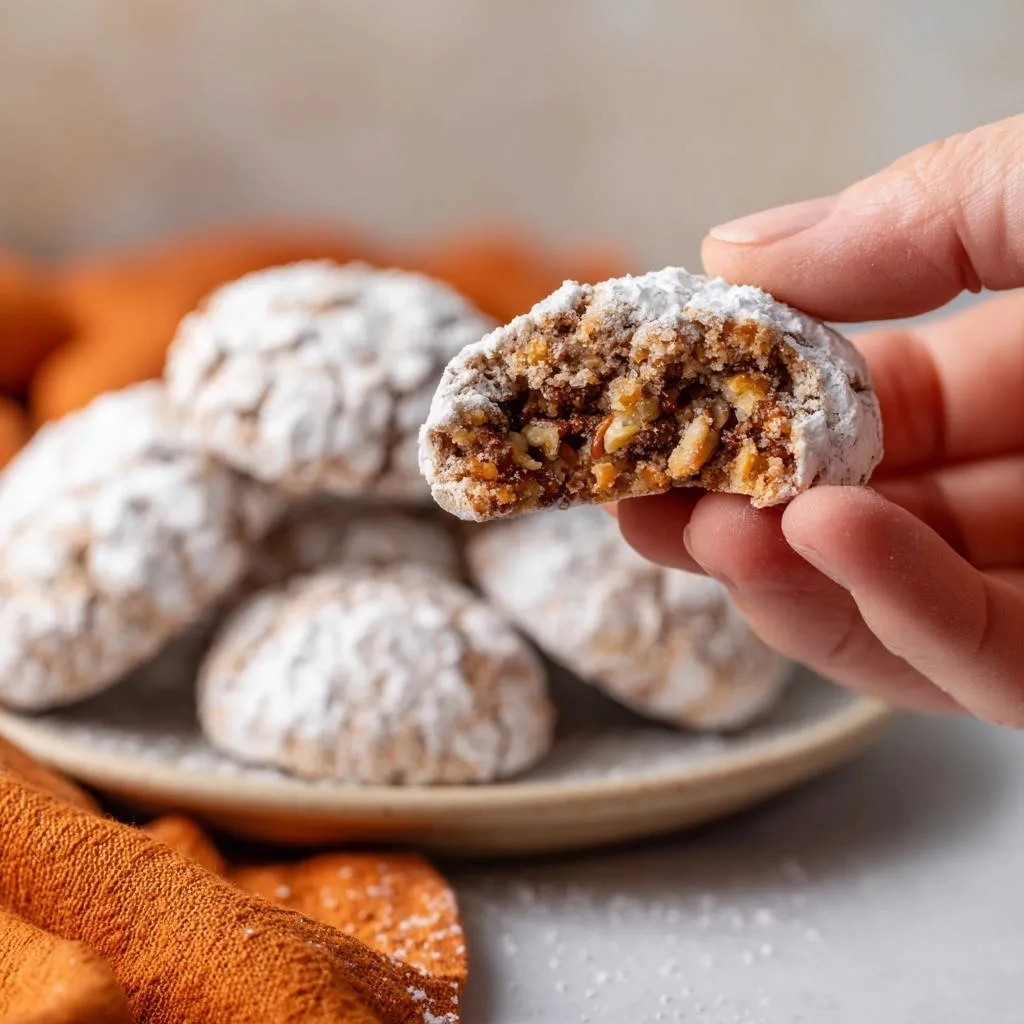
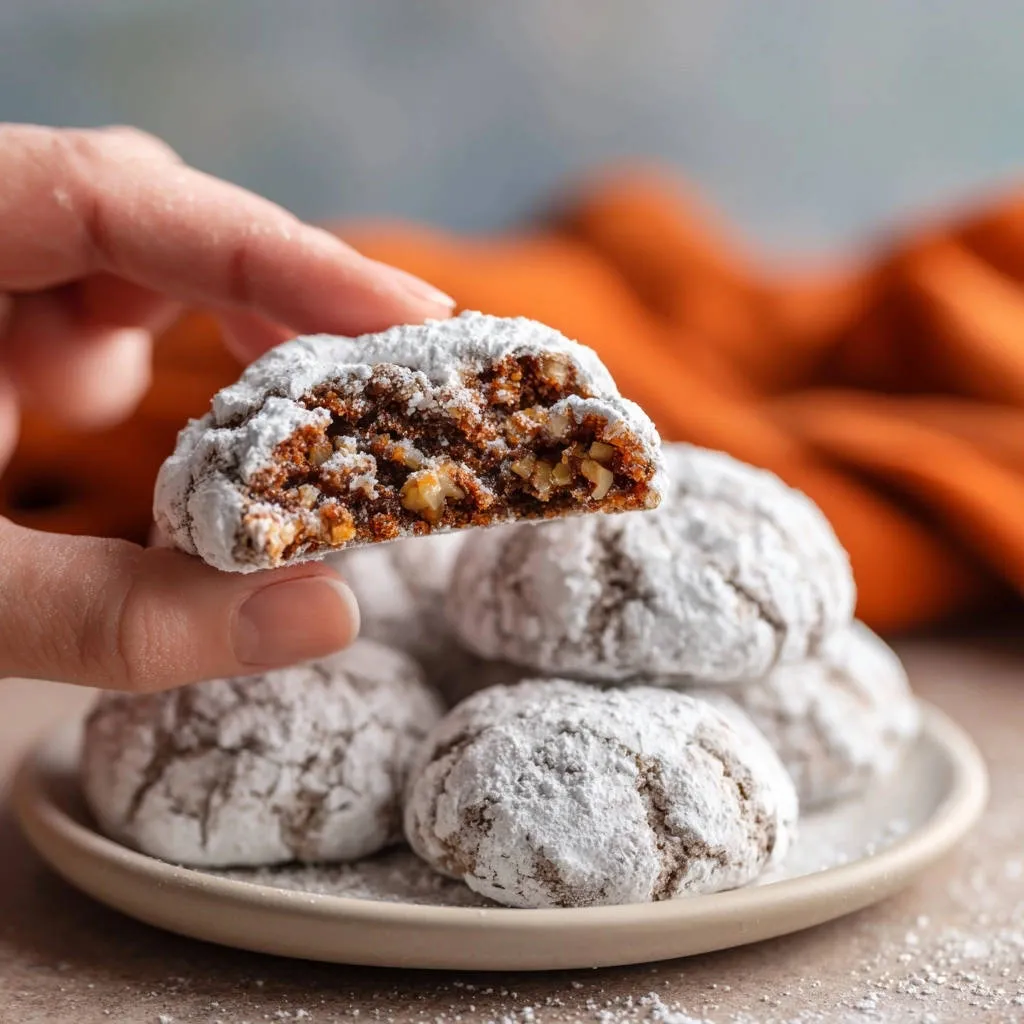
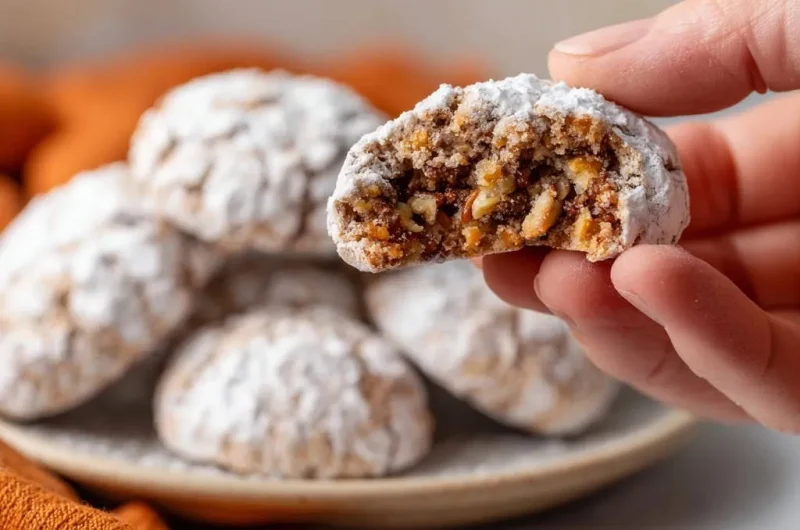
Prepare for a cookie that truly melts in your mouth, leaving behind a rich, buttery, and subtly sweet flavor. Each bite is light yet decadent, with a tender crumb that dissolves beautifully on the tongue.
If you enjoy this melt-in-your-mouth texture, explore glazed orange creamsicle cookies for a similar delight.
This recipe promises that iconic, perfectly powdered exterior combined with an interior that is always moist and incredibly tender. It’s the hallmark of truly exceptional butter cookies.
Gathering Your Essentials: Ingredients for Iconic Snowball Cookies
High-quality ingredients are the foundation of any great bake, and Classic Snowball Cookies are no exception. Selecting the right components ensures the best flavor and texture.
Butter: The Foundation of Tenderness
Unsalted butter is crucial here, allowing you to control the salt content precisely. Ensure it’s perfectly softened for optimal creaming, which is vital for air incorporation and a tender crumb.
Room temperature butter creams beautifully, forming a light and fluffy base that contributes significantly to the cookie’s signature texture.
Sweetness & Structure: Sugars and Flour
Powdered sugar (also known as confectioners’ sugar) is used in the dough for a finer, smoother texture than granulated sugar. It dissolves more readily, contributing to the melt-in-your-mouth quality.
All-purpose flour provides the essential structure. Adding it gradually and mixing gently prevents overdevelopment of gluten, which could make the cookies tough.
Flavor & Crunch: Vanilla, Salt, and Nuts
A good quality vanilla extract adds warmth and depth to the overall flavor profile. It complements the butteriness beautifully.
Just a touch of salt balances the sweetness and enhances all the other flavors. It’s a small but mighty ingredient.
Finely chopped walnuts or pecans add a delightful crunch and nutty flavor, a classic addition to these festive holiday cookies. Toasting them lightly beforehand can enhance their aroma even further.
Equipping Your Kitchen: Must-Have Tools for Success
Having the right tools makes the baking process smoother and helps ensure consistent, perfect results. Here are the essentials for your Classic Snowball Cookies.
- Mixing Mastery: Stand Mixer vs. Handheld
An electric mixer, whether a stand mixer with the paddle attachment or a handheld model, is invaluable for creaming butter and sugar. It ensures thorough aeration, critical for light and tender cookies.
While a mixer speeds things up, you can achieve great results with a sturdy whisk and a bit more elbow grease.
- Baking Sheets & Parchment: Your Non-Stick Allies
Quality baking sheets provide even heat distribution. Lining them with parchment paper prevents sticking, promotes even baking, and makes for effortless cleanup.
Parchment paper also helps prevent the bottoms of your delicate butter cookies from browning too quickly.
- Precision Tools: Measuring for Perfection
Accurate measuring cups and spoons are essential for consistency in baking. Precise ingredient ratios are key to achieving the perfect texture and flavor for your Classic Snowball Cookies.
Crafting Your Snowy Delights: A Step-by-Step Guide to Classic Snowball Cookies
Follow these detailed instructions to create the most tender, melt-in-your-mouth Classic Snowball Cookies. Each step builds on the last, guiding you to perfection.
- Prepare Your Workspace: Preheat and Line
Preheat your oven to 325 degrees F (160 degrees C) and line baking sheets with parchment paper. This ensures even baking and easy cookie removal, preventing any sticking.
- Cream Butter and Sugar: The Air Incorporation Secret
In a large bowl, cream together the softened unsalted butter and 1/2 cup powdered sugar until the mixture is light and fluffy. This crucial step incorporates air, which is fundamental for achieving that tender, melt-in-your-mouth texture mentioned in the original recipe, preventing dry cookies.
- Infuse Flavor: Vanilla and Salt
Stir in the vanilla extract and salt until well combined. These ingredients enhance the overall flavor profile of your Classic Snowball Cookies, adding depth and balance to the sweetness.
- Gentle Mixing: Flour and Nuts
Gradually add the all-purpose flour, mixing on low speed just until combined. Be very careful not to overmix, as overdeveloping the gluten can lead to tough cookies. Once the flour is mostly incorporated, gently stir in the finely chopped walnuts or pecans, ensuring they are evenly distributed.
- Shape Your Snowballs: Rolling the Dough
Roll the prepared dough into uniform 1-inch balls. Aim for consistency in size to ensure even baking. Place these on your parchment-lined baking sheets, ensuring about 1 inch of space between each cookie to allow for slight spreading without touching.
- Bake to Perfection: The “Just Set” Principle
Bake for 12 to 15 minutes, or until the edges appear lightly golden and the bottoms are just barely set. It’s important that they do not brown significantly. Baking just until set is key to preventing them from drying out and maintaining their tender crumb, which is the hallmark of perfect Classic Snowball Cookies.
- First Sugar Dusting: The Warmth Advantage
While the cookies are still warm but cool enough to handle, roll them generously in powdered sugar. The residual warmth helps the first layer of sugar adhere beautifully, creating a perfect base for the snowy finish and preventing the sugar from falling off.
- Cool Completely and Second Roll: The Signature Snowy Finish
Transfer the cookies to a wire rack and let them cool completely. This allows them to firm up. Once fully cooled, roll them in powdered sugar a second time. This double dusting achieves the iconic, beautiful snowy appearance of Classic Snowball Cookies and ensures a thick, even coating.
Elevate Your Bake: Expert Tips for Irresistible Snowball Cookies
Achieving truly exceptional Classic Snowball Cookies goes beyond just following the steps. These expert tips will help you master the nuances and ensure stellar results every time.
The Art of Creaming: Don’t Rush This Step!
Creaming butter and sugar isn’t just mixing; it’s about incorporating air. This process should take 2-3 minutes with an electric mixer, resulting in a pale, fluffy mixture.
Insufficient creaming leads to dense cookies, while proper aeration ensures a light, melt-in-your-mouth texture. This is a foundational step for tender butter cookies.
Mastering Mixing: Avoiding Tough Cookies
Once you add the flour, mix only until just combined. Overmixing develops the gluten, which will make your Classic Snowball Cookies tough and chewy instead of tender.
Use the lowest speed on your mixer or mix by hand, stopping as soon as no dry streaks of flour remain.
Baking to Perfection: Spotting the “Just Right” Moment
Snowball cookies are intentionally pale; they shouldn’t brown significantly. Look for edges that are barely golden and bottoms that are just set to the touch.
Pulling them from the oven at this precise point prevents them from drying out. A slight underbake is better than an overbake for achieving that tender crumb.
Double the Dusting: Achieving That Flawless Snowy Finish
The two-stage rolling in powdered sugar is essential for the iconic “snowball” look. The first roll adheres to the warm cookie, creating a base.
The second roll, once completely cool, adds that thick, pristine layer of “snow” that makes these holiday cookies so visually appealing and delicious.
Troubleshooting Your Classic Snowball Cookies: Common Issues & Quick Fixes
Even seasoned bakers encounter hiccups. Here are solutions to common problems you might face when making Classic Snowball Cookies.
Why Are My Cookies Spreading Too Much?
Excessive spreading often indicates that your butter was too soft, the dough was too warm, or perhaps the flour measurement was slightly off. Ensure your butter is softened, not melted, and chill the dough for 15-30 minutes if it feels overly soft before rolling.
You can also try adding an extra tablespoon or two of flour if the dough feels consistently sticky and difficult to work with.
Help! My Cookies Are Dry and Crumbly
This is usually a sign of overbaking or overmixing the flour. Ensure you only bake until the edges are just barely set, resisting the urge to let them brown.
Remember to mix the flour gently and only until combined to avoid developing too much gluten, which toughens the cookies.
The Powdered Sugar Won’t Stick!
If your powdered sugar isn’t adhering well, it’s likely due to the cookies being too cool for the first roll. The warmth helps the sugar melt slightly and stick.
For the second roll, ensure the cookies are completely cool, and roll them generously. You can also press the sugar gently into the cookies if needed.
Classic Snowball Cookies FAQs: Your Questions Answered
Let’s address some common queries about these delightful holiday cookies.
Can I Make These Nut-Free or Gluten-Free?
Yes, you can easily make these nut-free by simply omitting the walnuts or pecans. The recipe will still yield delicious butter cookies.
For a gluten-free version, use a 1:1 gluten-free all-purpose flour blend. Ensure it contains xanthan gum for best results, as this will help with the cookie’s structure.
How Long Do Snowball Cookies Last, and How Should I Store Them?
Classic Snowball Cookies, when stored properly, can last for up to 1-2 weeks at room temperature. Always keep them in an airtight container to maintain their freshness.
Placing a piece of parchment paper between layers of cookies can also help prevent them from sticking together.
Can I Freeze Snowball Cookie Dough or Baked Cookies?
Absolutely! You can freeze the shaped cookie dough balls for up to 3 months. Place them on a baking sheet to freeze solid, then transfer to an airtight freezer bag.
Baked and cooled Classic Snowball Cookies (before the second sugar roll) can also be frozen for up to 3 months in an airtight container. Thaw at room temperature and roll in powdered sugar twice before serving.
Serving Suggestions & Storage Solutions
Ensure your delicious Classic Snowball Cookies are enjoyed at their best and stay fresh for longer with these tips.
Perfect Pairings: Enjoying Your Snowball Cookies
These delicate cookies are wonderful on their own, but they also pair beautifully with a warm cup of coffee, tea, or hot cocoa. They are a quintessential addition to any holiday cookie platter.
Sweet Companions
After enjoying these delightful snowball cookies, consider these other sweet treats that share a love for rich flavors.
- For a deeply satisfying chocolate experience, try this Moist Chocolate Bundt Cake, perfect for when you crave something decadent.
- If you enjoy a fluffy texture, these Fluffy Diner-Style Pancakes offer a comforting sweetness that complements any occasion.
Serve them as a sweet finish to a festive meal or as a delightful treat during cozy winter evenings.
Keeping Them Fresh: Storage Tips
Always store your Classic Snowball Cookies in an airtight container at room temperature. This protects them from drying out and preserves their tender texture.
Avoid refrigerating them, as the cold can actually dry out butter cookies. A cool, dry pantry is ideal.
Make-Ahead Magic: Prepare for Future Cravings
The dough for these cookies can be made a day or two in advance and stored in the refrigerator. This is perfect for holiday baking when you’re short on time.
You can also bake the cookies ahead of time and freeze them before the second dusting. Simply thaw and roll when ready to serve for that fresh-baked experience.
Your Turn to Create: Share the Joy of Classic Snowball Cookies!
Now that you have all the secrets to truly tender, melt-in-your-mouth Classic Snowball Cookies, it’s your turn to create magic in your kitchen. This recipe promises consistent perfection, delivering cookies that will delight everyone who tries them.
Bake a batch, share the joy, and experience the pure delight of these snowy, buttery treasures. Happy baking!
Snowball Cookies
Course: DessertCuisine: AmericanDifficulty: easy4
about 36 cookies25
minutes15
minutes450
kcal60
minutesDiscover the secret to perfectly tender, melt-in-your-mouth snowball cookies every time. This recipe cracks the code, ensuring no more dry or crumbly results. Enjoy a snowy, sweet treat that’s simply irresistible.
Ingredients
1 cup (2 sticks) unsalted butter, softened
1/2 cup powdered sugar (for dough)
1 teaspoon vanilla extract
1/4 teaspoon salt
2 cups all-purpose flour
1 cup finely chopped walnuts or pecans
1 cup powdered sugar (for rolling)
Directions
- Preheat oven to 325 degrees F (160 degrees C). Line baking sheets with parchment paper.
- In a large bowl, cream together the softened butter and 1/2 cup powdered sugar until light and fluffy. This creaming step is crucial for incorporating air and achieving a tender texture.
- Stir in the vanilla extract and salt.
- Gradually add the flour, mixing on low speed just until combined. Be careful not to overmix, as this can make the cookies tough. Stir in the finely chopped nuts.
- Roll the dough into 1-inch balls. Place on prepared baking sheets, leaving about 1 inch between cookies.
- Bake for 12 to 15 minutes, or until the edges are lightly golden and the bottoms are just barely set. They should not brown much. Baking just until set ensures they stay tender and do not dry out.
- While the cookies are still warm (but cool enough to handle), roll them generously in powdered sugar. The warmth helps the first layer of sugar adhere beautifully.
- Let cookies cool completely on a wire rack. Once fully cooled, roll them in powdered sugar a second time for that perfect snowy finish.
Notes
- Ensure your butter is truly softened, not melted, for the creamiest texture. Don’t overmix the flour; stop as soon as it’s incorporated to keep the cookies tender.