I distinctly remember my first attempts at homemade chocolate pudding often ended in disappointment, plagued by frustrating lumps and a grainy texture. That quest for perfectly smooth, almost ethereal Creamy Dreamy Chocolate Pudding became a mission, and I’m thrilled to share the simple yet transformative trick that ensures every batch is flawlessly silky.
This recipe isn’t just about ingredients; it’s about a technique that guarantees that coveted melt-in-your-mouth consistency you thought only restaurants could achieve.
Why This Creamy Dreamy Chocolate Pudding is Your New Go-To Dessert
The “No Lumps, No Graininess” Promise
This recipe is engineered to conquer the most common pudding woes. By meticulously combining dry ingredients first and using a critical straining step, we eliminate any chance of unwanted texture, ensuring pure, unadulterated smoothness.
For a truly satisfying bake, consider trying our Red Velvet Cheesecake Stuffed Cookies next.
A Silky Texture That Melts in Your Mouth
Prepare for an unparalleled experience of luxuriousness. Each spoonful of this Creamy Dreamy Chocolate Pudding glides across your palate, a testament to its velvety, rich consistency.
Effortless Elegance for Any Occasion
Despite its impressive, sophisticated profile, this homemade chocolate dessert is surprisingly simple to execute. It’s perfect for a weeknight treat, yet elegant enough to grace your most special gatherings, proving that exceptional flavor doesn’t require complex steps.
The Foundation of Flavor: What You’ll Need for Your Creamy Dreamy Chocolate Pudding
Choosing quality ingredients is the first step towards a truly magnificent pudding. Here’s a breakdown of what makes this recipe shine:
Dairy Delights: Crafting the Creamy Base
Whole Milk: The star of our creamy base, whole milk provides essential richness and a full-bodied texture. Its higher fat content contributes significantly to the pudding’s luscious mouthfeel.
For a slightly lighter option, 2% milk can be used, though it will result in a marginally less decadent finish.
Cocoa & Cornstarch: The Dynamic Duo for Depth and Thickness
Unsweetened Cocoa Powder: This delivers the intense, deep chocolate flavor without added sweetness, allowing you to control the sugar levels.
Choose a good quality brand for the best results; it truly makes a difference in the overall taste of your Creamy Dreamy Chocolate Pudding.
If you enjoy the rich chocolate in this pudding, you might also enjoy the deep cocoa notes in a molten lava cookie pie.
Cornstarch: Our thickening agent of choice, cornstarch creates a silky, smooth pudding texture. Unlike flour, it thickens without contributing a starchy or heavy mouthfeel.
The Vanilla Touch: An Essential Aromatic
Vanilla Extract: A touch of vanilla is crucial for enhancing and rounding out the rich chocolate flavor. It adds a warm, aromatic depth that elevates the entire dessert.
Pure vanilla extract offers a superior flavor profile compared to artificial alternatives.
Elevating Every Bite: The Whipped Cream Topping Ingredients
Heavy Cream: When very cold, heavy cream whips into a light, airy, and stable topping. Its high fat content is key to achieving firm peaks.
Powdered Sugar: Also known as confectioners’ sugar, it dissolves easily into the whipped cream, ensuring a smooth, non-gritty sweetness.
Vanilla Extract (for whipped cream): A second dash of vanilla in the whipped cream harmonizes with the pudding and adds another layer of delightful aroma.
Essential Tools for Creamy Dreamy Chocolate Pudding Perfection
Having the right equipment on hand streamlines the process and contributes to the flawless outcome of your homemade chocolate dessert.
Your Kitchen Arsenal
You’ll need a few basic items that are likely already staples in your kitchen.
Medium Saucepan: For cooking the pudding, ensuring even heat distribution.
Whisk: Essential for combining dry ingredients, gradually adding milk, and constant stirring during cooking to prevent lumps and sticking.
Rubber Spatula: Ideal for scraping down the sides and bottom of the pan, ensuring all parts of the pudding cook evenly.
Mixing Bowls: For preparing the pudding and for whipping the cream.
Plastic Wrap: Crucial for preventing a skin from forming on the cooling pudding.
The Secret Weapon: A Fine Mesh Sieve
This unassuming tool is truly the game-changer for achieving that unparalleled silky smooth pudding texture.
Passing the hot pudding through the sieve catches any minuscule lumps, cooked bits, or undissolved cornstarch, ensuring a luxuriously uniform consistency.
Mastering the Method: Your Path to Flawless Creamy Dreamy Chocolate Pudding
Follow these detailed steps to create a truly exceptional homemade chocolate dessert.
- Step 1: The Crucial Dry Whisk
In a medium saucepan, thoroughly whisk together the granulated sugar, unsweetened cocoa powder, cornstarch, and salt until no visible lumps remain.
This initial dry mixing is vital for preventing lumps from forming later and ensuring an ultra-smooth pudding base.
- Step 2: Gradually Incorporate Milk for a Smooth Paste
Slowly whisk in about 1/2 cup of the whole milk into the dry mixture until a thick, smooth paste forms.
Then, gradually whisk in the remaining 2 cups of milk until fully combined and no dry streaks are visible.
- Step 3: Gentle Heat and Constant Care
Place the saucepan over medium heat, stirring constantly with a whisk or rubber spatula.
Be sure to scrape the bottom and sides of the pan diligently to prevent sticking and ensure even cooking.
Continue stirring for 8 to 12 minutes, or until the pudding visibly thickens to a consistency similar to Greek yogurt and coats the back of a spoon. Avoid vigorous boiling; gentle bubbles around the edges are sufficient.
- Step 4: Vanilla Infusion
Remove the pudding from the heat and stir in the 1 teaspoon of vanilla extract.
Adding vanilla at this stage preserves its delicate flavor and aroma.
- Step 5: The Game-Changing Sieve Trick for Unrivaled Smoothness
For that guaranteed silky smooth texture, immediately pour the hot pudding through a fine mesh sieve into a clean bowl.
Use a spatula to press the pudding through the sieve, catching any tiny lumps or cooked bits that may have formed.
This step is a true game-changer for achieving a professionally smooth consistency for your Creamy Dreamy Chocolate Pudding.
- Step 6: Chill to Perfection and Prevent Skin
Place a piece of plastic wrap directly onto the surface of the pudding, ensuring it touches the entire surface to prevent a skin from forming as it cools.
Refrigerate for at least 3 hours, or until thoroughly chilled and firmly set.
- Step 7: Whipping Up Cloud-Like Topping
Just before serving, prepare the whipped cream. In a separate cold bowl with cold beaters, whip the heavy cream until soft peaks form.
Add the powdered sugar and 1/2 teaspoon vanilla extract, then continue to whip until firm peaks form.
Using cold equipment is essential for achieving light and stable whipped cream.
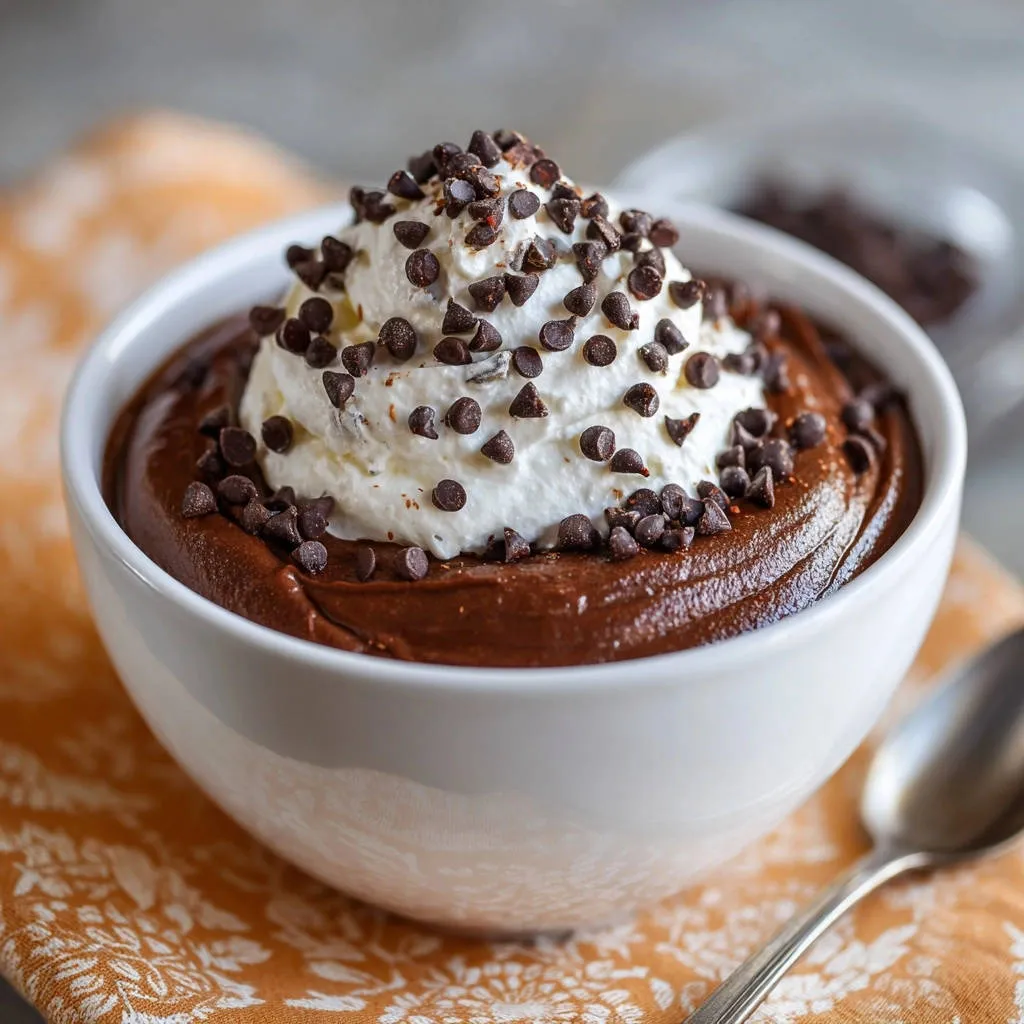
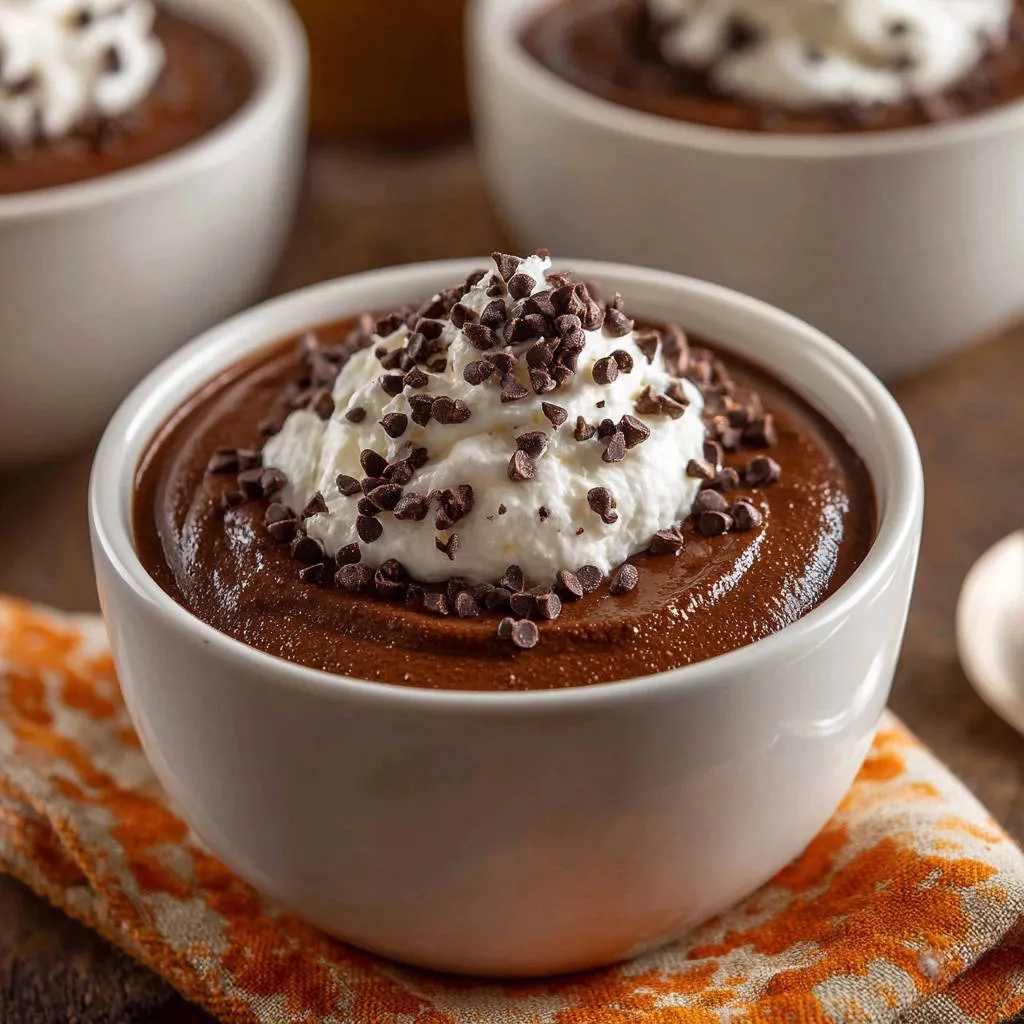
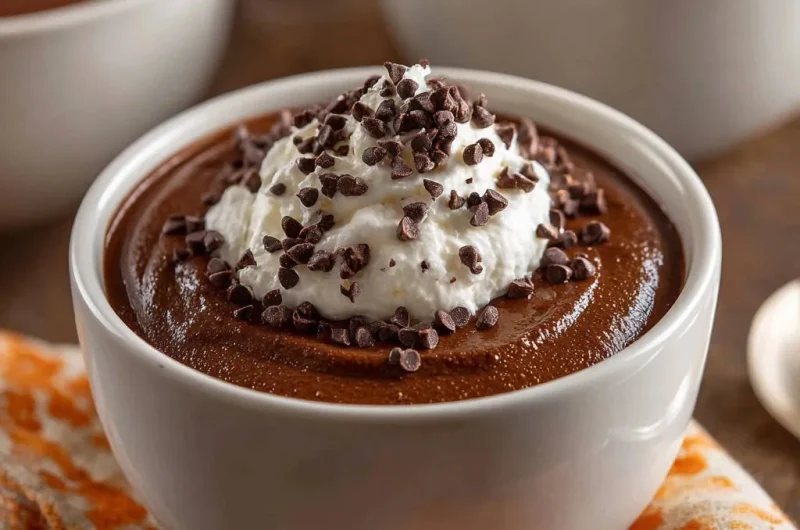
- Step 8: Assemble and Indulge in Your Creamy Dreamy Chocolate Pudding
Spoon the chilled chocolate pudding into individual serving bowls, top with a generous dollop of freshly whipped cream, and sprinkle with mini chocolate chips.
Enjoy your perfectly smooth, homemade pudding!
Beyond the Recipe: Expert Tips for Pudding Pros
Elevate your Creamy Dreamy Chocolate Pudding from delicious to truly unforgettable with these pro tips.
Temperature Control is Key
Ensure your heavy cream, bowl, and beaters are very cold for the most stable whipped cream. While milk for the pudding can be cold, a gradual addition to the dry mix helps prevent lumps more than temperature.
The Art of Stirring: No Shortcuts!
Constant, thorough stirring is non-negotiable during the cooking phase. This prevents the pudding from sticking to the bottom and sides, burning, or developing lumps. Use a whisk for the initial thickening, then a spatula to ensure no spots are missed.
Preventing the Infamous “Pudding Skin”
The plastic wrap trick is essential. By pressing the plastic wrap directly onto the surface of the hot pudding, you create a barrier that prevents air from drying out the top layer, thus eliminating the rubbery skin.
Achieving Stable, Silky Whipped Cream
Do not over-whip your cream; it can quickly turn grainy or even into butter. Stop whipping as soon as firm peaks form, indicating it’s light, airy, and stable enough to hold its shape beautifully atop your pudding.
Taste and Adjust: A Chef’s Best Friend
Once the pudding is cooked and off the heat (before chilling), give it a taste. If you prefer a slightly sweeter pudding, you can carefully stir in a tablespoon or two of granulated sugar until dissolved. This ensures your homemade chocolate dessert is perfectly tailored to your palate.
Common Pudding Pitfalls & How to Fix Them
Even seasoned home cooks encounter challenges. Here’s how to troubleshoot common issues with your Creamy Dreamy Chocolate Pudding.
Lumpy Pudding? Here’s the Smooth Solution!
Lumps usually stem from not whisking dry ingredients thoroughly or adding milk too quickly. Always begin with a lump-free dry mix and gradually whisk in the milk. If lumps still occur, the critical sieve step in this recipe will catch and remove them, guaranteeing a smooth finish.
Too Runny or Too Thick? Consistency Control
A runny pudding is often undercooked; continue to cook and stir until it reaches the desired Greek yogurt consistency. If it’s too thick, you may have cooked it too long or used slightly too much cornstarch. A small splash of milk can sometimes loosen an overly thick pudding after chilling, but it’s best to aim for perfect consistency during cooking.
My Whipped Cream Fell Flat!
Flat whipped cream is typically due to warm ingredients or overwhipping. Ensure your heavy cream, bowl, and beaters are thoroughly chilled. Stop whipping as soon as firm peaks appear to avoid a deflated or grainy texture.
More Chocolatey Goodness
If you’re in the mood for more chocolate treats, consider these recipes.
- For a baked treat that also features chocolate, try these bakery-style toasted s’mores chocolate chip muffins, which offer a different texture and flavor profile.
- Start your day with a chocolatey twist by making gingerbread chia overnight oats, a creamy, no-slime option that complements the richness of pudding.
Elevate Your Experience: Serving & Storage Secrets
Make your Creamy Dreamy Chocolate Pudding experience even more delightful with these serving suggestions and practical storage tips.
Creative Presentation Ideas
Beyond a simple bowl, try layering your chocolate pudding with whipped cream and fresh berries (raspberries or strawberries are excellent) in elegant parfait glasses. Serving in small, individual ramekins makes for a charming presentation. A sprinkle of flaky sea salt can also beautifully enhance the chocolate flavor.
Make-Ahead Mastery: Plan Your Dessert Delight
This chocolate pudding recipe is an ideal make-ahead dessert. Prepare the pudding base up to two days in advance, chilling it with the plastic wrap directly on the surface. Whip and add the cream and chocolate chips just before serving for optimal freshness and texture.
Storing Your Creamy Creation
Store any leftover Creamy Dreamy Chocolate Pudding in an airtight container in the refrigerator. If you’ve already topped it with whipped cream, it’s best consumed within 1-2 days. Without the whipped cream, the pudding base will stay fresh for up to 3-4 days, always with plastic wrap directly on its surface.
Your Top Questions Answered: Creamy Dreamy Chocolate Pudding FAQs
Here are answers to some common questions you might have about this delightful homemade chocolate dessert.
Can I make this with alternative milks?
While whole milk provides the richest texture, you can experiment with alternative milks. Oat milk or full-fat coconut milk (from a can) can offer a good creamy substitute, though the flavor and final texture will vary slightly. Almond milk may result in a thinner pudding.
What’s the best type of cocoa powder to use for Creamy Dreamy Chocolate Pudding?
For a deep, dark chocolate flavor and smooth texture, Dutch-processed cocoa powder is generally recommended. It’s less acidic than natural cocoa and results in a more mellow, rich chocolate taste, perfect for this silky smooth pudding.
How long will my homemade pudding last?
When properly stored in an airtight container with plastic wrap directly on the surface, your homemade chocolate pudding will last for about 3-4 days in the refrigerator. Whipped cream topping is best added just before serving.
Can I skip the sieve step for Creamy Dreamy Chocolate Pudding?
While you technically can skip the sieve, for the truly “silky smooth perfection” promised by this Creamy Dreamy Chocolate Pudding recipe, it is strongly recommended not to. The sieve is the secret to eliminating any tiny lumps, ensuring an unrivaled, professional-level texture that truly melts in your mouth.
Indulge in Silky Sweetness: Your Creamy Dreamy Chocolate Pudding Journey Awaits!
Now armed with the knowledge and techniques to achieve truly flawless Creamy Dreamy Chocolate Pudding, you’re ready to create something magical. This recipe promises not just a dessert, but an experience of pure, silky smooth bliss.
Go ahead, whisk up a batch, and delight in every spoonful of this comforting, elegant chocolate pudding. Don’t forget to share your creations and savor the joy of homemade perfection!
Chocolate Pudding
Course: DessertCuisine: AmericanDifficulty: easy4
servings25
minutes10
minutes550
kcal180
minutesAchieve perfectly smooth, silky chocolate pudding every time with this foolproof recipe. Learn the game-changing trick to banish lumps and enjoy a flawlessly creamy dessert, topped with homemade whipped cream and chocolate chips. A comforting classic made even better.
Ingredients
2 1/2 cups whole milk
1/2 cup granulated sugar
1/4 cup unsweetened cocoa powder
3 tablespoons cornstarch
1/4 teaspoon salt
1 teaspoon vanilla extract
1 cup heavy cream, very cold
2 tablespoons powdered sugar
1/2 teaspoon vanilla extract (for whipped cream)
1/4 cup mini chocolate chips, for topping
Directions
- In a medium saucepan, whisk together the granulated sugar, unsweetened cocoa powder, cornstarch, and salt until there are no visible lumps. This crucial first step ensures a smooth base.
- Gradually whisk in about 1/2 cup of the whole milk into the dry mixture until a smooth paste forms. Then, slowly whisk in the remaining 2 cups of milk until fully combined and no dry streaks remain.
- Place the saucepan over medium heat. Cook, stirring constantly with a whisk or rubber spatula, making sure to scrape the bottom and sides of the pan. Continue stirring for 8 to 12 minutes, or until the pudding visibly thickens to a consistency similar to Greek yogurt and coats the back of a spoon. Do not let it boil vigorously for an extended period, just gentle bubbles around the edges.
- Remove the pudding from the heat and stir in the 1 teaspoon of vanilla extract.
- For that guaranteed silky smooth texture, immediately pour the hot pudding through a fine mesh sieve into a clean bowl. Press it through with a spatula to catch any tiny lumps that may have formed. This step is a game changer!
- Place a piece of plastic wrap directly onto the surface of the pudding to prevent a skin from forming as it cools. Refrigerate for at least 3 hours, or until thoroughly chilled and set.
- Just before serving, prepare the whipped cream. In a separate cold bowl with cold beaters, whip the heavy cream until soft peaks form. Add the powdered sugar and 1/2 teaspoon vanilla extract, and continue to whip until firm peaks form.
- Spoon the chilled chocolate pudding into individual serving bowls, top with a generous dollop of whipped cream, and sprinkle with mini chocolate chips. Enjoy your perfectly smooth pudding!
Notes
- The secret to silky smooth pudding is sieving it immediately after cooking.