For years, I chased that elusive perfect crunch and tender bite in homemade fried chicken, often settling for dry results or a soggy coating. Achieving truly exceptional crispy chicken bites felt like a culinary unicorn, until I cracked the code.
For techniques to achieve that perfect crunch, explore how to make southern fried chicken tenders.
This recipe isn’t just about frying chicken; it’s a foolproof method ensuring every single bite is incredibly juicy on the inside and outrageously crispy on the outside, thanks to a few game-changing techniques.
Why These Crispy Chicken Bites Will Be Your Go-To Recipe
Say goodbye to dry, flavorless chicken! This recipe for crispy chicken bites guarantees succulent results, consistently delivering tender meat locked inside a glorious, golden crust.
If you enjoy this succulent chicken, explore how to achieve that perfect crisp with our guide to crispy honey garlic chicken bites.
Our unique approach tackles common frustrations, ensuring your homemade fried chicken is moist and never tough. We leverage a buttermilk soak, the magic of cornstarch, and a crucial double-dredge technique to build unparalleled crispiness.
It’s simpler than you think to achieve gourmet-level fried chicken right in your kitchen. The balance of perfectly seasoned chicken and an irresistible crunch makes this a standout dish, perfect for any occasion.
Prepare for rave reviews when you serve these truly exceptional, homemade chicken bites. They are a testament to how a few expert tips can transform a simple meal into something extraordinary.
Building Blocks of Flavor: Essential Crispy Chicken Bites Ingredients
The Star: Perfectly Prepped Chicken
We use 1.5 lbs of boneless, skinless chicken, either breasts or thighs, cut into uniform 1-inch pieces. Thighs offer extra moisture, while breasts provide a leaner option.
Consistent sizing is key for even cooking, ensuring every piece of your juicy chicken bites cooks perfectly at the same rate.
The Tenderizer: Buttermilk Magic
Two cups of buttermilk are the cornerstone of our tenderizing process. Its mild acidity gently breaks down the chicken fibers, resulting in incredibly moist and tender chicken.
Beyond tenderness, buttermilk also provides an ideal tacky surface, helping the seasoned flour breading adhere beautifully for maximum crunch.
The Crispy Coating: Flour & Our Secret Weapon
Our breading starts with 2 cups of all-purpose flour, creating a sturdy foundation for the crust. This flour mixture is the primary vehicle for flavor and texture.
Crucially, 2 tablespoons of cornstarch are our secret weapon. It absorbs moisture and prevents the coating from becoming soggy, delivering that signature extra-crispy, almost brittle crunch we all crave.
Flavor Boosters: Spices & Seasoning
A blend of 1 tablespoon paprika, 1 teaspoon garlic powder, 1 teaspoon onion powder, and 1 teaspoon black pepper infuses the breading with rich, aromatic depth. These spices complement the chicken’s natural flavors.
We use 1.5 teaspoons of salt, divided between the buttermilk soak and the breading. Salt is indispensable for seasoning the chicken from within and elevating every flavor in the crispy coating.
The Golden Finish: Frying Oil
Vegetable oil is recommended for frying, specifically enough to reach 3-4 inches deep in your pot. Oils like canola or peanut also work well.
It’s important to choose an oil with a high smoke point and a neutral flavor. This ensures clean-tasting fried chicken bites without imparting unwanted flavors.
DIY Dipping Bliss: Honey Mustard Sauce Essentials
A simple, homemade honey mustard dipping sauce elevates these chicken bites to another level. It’s incredibly easy to whisk together.
Complementary Flavors
Round out your meal with these chicken dishes.
- For a fresh take on chicken, consider these Cranberry Apple Chicken Salad Cups, featuring bright fruit notes.
- Enjoy a different kind of chicken preparation with the Harvest Apple and Walnut Salad, which offers crunchy textures.
Mayonnaise provides a creamy base, yellow mustard adds a tangy kick, honey introduces balancing sweetness, and apple cider vinegar brightens the entire sauce.
Optional Fresh Touches
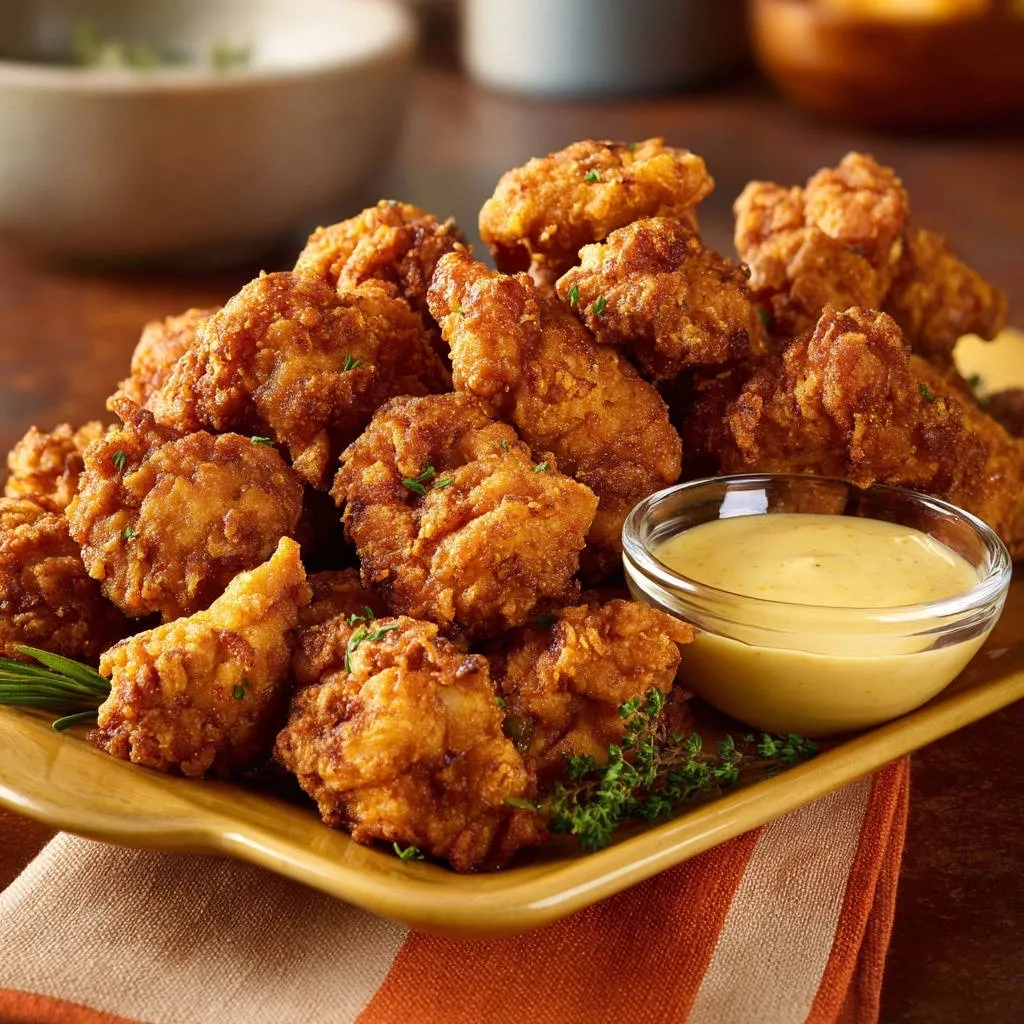
Fresh thyme or rosemary sprigs, while optional, offer a beautiful visual garnish. They also contribute a subtle, herbaceous aroma that enhances the overall presentation and sensory experience.
From Buttermilk to Golden: Your Crispy Chicken Bites Journey
- Prep Chicken for Juiciness:
Begin by placing your 1-inch chicken pieces in a bowl. Add the buttermilk and 1/2 teaspoon of salt, stirring until every piece is thoroughly coated.
Cover the bowl and refrigerate the chicken for at least 30 minutes, or ideally up to 4 hours. This essential buttermilk soak is absolutely vital for ensuring incredibly moist and tender chicken.
- Prepare Breading for Crispiness:
In a large, shallow dish, whisk together the all-purpose flour, cornstarch, paprika, garlic powder, onion powder, black pepper, and the remaining 1 teaspoon of salt.
Remember, the cornstarch is your secret weapon; it ensures an extra-crispy coating that clings beautifully to the chicken.
- Double Dredge for Max Crunch:
Carefully remove chicken pieces from the buttermilk, allowing any excess to drip off slightly, but do not pat them dry. The moisture is crucial for adhesion.
First, transfer a few pieces at a time to the flour mixture. Toss them thoroughly, pressing the seasoned flour firmly onto the chicken to create a good, even coating.
Next, dip each flour-coated piece back into the leftover buttermilk mixture quickly. Finally, return them to the flour mixture for a second, very thorough coating, ensuring every part is completely covered.
This double dredge is absolutely crucial for building a thick, exceptionally crispy crust that adheres perfectly during frying. As you finish coating, place the chicken on a wire rack to rest while you prepare the rest of the batch.
- Heat Oil Correctly:
Pour vegetable oil into a large, heavy-bottomed pot or Dutch oven, ensuring it reaches about 3-4 inches deep. This depth allows the chicken to submerge fully.
Heat the oil over medium-high heat until it reaches precisely 350°F (175°C). Using a reliable kitchen thermometer is highly recommended here.
Maintaining a consistent oil temperature is key to preventing dry chicken and ensuring ultimate crispiness without burning the coating.
- Fry with Care:
Carefully add chicken pieces to the hot oil, being mindful not to overcrowd the pot. Fry in batches if necessary to avoid dropping the oil temperature too drastically.
Maintain the oil temperature between 325°F and 350°F throughout the frying process. This range is critical for success.
Fry for 5-7 minutes, turning the pieces occasionally, until they are beautifully golden brown and cooked through. An internal temperature of 165°F indicates doneness.
Frying at this precise temperature ensures the breading crisps perfectly without burning, and the chicken cooks through completely without drying out.
- Drain and Serve:
Remove the cooked chicken from the oil with a slotted spoon and immediately transfer them to a wire rack set over a baking sheet.
This draining method is essential for allowing excess oil to drip away, which keeps your crispy chicken bites wonderfully crisp and prevents sogginess.
- Make Dipping Sauce:
While the chicken drains, whisk together all the mayonnaise, yellow mustard, honey, apple cider vinegar, and a pinch of salt for the dipping sauce in a small bowl until perfectly smooth.
- Enjoy Your Masterpiece:
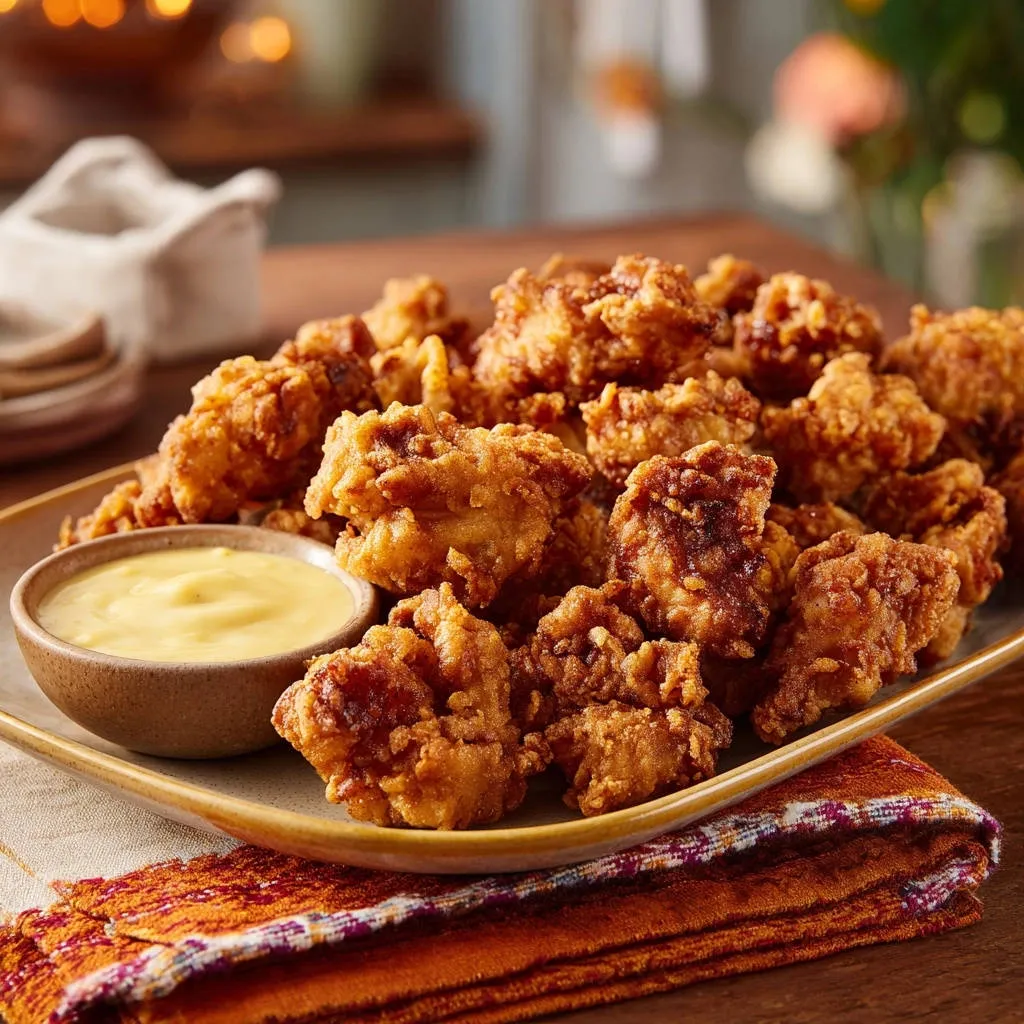
Serve your perfectly crispy chicken bites hot, accompanied by the tangy honey mustard dipping sauce. Garnish with fresh herbs like thyme or rosemary sprigs, if using, for an extra touch of flavor and elegant presentation.
Beyond the Recipe: Elevate Your Crispy Chicken Bites Game
Mastering the Buttermilk Soak
Optimal Soaking Time: While 30 minutes initiates the tenderizing, extending the soak to 2-4 hours provides maximum tenderness and allows the seasoning to deeply infuse the chicken. Avoid soaking longer than 4 hours to prevent mushiness.
Temperature Matters: Always ensure the chicken is fully submerged in the buttermilk and kept in the coldest part of your refrigerator. This maintains food safety and optimal tenderization.
Achieving the Ultimate Double Dredge
Press, Don’t Just Toss: After dipping, firmly press the flour mixture onto each chicken piece. This creates a thick, substantial coating that will adhere beautifully and develop an incredible crunch.
Rest for Adhesion: Allowing the double-dredged chicken to rest on a wire rack for 10-15 minutes before frying is a game-changer. This brief rest helps the coating “set” and adhere much better, preventing it from falling off in the hot oil.
Oil Temperature: The Crispy Gold Standard
Invest in a Thermometer: A reliable kitchen thermometer is non-negotiable for perfectly fried chicken. It eliminates guesswork and is crucial for achieving consistent results and the ultimate crispy coating.
Recovering from Drops: If the oil temperature drops too low after adding chicken, increase the heat slightly and wait for it to return to the ideal range (325-350°F) before adding more. Impatience leads to greasy, soggy chicken.
Batch Frying Best Practices
Don’t Overcrowd: Overcrowding the pot significantly drops the oil temperature, leading to greasy, less crispy chicken. Fry in small batches to maintain consistent heat and ensure each piece crisps perfectly.
Consistent Size: Ensure all your chicken pieces are cut to a uniform 1-inch size. This guarantees even cooking times across all batches, preventing some pieces from being undercooked or overdone.
Post-Frying Drain: Don’t Skip It!
Wire Rack is Key: Always drain fried chicken on a wire rack set over a baking sheet, never directly on paper towels. Draining on a rack allows air to circulate, preventing steam buildup that causes sogginess.
Season Immediately: For best flavor, lightly sprinkle your crispy chicken bites with a touch of extra salt (or your favorite seasoning blend) immediately after they come out of the oil and are draining. The oil helps the seasoning adhere.
Perfect Pairings: What to Serve with Your Bites
Classic Accompaniments
Serve these fantastic crispy chicken bites alongside classic comfort foods like a generous scoop of creamy mashed potatoes. The rich, smooth texture perfectly complements the crunch.
A crisp, tangy coleslaw is another excellent choice, offering a refreshing counterpoint to the savory fried chicken. For a diner-style experience, add a side of golden french fries or crunchy onion rings.
Light & Fresh Companions
Balance the richness of the fried chicken with vibrant green salads dressed in a light vinaigrette. The freshness cuts through the savory notes beautifully.
Roasted vegetables like tender asparagus, crisp green beans, or perfectly charred broccoli offer a healthier, flavorful side option that pairs wonderfully.
Creative Dipping Adventures
While our honey mustard sauce is delightful, don’t hesitate to experiment with other dipping sauces. Try a smoky BBQ sauce, a cooling ranch, a spicy sriracha mayo, or a sweet chili sauce for different flavor profiles.
For those who enjoy bold flavors, a creamy, tangy blue cheese dip makes an irresistible pairing. The sharp notes enhance the savory chicken beautifully.
Your Crispy Chicken Bites Questions, Answered
Can I use chicken thighs instead of breasts?
Yes, absolutely! Chicken thighs are an excellent choice for this recipe. They naturally contain more fat, making them even more forgiving and incredibly tender.
Thighs retain moisture even better than breasts, resulting in incredibly juicy chicken bites every time. Adjust cooking time slightly if pieces are larger.
What if I don’t have buttermilk?
You can easily make a buttermilk substitute at home with ingredients you likely already have. This is a common and effective hack.
Simply add 1 tablespoon of white vinegar or lemon juice to a liquid measuring cup, then fill the rest with regular milk (any fat content) up to the 2-cup line. Stir gently and let it sit for 5-10 minutes until it slightly curdles, then proceed with the recipe.
How can I make these gluten-free?
To make these crispy chicken bites gluten-free, substitute the all-purpose flour with a high-quality 1:1 gluten-free all-purpose flour blend. Many brands work wonderfully.
Ensure your chosen blend already contains xanthan gum, or add a quarter teaspoon to the dry ingredients if it doesn’t. Xanthan gum helps with the texture and binding of the coating.
What’s the best oil for frying?
For deep frying, always choose an oil with a high smoke point and a neutral flavor. This ensures your chicken bites taste clean and are cooked properly.
Vegetable oil, canola oil, peanut oil, or sunflower oil are all excellent choices that fit these criteria. Avoid olive oil, as its smoke point is too low for deep frying, which can lead to burnt flavors and smoke.
Can I bake or air fry these instead?
While this recipe is meticulously designed for deep frying to achieve ultimate crispiness, you can adapt it for baking or air frying if preferred. The texture will be slightly different but still delicious.
For baking, generously spray the coated chicken with cooking oil and bake at 400°F (200°C) for 20-25 minutes, flipping halfway, until golden and cooked through. For air frying, preheat your air fryer to 375°F (190°C), spray the chicken with oil, and cook for 15-20 minutes, shaking the basket frequently, until golden brown and cooked to 165°F internal temperature.
Keeping the Crunch: Storage & Reheating Tips
How to Store Leftovers
Allow any leftover crispy chicken bites to cool completely to room temperature before storing them. This prevents condensation and sogginess.
Place them in an airtight container lined with a paper towel (to absorb any residual moisture) in the refrigerator for up to 3-4 days. Proper storage ensures they remain safe to eat.
Best Way to Reheat for Crispiness
To restore that glorious crispiness, absolutely avoid the microwave. Microwaving will steam the chicken, making it soggy and rubbery.
Reheat in an oven at 375°F (190°C) for 10-15 minutes, or in an air fryer at 350°F (175°C) for 5-8 minutes, until they are heated through and the coating is wonderfully crisp again.
Can I Prepare the Chicken Ahead of Time?
Yes, you can certainly prepare aspects of the chicken ahead of time to streamline your cooking process. The buttermilk soak can be done up to 4 hours in advance.
You can even complete the double-dredging step. After coating, arrange the chicken on a wire rack set over a baking sheet, cover loosely with plastic wrap, and refrigerate for up to 2-3 hours before frying. This resting period can actually enhance the coating’s adhesion and crispiness!
Share Your Crispy Chicken Bites Success Story!
There’s immense satisfaction in creating something truly delicious from scratch, and these crispy chicken bites are a perfect example. You now have the secret to consistently juicy, crunchy perfection!
Don’t just keep this culinary triumph to yourself! We encourage you to try this recipe, personalize it with your favorite seasonings, and share your incredible cooking experiences. Your success stories and tips inspire us all.
We’d love to see your golden-brown masterpieces! Connect with us by sharing your photos and thoughts on social media or in the comments below. Happy frying, and enjoy every amazing bite!

Crispy Chicken Bites
Course: Main CourseCuisine: AmericanDifficulty: medium4
servings45
minutes35
minutes750
kcal60
minutesDiscover the ultimate secret to achieving perfectly juicy and incredibly crispy chicken bites at home. This game-changing recipe uses a buttermilk soak and double dredge technique for an unforgettable crunch and tender interior. Serve with a delicious homemade honey mustard dipping sauce.
Ingredients
1.5 lbs boneless, skinless chicken (breasts or thighs), cut into 1-inch pieces
2 cups buttermilk
2 cups all-purpose flour
2 tablespoons cornstarch
1 tablespoon paprika
1 teaspoon garlic powder
1 teaspoon onion powder
1 teaspoon black pepper
1.5 teaspoons salt (divided)
Vegetable oil, for frying
Fresh thyme or rosemary sprigs, for garnish (optional)
For the Dipping Sauce:
1/2 cup mayonnaise
1/4 cup yellow mustard
2 tablespoons honey
1 tablespoon apple cider vinegar
Pinch of salt
Directions
- Prep Chicken for Juiciness: Place chicken pieces in a bowl. Add buttermilk and 1/2 teaspoon of salt. Stir to coat the chicken completely. Cover the bowl and refrigerate for at least 30 minutes, or up to 4 hours. This buttermilk soak is a vital step for ensuring moist and tender chicken.
- Prepare Breading for Crispiness: In a large, shallow dish, whisk together the all-purpose flour, cornstarch, paprika, garlic powder, onion powder, black pepper, and the remaining 1 teaspoon of salt. The cornstarch is our secret weapon for an extra-crispy coating.
- Double Dredge for Max Crunch: Remove chicken from the buttermilk mixture, allowing any excess to drip off slightly (do not pat dry). Transfer the chicken pieces, a few at a time, to the prepared flour mixture. Toss them thoroughly, pressing the flour onto the chicken to ensure a good coating. Next, dip each flour-coated piece back into the leftover buttermilk mixture quickly. Finally, return them to the flour mixture for a second, very thorough coating, ensuring every part is covered. This double dredge is crucial for building a thick, extra-crispy crust that adheres perfectly. Place the coated chicken on a wire rack while you finish coating the rest.
- Heat Oil Correctly: Pour vegetable oil into a large, heavy-bottomed pot or Dutch oven. Add enough oil to reach about 3-4 inches deep, ensuring it will submerge the chicken pieces. Heat the oil over medium-high heat until it reaches 350°F (175°C). Using a kitchen thermometer is highly recommended here to maintain a consistent temperature, which is key to preventing dry chicken and ensuring ultimate crispiness.
- Fry with Care: Carefully add chicken pieces to the hot oil, making sure not to overcrowd the pot. Fry in batches if necessary to avoid dropping the oil temperature too much. Maintain the oil temperature between 325°F and 350°F throughout the frying process. Fry for 5-7 minutes, turning the pieces occasionally, until they are beautifully golden brown and cooked through (an internal temperature of 165°F). Frying at the precise temperature ensures the breading crisps perfectly without burning, and the chicken cooks through without drying out.
- Drain and Serve: Remove the cooked chicken from the oil with a slotted spoon and place them on a wire rack set over a baking sheet. This allows excess oil to drain away, which is essential for keeping them wonderfully crispy.
- Make Dipping Sauce: While the chicken drains, whisk together all the dipping sauce ingredients in a small bowl until smooth.
- Serve your crispy chicken bites hot with the honey mustard dipping sauce. Garnish with fresh herbs, if using, for an extra touch of flavor and presentation.
Notes
- A kitchen thermometer is highly recommended for maintaining optimal oil temperature for crispiness.