Fried chicken often feels like a culinary Everest, challenging home cooks to achieve that elusive balance of a shatteringly crisp crust and profoundly juicy meat. I’ve certainly had my share of attempts ending in disappointment – dry chicken or breading that slipped right off. But after years of perfecting, I’ve unlocked the secrets to the ultimate Crispy Fried Chicken with Creamy Gravy, ensuring every bite is a triumph of flavor and texture, never dry and always perfectly golden.
This isn’t just another fried chicken recipe; it’s a foolproof method that consistently delivers tender, moist chicken encased in an unbelievably crunchy coating, all brought together by a rich, savory gravy that will have everyone asking for seconds.
Why This Crispy Fried Chicken with Creamy Gravy Wins Every Time
What sets this recipe apart is its meticulous attention to technique, designed to eliminate common pitfalls and guarantee success. We focus on specific steps that build incredible flavor and ensure that coveted crispy-on-the-outside, juicy-on-the-inside experience.
For even more delicious chicken possibilities, explore these crispy pan-fried chicken cutlets.
You can trust this method to deliver consistently perfect results, transforming your fried chicken from a kitchen mystery into a beloved, reliable favorite. It’s a game-changer for anyone who has ever yearned for truly exceptional Crispy Fried Chicken with Creamy Gravy.
The Essential Building Blocks for Your Perfect Fried Chicken Feast
Great fried chicken starts with great ingredients. This recipe emphasizes quality and specific choices that contribute directly to the dish’s irresistible texture and deep flavor profile.
For the Irresistibly Juicy Chicken
Bone-in, skin-on chicken thighs or drumsticks are my go-to. The bone and skin contribute immense flavor and moisture during frying, preventing the chicken from drying out.
A simple yet potent blend of salt, black pepper, paprika, and garlic powder creates a foundational flavor layer. This seasoning penetrates the meat, ensuring every bite is savory and aromatic.
Crafting the Golden, Crispy Breading
All-purpose flour forms the base of our crispy coating. Its gluten structure creates a sturdy canvas for achieving that perfect crunch.
Cornstarch is the secret weapon here, providing an extra layer of crispiness and helping the breading adhere beautifully. It truly makes a noticeable difference in the final texture.
The egg wash, a simple mixture of large eggs and milk, acts as the crucial binder. It ensures the flour mixture clings to the chicken, creating a thick, robust crust.
The Secret to a Rich, Creamy Gravy
Reserved frying oil, infused with all those delicious browned bits from the chicken, forms the irreplaceable base of our gravy. This step elevates the gravy from good to truly exceptional.
Additional all-purpose flour combines with the flavorful oil to create a roux, the foundation for a smooth and velvety gravy. Milk gradually transforms this roux into a creamy, luscious sauce.
Simple seasonings like salt and black pepper are all that’s needed to enhance the deep, savory notes of the gravy.
Pantry Staples & Frying Oil Considerations
Beyond the stars, ensure you have quality vegetable oil for frying. A high-smoke-point, neutral-flavored oil is essential for achieving the perfect golden brown and avoiding off-flavors.
These humble ingredients, thoughtfully combined, are the key to unlocking the magic of this Crispy Fried Chicken with Creamy Gravy.
For a similar crunch, explore honey fried chicken on waffles.
Tools for Success: Equip Your Kitchen for Crispy Perfection
Having the right tools makes all the difference in achieving flawless fried chicken. These essentials streamline the process and ensure precise results.
- Large Bowls & Shallow Dishes
For an organized and efficient breading station setup.
- Heavy-Bottomed Pot or Dutch Oven
Crucial for maintaining a consistent oil temperature, which leads to evenly cooked and browned chicken.
- Deep-Fry Thermometer
Absolutely essential for precise temperature control, preventing greasy, soggy, or burnt chicken.
- Wire Rack & Baking Sheet
Used for resting both breaded and fried chicken, promoting air circulation for a truly crispy finish and preventing sogginess.
- Meat Thermometer
To accurately ensure the chicken is cooked through to 165°F (74°C) without overcooking, guaranteeing juiciness.
- Whisks & Tongs
Standard utensils for mixing, coating, and safely handling hot chicken.
Mastering the Method: Your Guide to Unforgettable Crispy Fried Chicken
Follow these steps closely, paying attention to the details, and you’ll be rewarded with the best Crispy Fried Chicken with Creamy Gravy you’ve ever made.
Preparing the Chicken for Optimal Flavor and Juiciness
Pat Dry & Season: Thoroughly pat chicken pieces dry with paper towels. In a large bowl, combine 1 tablespoon salt, 1 tablespoon black pepper, 1 teaspoon paprika, and 1/2 teaspoon garlic powder. Season the chicken pieces evenly on all sides with this spice mixture.
Drying the chicken is crucial for allowing the breading to adhere properly and achieve maximum crispness. Resting the seasoned chicken for at least 15 minutes at room temperature, or up to 2 hours refrigerated, allows the flavors to penetrate deeply and helps tenderize the meat for a juicier result.
Setting Up Your Breading Station
Create the Flour Mixture: In a shallow dish, whisk together the 2 cups all-purpose flour and 2 tablespoons cornstarch.
The addition of cornstarch is a secret weapon, contributing significantly to that extra-crispy, golden crust!
Prepare the Egg Wash: In another shallow dish, whisk the 2 large eggs with 1/2 cup milk.
This mixture acts as the ‘glue’ that binds the flavorful breading to your chicken, ensuring it stays put during frying.
The Art of Breading for Maximum Crunch
Dip and Coat: Dip each chicken piece first into the egg wash, ensuring it’s fully coated. Then transfer to the flour mixture and press firmly to ensure the flour mixture adheres well to all surfaces.
For an ultra-crispy crust, you can dip the chicken back into the egg wash and then into the flour mixture a second time. Place breaded chicken on a wire rack set over a baking sheet to rest while you finish the rest; this short rest period helps the coating set and adhere properly.
Achieving the Perfect Frying Temperature
Heat the Oil: Pour 4 cups vegetable oil into a large, heavy-bottomed pot or Dutch oven. Heat over medium-high heat until a deep-fry thermometer reads 350°F (175°C).
Maintaining the correct oil temperature is the single most critical factor for achieving perfectly cooked, juicy chicken with a crispy crust. Too low, and your chicken will be greasy; too high, and it will burn before cooking through.
Frying the Chicken to Golden Perfection
Fry in Batches: Carefully lower 2 to 3 chicken pieces into the hot oil, ensuring not to overcrowd the pot. Overcrowding will drop the oil temperature too quickly, leading to greasy or soggy chicken.
Maintain an oil temperature between 325°F to 350°F (160-175°C). Fry each side for about 6 to 8 minutes, turning occasionally, until the chicken is golden brown and the internal temperature reaches 165°F (74°C) when measured with a meat thermometer inserted into the thickest part of the meat without touching the bone.
This precise temperature control ensures the chicken is cooked through and perfectly juicy, without being overdone or dry. Visual cues like a deep golden-brown color and consistent sizzling also indicate proper cooking.
The Crucial Resting Period
Rest the Fried Chicken: Carefully remove the fried chicken from the oil and place it on a clean wire rack set over a baking sheet to drain any excess oil.
This essential resting period allows the chicken to redistribute its juices for maximum tenderness and juiciness inside, while also helping to maintain that desirable crispy exterior. It prevents the chicken from steaming and becoming soggy.
Whipping Up the Creamy Gravy
Start the Roux: Pour out all but 2 tablespoons of the frying oil from the pot, leaving behind any flavorful browned bits. Whisk in 2 tablespoons all-purpose flour, stirring constantly for 1 minute until a light roux forms.
Those browned bits are packed with flavor from the fried chicken and are crucial for a rich, savory gravy. The roux is the foundation for a smooth, thick gravy, ensuring a luxurious texture.
Thicken the Gravy: Gradually whisk in 2 cups milk, ensuring to scrape up any browned bits from the bottom of the pot. Continue whisking constantly until the gravy thickens to your desired consistency, about 5 to 7 minutes. Season with 1/2 teaspoon salt and 1 teaspoon black pepper, adjusting to taste.
Serving Your Culinary Masterpiece
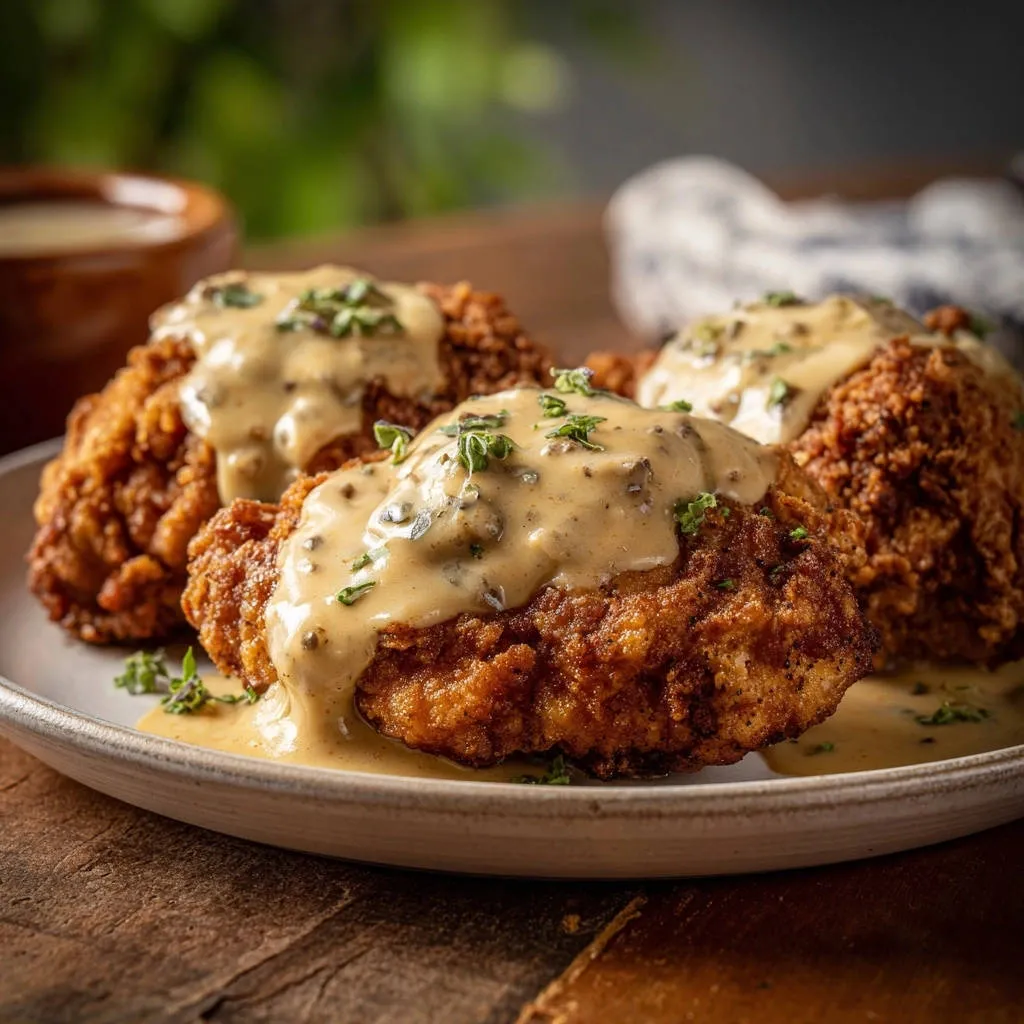
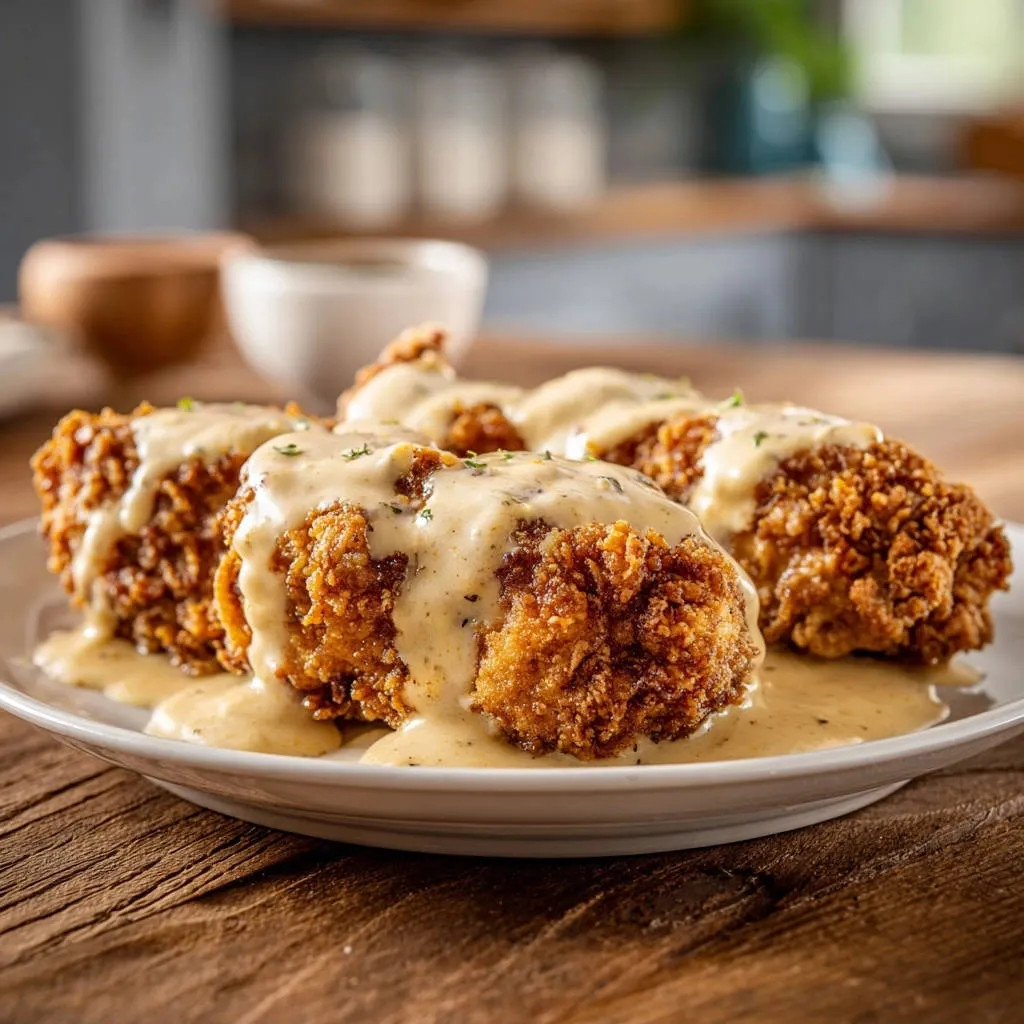
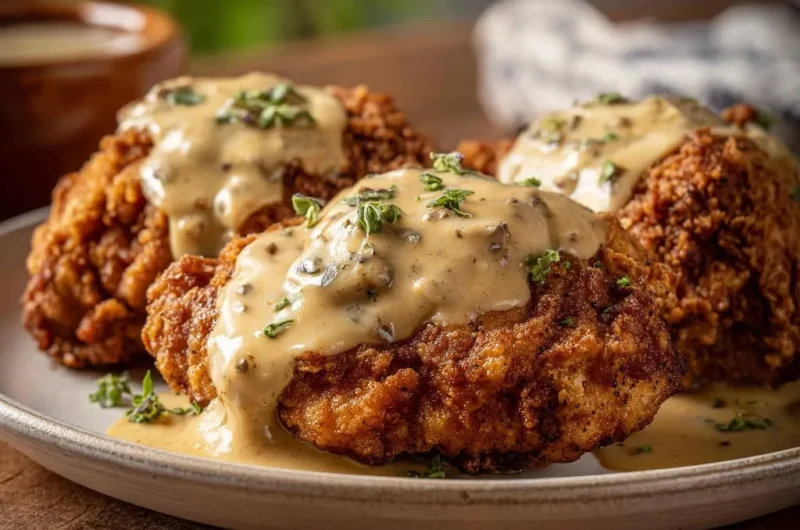
Garnish & Serve: Ladle generous amounts of the creamy gravy over the crispy fried chicken. Garnish with fresh chopped parsley or thyme for a touch of freshness and color, enhancing its presentation.
Serve immediately and enjoy that perfect combination of juicy inside and crispy outside that makes this Crispy Fried Chicken with Creamy Gravy an instant favorite! The warm, comforting aroma will fill your kitchen and your home.
Chef’s Secrets: Elevate Your Crispy Fried Chicken with Creamy Gravy Game
These expert tips are the result of countless batches, honed to perfection to ensure your fried chicken is nothing short of spectacular every single time.
Don’t Skip the Dry Patting: Moisture on the chicken’s surface is the enemy of a truly crispy crust. Thoroughly patting the chicken dry ensures the breading adheres better and fries to a superior crunch, preventing a soggy coating.
Embrace the Cornstarch: The small addition of cornstarch to your flour mixture is a game-changer. It contributes to a lighter, more shatteringly crispy texture that resists sogginess, making your crust truly exceptional.
Master Oil Temperature with a Thermometer: This is arguably the most crucial tip. Invest in a reliable deep-fry thermometer and use it. Too low a temperature results in greasy chicken; too high burns the exterior before the interior cooks. Consistency is key for perfect results!
Resist Overcrowding the Pot: Frying too many pieces at once drastically drops the oil’s temperature. This leads to longer cooking times, uneven browning, and a greasy, less crispy result. Work in small batches to maintain optimal temperature and crispness.
Let it Rest: Just like a perfectly cooked steak, resting fried chicken is essential. It allows the internal juices to redistribute, resulting in incredibly tender and moist meat while helping to maintain that glorious crispy exterior. Patience truly pays off here.
Don’t Discard the Flavorful Oil Bits: Those browned, delicious bits left in the pot after frying are pure flavor gold for your gravy. Make sure to incorporate and scrape them up when you build your roux; they add unmatched depth and savoriness to your creamy gravy!
Season Generously and Early: Seasoning the chicken itself before breading ensures deep, foundational flavor. Don’t be shy; the breading will dilute some of the surface seasoning, so ensure the chicken itself is well-seasoned for a truly flavorful bite.
Common Challenges & Simple Solutions for Fried Chicken Success
Even seasoned cooks can encounter snags. Here’s how to troubleshoot common issues and ensure your Crispy Fried Chicken with Creamy Gravy is always a triumph.
Why is my fried chicken greasy or soggy?
This is typically caused by oil that isn’t hot enough. When the oil temperature drops too low (often from overcrowding the pot), the chicken absorbs more oil instead of cooking crisply. Ensure your oil stays between 325-350°F and fry in small batches to maintain this crucial temperature.
My chicken is burnt on the outside, but raw on the inside!
This indicates your oil temperature was too high. The exterior cooks too quickly before the heat has a chance to penetrate and cook the interior. Reduce your oil temperature to the recommended range and use a meat thermometer to confirm doneness, ensuring a perfectly cooked interior.
Why isn’t my breading sticking to the chicken?
The most common culprit is moisture on the chicken’s surface. Always pat your chicken thoroughly dry before seasoning and breading. Also, ensure you press the flour mixture firmly onto the chicken, and consider a double-dip for extra adhesion and a more robust crust.
My gravy is lumpy or too thin/thick.
Lumpy gravy usually results from not whisking the flour thoroughly enough when making the roux, or adding milk too quickly. Whisk constantly as you cook the flour, and gradually add cold milk while whisking vigorously. If too thin, make a quick slurry of flour/cornstarch and water/milk and whisk into simmering gravy. If too thick, gradually whisk in a little more warm milk to reach your desired consistency.
Perfect Pairings: What to Serve with Your Crispy Fried Chicken
Elevate your Crispy Fried Chicken with Creamy Gravy experience with these complementary side dishes and beverages. They provide a delicious balance to the rich, savory flavors.
What to Serve Alongside
To complement your crispy fried chicken, consider these dishes that bring fresh flavors and classic comfort.
- For a refreshing contrast to the richness, try our creamy zesty chicken and corn salad, featuring bright, summery ingredients.
- Round out your meal with a serving of our creamy garlic mashed potatoes and gravy, a classic partner for fried chicken.
Classic Comfort Sides
Pair your Crispy Fried Chicken with Creamy Gravy with timeless favorites like fluffy mashed potatoes, creamy coleslaw, or a comforting macaroni and cheese for the ultimate indulgence. For an extra special touch, consider a creamy potato gratin as a decadent accompaniment.
Fresh and Vibrant Compliments
Balance the richness with lighter options such as a crisp green salad with a tangy vinaigrette, steamed green beans with lemon zest, or sweet corn on the cob. These sides add a refreshing contrast and cut through the richness beautifully.
Beverage Pairings
Iced tea or homemade lemonade are classic non-alcoholic choices that refresh the palate. For alcoholic pairings, a crisp lager or a light-bodied sparkling wine can beautifully cut through the richness of the fried chicken and gravy, enhancing the overall dining experience.
Planning Ahead: Make-Ahead Tips and Storage Solutions
Thoughtful preparation and proper storage ensure that your Crispy Fried Chicken with Creamy Gravy remains delicious and ready to enjoy.
Can I prepare parts of the Crispy Fried Chicken in advance?
You can season the chicken up to 2 hours ahead (refrigerated), allowing flavors to deepen even further. The dry breading mixture can also be prepared in advance and stored in an airtight container. However, breading the chicken too far ahead of frying can make it soggy; it’s best to bread just before frying for optimal crispness.
How to Store Leftovers for Maximum Freshness
Store leftover fried chicken and gravy separately in airtight containers in the refrigerator for up to 3-4 days. Ensure they are cooled completely before storing to prevent condensation, which can lead to sogginess.
Reheating for Retaining Crispiness
To best revive the crispiness of leftover fried chicken, reheat it in an oven or air fryer rather than a microwave. Preheat your oven to 375°F (190°C) and bake until heated through and crispy, about 15-20 minutes, flipping halfway. Reheat gravy gently on the stovetop, adding a splash of milk if needed to adjust consistency.
Your Crispy Fried Chicken Questions, Answered!
Can I use boneless, skinless chicken for this recipe?
While the recipe is optimized for bone-in, skin-on chicken (which adds flavor and helps maintain moisture), you can use boneless, skinless cuts like thighs or breasts. Be aware that cooking times will be significantly shorter, so monitor the internal temperature carefully with a meat thermometer to prevent overcooking, ensuring they remain juicy.
What kind of oil is best for frying crispy chicken?
For the best results, use a high-smoke-point neutral oil such as vegetable oil, canola oil, or peanut oil. These oils can withstand the high frying temperatures required without imparting unwanted flavors or breaking down prematurely, giving your chicken a clean, delicious taste and golden color.
Can I make the creamy gravy gluten-free?
Yes, you can! Substitute the all-purpose flour in the gravy with a gluten-free all-purpose flour blend (ensure it’s suitable for making a roux) or use cornstarch to thicken. For a cornstarch slurry, mix 1 tablespoon of cornstarch with 2 tablespoons of cold water, then whisk into the hot gravy until thickened. For more great sides, check out our recipe for Crispy Garlic Parmesan Potato Wedges.
Is it possible to bake or air fry this chicken for a healthier option?
While you can bake or air fry breaded chicken, the signature deep crispiness and unique flavor profile of true Crispy Fried Chicken with Creamy Gravy are best achieved through traditional deep frying. Baking or air frying will yield a different texture, often less crunchy, but can still be a delicious alternative. You would need to adjust cooking times and temperatures significantly to achieve a comparable, though distinct, result.
Your Crispy Fried Chicken with Creamy Gravy Masterpiece Awaits!
Now that you’re armed with all the tips, tricks, and detailed instructions, it’s time to banish dry, bland fried chicken from your kitchen forever. This recipe for Crispy Fried Chicken with Creamy Gravy promises a dish that’s unbelievably tender, perfectly seasoned, and enveloped in a golden, crunchy crust that will impress everyone at your table.
Gather your ingredients, ignite your culinary spirit, and prepare to create a meal that will earn rave reviews and become a cherished family favorite. Don’t forget to share your delectable creations with us – we can’t wait to see your masterpiece and hear how much you loved this ultimate fried chicken recipe!
Crispy Fried Chicken
Course: Main CourseCuisine: AmericanDifficulty: medium4
servings45
minutes35
minutes1200
kcal60
minutesDiscover the secret to perfectly crispy, golden fried chicken with tender, juicy meat every time. Paired with a rich, creamy homemade gravy, this classic comfort food will become a family favorite. Say goodbye to dry chicken and soggy breading!
Ingredients
4 chicken thighs or drumsticks (bone in, skin on)
2 cups all purpose flour
2 tablespoons cornstarch
1 tablespoon salt
1 tablespoon black pepper
1 teaspoon paprika
1/2 teaspoon garlic powder
2 large eggs
1/2 cup milk (for egg wash)
4 cups vegetable oil, for frying
For the Gravy:
2 tablespoons leftover frying oil (with delicious bits)
2 tablespoons all purpose flour
2 cups milk
1/2 teaspoon salt
1 teaspoon black pepper
Fresh chopped parsley or thyme, for garnish
Directions
- Prepare the chicken: Pat the chicken pieces thoroughly dry with paper towels. In a large bowl, combine 1 tablespoon salt, 1 tablespoon black pepper, 1 teaspoon paprika, and 1/2 teaspoon garlic powder. Season the chicken pieces evenly on all sides with this spice mixture. Let them sit for at least 15 minutes at room temperature, or up to 2 hours refrigerated, to allow the seasoning to penetrate and help with juiciness.
- Set up breading station: In a shallow dish, whisk together the 2 cups all purpose flour and 2 tablespoons cornstarch. In another shallow dish, whisk the 2 large eggs with 1/2 cup milk.
- Bread the chicken: Dip each chicken piece first into the egg wash, ensuring it’s fully coated, then transfer to the flour mixture. Press firmly to ensure the flour mixture adheres well to all surfaces. For an extra crispy crust, you can dip the chicken back into the egg wash and then into the flour mixture a second time. Place breaded chicken on a wire rack while you finish the rest.
- Heat the oil: Pour the vegetable oil into a large, heavy bottomed pot or Dutch oven. Heat over medium high heat until a deep fry thermometer reads 350°F. Maintaining the correct oil temperature is crucial for achieving juicy chicken with a crispy crust.
- Fry the chicken: Carefully lower 2 to 3 chicken pieces into the hot oil, ensuring not to overcrowd the pot. Overcrowding will drop the oil temperature too quickly, leading to greasy or soggy chicken. Maintain an oil temperature between 325°F to 350°F. If the oil is too hot, the outside will burn before the inside cooks through; too cool, and the chicken will be greasy. Fry each side for about 6 to 8 minutes, turning occasionally, until the chicken is golden brown and the internal temperature reaches 165°F (74°C) when measured with a meat thermometer inserted into the thickest part of the meat without touching the bone. This specific temperature control ensures the chicken is cooked through and perfectly juicy, without being overdone.
- Rest the chicken: Carefully remove the fried chicken from the oil and place it on a clean wire rack set over a baking sheet to drain any excess oil. This also allows the chicken to rest, redistributing its juices for maximum tenderness and juiciness inside.
- Make the creamy gravy: Pour out all but 2 tablespoons of the frying oil from the pot, leaving behind any flavorful browned bits. Whisk in 2 tablespoons all purpose flour, stirring constantly for 1 minute until a light roux forms. Gradually whisk in 2 cups milk, ensuring to scrape up any browned bits from the bottom of the pot. Continue whisking constantly until the gravy thickens to your desired consistency, about 5 to 7 minutes. Season with 1/2 teaspoon salt and 1 teaspoon black pepper.
- Serve: Ladle generous amounts of the creamy gravy over the crispy fried chicken. Garnish with fresh chopped parsley or thyme. Serve immediately and enjoy that perfect juicy inside and crispy outside!
Notes
- Maintaining correct oil temperature is crucial for crispy, juicy chicken. Resting the chicken after frying ensures maximum tenderness.