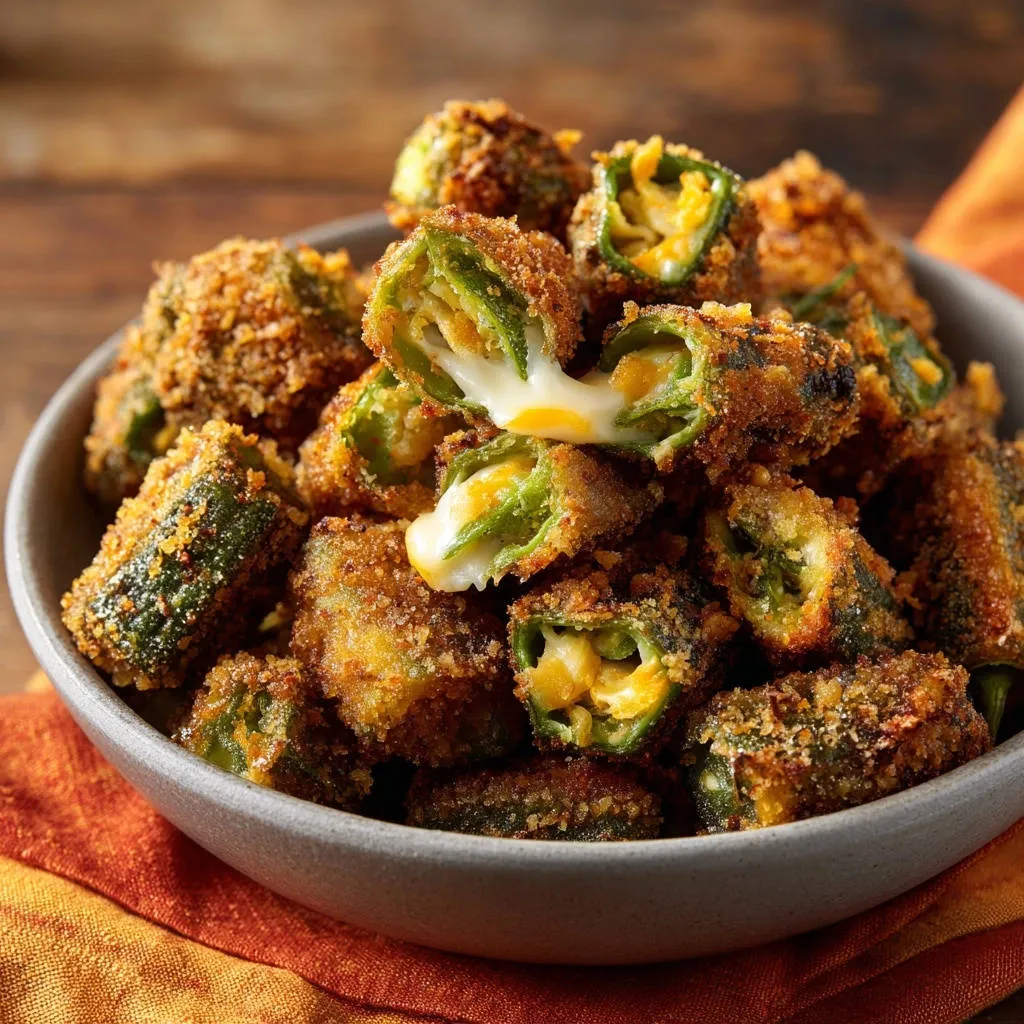
There’s nothing quite as frustrating as anticipating a plate of perfectly golden, gooey Crispy Jalapeño Cheese Bites, only to watch the cheesy filling ooze out into the hot oil. I’ve been there too many times, but after countless experiments, I’ve finally perfected a method that guarantees every single bite is leak-proof and gloriously crispy.
This recipe isn’t just about frying; it’s about a couple of game-changing techniques that lock in that irresistible, creamy cheese, ensuring you get pure bliss with every crunchy mouthful. Get ready for homemade cheese bites that consistently deliver on their promise!
The Secret to Seriously Gooey, Never-Leaky Crispy Jalapeño Cheese Bites
What makes these Crispy Jalapeño Cheese Bites truly exceptional is their foolproof design. We tackle the common problem of cheese leakage head-on, ensuring a consistently delightful experience.
For another cheesy bite perfect for gatherings, try these crispy cheesy potato puffs.
This unique approach focuses on creating an impenetrable, super crispy shell that encases a perfectly melted, spiced cheese core.
Forget soggy breading or deflated appetizers; our method guarantees a satisfying crunch and a rich, spicy creaminess in every bite, making them the ultimate crunchy appetizers for any occasion.
For that same crunchy exterior, explore our crispy fried cheese curds recipe.
Gather Your Flavor Makers: What You’ll Need
The Core: Jalapeños and a Creamy Cheese Blend
Fresh Jalapeños: Select firm, vibrant green jalapeños. Their natural cavity is the perfect vessel for our cheese, and their inherent spice gives these bites their signature kick.

Cream Cheese: Softened cream cheese is essential for a smooth, homogenous filling that blends seamlessly with the other cheeses. It provides the luxurious creaminess that holds everything together.
Shredded Cheddar & Monterey Jack: This dynamic duo offers a balanced flavor profile and excellent melting properties. Cheddar brings a sharp, savory note, while Monterey Jack contributes a milder, wonderfully gooey texture.
Garlic Powder & Salt: These seasonings elevate the cheese filling, adding depth and enhancing the overall savory experience of your Crispy Jalapeño Cheese Bites.
The Crispy Coating Crusaders: Breading Station Essentials
All-Purpose Flour: The initial dredge in flour creates a dry surface on the jalapeño and cheese, providing an ideal base for the egg wash to adhere to.
Large Eggs: Lightly beaten eggs act as the critical binder, allowing the breadcrumbs to stick firmly and form a cohesive coating around each bite.
Panko Breadcrumbs: Panko is non-negotiable for achieving that ultimate, airy crispness. Unlike standard breadcrumbs, Panko’s larger, flakier texture absorbs less oil and delivers an unparalleled crunch.
Frying Medium and Flavor Boosters
Vegetable Oil: A neutral-flavored oil like canola, peanut, or sunflower oil is perfect for deep frying. It heats evenly and won’t impart unwanted flavors, allowing the jalapeño and cheese to shine.
The remaining salt (separate from the filling) is used to season the breading, ensuring flavor permeates every layer of these delightful spicy cheese balls.
Essential Gear for Perfect Crispy Bites
Small Spoon or Melon Baller: Indispensable for cleanly scooping out jalapeño seeds and membranes, crucial for both heat control and creating a tidy cheese cavity.
Shallow Dishes: Three wide, shallow dishes are necessary for an organized and efficient breading station, preventing cross-contamination and simplifying the process.
Heavy-Bottomed Pot or Dutch Oven: Provides stable heat distribution, which is vital for maintaining a consistent oil temperature and ensuring even cooking.
Candy Thermometer or Deep-Fry Thermometer: Absolutely crucial for maintaining the precise oil temperature (350-375°F / 175-190°C), which is key to perfectly crispy, non-greasy bites that won’t leak.
Slotted Spoon or Spider Skimmer: Essential for safely adding and removing the Crispy Jalapeño Cheese Bites from the hot oil, allowing excess oil to drain quickly.
Wire Rack with Paper Towel-Lined Baking Sheet: Provides the ideal setup for draining fried bites, promoting air circulation to maintain crispness and absorb residual oil.
Step-by-Step Perfection: Crafting Your Crispy Jalapeño Cheese Bites
- Prepare the Jalapeños:
Carefully wash and dry the jalapeños to ensure a clean surface for breading.
Cut each jalapeño in half lengthwise, then use a small spoon to meticulously remove all seeds and membranes. This is crucial for managing the heat level and creating a clean pocket for the cheese. Once cleaned, cut each jalapeño half into 2 or 3 smaller, bite-sized pieces, perfect for single servings.
- Whip Up the Creamy Cheese Filling:
In a medium bowl, combine the softened cream cheese, shredded cheddar, shredded Monterey Jack, garlic powder, and 1/4 teaspoon salt.
Mix until well combined and smooth, ensuring all ingredients are evenly distributed for a consistent, flavorful experience in every Crispy Jalapeño Cheese Bite.
- Fill the Jalapeño Pockets:
Carefully fill each prepared jalapeño piece with a small amount of the cheese mixture.
Ensure the cheese is nestled securely inside the jalapeño cavity and try not to let it overflow onto the cut edges. This precise filling creates a natural pocket for the cheese and forms the first crucial line of defense against leaks.
- Set Up Your Breading Station:
Arrange three shallow dishes on your workspace, moving from left to right for an assembly line approach: Place the all-purpose flour in the first, the lightly beaten eggs in the second, and the Panko breadcrumbs (mixed with the remaining 1/4 teaspoon salt for seasoning) in the third.
This organized setup makes the breading process efficient, minimizes mess, and ensures each layer is applied correctly.
- Apply the First Crispy Layer:
Dredge each filled jalapeño piece in the flour, shaking off any excess gently. This initial flour coating helps the egg adhere better and forms a uniform surface.
Then, dip it into the egg mixture, ensuring it’s fully coated. Finally, roll it generously in the seasoned Panko breadcrumbs, pressing gently to make sure the crumbs adhere well and create a strong, even first coating.
- The No-Leak Double Coating Secret:
This is the game-changer for preventing cheese leaks in your homemade cheese bites! After the first breading, dip each piece back into the egg, and then again into the Panko breadcrumbs for a second, robust coating.
This creates a thick, resilient, protective barrier that effectively locks in the delicious, gooey cheese, ensuring it stays exactly where it belongs during frying. Place the double-breaded pieces on a plate or baking sheet.
- The Crucial Chill: Firming Up for Frying Success:
Transfer the breaded jalapeño bites to the freezer for 15-20 minutes. This step is absolutely vital for making no-leak recipe a reality.
This crucial chilling period helps the cheese firm up significantly and prevents it from melting too quickly and bursting through the breading when it hits the hot oil. Do NOT skip this step – it’s key to perfect fried jalapeño snacks!
- Heat the Frying Oil:
While the bites are chilling, heat about 2-3 inches of vegetable oil in a large, heavy-bottomed pot or Dutch oven over medium-high heat.
Aim for a consistent temperature of 350-375 degrees Fahrenheit (175-190°C). Use a candy thermometer to accurately monitor the temperature; proper oil temperature is essential for achieving maximum crispness and preventing greasy bites.
- Fry to Golden Perfection:
Carefully add the frozen jalapeño bites to the hot oil in batches, ensuring you don’t overcrowd the pot. Overcrowding lowers the oil temperature significantly and can lead to soggy, rather than crispy, results.
Fry for 3-4 minutes, turning occasionally with tongs or a slotted spoon, until they are beautifully golden brown and irresistibly crispy. The cheese inside will be perfectly melted and bubbling.
- Drain and Serve:
Remove the fried bites with a slotted spoon and place them on a wire rack lined with paper towels to drain any excess oil. This final step ensures they stay crisp.
Serve immediately and enjoy that perfect, cheesy goodness with a satisfying crunch! These Crispy Jalapeño Cheese Bites are best enjoyed fresh from the fryer.
Master Your Bites: Essential Tips for Success
Meticulous Jalapeño Prep is Key: Don’t rush removing the seeds and membranes. A thorough job ensures both heat control (for those who prefer less spice) and a perfectly clean cavity for the cheese, setting the stage for a successful filling.
Chill Your Cheese Filling (Optional but Recommended): If your cream cheese mixture feels very soft or warm, a quick chill for 10-15 minutes before filling can make it significantly easier to handle and less prone to oozing during the filling process.
Press the Panko Firmly: When applying the breadcrumbs, especially the second layer, gently but firmly press the Panko onto the jalapeño and cheese. This ensures a thick, even, and durable coating that is crucial for locking in the cheese.
Do Not Skip the Freezer Step: The 15-20 minute chill in the freezer is non-negotiable for preventing leaks. It allows the cheese to firm up and the breading to set, creating a vital protective barrier against the hot oil and guaranteeing a no-leak recipe.
Accurate Oil Temperature is Your Best Friend: Always use a thermometer and strive to maintain the oil temperature precisely within the 350-375°F (175-190°C) range. Too low, and your Crispy Jalapeño Cheese Bites will be greasy; too high, and they’ll burn before the cheese perfectly melts. Adjust heat as needed between batches.
Don’t Overcrowd the Pot: Fry in small batches to prevent the oil temperature from dropping too significantly. This critical practice ensures each bite gets uniformly crispy and avoids sogginess, maximizing the crunch factor.
Troubleshooting Common Crispy Jalapeño Cheese Bites Mishaps
My Cheese is Leaking Out!
This is often due to an insufficient breading barrier or the bites not being chilled long enough. Ensure you’ve applied the double breading thoroughly, pressing the Panko firmly into place. Also, never skip the 15-20 minute freezer chill – it’s absolutely crucial for the cheese to firm up before frying and creating a stable core.
My Bites Are Soggy, Not Crispy.
Soggy bites usually point to oil that isn’t hot enough. Always use a thermometer to maintain the oil temperature between 350-375°F (175-190°C). Overcrowding the pot can also cause a significant drop in temperature, so fry in small batches to keep the oil consistently hot.
The Breading Fell Off During Frying.
This can happen if the flour coating wasn’t fully adhered, the egg wash wasn’t even, or the Panko wasn’t pressed on firmly enough during both breading stages. Ensure each layer is well-adhered before moving to the next step, and gently but firmly press the breadcrumbs into the surface for maximum adherence.
My Crispy Jalapeño Cheese Bites Are Too Spicy / Not Spicy Enough.
For less heat, be extremely thorough when removing all seeds and white membranes from the jalapeños – these fibrous parts contain most of the capsaicin, which is responsible for the heat. For more heat, you can intentionally leave a few seeds in or even add a tiny pinch of cayenne pepper directly to the cheese mixture for an extra kick.
Beyond the Fryer: Serving, Storing, and Making Ahead
Perfect Pairings and Serving Suggestions
These crunchy appetizers are fantastic on their own, but they truly shine with a delicious dipping sauce. Consider a cool ranch dressing, a zesty cilantro lime crema, or a vibrant sweet chili sauce to complement their heat and richness.
They make an excellent party appetizer, game day snack, or a fun addition to a spread of small bites alongside fresh guacamole or a bright salsa.
How to Store Leftovers (If There Are Any!)
Once cooled, fried leftovers can be stored in an airtight container in the refrigerator for up to 2-3 days. For best results, don’t microwave them, as this will make them soggy.
To restore their crispness, reheat them in an air fryer or oven (see FAQ below) until heated through and golden brown again.
Can You Make Crispy Jalapeño Cheese Bites Ahead of Time?
Absolutely, and it’s highly recommended for convenience! You can prepare these Crispy Jalapeño Cheese Bites right up to the freezing step.
Place the double-breaded bites on a baking sheet and freeze until solid, then transfer them to a freezer-safe bag or container for up to 1 month. Fry directly from frozen, adding a minute or two to the frying time if needed, for fresh-tasting results anytime.
Your Crispy Jalapeño Cheese Bites FAQs Answered
Can I Bake or Air Fry These Instead of Frying?
While deep frying yields the absolute best crispness and gooey center, you can bake or air fry them as a slightly lighter alternative. For baking, preheat your oven to 400°F (200°C) and bake for 15-20 minutes, flipping halfway, until golden and crisp. For air frying, cook at 375°F (190°C) for 10-15 minutes, also flipping halfway through the cooking time.
The texture won’t be identical to deep-fried, but they’ll still be delicious and a great option for a less indulgent treat. If you enjoy crispy baked snacks, you might also like these crispy baked onion rings for another crowd-pleasing appetizer.
How Can I Make These Bites Gluten-Free?
Yes, absolutely! Simply substitute the all-purpose flour with a high-quality gluten-free all-purpose flour blend and use gluten-free Panko breadcrumbs, which are widely available. The rest of the process remains exactly the same, ensuring a delicious and satisfying gluten-free treat.
What’s the Best Way to Reheat Crispy Jalapeño Cheese Bites?
To restore their crispy texture, avoid the microwave at all costs! For optimal results, reheat leftovers in an air fryer at 350°F (175°C) for 5-7 minutes, or in a preheated oven at 375°F (190°C) for 8-12 minutes, until they are heated through and gloriously crisp again.
Can I Use Different Cheeses in the Filling?
While our blend of cream cheese, cheddar, and Monterey Jack provides the perfect balance of creaminess and melt, you can certainly experiment! Pepper Jack for extra heat, a smoked gouda for a deeper, more complex flavor, or even a sharp provolone are all great options. Just ensure your chosen cheeses melt well to maintain that desirable gooey center.
Ready to Indulge? Your Crispy, Cheesy Creation Awaits!
Now that you’re equipped with the ultimate “no-leak” secret and all the expert tips for success, there’s nothing stopping you from creating the most irresistible Crispy Jalapeño Cheese Bites! Say goodbye to disappointing, deflated appetizers and hello to perfectly golden, outrageously cheesy, and satisfyingly spicy mouthfuls.
More Cheesy Goodness
If you’re enjoying the cheesy comfort of these jalapeño bites, you might like these other rich and satisfying recipes.
- For a truly satisfying baked pasta, try this ultimate baked mac and cheese, featuring a creamy texture that complements the theme.
- If you appreciate well-seasoned, flavorful meatballs, consider these cheesy loaded beef meatballs for another hearty option.
Gather your ingredients, follow our expert guide, and prepare to impress your family and friends with these phenomenal homemade cheese bites. You might even want to whip up a batch of perfect creamy garlic dip to serve alongside them. Don’t forget to share your culinary triumphs with us! Happy frying!
Jalapeño Cheese Bites
Course: AppetizerCuisine: AmericanDifficulty: medium4
12-24 bites45
minutes20
minutes350
kcal60
minutesTired of leaky jalapeño bites? This recipe reveals the secret to keeping gooey cheese inside a perfectly crispy shell. A simple double-breading and freezing step ensures every bite is pure cheesy goodness without the mess.
Ingredients
6-8 medium fresh jalapeños
4 ounces cream cheese, softened
1/2 cup shredded cheddar cheese
1/4 cup shredded Monterey Jack cheese
1/2 teaspoon garlic powder
1/4 teaspoon salt
1/2 cup all-purpose flour
2 large eggs, lightly beaten
1 1/2 cups Panko breadcrumbs
Vegetable oil, for frying
Directions
- Wash and dry the jalapeños. Carefully cut each jalapeño in half lengthwise, then use a small spoon to remove all seeds and membranes. This is important for managing the heat and creating a space for the cheese. Once cleaned, cut each jalapeño half into 2 or 3 smaller, bite-sized pieces.
- In a medium bowl, combine the softened cream cheese, shredded cheddar, shredded Monterey Jack, garlic powder, and 1/4 teaspoon salt. Mix until well combined.
- Carefully fill each jalapeño piece with a small amount of the cheese mixture. Ensure the cheese is nestled inside the jalapeño cavity and try not to let it overflow onto the cut edges. This creates a natural pocket for the cheese.
- Set up your breading station: Place the flour in one shallow dish, the beaten eggs in a second, and the Panko breadcrumbs (mixed with the remaining 1/4 teaspoon salt) in a third.
- Dredge each filled jalapeño piece in the flour, shaking off any excess. Then dip it into the egg mixture, ensuring it’s fully coated. Finally, roll it generously in the Panko breadcrumbs, pressing gently to make sure the crumbs adhere well.
- Here’s the secret for no leaks! After the first breading, dip each piece back into the egg and then into the Panko again for a second coating. This creates a thick, protective barrier that locks in the cheese. Place the double-breaded pieces on a plate or baking sheet.
- Place the breaded jalapeño bites in the freezer for 15-20 minutes. This crucial step helps the cheese firm up and prevents it from melting too quickly and bursting through the breading during frying.
- While the bites are chilling, heat about 2-3 inches of vegetable oil in a large, heavy-bottomed pot or Dutch oven over medium-high heat to 350-375 degrees Fahrenheit. Use a candy thermometer to monitor the temperature.
- Carefully add the frozen jalapeño bites to the hot oil in batches, ensuring you don’t overcrowd the pot. Fry for 3-4 minutes, turning occasionally, until golden brown and crispy. The cheese inside will be perfectly melted.
- Remove the fried bites with a slotted spoon and place them on a wire rack lined with paper towels to drain excess oil. Serve immediately and enjoy that perfect, cheesy goodness!
Notes
- Double-breading and freezing the bites are crucial steps for preventing cheese leaks during frying.