Making truly impressive layered treats, like these Decadent Caramel Dream Bars, usually ends in frustration when it comes time to slice the delicate, sticky layers.
I spent years perfecting a recipe that delivers balanced flavor and, more importantly, a guaranteed, bakery-quality clean cut every single time, thanks to one simple tool.
For a similarly delightful experience with a bright citrus twist, explore how to make creamy orange zest bars.
This article breaks down the essential technique-the secret hot knife method-that ensures your rich caramel and chocolate layers never squish, tear, or crumble.
Why These Decadent Caramel Dream Bars Will Be Your New Favorite
These treats distinguish themselves by achieving essential structural integrity, primarily due to precise chilling methods and the stabilizing inclusion of condensed milk in the homemade caramel layer.
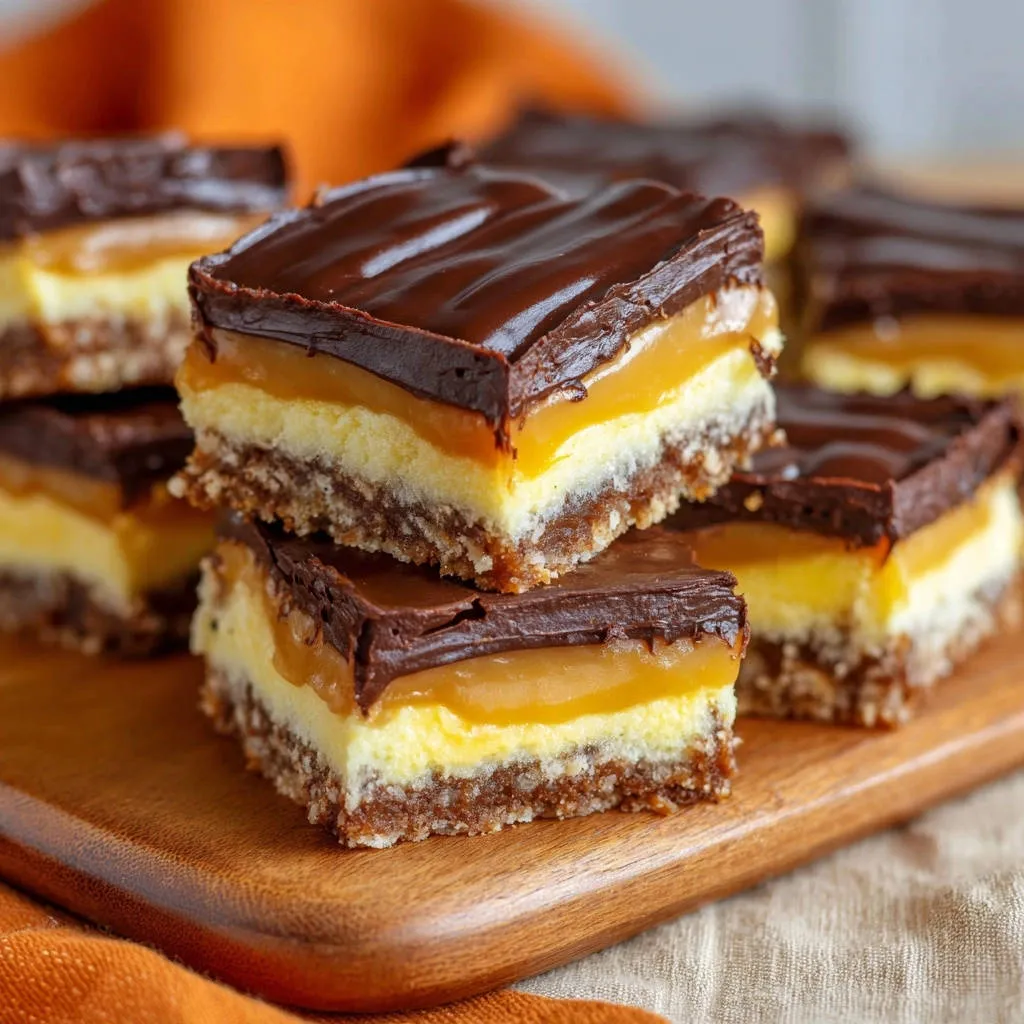
The combination of a buttery, sturdy crust, a light and tangy creamy filling, and a rich, chewable caramel creates a profound balance of texture and sweetness, avoiding the cloying flavor of lesser layered bar recipes.
For more layered bar ideas, check out these caramel pecan brownie bars.
The recipe is also easily adaptable; whether you prefer the traditional crunch of graham crackers or need a heartier base using rolled oats, the integrity of the base remains firm and delicious.
The Four-Layer Flavor Foundation: Essential Ingredients Breakdown
Building the Perfect Base: Crunch and Texture
Finely crushed graham crackers provide the classic flavor and structure required for a robust crust that stands up to the heavy layers.
For a variation, you can substitute the graham crackers with crushed vanilla wafers or rolled oats, but ensure they are crushed very finely for a firm foundation.
The optional addition of chopped walnuts or pecans introduces essential fat and bitterness, which helps to cut through the ultimate richness of the subsequent sweet layers.
Achieving Smoothness: The Role of Sour Cream and Sweetened Milk
Using sour cream or softened cream cheese in the creamy layer is crucial because it provides a necessary acidic tang that subtly brightens the overall flavor profile.
This dairy inclusion also helps create a smoother, slightly denser custard-like texture that sets cleanly, significantly reducing the risk of the caramel layer bleeding into the filling below.
Homemade Caramel: Avoiding Graininess and Achieving Thickness
The key to creating a non-sticky, perfectly sliceable caramel layer is incorporating a measured portion of sweetened condensed milk along with the butter and brown sugar.
This extra milk acts as a strong emulsifier, stabilizing the caramel so that it firms up ideally when chilled, effectively preventing layer slippage during the critical cutting process.
The Glossy Finish: Selecting and Melting Chocolate
Melting the semi-sweet chocolate chips with a small amount of heavy cream or butter creates a flexible, ganache-like topping, rather than a hard, brittle chocolate shell.
This technique ensures the glossy topping will set firmly but remain flexible enough that it will not shatter or crack when the cold bars meet the hot knife during the final slicing step.
Essential Equipment Checklist for Bar Baking Success
8×8 Inch Metal Baking Pan: A metal pan conducts heat quickly and evenly, which is vital for ensuring the crust bakes fully and the creamy layer sets properly.
Parchment Paper with Overhang: This is an absolutely essential tool for stress-free removal; the overhang acts as handles, allowing you to lift the entire chilled block out of the pan before slicing.
Sturdy Whisk and Saucepan: Necessary for constantly stirring the caramel layer for three minutes to prevent the sugar from burning or crystallizing, resulting in a perfectly smooth, stable caramel.
Tall Glass and Sharp Knife: The glass is required for the hot water dip, and a long, sharp chef’s knife is mandatory for achieving the clean, decisive cuts necessary for this recipe.
Creating the Layers: A Step-by-Step Guide to Baking Decadent Caramel Dream Bars
Phase 1: Pressing and Pre-Baking the Foundation
Preheat your oven to 350°F. Line the 8×8 pan with parchment paper, leaving a generous overhang on two opposite sides; this overhang is crucial for later removal.
Combine your crushed crackers, sugar, optional nuts, and melted butter, mixing until thoroughly moistened; then, press this mixture very firmly and evenly across the pan bottom.
Bake the crust for exactly 10 minutes until it is just set, not browned, then remove it from the oven and allow it to cool slightly while you prepare the creamy filling.
Phase 2: Pouring and Setting the Creamy Layer
In a separate bowl, whisk together the large egg, vanilla, sweetened condensed milk, and softened sour cream or cream cheese until the mixture is completely smooth with no lumps remaining.
Pour this creamy mixture carefully over the warm, pre-baked crust, ensuring the entire surface is covered evenly up to the edges of the pan.
Return the pan to the oven and bake for 20 to 25 minutes; the creamy layer is done when the edges look lightly golden and the center is mostly set with only a slight jiggle remaining.
Phase 3: Crafting the Sturdy Caramel
While the bars cool slightly, melt the butter in a medium saucepan over medium heat; stir in the brown sugar, salt, and the remaining portion of condensed milk.
Bring the mixture to a gentle simmer, stirring continuously for approximately 3 minutes until the brown sugar is fully dissolved and the caramel begins to thicken subtly.
Removing the caramel from the heat immediately prevents over-thickening; pour it quickly and evenly over the still-warm creamy layer, then allow the pan to cool completely to room temperature (about 1 hour).
Phase 4: The Chill and Chocolate Glaze
Once the bars are cool to the touch, transfer them to the refrigerator and initiate the long chill, which must last a minimum of 4 hours, or ideally, overnight.
To make the chocolate topping, place the chocolate chips and heavy cream in a small bowl and microwave them in short 30-second bursts, stirring until the mixture is smooth and beautifully glossy.
Pour the warm chocolate over the fully chilled, firm caramel layer and quickly spread it edge-to-edge; chill the bars again for just 30 minutes until the chocolate is set but not yet rock hard.
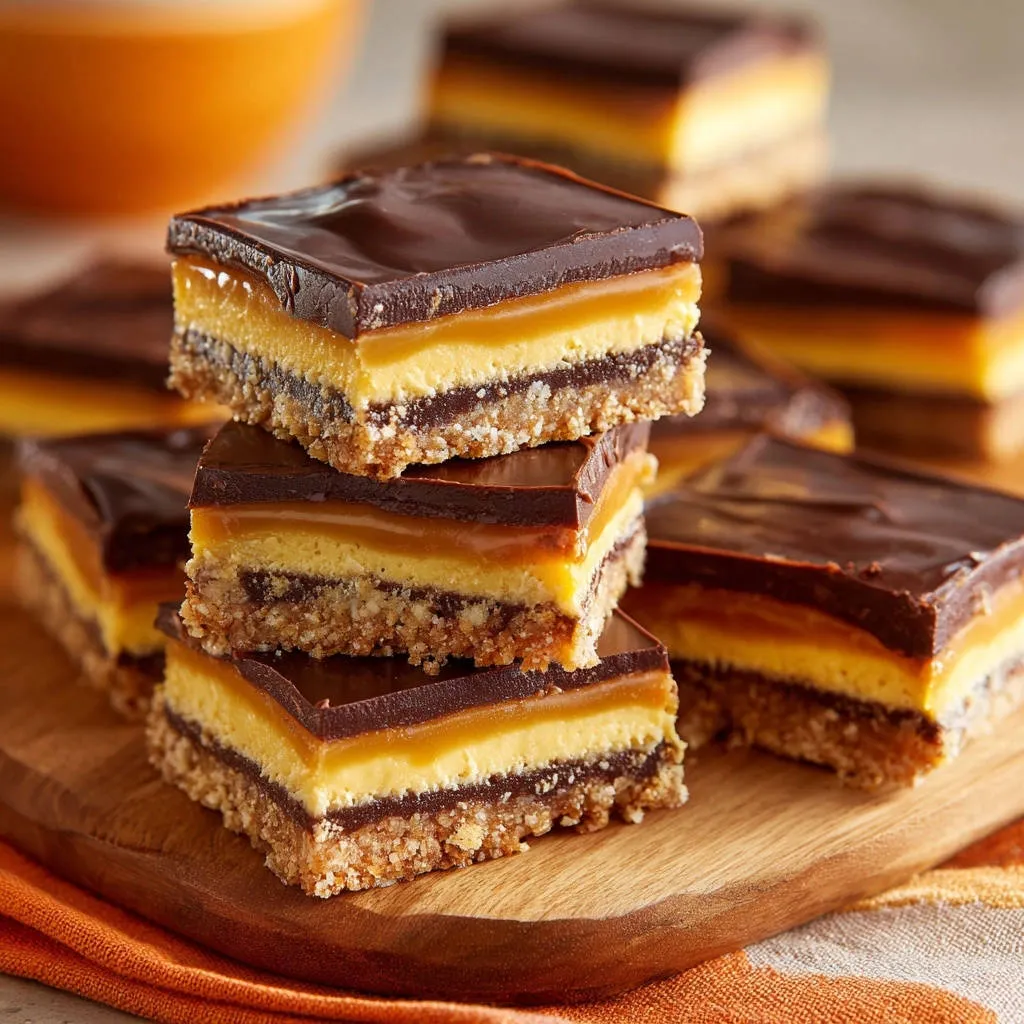
The Clean Slice Guarantee: Achieving Bakery-Quality Edges Every Time
The difference between messy, stuck layers and perfect, sharp squares of Decadent Caramel Dream Bars lies entirely in this three-part method.
Why 4 Hours in the Fridge is Non-Negotiable
The extended chilling time is absolutely essential to fully solidify the butter in the crust and, most critically, to firm up the high-sugar caramel layer.
This firming prevents the layers from slipping, bulging, or sticking aggressively to the knife blade when pressure is applied during the cut.
Mastering the Essential Re-Dip Before Every Cut
Fill a tall glass with very hot water and dip a long, sharp knife blade into the water for a full 30 seconds to heat it thoroughly.
Immediately wipe the blade completely dry with a clean towel; the hot, dry knife will melt through the chocolate topping cleanly without cracking it.
Crucially, you must re-dip the knife in the hot water and wipe it completely dry before every single cut you make; this ensures the sticky caramel is momentarily softened and prevents it from tearing the beautiful layers.
Using the Parchment Overhang for Stress-Free Removal
Never attempt to slice these bars while they are still in the pan; this always results in torn edges where the knife meets the pan wall.
Use the parchment paper overhang handles to gently lift the entire chilled block of bars out of the pan and onto a sturdy cutting board.
Slicing on a flat, stable surface allows you to apply even downward pressure for a uniform, professional cut.
Chef’s Secrets: Elevating Your Decadent Caramel Dream Bars Game
Optimize Your Texture with Ingredient Swaps:
For an ultra-rich, cheesecake-like layer, use softened cream cheese instead of sour cream in Phase 2; this yields a denser, more decadent creamy layer.
The Salt Layer Trick:
Immediately after pouring the warm caramel layer, sprinkle a tiny, even pinch of flaky sea salt (like Maldon) over the top for a sophisticated, contrasting salty-sweet finish.
Sifting for Superior Crumb:
If using flour or powdered sugar in your crust variation, briefly sifting these ingredients ensures an even lighter, more consistent crust texture that is less likely to feel heavy.
Troubleshooting Your Dream Bars: Common Issues and Quick Fixes
My Layers Squished Together!
This is almost always caused by insufficient cooling time before subsequent layers were added, allowing the heat to melt and mix the layers prematurely.
Ensure the creamy layer is entirely set before adding the caramel, and always complete the mandatory 4-hour chill before attempting to slice the bars.
The Crust is Too Hard or Crumbly.
A hard crust usually indicates that you over-baked the base during the initial 10-minute step; stick strictly to the time limit for a tender crust.
If the crust is crumbly, it means the mixture was not pressed firmly enough into the pan before baking, preventing the melted butter from properly binding the crumbs.
My Caramel Layer Is Grainy.
Graininess occurs when the sugar crystals did not fully dissolve during the short simmering phase.
Make sure you stir the caramel mixture continuously and thoroughly for the entire 3 minutes, ensuring all granules are dissolved before removing it from the heat.
Frequently Asked Questions About Decadent Caramel Dream Bars
Can I Use Store-Bought Caramel?
Yes, you can substitute homemade caramel, but the store-bought variety must be thick, like a true caramel topping, and not a thin syrup designed for ice cream.
Thin sauces will not set properly, compromising the structure of your layered treats and making clean slicing impossible.
How Should I Store Leftovers?
Due to the condensed milk and creamy layer, these Decadent Caramel Dream Bars must be stored in an airtight container in the refrigerator.
They will keep well for up to 5 days, or you can freeze pre-cut, tightly wrapped portions for up to two months; thaw them overnight in the fridge before serving.
Can I Double the Recipe?
Absolutely; this recipe is easily doubled and fits perfectly into a standard 9×13 inch baking pan.
Note that the baking times will need to be slightly adjusted for the larger surface area, generally requiring an additional 5 to 10 minutes in the oven to fully set the creamy layer.
Ready to Impress? Share Your Decadent Caramel Dream Bars Masterpiece!
These Decadent Caramel Dream Bars are the ultimate expression of layer baking-rich, chewy, creamy, and topped with the perfect snap of chocolate.
More Sweet Treats to Enjoy
Complement your caramel bars with these other baked delights.
- For a moist and flavorful morning bake, try these Glazed Carrot Walnut Muffins which share a similar comforting spice profile.
- If you appreciate a sweet, sticky glaze, you’ll love these Glazed Pecan Cinnamon Rolls for their rich flavor and satisfying texture.
Trust the process, commit to the 4-hour chill, and utilize the hot knife technique to finally achieve the beautifully clean edges you’ve always wanted.
Now that you hold the secret to guaranteed clean slicing, go ahead and bake a batch that will truly wow your guests with its professional finish and unbeatable flavor.
Caramel Dream Bars
Course: DessertCuisine: AmericanDifficulty: medium16
squares (8×8 pan)30
minutes35
minutes350
kcal360
minutesThese layered bars feature a buttery graham cracker crust topped with a creamy filling, a rich homemade caramel, and a smooth chocolate glaze. The recipe emphasizes the critical extended chilling and hot-knife technique required to achieve perfectly neat, bakery-style squares without crumbling or sticking.
Ingredients
For the Crust:
1 1/2 cups finely crushed graham crackers or oats
1/2 cup chopped walnuts or pecans (optional)
1/4 cup granulated sugar
1/2 cup (1 stick) melted butter
For the Creamy Layer:
1 (14 ounce) can sweetened condensed milk
1/2 cup sour cream or cream cheese, softened
1 teaspoon vanilla extract
1 large egg
For the Caramel Layer:
1/2 cup (1 stick) butter
1/2 cup packed brown sugar
1/4 cup sweetened condensed milk (from a second can)
1/2 teaspoon salt
For the Chocolate Topping:
1 cup semi-sweet chocolate chips
2 tablespoons heavy cream or butter
Directions
- Prepare the Crust. Preheat oven to 350 degrees F. Line an 8×8 inch baking pan with parchment paper, leaving an overhang on two sides for easy removal (this is crucial later). In a medium bowl, combine the crushed crackers, nuts, sugar, and melted butter. Press the mixture firmly and evenly into the bottom of the prepared pan. Bake for 10 minutes. Remove and set aside.
- Make the Creamy Layer. While the crust cools slightly, whisk together the sweetened condensed milk, sour cream (or cream cheese), vanilla, and egg until smooth and well combined. Pour this mixture evenly over the pre-baked crust.
- Bake the Layers. Return the pan to the oven and bake for 20 to 25 minutes, or until the creamy layer is mostly set and the edges are lightly golden. Let cool in the pan on a wire rack for about 15 minutes while you prepare the caramel.
- Create the Caramel. In a medium saucepan, melt the butter over medium heat. Stir in the brown sugar, condensed milk, and salt. Bring to a gentle simmer, stirring constantly for about 3 minutes until the sugar is fully dissolved and the mixture has thickened slightly. Remove from heat and pour the caramel layer immediately over the warm, set creamy layer. Return the pan to the wire rack and allow to cool completely at room temperature, about 1 hour.
- Chill Thoroughly (The Key to Clean Slices). Once cooled to room temperature, transfer the bars to the refrigerator and chill for a minimum of 4 hours, or preferably overnight, until the caramel is completely firm and non-sticky. This extended chill is mandatory to lock in the layers.
- Finish with Chocolate Topping. Place the chocolate chips and heavy cream (or butter) in a small microwave-safe bowl. Microwave in 30 second bursts, stirring until smooth and glossy. Pour the chocolate over the chilled caramel layer and spread quickly to cover the surface. Chill for another 30 minutes until the chocolate is just set but not rock hard.
- The Guaranteed Clean Slice Method. Remove the chilled bars from the pan using the parchment paper overhang. Place them on a sturdy cutting board. To achieve perfectly neat squares, fill a tall glass with very hot water. Dip a long, sharp knife into the hot water for 30 seconds, then immediately wipe the blade completely dry with a towel. Use the hot, dry knife to slice quickly through the bars. Crucially, re-dip the knife in the hot water and wipe it clean before every single cut. This keeps the chocolate from cracking and prevents the caramel from sticking and tearing the layers. Serve immediately or store in the refrigerator.
Notes
- The extended chill time (minimum 4 hours) is mandatory. Use the hot-knife technique, wiping the blade dry before every cut, for clean slices.