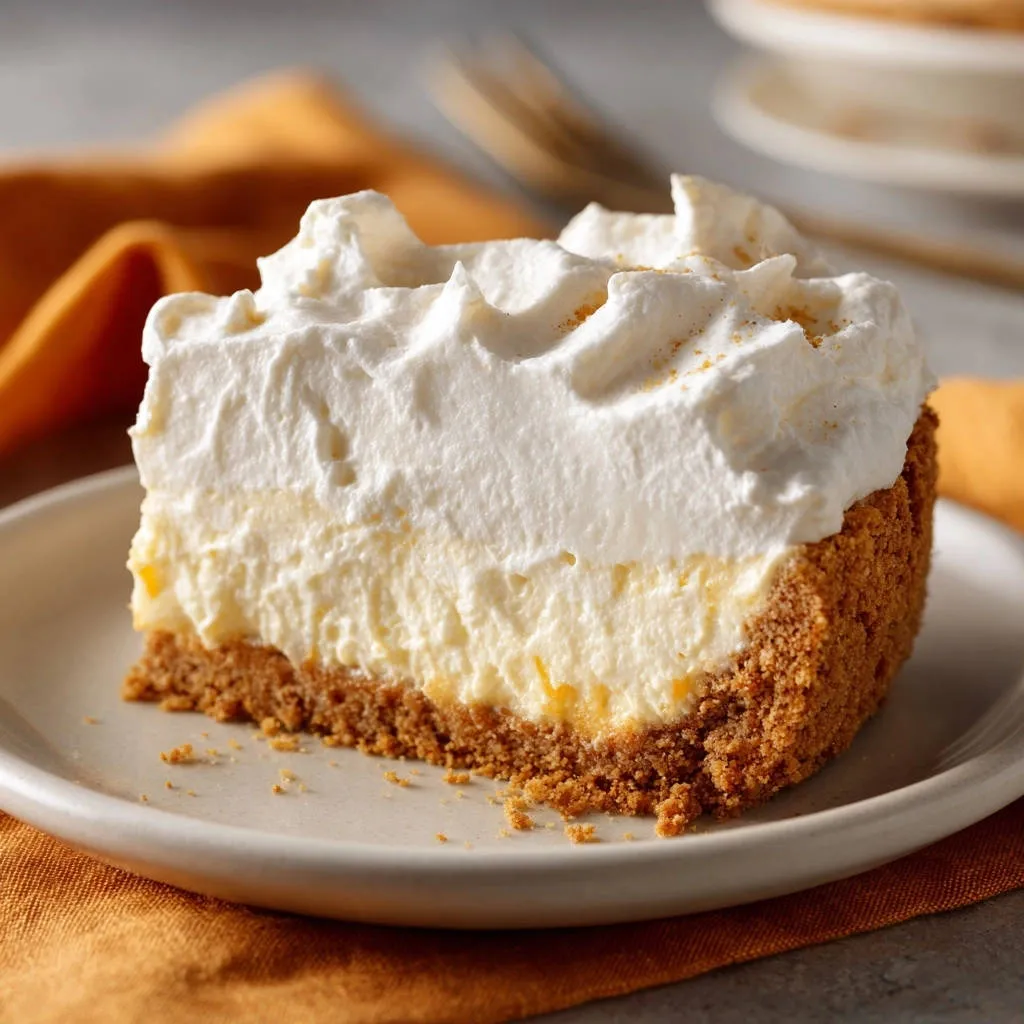
There’s nothing more disappointing than meticulously crafting a beautiful no-bake pie, only for it to crumble or wobble the moment you try to serve that first slice. I’ve been there, and I know the frustration! That’s why I perfected this Easy No-Bake Lemon Cream Pie recipe, specifically designed to give you that effortlessly firm, elegant slice you dream of, every single time.
This recipe isn’t just about incredible zesty flavor; it’s about a foolproof technique that guarantees a stable crust and a perfectly set, creamy filling. Prepare to impress everyone with your stunning, reliably delicious lemon dessert.
Why This Recipe is Your New Dessert Go-To
Say Goodbye to Wobbly Pies and Crumbly Crusts
Many no-bake pies promise ease but deliver disappointment when it comes to serving. This recipe directly addresses the common pitfalls of wobbly fillings and fragile crusts, ensuring your efforts are always rewarded.
We’re tackling those frustrations head-on with simple yet crucial techniques that guarantee a picture-perfect result.
The Secret to a Guaranteed Firm Slice
The magic of this Easy No-Bake Lemon Cream Pie lies in its intentional approach to chilling and ingredient interaction. By understanding the ‘why’ behind each step, you’ll consistently achieve that beautifully firm, clean slice that holds its shape, making serving a breeze.
This isn’t just a recipe; it’s a guide to unlocking dessert perfection. Your pie will be firm, luscious, and always ready for its close-up.
Refreshingly Easy, Irresistibly Delicious
Beyond its structural integrity, this pie is a flavor powerhouse. The bright, zesty lemon cutting through the rich, creamy filling is simply irresistible, offering a delightful balance that appeals to every palate.
The no-bake method means less time in the kitchen and more time enjoying this wonderfully refreshing treat. It’s truly a dessert that tastes gourmet but is surprisingly simple to create.
Essential Tools for Your No-Bake Lemon Pie Adventure
9-inch Pie Plate: This is your canvas for creating a beautifully shaped pie. A standard glass or ceramic pie plate works perfectly.
Large Mixing Bowls (2): One for your crust, another for the filling, and a third, preferably chilled, for the whipped topping. This prevents cross-contamination and allows for efficient workflow.
Electric Mixer: Absolutely essential for achieving light, fluffy cream cheese and stiff, stable peaks for your heavy cream. A stand mixer or a good hand-held model will make the process effortless.
Rubber Spatula: Ideal for scraping down bowls, folding ingredients gently, and spreading the filling smoothly into the crust. Its flexibility is key for no-waste baking.
Measuring Cups and Spoons: Accuracy is vital in baking, even in no-bake recipes, to ensure the perfect consistency and flavor balance.
Measuring Cup with a Flat Bottom (for crust): A secret weapon for compacting your graham cracker crust firmly and evenly, ensuring it doesn’t crumble upon slicing.
Whisk (optional, for whipped topping): If you don’t have an electric mixer, a strong arm and a whisk can achieve whipped cream, though it requires more effort.
Building Blocks of Zesty Perfection: Your Ingredients List
- 1 and 1/2 cups graham cracker crumbs
- 1/4 cup granulated sugar
- 1/2 cup unsalted butter, melted
- 1 (8 ounce) package cream cheese, softened
- 1 (14 ounce) can sweetened condensed milk
- 1/2 cup fresh lemon juice
- 1 teaspoon lemon zest
- 1 teaspoon vanilla extract
- 2 cups heavy cream, very cold
- 1/2 cup powdered sugar
- 1/2 teaspoon ground cinnamon or nutmeg (for garnish, optional)
The Sturdy Crust Foundation: Graham Cracker & Butter Chemistry
Graham cracker crumbs provide a subtly sweet, crunchy base that beautifully complements the creamy lemon filling. Combined with melted butter, they form a cohesive mixture that, when properly compacted, creates a wonderfully sturdy foundation for your pie.
The granulated sugar adds a touch of sweetness to the crust, balancing the tartness of the lemon. Unsalted butter is preferred to control the overall saltiness of your dessert.
Creamy Dream Team: Cream Cheese & Sweetened Condensed Milk
Softened cream cheese is crucial for a smooth, lump-free filling. It provides the signature tangy richness and body that makes this pie so luxurious, acting as the primary structure for the filling.
Sweetened condensed milk adds intense sweetness and contributes significantly to the creamy texture, reducing the need for additional sugar and ensuring a consistently smooth consistency.
The Zesty Star: Fresh Lemon Juice and Zest
Fresh lemon juice is the undeniable star, providing the vibrant, zesty flavor that defines this pie. Crucially, the acidity in the lemon juice also reacts chemically with the dairy in the cream cheese and condensed milk, helping the filling to set beautifully without any baking.
Lemon zest, derived from the peel, contains concentrated essential oils that amplify the lemon flavor, adding aromatic depth that juice alone cannot achieve. Always opt for fresh lemons for the best results.
Whipped Cloud Topping: Heavy Cream & Powdered Sugar Secrets
Very cold heavy cream is non-negotiable for achieving a stable and voluminous whipped topping. The colder the cream, the faster and more reliably it will whip to stiff peaks, creating that light, airy cloud that crowns your pie.
Powdered sugar, also known as confectioners’ sugar, dissolves instantly into the cream, ensuring a smooth texture without any grainy sugar crystals. It also contains a small amount of cornstarch, which helps stabilize the whipped cream, preventing it from weeping.
Crafting Your Easy No-Bake Lemon Cream Pie: Step-by-Step Perfection
-
Prepare the Crust:
In a medium bowl, combine 1½ cups graham cracker crumbs and ¼ cup granulated sugar. Pour in ½ cup melted unsalted butter and stir well until every crumb is moistened and combined. It should resemble wet sand.
Press this mixture very firmly and evenly into the bottom and up the sides of a 9-inch pie plate. For a truly solid crust that resists crumbling, use the flat bottom of a measuring cup or a glass to really compact it. This step is critical for density and stability.
Place the compacted crust in the refrigerator to chill for at least 30 minutes while you prepare the filling. This crucial chilling step allows the butter to solidify, creating a much more stable and sliceable graham cracker crust.
-
The Silky-Smooth Lemon Cream Filling Assembly:
In a large mixing bowl, beat 1 (8 ounce) package of softened cream cheese with an electric mixer until it is light, smooth, and fluffy, which usually takes about 2-3 minutes. This ensures no lumps and a wonderfully airy texture for your filling.
Gradually add 1 (14 ounce) can of sweetened condensed milk, beating on medium speed until the mixture is completely smooth and well combined. Continue to scrape down the sides of the bowl to ensure even mixing.
Stir in ½ cup fresh lemon juice, 1 teaspoon lemon zest, and 1 teaspoon vanilla extract until just incorporated. The lemon juice reacts with the dairy proteins to help the filling thicken and set, so ensure it’s thoroughly and evenly mixed throughout.
-
The Golden Rule of Chilling: Unlocking That Firm Slice:
Carefully pour the creamy lemon cream cheese filling into your pre-chilled graham cracker crust. Use a rubber spatula to spread it evenly across the bottom and against the sides of the crust.
Return the pie to the refrigerator and chill for a minimum of 4 hours. For the absolute best, most guaranteed firm slice, ideally, chill it overnight. This extended chilling time is the absolute secret to achieving that perfectly firm slice and allows the filling to fully set. Do not rush this step!
-
Whipping Up the Fluffy, Billowy Topping:
Just before serving, in a separate large mixing bowl (or using a chilled bowl and whisk for best results), beat 2 cups of very cold heavy cream with an electric mixer on medium-high speed. Continue beating until soft peaks begin to form.
Gradually add ½ cup powdered sugar, continuing to beat until stiff peaks form. Be careful not to overbeat, or you’ll end up with butter! The cream should hold its shape firmly when the beater is lifted.
-
The Grand Finale: Garnish and Elegant Serving:
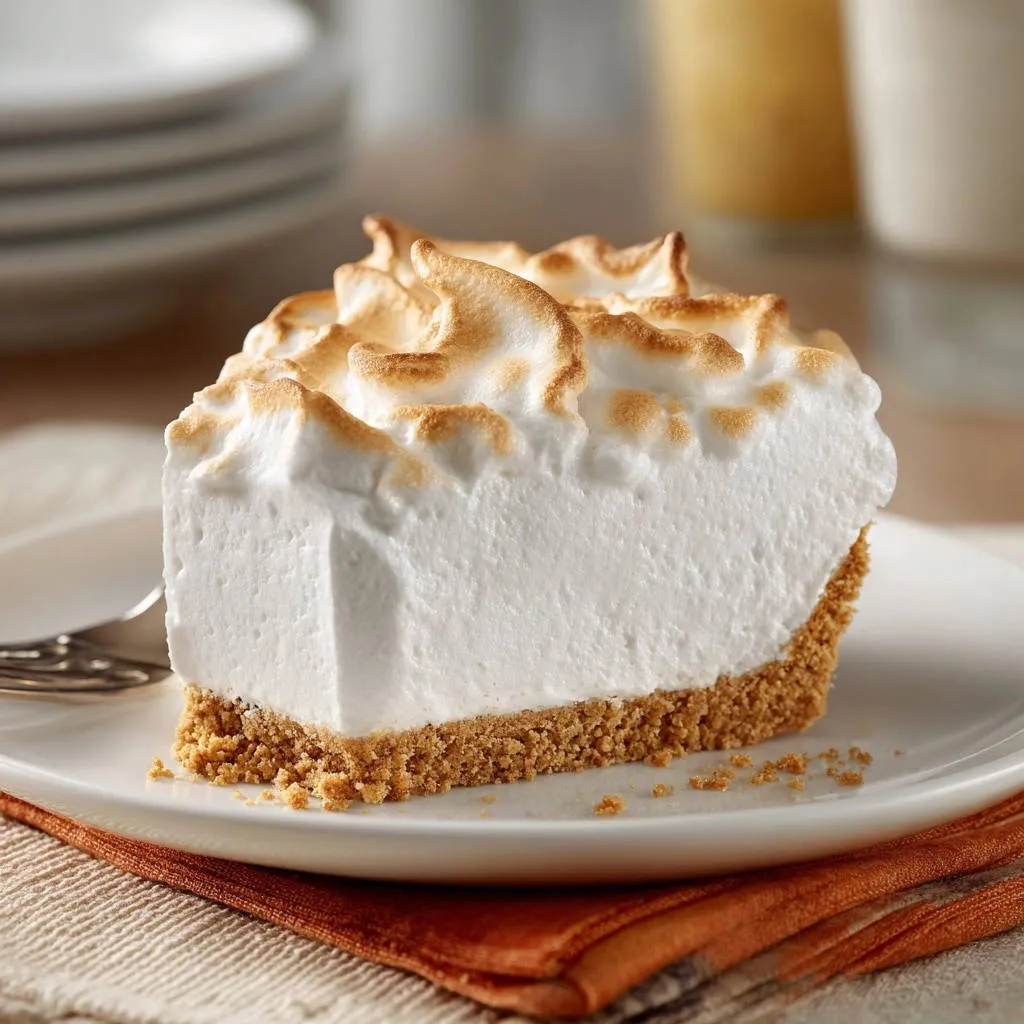
Spoon or pipe the freshly whipped topping generously over your perfectly chilled Easy No-Bake Lemon Cream Pie. For a decorative touch, you can use a piping bag with a star tip.
If desired, sprinkle a delicate pinch of ground cinnamon or nutmeg over the whipped cream for added aroma and visual appeal. Slice with a sharp, clean knife, wiping it between slices for the cleanest cuts, and serve immediately to enjoy the harmonious layers and guaranteed firm texture.
Chef’s Secrets: Elevate Your No-Bake Lemon Cream Pie Game
Mastering the Crust: The Power of Compaction
Firm Pressure is Key: Don’t just pat the crumbs. Use the back of a flat-bottomed measuring cup or a small glass to really press the mixture down. This eliminates air pockets and creates a dense, sturdy base that won’t crumble when sliced.
Even Thickness: Ensure the crust is evenly distributed up the sides and across the bottom of the pie plate. An even thickness prevents weak spots.
The Magic of Using Fresh Lemons
Zest First, Then Juice: Always zest your lemons before juicing them. It’s much easier to get all that aromatic zest from a firm, whole lemon.
Room Temperature Lemons: If your lemons are cold, roll them firmly on the counter for a minute before juicing. This helps release more juice.
Natural Setting Power: Remember, fresh lemon juice isn’t just for flavor; its acidity is essential for the chemical reaction that sets your creamy filling without heat.
The Art of Patience: Don’t Rush the Chill!
Crust Firmness: The initial 30-minute chill for the crust allows the melted butter to re-solidify, effectively binding the graham cracker crumbs together. Skipping this leads to a crumbly mess.
Filling Stability: The extended chilling for the entire pie (4 hours minimum, ideally overnight) is paramount. During this time, the lemon juice interacts fully with the dairy, and the fats firm up, transforming the liquid filling into a sliceable, creamy texture. Rushing this step is the most common reason for a wobbly pie.
Achieving Perfect, Stable Whipped Cream Peaks
Super Cold is Best: Ensure your heavy cream is straight from the coldest part of your refrigerator. Chilling your mixing bowl and whisk attachments in the freezer for 10-15 minutes beforehand can also significantly help.
Gradual Sweetening: Add powdered sugar slowly as soft peaks form. This ensures it’s fully incorporated and doesn’t weigh down the cream.
Don’t Overbeat: Beat until stiff peaks form, where the cream holds its shape. Over-beating will turn it grainy and then into butter. Stop as soon as it’s firm.
Troubleshooting Your No-Bake Pie Challenges
“Why is My Lemon Cream Filling Wobbly?”
The most common culprit is insufficient chilling time. The filling absolutely needs that minimum of 4 hours, and preferably overnight, for the lemon juice to fully react with the dairy and for the fats to firm up properly. Do not shortchange this crucial step.
Another factor could be insufficient mixing of the cream cheese or lemon juice. Ensure the cream cheese is beaten until light and fluffy, and the lemon juice is thoroughly incorporated to initiate the setting process effectively.
“My Graham Cracker Crust is Crumbly!”
This usually indicates that the crust was not compacted firmly enough or that it wasn’t chilled long enough. The butter needs to re-solidify completely to bind the crumbs. Press down hard with a measuring cup to create a dense base.
Ensure your melted butter quantity is correct; too little butter won’t provide enough binding. Re-chilling the crust for an additional 30 minutes can sometimes help if it’s still slightly fragile.
“My Whipped Cream Topping Isn’t Stiff”
Warm heavy cream is the primary reason for unstable whipped cream. Always use very cold heavy cream, straight from the fridge, and consider chilling your bowl and whisk.
Ensure you are using heavy cream, not half-and-half or milk, as heavy cream has the necessary fat content to whip properly. Also, under-beating will result in soft peaks, so continue beating until firm peaks hold their shape.
Serving Suggestions & Delightful Flavor Pairings
Fresh Fruit Accents for Visual Appeal and Taste
Enhance the vibrant lemon flavor and visual appeal of your Easy No-Bake Lemon Cream Pie with fresh fruit. Slices of fresh strawberries, blueberries, or raspberries add a beautiful pop of color and a lovely textural contrast.
A simple mixed berry compote or a drizzle of raspberry coulis can elevate the presentation and add another layer of fruity deliciousness. Consider delicate curls of lemon zest for an elegant finish.
Beyond the Pie: Creative Dessert Combinations
While this pie is perfect on its own, it also pairs wonderfully with other light desserts. Imagine serving a small slice alongside a scoop of vanilla bean ice cream or a light fruit sorbet.
For those who love other no-bake treats, consider a platter featuring this pie alongside something like amazing no-bake peanut butter bars that never fall apart for a delightful contrast in flavors and textures. For more zesty options, a slice of fluffy lemon loaf cake would perfectly complement this creamy pie.
For those who love other no-bake treats, consider a platter featuring this pie alongside something like peanut butter berry crumble pie.
Storing Your Delicious Lemon Cream Pie
Refrigerator Storage for Peak Freshness
To maintain its optimal texture and freshness, cover your Easy No-Bake Lemon Cream Pie loosely with plastic wrap or aluminum foil. Store it in the refrigerator for up to 3-4 days.
Keep in mind that the graham cracker crust will soften slightly over time, but the filling will remain delightfully firm and creamy.
Can You Freeze No-Bake Lemon Cream Pie?
Yes, you can freeze this pie! For best results, freeze the pie without the whipped topping. Wrap the fully chilled pie tightly in several layers of plastic wrap, then an additional layer of aluminum foil.
It can be stored in the freezer for up to 1 month. Thaw it in the refrigerator overnight before adding freshly whipped cream and serving.
Frequently Asked Questions (FAQs) About Easy No-Bake Lemon Cream Pie
Can I use a pre-made graham cracker crust?
Absolutely! Using a pre-made crust is a fantastic shortcut that will save you time. Ensure it’s a 9-inch crust, and still give it a quick chill while you prepare the filling for optimal stability.
What if I don’t have fresh lemons on hand?
While fresh lemon juice and zest provide the best flavor and setting power, in a pinch, you can use bottled lemon juice. However, you might miss some of the vibrant aroma that only fresh zest can provide, and the filling might require slightly longer chilling to set perfectly.
Can this Easy No-Bake Lemon Cream Pie be made dairy-free?
Adapting this recipe for dairy-free diets is challenging due to the cream cheese, sweetened condensed milk, and heavy cream. While there are dairy-free alternatives for each, their chemical properties may affect the setting and texture of the pie, so results may vary.
How long does the pie last in the refrigerator?
When properly covered and refrigerated, your Easy No-Bake Lemon Cream Pie will last for 3-4 days. The flavor actually deepens slightly over the first day, but the crust will soften gradually.
Can I make individual mini lemon cream pies?
Yes, this recipe is perfect for mini pies! You can press the graham cracker crust into muffin tins lined with paper liners or small ramekins. Adjust the chilling time slightly for smaller portions, typically 2-3 hours for the mini versions.
Ready to Impress? Share Your Zesty Creation!
You now possess the secrets to creating an Easy No-Bake Lemon Cream Pie that truly lives up to its name – effortlessly delicious with perfectly firm slices every time. Say goodbye to wobbly desserts and hello to your new favorite go-to lemon treat!
More Sweet and Savory Ideas
If you enjoyed this lemon cream pie, you might like these other dishes.
- For a different kind of pie experience, consider the Savory Beef and Cheddar Breakfast Pie, offering a hearty contrast to the sweet lemon.
- If you appreciate rich, baked goods, try the Ricotta Stuffed Brioche French Toast, which uses a similar method for a satisfying texture.
Don’t just keep this zesty perfection to yourself. Whip up this stunning pie, share it with loved ones, and savor every delightful bite. I can’t wait to hear how much you love it!
For a different kind of sweet satisfaction, explore chocolate toffee cream pie.

Lemon Cream Pie
Course: DessertCuisine: AmericanDifficulty: easy8
servings20
minutes550
kcal300
minutesNever struggle with a wobbly no-bake pie again! This Easy No-Bake Lemon Cream Pie uses a simple trick to ensure a perfectly firm and beautiful slice every single time. Enjoy the delightful blend of tangy lemon and creamy sweetness over a stable graham cracker crust.
Ingredients
1 and 1/2 cups graham cracker crumbs
1/4 cup granulated sugar
1/2 cup unsalted butter, melted
1 (8 ounce) package cream cheese, softened
1 (14 ounce) can sweetened condensed milk
1/2 cup fresh lemon juice
1 teaspoon lemon zest
1 teaspoon vanilla extract
2 cups heavy cream, very cold
1/2 cup powdered sugar
1/2 teaspoon ground cinnamon or nutmeg (for garnish, optional)
Directions
- Prepare the crust: In a medium bowl, combine the graham cracker crumbs and granulated sugar. Pour in the melted butter and stir until well combined. Press the mixture firmly and evenly into the bottom and up the sides of a 9-inch pie plate. For a truly solid crust that won’t crumble, use the back of a measuring cup to really compact it. Place the crust in the refrigerator to chill for at least 30 minutes while you prepare the filling. This crucial chilling step helps the butter set, making your crust much more stable.
- Make the filling: In a large mixing bowl, beat the softened cream cheese with an electric mixer until it is light and fluffy, about 2-3 minutes. Gradually add the sweetened condensed milk, beating until smooth and well combined. Stir in the fresh lemon juice, lemon zest, and vanilla extract until fully incorporated. The lemon juice reacts with the dairy to help the filling set, so ensure it is evenly mixed.
- Assemble the pie: Pour the lemon cream cheese filling into the chilled graham cracker crust. Spread evenly with a spatula. Return the pie to the refrigerator and chill for a minimum of 4 hours, or ideally overnight. This extended chilling time is the absolute secret to achieving that guaranteed firm slice. Do not rush this step!
- Prepare the whipped topping: Just before serving, in a separate large mixing bowl, beat the very cold heavy cream with an electric mixer on medium-high speed until soft peaks form. Gradually add the powdered sugar and continue to beat until stiff peaks form.
- Serve: Spoon or pipe the whipped topping generously over the chilled pie. If desired, sprinkle with a pinch of ground cinnamon or nutmeg. Slice and serve immediately, enjoying the perfectly firm layers.
Notes
- Extended chilling is key for a firm slice. Do not rush this step!