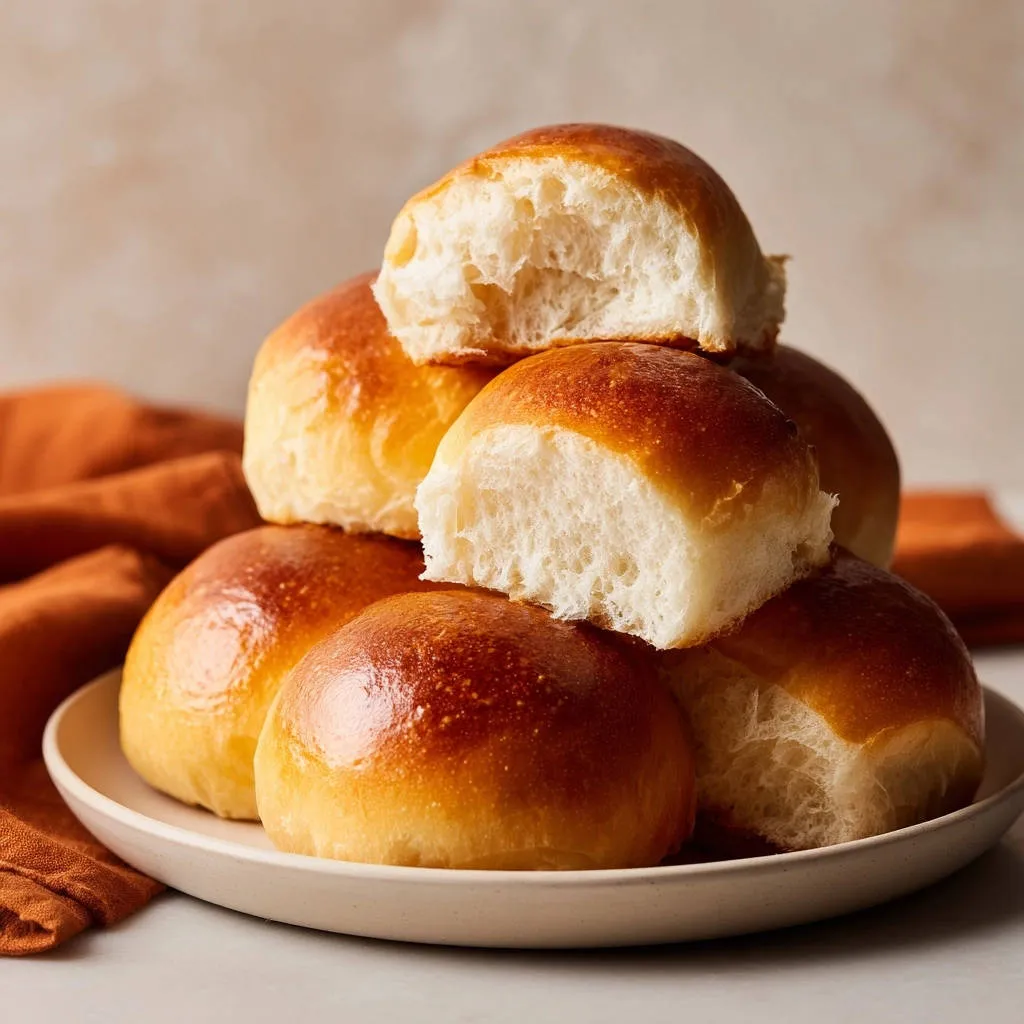
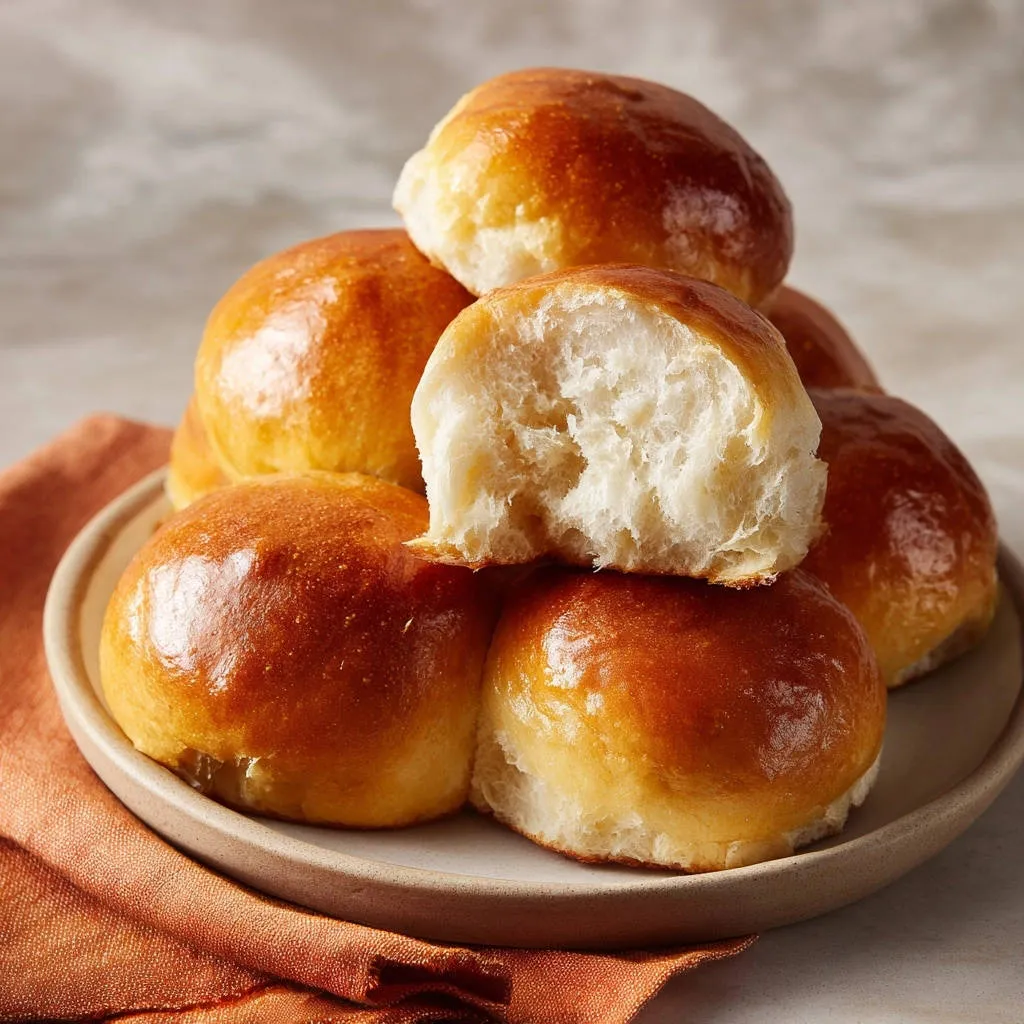
There’s nothing quite like a warm, soft dinner roll, but achieving that perfect fluffy texture can often feel like a closely guarded baker’s secret. I used to struggle with dense, heavy rolls until I uncovered a few simple, yet game-changing, techniques. Now, every batch of these Fluffy Homemade Dinner Rolls emerges wonderfully light and airy, becoming the star of any meal.
This recipe isn’t just about ingredients; it’s about understanding the subtle science behind truly exceptional bread, ensuring your efforts always result in bakery-quality perfection.
Beyond the Basic: What Makes These Fluffy Homemade Dinner Rolls Shine?
The “Never Dense” Promise: Achieving Airy Perfection
Many home bakers face the frustration of dense rolls. This recipe explicitly tackles that challenge, offering a method designed to guarantee a light, airy crumb with every bake.
For another take on savory baked goods, explore these cheddar biscuits with flaky layers.
We focus on precise techniques and visual cues, eliminating the guesswork that often leads to heavy results.
A Simple Technique, Game-Changing Results
The secret to these rolls isn’t complicated; it’s rooted in understanding how to handle yeast dough. From specific kneading to a unique shaping method, each step builds towards an unbelievably tender interior.
You’ll learn the crucial aspects of dough development that transform a basic recipe into an extraordinary one.
Why Homemade Fluffy Dinner Rolls Always Win
The unparalleled joy of homemade rolls goes beyond just the taste; it’s the warm aroma filling your kitchen, the soft pull-apart texture, and the incredible freshness. Store-bought options simply can’t compare to the rich flavor and melt-in-your-mouth tenderness of these Fluffy Homemade Dinner Rolls.
They bring a special comfort and pride to any meal, elevating the dining experience for family and friends.
Gather Your Essentials: Key Ingredients for Bakery-Soft Rolls
The Foundation: Flour Power
All-purpose flour forms the structural backbone of our rolls. Using the specified amount is crucial; too much flour will make your dough stiff and dense, preventing that desired fluffiness.
The Spark: Active Dry Yeast
Active dry yeast is the living leavening agent responsible for making your rolls rise. Ensuring it’s fresh and properly activated is the first step to a successful, airy dough.
Sweetness and Structure: Sugar and Salt
Granulated sugar provides essential food for the yeast, helping it activate and create carbon dioxide for rising, while also adding a subtle sweetness to the finished roll. Salt, though in a small amount, is vital for balancing flavors and regulating yeast activity, preventing it from over-fermenting.
Richness and Tenderness: Butter and Egg
Melted unsalted butter contributes richness and a wonderfully soft texture, while the large egg adds moisture, binds ingredients, and enhances the overall structure and golden color of the crust.
The Liquid Base: Warm Milk
Warm milk is essential for activating the yeast, providing the perfect environment for it to thrive. Its fat content also contributes to a tender crumb, making these rolls exceptionally soft.
Essential Tools for Your Fluffy Homemade Dinner Rolls Adventure
Mixing & Kneading Made Easy
Stand Mixer with Dough Hook: While not essential, a stand mixer significantly simplifies the kneading process, ensuring consistent dough development without the arm workout. It’s a true time-saver for yeast breads.
Large Mixing Bowls: You’ll need at least one generously sized mixing bowl for combining ingredients and allowing the dough to comfortably double in size during its first rise.
Proofing Perfection
Plastic Wrap or Clean Kitchen Towel: Essential for covering the dough during both rising periods, this prevents the surface from drying out and forming a crust, which can hinder the rise.
Warm, Draft-Free Spot: This isn’t a physical tool, but a crucial environmental factor. Think of it as your dough’s cozy nursery – common spots include a slightly warmed (then turned off) oven, a microwave with the door closed, or a sunny corner of your kitchen.
Shaping & Baking Essentials
9×13 Inch Baking Pan: This standard pan size is perfect for baking a dozen rolls, allowing them to proof and bake perfectly nestled together, contributing to their soft sides.
Pastry Brush: A pastry brush is key for applying the final melted butter glaze, adding that irresistible shine and enhancing the softness of the crust.
For more cheesy goodness, discover how to achieve foolproof cheese suspension in your next bake.
Crafting Perfection: The Method Behind Our Fluffy Homemade Dinner Rolls
Activate Your Yeast: The Foamy Indicator
In a large mixing bowl or the bowl of a stand mixer, combine the warm milk, yeast, and 1 tablespoon of the granulated sugar. Stir gently and let it sit for 5-10 minutes until foamy. This crucial step confirms your yeast is alive and ready to make your rolls rise beautifully, ensuring a light and airy result.
Combine the Wet Ingredients
Add the remaining 3 tablespoons of sugar, the large egg, the melted and cooled butter, and the salt to the activated yeast mixture. Mix well to thoroughly incorporate all the ingredients, creating a smooth and rich liquid base for your dough.
Gradually Incorporate Flour for a Shaggy Dough
Gradually add 3 cups of the all-purpose flour to the wet mixture, mixing until a shaggy, somewhat rough dough forms. If the dough is still very sticky, add the remaining 1/2 cup of flour, 1 tablespoon at a time, until the dough comes together and pulls away from the sides of the bowl. Be careful not to add too much flour, as this is a common culprit for dense, tough rolls.
Kneading for That Perfect Crumb: The Windowpane Test
Knead the dough on a lightly floured surface or with a stand mixer for 8-10 minutes. The goal is a dough that is smooth, elastic, and passes the windowpane test – you should be able to stretch a small piece thin enough to see light through it without tearing. This proper kneading is absolutely essential for developing the gluten structure that gives your Fluffy Homemade Dinner Rolls their desired chew and airy internal texture.
The First Rise: Doubling in Size
Lightly grease a clean bowl, then place the kneaded dough in the bowl, turning it once to coat the entire surface. Cover the bowl tightly with plastic wrap or a clean kitchen towel and let it rise in a warm, draft-free place for 1 to 1 1/2 hours, or until it has visibly doubled in size. This initial fermentation builds significant flavor and strength in the dough.
Deflate and Divide the Dough
Once risen, gently deflate the dough to release excess air, then turn it out onto a lightly floured surface. Using a kitchen scale for accuracy, divide the dough into 12 equal pieces. This ensures that all your rolls bake evenly.
The Art of Shaping: Preserving Air for Maximum Fluffiness
This is where the magic truly happens for achieving ultimate fluffiness! Gently shape each piece of dough into a smooth, taut ball. The key is to create tension on the surface while preserving the delicate internal air structure – avoid pressing out too much air. Pinch the bottom seam closed and place the rolls seam-side down in a lightly greased 9×13 inch baking pan, leaving a little space between each roll for expansion during the second rise.
Proofing Perfection: The Indentation Test for Lightness
Cover the pan again with plastic wrap or a clean kitchen towel. Let the rolls proof for their second rise in a warm, draft-free place for another 30-45 minutes, or until they look visibly puffy and nearly doubled again. To test for perfect proofing, gently press your finger into a roll; if the indentation springs back slowly and partially, they are ready. This precise proofing ensures maximum lightness and prevents dense or overly airy rolls.
Preheat Your Oven
While the rolls are completing their second rise, preheat your oven to 375 degrees F (190 degrees C). A consistently preheated oven is crucial for an even bake and a beautiful golden crust.
Bake to Golden Perfection
Bake the rolls for 15-20 minutes, or until they achieve a beautiful golden brown color on top. Keep a close eye on them during the final minutes, as oven temperatures can vary and rolls can brown quickly.
The Finishing Touch: Butter Brush
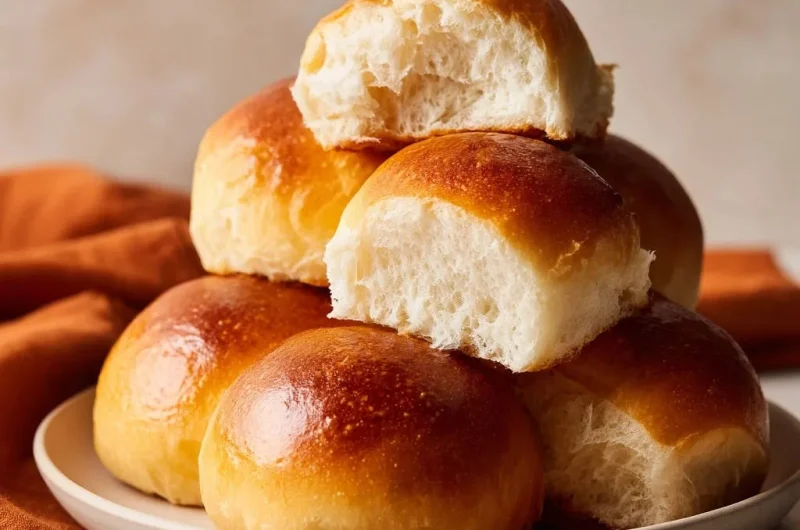
Immediately after removing your Fluffy Homemade Dinner Rolls from the oven, brush the tops generously with 1 tablespoon of melted butter. This not only adds an irresistible shine but also enhances their softness and provides a delicious buttery flavor that truly elevates them.
Serve Warm and Savor
Serve your perfectly fluffy homemade dinner rolls warm, straight from the oven. Enjoy the gratifying reward of your baking efforts!
Master Your Bake: Expert Tips for Fluffy Homemade Dinner Rolls Success
Don’t Over-Flour the Dough: This is arguably the most critical tip for fluffy rolls. Only add enough flour for the dough to come together and be manageable, aiming for it to remain slightly sticky to the touch. Excess flour leads to dense, tough rolls.
Respect the Yeast: The temperature of your warm milk is paramount. Aim for 105-115°F (40-46°C). Too hot will kill the yeast, rendering it inactive, while too cold won’t allow it to activate properly, hindering your rise.
Find the Warm, Draft-Free Spot: Dough thrives and rises best in a consistent, warm environment free from cold drafts. Good options include a slightly warmed (then turned off) oven, a microwave with the door closed, or simply a sunny spot on your counter, away from open windows.
The Windowpane Test is Your Friend: Do not skip this kneading check! It is the most reliable indicator that your gluten is perfectly developed, ensuring that desired chewiness and elasticity crucial for light, airy rolls.
Gentle Handling After the First Rise: When deflating and dividing the dough, be gentle. You want to release the larger pockets of air, but you also want to preserve some of the delicate structure that developed during the first rise, contributing to the roll’s final texture.
Proofing is Patience: The second rise (proofing) is just as critical as the first. Don’t rush it! The indentation test is your best guide to confirm your rolls are perfectly airy and ready for the oven, preventing both under- and over-proofed results.
Bake Until Golden: While you certainly don’t want to overbake and dry out your rolls, underbaking can result in a doughy, unappealing texture. Look for a rich, even golden-brown color on top and a hollow sound when gently tapped.
Solving Common Challenges: Troubleshooting Your Dinner Rolls
Why Are My Rolls Dense and Heavy?
Density is typically caused by adding too much flour, insufficient kneading, or under-proofing. Ensure you’re accurately measuring flour and kneading until the dough passes the windowpane test. Always allow adequate time for both the first rise and the second proofing.
My Rolls Didn’t Rise Enough (or at all!)
This common issue usually points to inactive yeast or an environment that’s too cold for rising. Always double-check your yeast expiration date and verify your milk temperature. Make sure your rising spot is consistently warm and completely draft-free.
Rolls are Dry or Crumbly
Over-baking is the primary culprit for dry rolls; keep a close eye on their color as they bake, aiming for golden, not deep brown. Also, be careful not to incorporate excessive flour during the mixing or kneading stages, which can lead to a dry, crumbly texture.
Unevenly Baked Rolls
Uneven baking can stem from inconsistent oven temperatures or placing the baking pan too close to the oven’s walls or heating elements. Consider rotating your baking pan halfway through the bake. Using an oven thermometer can also help verify your oven’s accuracy.
Your Top Questions About Fluffy Homemade Dinner Rolls, Answered!
Can I Make Fluffy Homemade Dinner Rolls Ahead of Time?
Yes, you absolutely can! You can prepare the dough through the first rise, then gently punch it down, shape the rolls, and arrange them in your greased baking pan. Cover them tightly with plastic wrap and refrigerate overnight. On baking day, allow them to come to room temperature and proof for about 1-1.5 hours before baking. For more detailed instructions on make-ahead dough techniques, you might find our tips for managing yeast dough helpful.
How Do I Store Leftover Fluffy Dinner Rolls?
To keep your cooled leftover rolls at their best, store them in an airtight container or a large plastic bag at room temperature. They will retain their freshness for up to 2-3 days. For that “just baked” softness, reheat them briefly in the microwave or a warm oven before serving.
Can I Freeze the Dough or Baked Rolls?
Freezing is an excellent option! You can freeze shaped, unbaked rolls by arranging them on a baking sheet until solid, then transferring them to a freezer-safe bag for up to 2-3 weeks. Thaw them overnight in the refrigerator and proof before baking. Fully baked and cooled rolls can also be frozen for up to a month; simply thaw and reheat gently.
Can I Substitute Ingredients for Dietary Needs?
For dairy-free rolls, you can successfully use a non-dairy milk alternative (such as almond or oat milk) and a high-quality plant-based butter substitute. For gluten-free requirements, this specific recipe would need substantial modification and a dedicated gluten-free flour blend. We always recommend finding a recipe specifically designed for gluten-free dinner rolls to ensure optimal texture and taste.
What Other Flavor Variations Can I Try?
Feel free to get creative and customize your rolls! You can incorporate a tablespoon of finely chopped fresh herbs like rosemary or thyme into the flour mixture for a savory touch. Another delicious idea is to brush the tops with garlic butter immediately after baking, or sprinkle them with flaky sea salt before they go into the oven for an added textural and flavor boost.
Enjoying and Preserving Your Homemade Dinner Rolls
Classic Pairings for Your Perfect Rolls
These Fluffy Homemade Dinner Rolls are incredibly versatile and complement almost any meal. They are a beloved staple with holiday dinners, pair wonderfully alongside a comforting bowl of hearty beef stew or chili, or simply shine when served with butter and jam for breakfast or brunch. Their tender crumb makes them the ultimate accompaniment.
More Baking Inspiration
Since you’ve mastered these soft dinner rolls, perhaps you’re in the mood for more baked goods.
- If you enjoyed the baking process, consider trying this Raspberry Swirl Bundt Cake for a fruity treat.
- For a different kind of cake, explore the Chocolate Marble Loaf Cake and its unique swirling technique.
Beyond the Basket: Creative Serving Ideas
If you’re fortunate enough to have leftovers (a rare occurrence!), these rolls can be repurposed beautifully. Transform them into mini sliders, use them to sop up rich gravy from a roast, or even split and lightly toast them for a unique and soft burger bun. Their absorbent texture makes them ideal for soaking up flavorful sauces.
Your Kitchen Awaits: Share Your Fluffy Homemade Dinner Rolls Masterpiece!
There’s immense satisfaction in pulling a pan of warm, golden-brown fluffy homemade dinner rolls from your oven. With this comprehensive guide, you now possess the secrets to achieving that bakery-quality softness and irresistible taste every single time. We wholeheartedly encourage you to try this recipe and experience the genuine joy of baking these truly crowd-pleasing rolls.
Don’t forget to share your baking creations with us! We absolutely love seeing your triumphs in the kitchen. For even more delightful recipes, expert tips, and culinary inspiration, make sure to explore our other articles and guides. Happy baking!
Dinner Rolls
Course: BreadCuisine: AmericanDifficulty: medium4
12 rolls30
minutes20
minutes240
kcal180
minutesDiscover the secret to perfectly soft and fluffy dinner rolls that are light and airy every time. This recipe guides you through simple techniques to ensure wonderfully delicious results. You’ll love serving these warm, homemade rolls.
Ingredients
1 cup warm milk (about 105-115 degrees F)
2 1/4 teaspoons active dry yeast (one standard packet)
1/4 cup granulated sugar, divided
1 large egg
1/4 cup unsalted butter, melted and cooled
1 teaspoon salt
3 to 3 1/2 cups all-purpose flour, plus more for dusting
1 tablespoon unsalted butter, melted (for brushing)
Directions
- In a large mixing bowl or the bowl of a stand mixer, combine the warm milk, yeast, and 1 tablespoon of the granulated sugar. Stir gently and let it sit for 5-10 minutes until foamy. This confirms your yeast is active.
- Add the remaining 3 tablespoons of sugar, egg, melted butter, and salt to the yeast mixture. Mix well.
- Gradually add 3 cups of the all-purpose flour, mixing until a shaggy dough forms. If the dough is still very sticky, add the remaining 1/2 cup of flour, 1 tablespoon at a time, until the dough comes together and pulls away from the sides of the bowl. Be careful not to add too much flour.
- Knead the dough on a lightly floured surface or with a stand mixer for 8-10 minutes, until it’s smooth, elastic, and passes the windowpane test (you can stretch a small piece thin enough to see light through it without tearing). This proper kneading is key to developing the gluten for a fluffy crumb.
- Lightly grease a clean bowl. Place the dough in the bowl, turning once to coat. Cover the bowl with plastic wrap or a clean kitchen towel and let it rise in a warm, draft-free place for 1 to 1 1/2 hours, or until doubled in size.
- Once risen, gently deflate the dough. Turn it out onto a lightly floured surface. Divide the dough into 12 equal pieces.
- This is where the magic happens for fluffiness: Gently shape each piece into a smooth ball. Avoid pressing out too much air. The key is to create tension on the surface while preserving the internal structure. Pinch the bottom seam closed and place the rolls seam-side down in a lightly greased 9×13 inch baking pan, leaving a little space between each.
- Cover the pan again with plastic wrap or a clean kitchen towel. Let the rolls proof for their second rise in a warm, draft-free place for another 30-45 minutes, or until they look visibly puffy and nearly doubled again. To test if they are perfectly proofed (and not over or under), gently press your finger into a roll. If the indentation springs back slowly and partially, they are ready. If it springs back immediately, they need more time. If it stays indented and doesn’t spring back at all, they might be over-proofed. This precise proofing ensures maximum lightness.
- Preheat your oven to 375 degrees F (190 degrees C).
- Bake the rolls for 15-20 minutes, or until they are golden brown on top.
- Immediately after removing from the oven, brush the tops with 1 tablespoon of melted butter for extra shine and softness.
- Serve warm and enjoy your perfectly fluffy homemade dinner rolls!
Notes
- Key techniques like proper kneading and precise proofing are essential for achieving the perfect fluffy texture.