
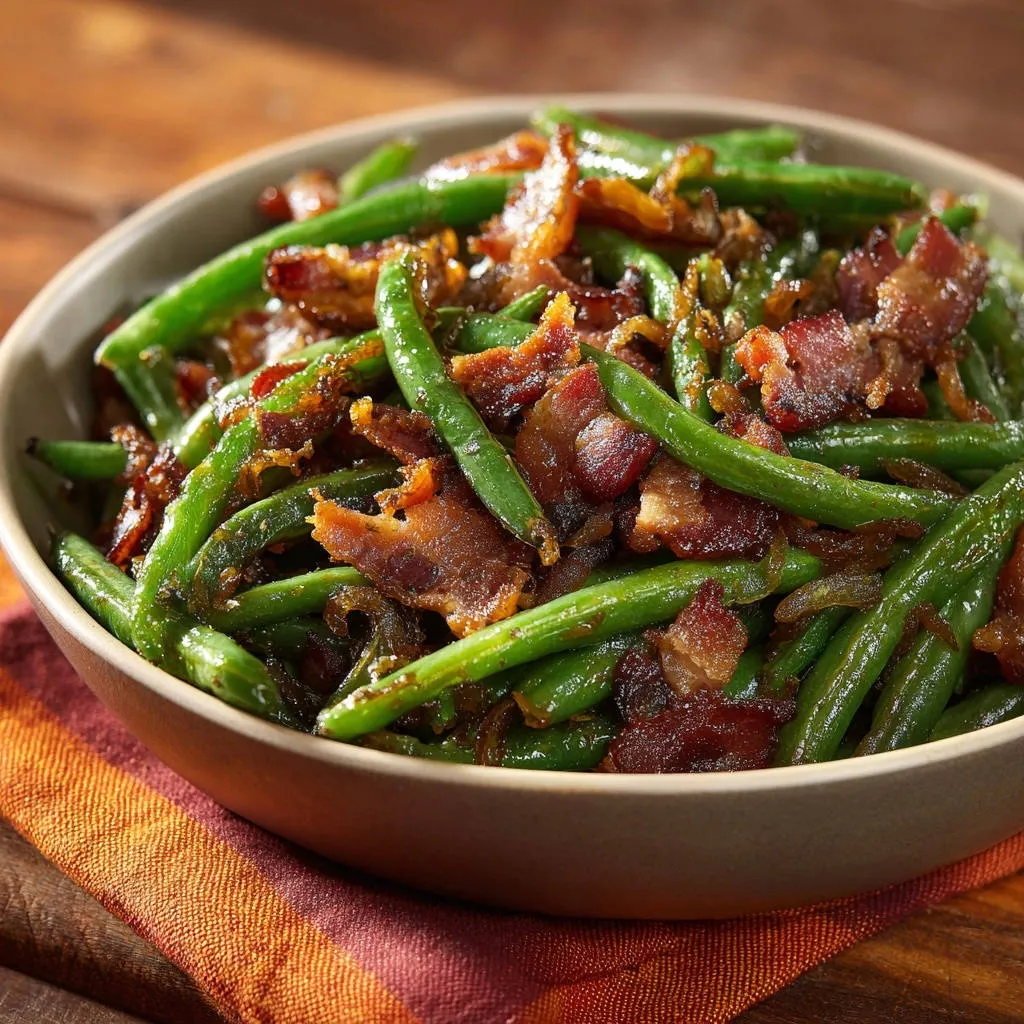
I remember the frustration of rubbery, dull green beans-a common mealtime disappointment. But discovering this simple, expert method transformed my approach to side dishes forever.
This recipe for Garlic Bacon Green Beans isn’t just about cooking; it’s about mastering that elusive crisp-tender texture and a vibrant green color, making it a reliable showstopper for any meal.
For more garlic goodness, explore fluffy loaded garlic mashed potatoes.
Why This Garlic Bacon Green Beans Recipe Shines (And Stays Crisp!)
This isn’t just another green bean recipe; it’s a meticulously crafted guide to perfection. The secret lies in a precise blanching and shocking technique, ensuring your green beans retain their vibrant color and satisfying snap.
For a similar savory bite, check out these crispy skillet potatoes.
The layers of flavor, from the savory bacon fat to the aromatic garlic and onion, elevate these beans far beyond a simple side dish. It’s a side that consistently steals the show, guaranteed to impress every time.
Essential Ingredients for Irresistible Garlic Bacon Green Beans
The Star: Fresh Green Beans Selection
Choosing the right green beans is the first step to success. Look for beans that are firm, unblemished, and have a vibrant green color.
They should snap cleanly when bent, indicating freshness and readiness for that perfect crisp-tender texture.
Savory Foundation: Bacon & Its Flavorful Fat
Bacon provides a crucial layer of smoky, salty flavor that permeates the entire dish. Its rendered fat is the foundation, creating a rich base for sautéing the aromatics.
For the best flavor, choose a good quality, thick-cut bacon, which yields more flavorful fat and substantial crispy bits.
Aromatic Heart: Garlic and Onion Dynamics
Freshly minced garlic and finely diced yellow onion are indispensable here. They caramelize slightly in the bacon fat, releasing a deeply aromatic and sweet-savory fragrance.
This aromatic base adds complexity and depth, transforming simple green beans into a truly savory side dish.
Sweet Hint: The Optional Brown Sugar Touch
A touch of brown sugar is entirely optional but highly recommended for those seeking an extra layer of flavor. It aids in the caramelization of the onions and garlic, subtly balancing the savory notes.
This creates a delightful interplay of sweet and savory that enhances the overall taste profile of the Garlic Bacon Green Beans.
Finishing Flourish: Salt, Pepper & Olive Oil
Proper seasoning with salt and freshly ground black pepper is vital to bring all the flavors into harmony. Taste and adjust for a perfectly balanced dish.
Olive oil is a backup, used only if your bacon doesn’t render enough fat, ensuring a rich cooking base without sacrificing flavor.
Gear Up: Tools for Your Garlic Bacon Green Bean Adventure
Having the right kitchen tools makes preparing these green beans effortless and enjoyable. Each plays a specific role in achieving perfect results.
Large Skillet or Frying Pan: Essential for evenly cooking the bacon and later tossing the beans.
Slotted Spoon: For easily removing crispy bacon while leaving the precious fat behind.
Large Pot: Needed for blanching the green beans effectively and quickly.
Large Bowl for Ice Bath: Crucial for stopping the cooking process and preserving the beans’ vibrant color.
Colander: For draining the green beans thoroughly after blanching and shocking.
Step-by-Step Perfection: How to Make Garlic Bacon Green Beans
- Crispy Bacon & Flavorful Fat Foundation
Start by dicing four strips of bacon and cooking them in a large skillet over medium heat. Agitate occasionally until they turn beautifully crispy and golden.
Using a slotted spoon, carefully transfer the crispy bacon bits to a paper towel-lined plate. This allows excess grease to drain, keeping the bacon perfectly crunchy.
Leave about one tablespoon of the rendered bacon fat in the skillet. This flavorful fat is the bedrock of our Garlic Bacon Green Beans, enriching every other ingredient it touches. If less than a tablespoon remains, supplement with a small amount of olive oil to reach the desired quantity.
- The Ice Bath Method: Blanching for Vibrant Snap
While the bacon renders, bring a large pot of generously salted water to a rolling boil. Adding salt at this stage seasons the green beans from the inside out.
Introduce one pound of trimmed fresh green beans to the boiling water and cook for a brief 3-4 minutes. You’re looking for them to transform into a bright, almost neon green and achieve a crisp-tender texture, where they’re cooked but still have a pleasant bite.
Immediately after cooking, drain the beans quickly and plunge them into a large bowl filled with ice water. This crucial “ice bath” stops the cooking process dead in its tracks, locking in that vibrant green color and preventing them from becoming overcooked and limp. Once thoroughly cooled, drain the beans exceptionally well.
- Sautéing Aromatics with a Sweet Caramel Glaze (Optional)
Return to the skillet with the reserved bacon fat over medium heat. Add two cloves of minced garlic and 1/4 cup of finely diced yellow onion.
Sauté these aromatics for 3-4 minutes, stirring frequently, until the onion softens and becomes translucent, and the garlic releases its intoxicating fragrance. Be careful not to burn the garlic, as it can turn bitter quickly.
If you’re using it, stir in one teaspoon of brown sugar at this stage. It will melt and help caramelize the onions slightly, adding a delightful subtle sweetness that balances the savory bacon and garlic flavors.
- Bringing It All Together: A Quick Toss
Add the blanched and thoroughly drained green beans directly into the hot skillet with the fragrant garlic and onion. This step is about heating them through and coating them.
Toss the beans quickly and gently for just 2-3 minutes. This ensures they are evenly coated in the flavorful bacon fat and aromatics without overcooking them and losing their crisp-tender texture.
Season the mixture generously with salt and freshly ground black pepper to taste. Always taste a bean to ensure the seasoning is perfectly balanced before moving on.
- The Grand Finale: Reincorporating Crispy Bacon & Serving
Remove the skillet from the heat immediately after seasoning. This prevents any further cooking of the beans.
Stir in the reserved crispy bacon bits you set aside earlier. This ensures the bacon retains its maximum crunch, providing a delightful textural contrast to the tender beans.
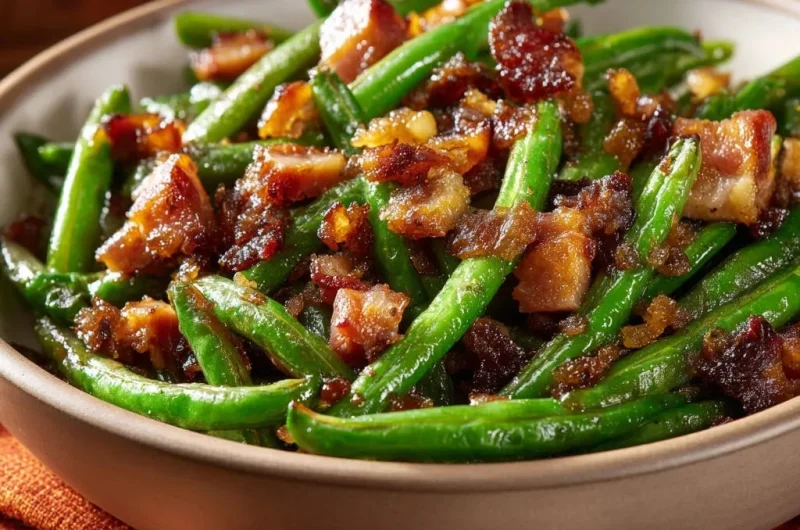
Serve your perfectly crisp-tender Garlic Bacon Green Beans immediately to enjoy them at their peak flavor and texture. The harmonious blend of savory, sweet, and aromatic notes will be a true culinary delight.
Chef’s Secrets: Elevating Your Garlic Bacon Green Beans
Mastering the Blanch & Shock Technique: The ice bath isn’t optional; it’s a game-changer. It stops enzymatic reactions that cause color dulling and overcooking, ensuring your green beans maintain their brilliant green hue and perfect snap.
Bacon Fat vs. Olive Oil: Building the Ultimate Flavor Base: Always prioritize bacon fat for unparalleled depth of flavor. Only add olive oil if there isn’t enough bacon fat (about a tablespoon), ensuring a rich base for your aromatics without diluting the smoky essence.
The Art of Seasoning: When to Add Salt & Pepper: Season the blanching water for internal flavor. Add salt and pepper to the finished dish only after the green beans are tossed with the bacon fat and aromatics, tasting as you go to avoid over-salting.
Don’t Overcrowd the Pan: When cooking bacon, give it space to crisp up properly. If preparing a large batch, cook the bacon in two shifts to ensure even browning and crispness, preventing steaming.
Fresh Garlic is Key: While convenient, pre-minced garlic often lacks the pungency and vibrant flavor of freshly minced cloves. Take the extra minute to mince your own for the best aromatic foundation in your Garlic Bacon Green Beans.
Troubleshooting Common Green Bean Woes
“My Green Beans Are Still Limp!”
This usually indicates overcooking during blanching or insufficient chilling. Ensure you cook them for only 3-4 minutes until crisp-tender.
Plunge them immediately into a generous ice bath to halt cooking. Proper draining after the ice bath is also crucial.
“The Garlic Burned and Tastes Bitter!”
Garlic burns quickly and turns acrid. Always sauté garlic and onion over medium heat, stirring constantly, for only 3-4 minutes.
Remove from heat immediately if you notice the garlic browning too rapidly. Don’t leave it unattended.
“My Dish Lacks Oomph/Flavor!”
Ensure you used enough bacon fat as the base; it’s a primary flavor driver. Taste and adjust your salt and pepper at the end.
A small squeeze of fresh lemon juice or a pinch of red pepper flakes at the end can also brighten and elevate the flavors of your Garlic Bacon Green Beans.
“The Bacon Isn’t Crispy Enough!”
Bacon needs medium heat and adequate time to render fat and crisp up. Avoid high heat, which can burn the bacon before it gets crispy.
Ensure your skillet isn’t overcrowded, allowing air to circulate. If cooking a large amount, work in batches.
Serving Suggestions & Perfect Pairings for Garlic Bacon Green Beans
Classic Comfort Food Companions
These savory green beans are a natural fit for hearty, comforting meals. Pair them alongside a succulent roast chicken, tender meatloaf, or creamy mashed potatoes for a satisfying family dinner.
Round Out Your Meal
Consider these hearty dishes to complete your dinner plans.
- For a satisfying main, try this Classic Salisbury Steak with Onion Gravy, offering a rich sauce that complements the vibrant green beans.
- If you’re leaning towards another comforting classic, this Classic Glazed Meatloaf provides a familiar, tender centerpiece that pairs well.
They provide a fresh, crisp counterpoint to rich main courses, making every bite feel balanced and delicious.
Holiday Feast Highlights
Elevate your holiday table with this vibrant side. Garlic Bacon Green Beans shine next to roasted turkey, glazed ham, or a prime rib roast.
Their festive color and robust flavor make them a welcome addition to any Thanksgiving, Christmas, or Easter spread, offering a beloved alternative to traditional casseroles.
Light & Fresh Dinner Sides
For lighter meals, these green beans are incredibly versatile. Serve them alongside grilled salmon, baked cod, or a simple pan-seared chicken breast.
They also complement vegetarian dishes beautifully, adding a burst of flavor and texture that can transform a simple meal.
Make Ahead, Storage & Reheating Tips
Prepping Ahead: Your Time-Saving Strategy
To save time, you can blanch and ice bath the green beans up to 2 days in advance. Store them well-drained in an airtight container in the refrigerator.
The bacon can also be cooked until crispy and stored in an airtight container at room temperature for a day, or refrigerated for up to 3 days. Reheat the bacon briefly in a skillet to re-crisp before adding to the beans.
Storing Leftovers for Optimal Freshness
Store any leftover Garlic Bacon Green Beans in an airtight container in the refrigerator for up to 3-4 days. While the beans will lose some of their crispness, they will still be delicious.
Ensure they are cooled completely before storing to prevent condensation, which can lead to sogginess.
Reheating Without Losing the Crunch
To best preserve texture, avoid microwaving. Reheat leftovers in a skillet over medium heat for a few minutes, tossing gently until warmed through.
For maximum crispness, you can also spread them on a baking sheet and reheat in a preheated oven at 350°F (175°C) for 5-7 minutes. Add the reserved crispy bacon bits after reheating to maintain their crunch.
Frequently Asked Questions About Garlic Bacon Green Beans
Can I use frozen green beans for this recipe?
While fresh is best, you can use frozen green beans. Do not blanch them; simply thaw them completely and pat them very dry before adding to the skillet.
Frozen beans may not achieve the exact same crisp-tender snap as fresh, but they will still be flavorful.
What if I don’t eat bacon? Can I make this vegetarian?
Absolutely! For a vegetarian version, omit the bacon. Instead, start by sautéing the garlic and onion in 1-2 tablespoons of olive oil or butter.
You can add a pinch of smoked paprika or a teaspoon of liquid smoke to replicate some of the smoky flavor bacon provides, or add toasted nuts for crunch.
Can I add other vegetables to this dish?
Yes, compatible vegetables like thinly sliced bell peppers, cherry tomatoes (added at the end), or mushrooms can be added. Cook them according to their individual cooking times.
Mushrooms can be sautéed with the onions, while bell peppers might be added with the green beans for a quick toss.
Is brown sugar essential, or can I omit it?
Brown sugar is entirely optional and serves to enhance caramelization and balance flavors with a subtle sweetness. If you prefer a purely savory profile, feel free to omit it.
The Garlic Bacon Green Beans will still be incredibly delicious without it, just with a slightly different flavor dynamic.
Ready to Impress? Share Your Garlic Bacon Green Beans Masterpiece!
Now you possess the expert knowledge to create Garlic Bacon Green Beans that are consistently vibrant, crisp-tender, and bursting with flavor. Say goodbye to limp, sad green beans forever!
I encourage you to try this recipe and share your spectacular results. Enjoy the satisfaction of serving a truly exceptional side dish that will earn rave reviews every single time.
Garlic Bacon Green Beans
Course: Side DishCuisine: AmericanDifficulty: easy4
servings15
minutes20
minutes240
kcal35
minutesTired of soft, dull green beans? This recipe guarantees perfectly crisp-tender beans, vibrant in color and bursting with flavor. With crispy bacon, aromatic garlic, and sweet caramelized onion, these Garlic Bacon Green Beans are a showstopper side dish.
Ingredients
1 pound fresh green beans, trimmed
4 strips bacon, diced
1 tablespoon olive oil (if needed)
2 cloves garlic, minced
1/4 cup finely diced yellow onion
1 teaspoon brown sugar (optional, for caramelization)
Salt to taste
Black pepper to taste
Directions
- In a large skillet or frying pan, cook the diced bacon over medium heat until crispy. Remove the crispy bacon bits with a slotted spoon and set aside on a paper towel lined plate. Leave about 1 tablespoon of bacon fat in the pan. If there is less, add a touch of olive oil.
- While the bacon cooks, bring a pot of salted water to a rolling boil. Add the trimmed green beans and cook for 3-4 minutes, until they are bright green and crisp-tender. Immediately drain the beans and plunge them into an ice bath to stop the cooking process. Drain well again once cooled. This crucial step prevents overcooking and retains their vibrant color.
- Add the minced garlic and diced yellow onion to the skillet with the reserved bacon fat. Saute over medium heat for 3-4 minutes, until the onion softens and the garlic becomes fragrant. If using, stir in the brown sugar to help caramelize the onions slightly.
- Add the blanched and drained green beans to the hot skillet with the garlic and onion. Toss quickly for 2-3 minutes, just to heat them through and coat them evenly in the flavorful fat. Season with salt and black pepper to taste.
- Remove the skillet from the heat. Stir in the reserved crispy bacon bits. Serve immediately and enjoy your perfectly crisp-tender green beans!
Notes
- Blanching in salted water and immediately cooling in an ice bath is crucial for crisp-tender texture and vibrant color.