As a food content strategist, I’ve seen countless home cooks struggle with white chocolate seizing, turning what should be a smooth, dreamy confection into a frustrating, grainy mess. But imagine perfectly glossy, melt-in-your-mouth Heavenly White Chocolate Candy Clusters, effortlessly made thanks to one simple “no-seize” secret. This recipe ensures flawless results every time, making these festive bites a true joy to create and share.
Why These Heavenly White Chocolate Candy Clusters Are Your New Go-To
Mastering White Chocolate: The End of Seized Melts
White chocolate is notoriously finicky when melting, often seizing into an unworkable lump. This recipe provides a meticulous, step-by-step melting method that guarantees a silky-smooth consistency, eliminating the frustration of ruined batches. You’ll achieve professional-looking clusters effortlessly.
Effortless Elegance: Simple Steps, Stunning Results
Despite their impressive appearance, these clusters are incredibly simple and quick to prepare, requiring minimal fuss. They’re perfect for those moments when you need a beautiful dessert or gift in a flash, without compromising on taste or presentation.
A Crowd-Pleasing Treat for Any Occasion
The delightful combination of crisp cereal and creamy white chocolate appeals to nearly everyone, making these clusters universally loved. They are ideal for holiday platters, birthday parties, afternoon snacks, or simply a sweet indulgence to brighten your day.
The Simple Building Blocks for Irresistible Clusters
Choosing Your White Chocolate: Chips vs. Wafers
For the best results, use high-quality white chocolate. Melting wafers are often preferred as they contain stabilizers that prevent seizing, offering the smoothest melt. White chocolate chips also work well, just ensure they are of good quality.
The Crispy Foundation: Rice Cereal’s Role
Crisp rice cereal provides the essential textural contrast to the rich white chocolate. Its light, airy crunch prevents the clusters from being overly sweet or dense, creating a balanced and satisfying bite.
A Pop of Color: Adding Festive Flair
Small red candy bits or sprinkles are incorporated primarily for visual appeal, adding a vibrant and festive touch. You can customize the color to suit any holiday or theme, making these clusters truly versatile.
Essential Kitchen Gear for Cluster Perfection
Heatproof Bowl and Saucepan (for Double Boiler Method): Essential for controlled, gentle melting that prevents white chocolate from seizing.
Microwave-Safe Bowl (for Microwave Method): A convenient alternative for melting, but demands careful attention to prevent overheating.
Baking Sheet(s): Needed to hold your formed clusters as they set.
Parchment Paper or Wax Paper: Absolutely crucial for lining the baking sheet, ensuring the clusters release easily without sticking.
Large Mixing Bowl: Provides ample space to combine the melted chocolate, cereal, and candy bits.
Rubber Spatula: Ideal for gently folding the ingredients together without crushing the delicate rice cereal.
Spoons or Small Scoop: For accurately dropping uniform portions of the mixture onto the prepared baking sheet.
Crafting Your Heavenly White Chocolate Candy Clusters: A Foolproof Guide
- Prep for Success: Setting the Stage
Prepare your workspace by lining a baking sheet with parchment paper or wax paper. This crucial step ensures your beautiful clusters won’t stick, making cleanup a breeze and preserving their perfect shape.
- The “No-Seize” Melting Method: White Chocolate Unveiled
Choose your preferred melting method to achieve perfectly smooth white chocolate. For the stovetop method, place white chocolate chips or wafers in a heatproof bowl set over a saucepan of simmering water, ensuring the bowl does not touch the water.
Stir gently and continuously until the chocolate is completely melted and beautifully smooth. This gentle, indirect heat is your secret weapon against seizing.
Alternatively, use a microwave-safe bowl, heating in 30-second intervals and stirring thoroughly after each. Always be cautious not to overheat or allow any water to come into contact with the chocolate, as this can cause it to seize instantly.
- Harmonizing Textures: Combining Chocolate & Cereal
In a large mixing bowl, add the crisp rice cereal. Carefully pour the perfectly melted, smooth white chocolate over the cereal.
- A Splash of Joy: Incorporating Color
Sprinkle the small red candy bits or sprinkles evenly over the white chocolate and cereal mixture. This adds a festive pop of color and extra fun to your clusters.
- Gentle Coating: The Art of Even Distribution
Using a spatula, gently fold the mixture until the cereal and candy bits are thoroughly and evenly coated with the white chocolate. Be mindful to fold gently, avoiding any harsh pressing that could crush the delicate rice cereal.
- Shaping Your Delights: Forming Perfect Clusters
Drop spoonfuls of the coated mixture onto your prepared baking sheet. You have complete control over the size; make them as large or as small as you desire for your perfect bite-sized treats.
- The Patience Pays Off: Chilling for Firmness
Place the baking sheet containing the clusters into the refrigerator for at least 30 minutes. This chilling time is essential for the white chocolate to fully set and for the clusters to become firm and stable.
- Ready to Shine: Serving Your Sweet Creations
Once completely set, gently transfer the firm clusters to a serving bowl or platter. They are now ready to be enjoyed!
Chef’s Secrets & Pro Tips for Next-Level Clusters
Temperature Control is Key: When melting white chocolate, remember that consistency is your friend. Overheating even slightly can cause it to become grainy or seize. Remove it from heat just as it’s almost melted, and stir to finish with residual warmth.
Don’t Rush the Chill: While 30 minutes is a minimum, allowing your clusters to chill longer (e.g., an hour or more) ensures they are perfectly firm and less prone to melting when handled. This is especially important if your kitchen is warm.
Get Creative with Add-Ins: Elevate your clusters by experimenting with other mix-ins! Try chopped dried cranberries, mini marshmallows, crushed peppermint candy for a holiday twist, or even a sprinkle of sea salt for a sweet and savory note. For another delightful no-bake treat, consider our amazing no-bake peanut caramel bars.
Presentation Matters: For gifting, place clusters in small paper cupcake liners before boxing. Arrange them on a pretty platter for parties. A light dusting of edible glitter can add extra sparkle for special occasions.
Common Cluster Conundrums & How to Solve Them
Why Did My White Chocolate Seize?
White chocolate often seizes due to contact with even a tiny drop of water or being overheated too quickly. Ensure all your utensils and bowls are completely dry, and always melt it gently over low heat or in short microwave bursts, stirring frequently.
Clusters Too Sticky or Soft?
If your clusters remain sticky or too soft, it’s likely they haven’t been chilled long enough. Return them to the refrigerator for an additional 30-60 minutes. High humidity can also affect setting; ensure they are kept cool and dry.
Unevenly Coated Clusters?
Uneven coating usually happens from not folding gently and thoroughly enough. Ensure you scrape the bottom and sides of the bowl to mix all the cereal and candy bits into the melted chocolate. Gentle but persistent folding is key.
Keeping Your Heavenly Clusters Fresh & Fabulous
Best Storage Practices: Room Temp vs. Refrigerator
Store your Heavenly White Chocolate Candy Clusters in an airtight container at room temperature for up to one week. If you prefer a firmer, snappier bite, especially in warmer climates, you can store them in the refrigerator, which extends their freshness slightly.
Make-Ahead Marvels: Preparing in Advance
These clusters are excellent for making ahead! You can prepare them up to 5-7 days in advance of an event, storing them properly. This makes them a perfect stress-free dessert option for parties and gatherings.
Creative Ways to Enjoy and Serve
Beyond simply snacking, these clusters make a delightful addition to dessert platters, a fun topping for ice cream, or a charming edible gift. Consider serving them alongside coffee or hot chocolate for a cozy treat.
Your Top Questions About White Chocolate Candy Clusters Answered
Can I use other types of chocolate?
While this recipe specifically perfects white chocolate, you can adapt it for milk or dark chocolate. However, their melting properties differ slightly, so adjust your melting technique accordingly. Dark chocolate, for instance, is less prone to seizing. If you’re looking to explore other delightful chocolate creations, you might also enjoy our delicious raspberry chocolate coconut truffles.
What if I don’t have parchment paper?
Wax paper is a good substitute for parchment paper when making these clusters, as it also provides a non-stick surface. If you don’t have either, a silicone baking mat would also work perfectly. Greasing a baking sheet heavily with butter or oil is a last resort, but not ideal.
Can I double or halve the recipe?
Yes, this recipe is very forgiving and scales well. You can easily double the ingredients to make a larger batch for a party, or halve it for a smaller, personal treat. Just ensure your melting bowl and mixing bowl are large enough for the quantity you choose.
Are these clusters gluten-free?
This recipe can be gluten-free if you use a certified gluten-free crisp rice cereal and ensure your white chocolate does not contain gluten-containing additives. Always check the labels of all your ingredients to confirm their GF status.
How long do they last?
When stored in an airtight container, these white chocolate candy clusters will stay fresh and delicious for up to a week at room temperature, or even longer if kept refrigerated, maintaining their delightful crunch and flavor.
Ready to Create Your Own Heavenly Clusters?
Now that you hold the “no-seize” secret and a foolproof guide, you’re perfectly equipped to create these Heavenly White Chocolate Candy Clusters with confidence. They are sure to be a beloved addition to your recipe repertoire, bringing joy with every crisp, sweet bite.
Don’t wait – gather your ingredients and get ready to impress! We’d love to see your creations; share your Heavenly White Chocolate Candy Clusters masterpieces with us on social media!
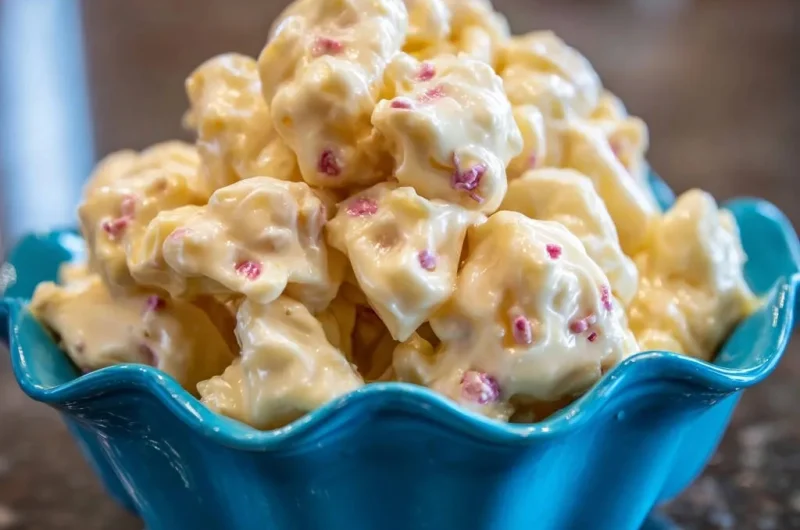
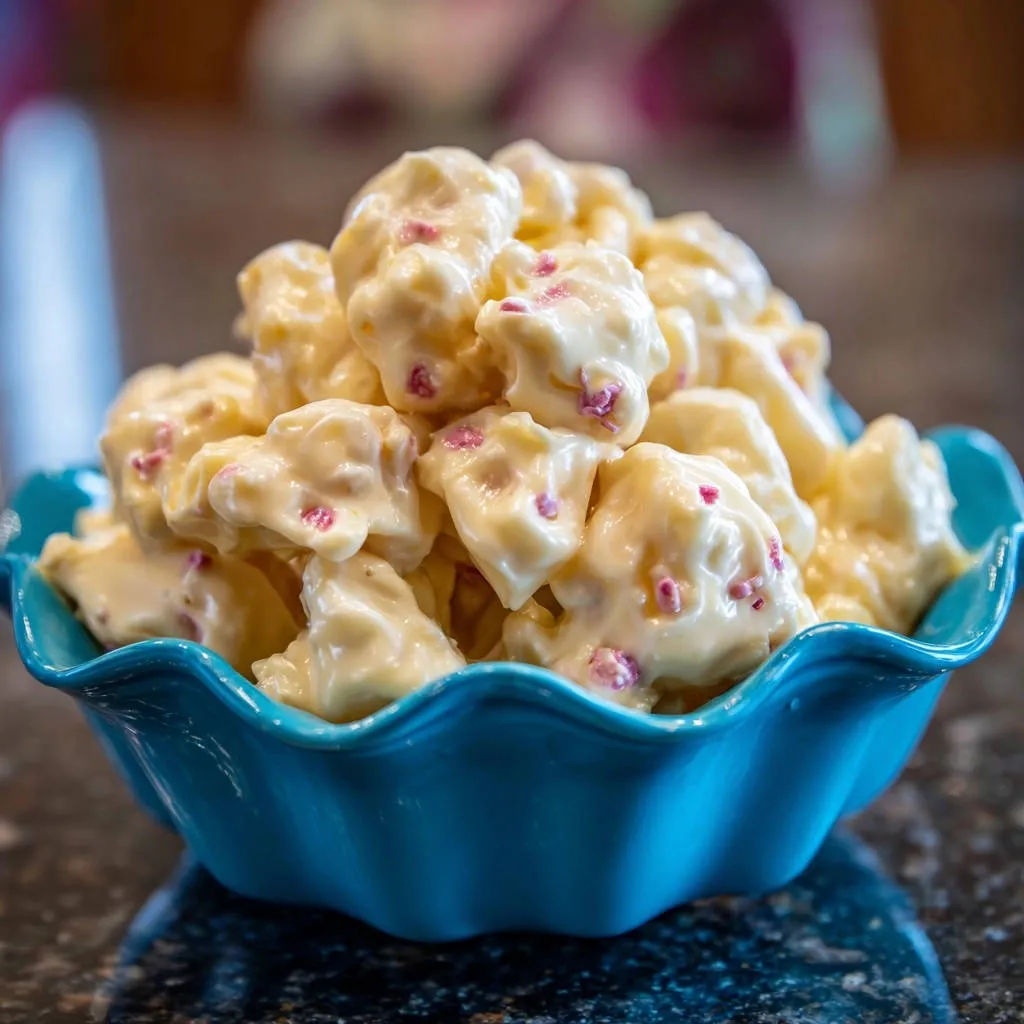
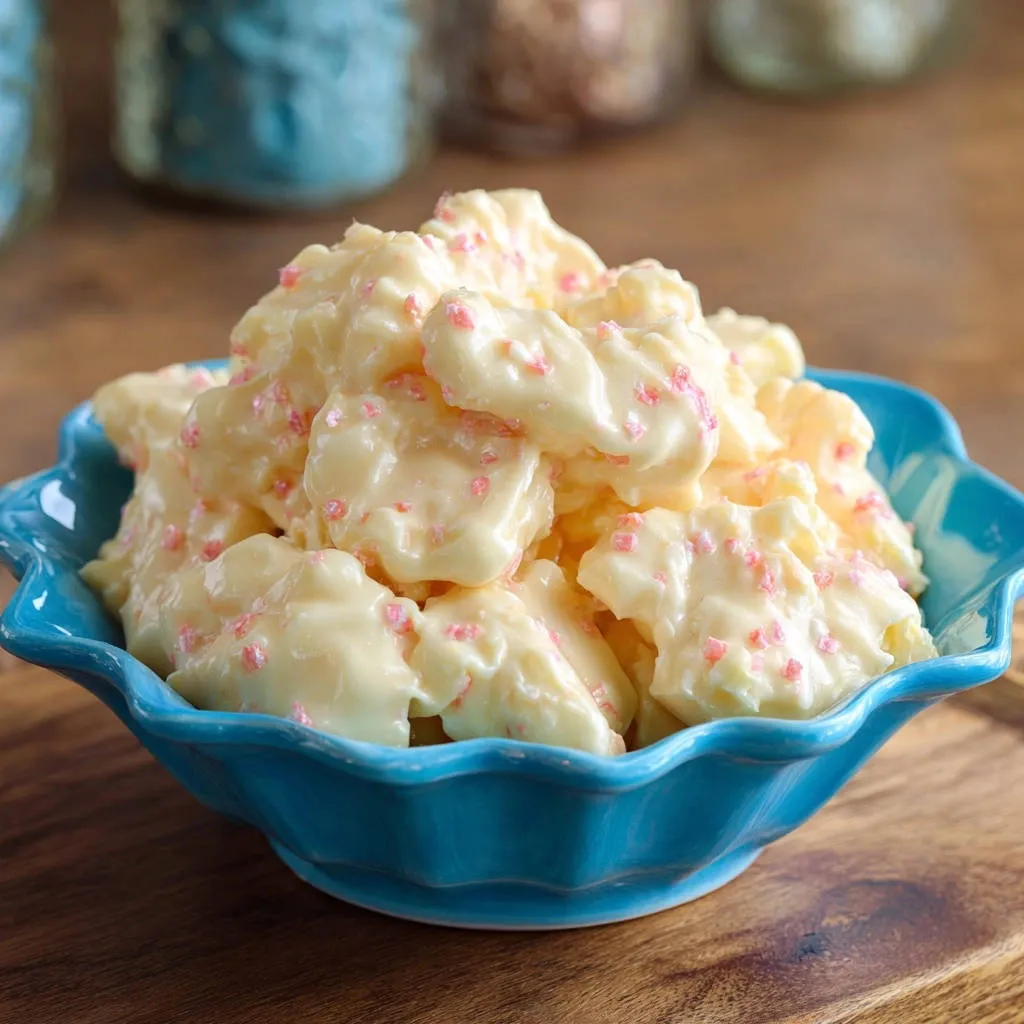
White Chocolate Candy Clusters
Course: SnacksCuisine: AmericanDifficulty: easy4
24-30 clusters20
minutes240
kcal50
minutesTired of seized white chocolate? Discover the foolproof secret to perfectly smooth, melted white chocolate every time. These easy-to-make clusters, combining crisp rice cereal and vibrant red candy bits, are a delightful, no-fuss treat.
Ingredients
12 ounces white chocolate chips or melting wafers
6 cups crisp rice cereal
1/4 cup small red candy bits or sprinkles
Directions
- Preparation: Line a baking sheet with parchment paper or wax paper. Set aside.
- Melt White Chocolate (The Secret to No Seizing!): Place the white chocolate chips or wafers in a heatproof bowl. Create a double boiler by placing the bowl over a saucepan of simmering water, ensuring the bottom of the bowl does not touch the water. Stir gently and continuously until the chocolate is completely melted and smooth. Alternatively, you can microwave the chocolate in a microwave-safe bowl in 30-second intervals, stirring thoroughly after each interval, until melted and smooth. Be very careful not to overheat or allow any water to touch the chocolate. This gentle melting method prevents the chocolate from seizing.
- Combine: In a large mixing bowl, add the crisp rice cereal. Pour the perfectly melted white chocolate over the cereal.
- Add Color: Sprinkle the red candy bits over the white chocolate and cereal mixture.
- Coat Evenly: Gently fold the mixture with a spatula until the cereal and candy bits are evenly coated with the white chocolate. Be gentle to avoid crushing the cereal.
- Form Clusters: Drop spoonfuls of the coated mixture onto the prepared baking sheet. You can make them as large or small as you like.
- Chill to Set: Place the baking sheet in the refrigerator for at least 30 minutes, or until the white chocolate clusters are completely set and firm.
- Serve: Once set, transfer the clusters to a serving bowl and enjoy! Store any leftovers in an airtight container at room temperature for up to a week, or in the refrigerator for a firmer bite.
Notes
- Store leftovers in an airtight container at room temperature for up to a week, or in the refrigerator for a firmer bite.