There’s nothing quite as disappointing as biting into an eagerly anticipated mini cake, only to discover it’s dry and crumbly. For years, I struggled with achieving that perfectly tender crumb in my individual treats, but then I unlocked a simple, game-changing secret.
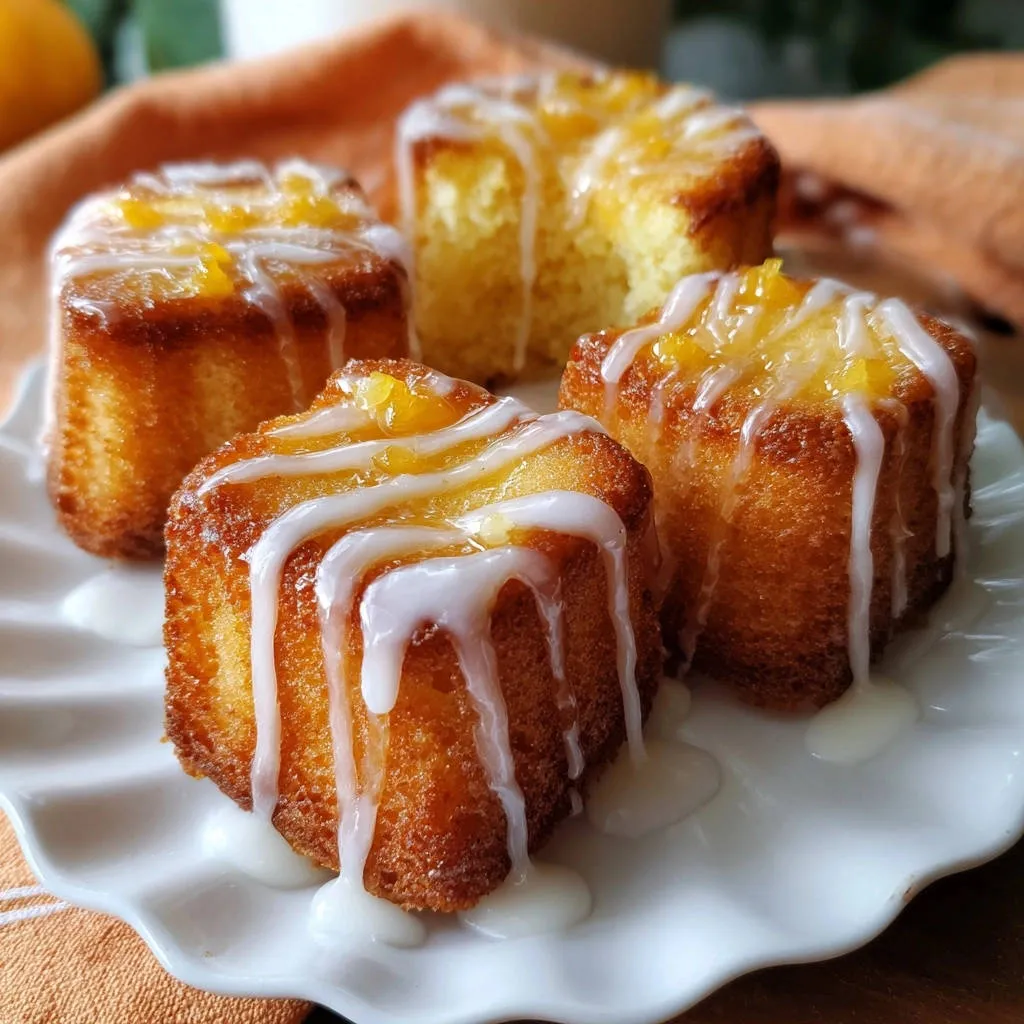
This recipe for Lemon Glazed Mini Cakes isn’t just about delicious citrus flavor; it’s about a unique technique that guarantees an incredibly moist and flavorful cake every single time. Get ready for baking success and the most delightful, zesty mini cakes you’ve ever experienced.
For a similar chocolate experience, consider trying a moist chocolate bundt cake with foolproof pan release.
Unlock the Secret: Why These Lemon Glazed Mini Cakes Reign Supreme
What sets these Lemon Glazed Mini Cakes apart from all others? It’s a combination of meticulous ingredient selection and a crucial moisture-infusion step that transforms them from good to truly exceptional.
The Magic of the Lemon Simple Syrup: Your Moisture Guarantee
The secret weapon in this recipe is a warm lemon simple syrup, generously brushed over the cakes immediately after baking. This syrup penetrates deeply, ensuring each mini cake remains incredibly tender and moist for days.
It’s a simple addition that guarantees a soft crumb and vibrant flavor, completely banishing any concerns of dry, lackluster small cakes.
Effortless Elegance: Simple Steps, Stunning Results
Despite their sophisticated appearance, these Lemon Glazed Mini Cakes are surprisingly straightforward to prepare. The instructions are clear, guiding even novice bakers to a beautiful and delicious outcome.
You’ll achieve professional-looking individual desserts without any advanced baking techniques, making them perfect for any occasion.
Bright, Zesty Flavor: A Burst of Sunshine in Every Bite
From fresh lemon zest in the batter to a tangy lemon simple syrup and a bright lemon glaze, this recipe maximizes the vibrant citrus flavor. Each component contributes to a refreshing and irresistible taste.
The result is a perfectly balanced treat that offers a delightful burst of sunshine, making these tiny cakes a favorite for anyone who loves citrus.
Gather Your Zesty Arsenal: Essential Ingredients for Mini Cake Perfection
Success in baking often begins with understanding your ingredients. Here’s a breakdown of what you’ll need and why each element is crucial for your Lemon Glazed Mini Cakes.
For the Light and Tender Cake Base
All-Purpose Flour: The structural foundation. Measure it correctly by spooning into a cup and leveling, avoiding compaction.
Baking Powder & Salt: Leavening and flavor enhancers. Baking powder provides lift, creating a light texture, while salt balances the sweetness.
Unsalted Butter, Softened: Key for richness and tenderness. Softened butter creams beautifully with sugar, incorporating air for a delicate crumb.
Granulated Sugar: Sweetens and tenderizes the cake, also aids in creaming with butter.
Large Eggs: Bind ingredients, add moisture, and contribute to the cake’s structure and richness.
Milk & Vanilla Extract: Add moisture and depth of flavor. Milk contributes to tenderness, and vanilla is a universal flavor enhancer.
Fresh Lemon Zest & Juice: The heart of the lemon flavor. Zest provides aromatic oils for intense citrus notes, while fresh juice adds tang and acidity.
Crafting the Moisture-Locking Lemon Simple Syrup
Granulated Sugar & Water: Form the base of the syrup. Heating dissolves the sugar, creating a liquid that easily absorbs into the warm cakes.
Fresh Lemon Juice: Infuses the syrup with additional bright, tangy flavor, complementing the cake beautifully.
The Dazzling Finale: Bright Lemon Glaze
Powdered Sugar: The essential base for a smooth, pourable glaze. Its fine texture dissolves easily.
Fresh Lemon Juice: Provides the signature lemon tang and thins the glaze to a drizzling consistency.
Milk (Optional): A small amount can adjust the glaze consistency if needed, making it slightly creamier or thinner.
Lemon Zest (for garnish, optional): A final flourish that adds visual appeal and a burst of fresh lemon aroma.
Your Baker’s Toolkit: Essential Equipment for Mini Cakes
Having the right tools on hand ensures a smooth and enjoyable baking process. Here’s what you’ll need to create your perfect Lemon Glazed Mini Cakes.
Must-Have Baking Pans and Prep Gear
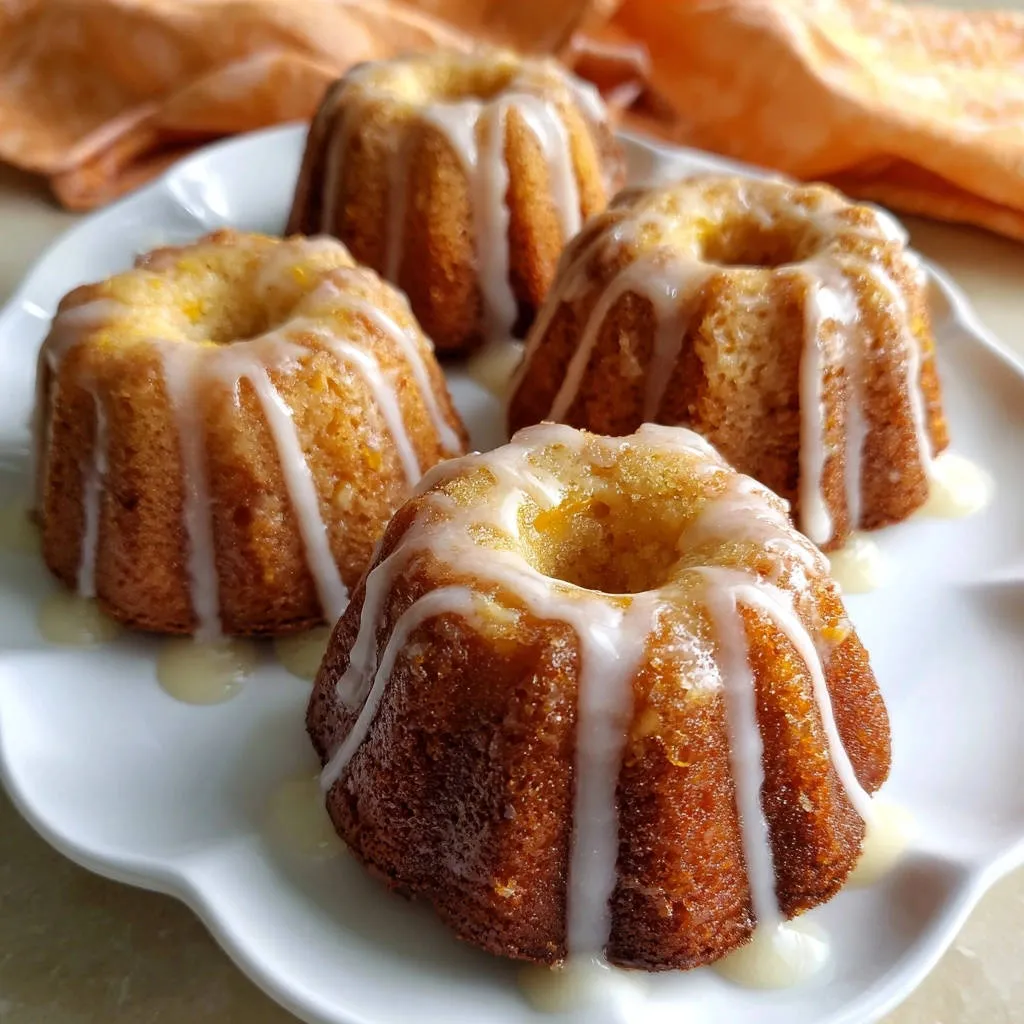
A good quality mini cake mold, whether a mini bundt pan or a standard mini loaf pan, is essential for shaping these adorable treats. Ensure your pan is non-stick or well-prepared.
A wire rack is crucial for cooling your cakes evenly and allowing the simple syrup and glaze to set properly without making the bottoms soggy.
Mixing and Measuring Essentials
An electric mixer, either stand or hand-held, will make creaming butter and sugar much easier and more efficient. You’ll also need a set of mixing bowls in various sizes for combining wet and dry ingredients.
Accurate measuring cups and spoons are vital for consistent results, and a whisk is perfect for aerating dry ingredients and combining liquids for the glaze.
Baking Brilliance: A Step-by-Step Guide to Lemon Glazed Mini Cakes
Follow these detailed steps carefully, and you’ll be rewarded with the most tender, flavorful Lemon Glazed Mini Cakes. Pay close attention to the “why” behind each action for guaranteed success.
Preparing Your Molds and Dry Ingredients
Preheat your oven to 350°F (175°C) to ensure it’s at the correct temperature when your batter is ready. Meticulously grease and flour your mini cake molds or mini bundt pan, ensuring every crevice is coated.
This thorough preparation is absolutely critical for preventing your delicate cakes from sticking and ensures they release cleanly, preserving their beautiful shape. In a medium bowl, whisk together the all-purpose flour, baking powder, and salt.
Whisking these dry ingredients ensures they are evenly distributed, so your cakes rise uniformly and are seasoned perfectly throughout.
Creaming, Mixing, and Achieving the Perfect Batter
In a large bowl, using an electric mixer, cream the softened butter and granulated sugar together for 3-5 minutes until they are light and fluffy. This step incorporates air into the mixture, which is essential for a tender, airy cake crumb.
Beat in the eggs one at a time, mixing well after each addition until fully incorporated. This allows each egg to emulsify properly, contributing to a smooth batter.
Stir in the vanilla extract, lemon zest, and fresh lemon juice. These ingredients infuse the batter with their delightful aromas and bright citrus notes.
Gradually add the dry ingredient mixture to the wet ingredients, alternating with the milk. Begin and end with the dry ingredients. Mix on low speed only until just combined.
It’s crucial not to overmix the batter, as overdeveloping the gluten can lead to a tough and dense cake, sacrificing that delicate texture we’re aiming for.
Baking to Golden Perfection
Spoon the batter evenly into your prepared mini cake molds, filling each about two-thirds full. This allows sufficient space for the cakes to rise without overflowing.
Bake for 20-25 minutes, or until the tops are golden brown and a toothpick inserted into the center of a cake comes out clean. Begin checking for doneness a few minutes early.
Be careful not to overbake, as this is the primary cause of dry cakes. A clean toothpick means the cake is fully cooked and ready to come out.
The Moisture Infusion: Crafting and Applying the Simple Syrup
While the cakes are baking, prepare the Lemon Simple Syrup. In a small saucepan, combine 1/4 cup granulated sugar, 1/4 cup water, and 1 tablespoon fresh lemon juice. Heat over medium heat, stirring until the sugar completely dissolves.
Remove the syrup from the heat once clear. Once the cakes are out of the oven, let them cool in the molds for about 5-10 minutes; they should still be warm.
While still warm, gently poke small holes all over the top of each cake using a toothpick or skewer. This creates channels for the syrup to penetrate deeply.
This is the key moisture step: Generously brush or spoon the warm Lemon Simple Syrup over the warm cakes, allowing it to soak in thoroughly. This infuses the cakes with incredible moisture and bright lemon flavor, ensuring they stay moist for days.
Cooling and Glazing for an Irresistible Finish
Let the cakes cool completely on a wire rack before attempting to remove them from their molds. This patience prevents breakage and ensures they are firm enough to handle.
Once completely cooled, prepare the Lemon Glaze. In a small bowl, whisk together the powdered sugar and 2 tablespoons of fresh lemon juice until smooth. If you need inspiration for other vibrant glazes, consider making an easy orange glaze recipe for a citrusy twist.
Add the optional milk, a teaspoon at a time, until you reach your desired drizzling consistency. The glaze should be thick enough to cling but thin enough to flow gracefully.
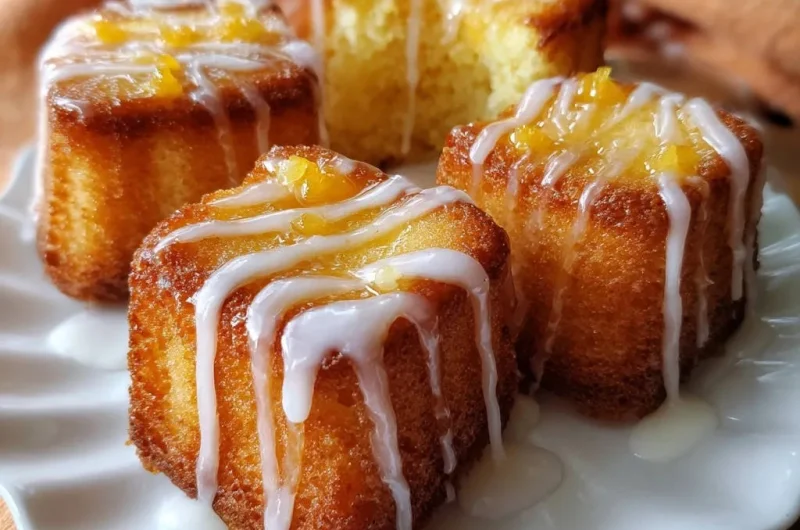
Drizzle the bright lemon glaze over the cooled mini cakes. Garnish with a sprinkle of fresh lemon zest if desired for extra visual appeal and a burst of fresh aroma. Serve and enjoy your perfectly moist, zesty treats!
Chef’s Secrets: Elevating Your Lemon Glazed Mini Cakes to Masterpiece Status
Even with a great recipe, a few insider tips can make all the difference. These techniques will help you achieve truly spectacular Lemon Glazed Mini Cakes.
The Art of Not Overmixing
Overmixing develops gluten in the flour, which leads to a tough, rubbery, and dense cake. Always mix only until the ingredients are just combined, and no streaks of flour remain. A light hand here ensures a beautifully tender crumb.
Preventing Stickage: Greasing Your Molds Like a Pro
For mini cakes, especially those with intricate designs like mini bundt molds, thorough greasing is paramount. Use a baking spray with flour, or apply softened butter followed by a dusting of flour, ensuring every crevice is coated.
Reading Your Oven: The Perfect Bake Time
Oven temperatures can vary significantly. Rely on visual cues-golden brown tops and a clean toothpick test-rather than just the clock. Start checking for doneness a few minutes before the recipe indicates to prevent overbaking, which is the enemy of moisture.
Lemon Zest vs. Lemon Juice: Getting the Balance Right
Lemon zest contains the aromatic oils that provide intense lemon flavor without adding excess liquid. Use a microplane for fine zest, being careful to avoid the bitter white pith beneath the yellow skin. Save the juice for the syrup and glaze.
Glaze Consistency: A Drizzly Dream
The perfect glaze for these mini cakes should be thick enough to provide a good coating but thin enough to drip attractively down the sides. Adjust the consistency by adding powdered sugar for thickness or tiny drops of lemon juice or milk for thinness, stirring well after each addition.
Common Conundrums Solved: Troubleshooting Your Mini Cake Bakes
Even seasoned bakers encounter challenges. Here are solutions to common issues you might face when making Lemon Glazed Mini Cakes.
Why Are My Mini Cakes Dry?
The most common culprit for dry cakes is overbaking. Ensure you are pulling them from the oven as soon as a toothpick inserted into the center comes out clean, and absolutely do not skip the crucial lemon simple syrup step.
Another factor could be overmixing the batter, which develops too much gluten and results in a tougher, drier texture. Mix only until ingredients are just combined.
My Cakes Are Sticking to the Pan!
This usually indicates insufficient greasing and flouring of your molds. For intricate pans, use a baking spray with flour, or carefully butter and flour every part of the mold.
Also, allow the cakes to cool in the molds for the recommended 5-10 minutes before attempting to invert them, as this allows them to firm up slightly.
The Glaze is Too Thin/Too Thick
If your glaze is too thin, gradually whisk in more powdered sugar until it reaches the desired consistency. If it’s too thick, add a tiny splash (1/4 teaspoon at a time) of lemon juice or milk until it’s perfectly drizzly.
Cakes Sank in the Middle – What Happened?
Cakes can sink if they are underbaked, meaning the structure hasn’t fully set before cooling. Ensure the toothpick test is truly clean from the center.
Sudden temperature drops, such as opening the oven door too early, can also cause cakes to collapse. Additionally, ensure your baking powder is fresh and active.
Beyond Basic: Creative Twists for Your Lemon Glazed Mini Cakes
While these Lemon Glazed Mini Cakes are perfect as is, don’t hesitate to get creative! Here are a few ideas to customize them to your taste.
Complementary Recipe Ideas
Enjoying these lemon glazed mini cakes? Consider these other sweet treats for your next baking project.
- For a fun breakfast or dessert that brings the campfire indoors, try these S’mores Pancakes with their toasted marshmallow flavor.
- If you appreciate a comforting breakfast with a delightful contrast in textures, you might like this French Toast Casserole, featuring a crisp top and a soft interior.
Berry Bright Additions
Fold in a handful of fresh blueberries, raspberries, or even chopped strawberries into the batter just before baking. The tartness of the berries beautifully complements the bright lemon flavor.
If using frozen berries, toss them in a little flour first to prevent them from sinking to the bottom of the molds, and be aware that baking time might slightly increase.
Spice it Up: Warm Flavor Notes
For a more sophisticated flavor profile, consider adding a pinch of warm spices to your cake batter. A quarter teaspoon of cardamom or ginger can add a subtle, fragrant warmth that beautifully enhances the lemon without overpowering it.
For another rich spiced cake experience, explore old-fashioned gingerbread cake.
Dairy-Free and Gluten-Free Swaps
To make these mini cakes dairy-free, substitute plant-based milk (like almond or oat milk) and a good quality dairy-free butter alternative. For gluten-free, a 1:1 gluten-free baking flour blend can often be substituted successfully, though minor adjustments to liquid may be needed.
Alternative Glazes and Toppings
Instead of a plain lemon glaze, consider a cream cheese glaze made with softened cream cheese, powdered sugar, and lemon juice for a tangier finish. For a beautiful pink glaze, mix powdered sugar with a small amount of raspberry puree.
Garnish with candied lemon slices, edible flowers, or a sprinkle of toasted shredded coconut for added texture and visual appeal.
Enjoying and Preserving Your Lemon Glazed Mini Cakes
These delightful Lemon Glazed Mini Cakes are a joy to share and surprisingly simple to store, thanks to that wonderful simple syrup.
Elegant Serving Suggestions
Serve these elegant mini cakes individually on small dessert plates, perhaps accompanied by a few fresh berries or a delicate dollop of lightly sweetened whipped cream. They are perfectly sized for afternoon tea gatherings, festive brunches, or as a charming addition to any dessert buffet.
Storing for Freshness: Keeping Them Moist
To keep your glazed Lemon Glazed Mini Cakes at their absolute best, store them in an airtight container at room temperature. The simple syrup works wonders, helping them retain their incredible moisture and fresh lemon flavor for up to 3 days.
Can I Make These Ahead?
Absolutely! The unglazed mini cakes are excellent candidates for making ahead. Once baked and completely cooled, wrap them tightly in plastic wrap, then foil, and freeze for up to a month. When ready to serve, thaw them at room temperature, then apply the simple syrup and glaze as directed in the recipe.
Your Lemon Glazed Mini Cakes Questions Answered
Here are answers to some common questions about baking and enjoying these delightful Lemon Glazed Mini Cakes.
Can I use bottled lemon juice?
While fresh lemon juice provides the brightest, most authentic and vibrant flavor, bottled lemon juice can be used in a pinch. However, you might notice a slight difference in the overall intensity and freshness of the lemon taste.
How far in advance can I make these?
These mini cakes are truly at their peak when enjoyed within 2-3 days of baking. The simple syrup helps them maintain their moisture beautifully, but for optimal freshness and texture, plan to make them as close to your serving time as possible.
Can I freeze Lemon Glazed Mini Cakes?
Yes, you can freeze them effectively! Bake the cakes and allow them to cool completely. Before glazing, wrap each cake tightly in plastic wrap, then in aluminum foil, and freeze for up to 1 month. When you’re ready to serve, simply thaw them at room temperature, then proceed with the simple syrup and glaze steps.
What if I don’t have a mini cake pan?
No mini cake pan? No problem! You can easily adapt this recipe to a regular muffin tin; fill cavities about two-thirds full, and adjust the baking time to approximately 15-20 minutes. For a single 8×8 inch square cake, increase the baking time to 30-35 minutes, always checking for a clean toothpick.
Bake, Share, and Savor: Your Mini Cake Masterpiece Awaits!
Now that you’re equipped with the secret to incredibly moist and flavorful Lemon Glazed Mini Cakes, it’s time to preheat your oven and experience the joy of baking these delightful treats. They are perfect for any occasion, from casual gatherings to elegant celebrations, always impressing with their tender crumb and zesty flavor.
Don’t forget to share your baking triumphs with us! We love seeing your creations and hearing how much you and your loved ones enjoy these truly special mini cakes. Enjoy every tender, zesty bite of your homemade masterpiece!
Mini Cakes
Course: DessertCuisine: AmericanDifficulty: medium4
12-18 mini cakes25
minutes20
minutes350
kcal60
minutesSay goodbye to dry, crumbly cakes! These adorable Lemon Glazed Mini Cakes stay perfectly tender and flavorful thanks to a simple secret: a lemon simple syrup soak. They’re surprisingly easy to make and burst with bright citrus taste.
Ingredients
For the Mini Cakes:
1 1/2 cups all-purpose flour
1 1/2 teaspoons baking powder
1/2 teaspoon salt
1 cup (2 sticks) unsalted butter, softened
1 cup granulated sugar
2 large eggs
1/2 cup milk
1 teaspoon vanilla extract
Zest of 1 large lemon
2 tablespoons fresh lemon juice
For the Lemon Simple Syrup:
1/4 cup granulated sugar
1/4 cup water
1 tablespoon fresh lemon juice
For the Lemon Glaze:
1 cup powdered sugar
2-3 tablespoons fresh lemon juice
1 tablespoon milk (optional, for desired consistency)
1 teaspoon lemon zest (for garnish, optional)
Directions
- Preheat your oven to 350 degrees F (175 degrees C). Thoroughly grease and flour your mini cake molds or a mini bundt pan, ensuring every crevice is coated to prevent sticking.
- In a medium bowl, whisk together the all-purpose flour, baking powder, and salt. Set aside.
- In a large bowl, using an electric mixer, cream the softened butter and granulated sugar together until light and fluffy, about 3-5 minutes.
- Beat in the eggs one at a time, mixing well after each addition until fully incorporated. Stir in the vanilla extract, lemon zest, and lemon juice.
- Gradually add the dry ingredient mixture to the wet ingredients, alternating with the milk. Begin and end with the dry ingredients. Mix on low speed until just combined, being careful not to overmix. Overmixing can lead to a tough cake.
- Spoon the batter evenly into your prepared mini cake molds, filling each about two-thirds full.
- Bake for 20-25 minutes, or until the tops are golden brown and a toothpick inserted into the center of a cake comes out clean. Be careful not to overbake, as this can lead to dryness.
- While the cakes are baking, prepare the Lemon Simple Syrup. In a small saucepan, combine 1/4 cup granulated sugar, 1/4 cup water, and 1 tablespoon fresh lemon juice. Heat over medium heat, stirring until the sugar completely dissolves. Remove from heat.
- Once the cakes are out of the oven, let them cool in the molds for about 5-10 minutes. While still warm, gently poke small holes all over the top of each cake using a toothpick or skewer.
- This is the key moisture step: Generously brush or spoon the warm Lemon Simple Syrup over the warm cakes, allowing it to soak in thoroughly. This infuses the cakes with incredible moisture and bright lemon flavor, ensuring they stay moist for days.
- Let the cakes cool completely on a wire rack before removing them from their molds.
- Once cooled, prepare the Lemon Glaze. In a small bowl, whisk together the powdered sugar and 2 tablespoons of fresh lemon juice until smooth. Add the optional milk, a teaspoon at a time, until you reach your desired drizzling consistency.
- Drizzle the lemon glaze over the cooled mini cakes. Garnish with a sprinkle of fresh lemon zest if desired. Serve and enjoy!
Notes
- The lemon simple syrup is the key step to ensuring these cakes stay incredibly moist for days.