Why This Lemon Pepper Chicken Breasts Recipe Will Change Your Weeknights
The Secret to Never-Dry Chicken, Revealed
The disappointment of a dry chicken breast is a thing of the past with this method. Our secret lies in two crucial steps: gently pounding the chicken to an even thickness and allowing it a vital resting period after cooking. These techniques ensure every bite of your chicken is incredibly moist and tender.Effortless Elegance for Busy Evenings
This recipe proves that a quick weeknight meal doesn’t mean sacrificing flavor or quality. With minimal prep and cooking time, you can have a sophisticated, restaurant-worthy meal on the table. It’s truly ideal for those busy evenings when you crave something special without the fuss.A Flavor Profile That Delights (But Isn’t Overpowering)
The classic combination of bright lemon and pungent black pepper creates a vibrant, savory flavor that appeals to almost everyone. It’s bold enough to be exciting yet balanced, ensuring a delightful taste experience without overwhelming your palate. This makes it a versatile dish perfect for any occasion.Building Blocks of Flavor: What You’ll Need
The Star: Boneless, Skinless Chicken Breasts
Opt for fresh, high-quality boneless, skinless chicken breasts. Their lean nature makes them perfect for quick cooking, but also means proper technique is essential to maintain juiciness. Aim for similarly sized breasts for even cooking.The Zesty Duo: Lemon & Pepper (Fresh is Best!)
The magic of this dish comes from fresh ingredients. Use real lemons for zest, not bottled juice, for an unmatched bright, aromatic citrus note. Freshly ground black pepper delivers a far more potent and complex flavor than pre-ground varieties.Pantry Staples: Olive Oil & Salt
Good quality olive oil is essential for achieving a beautiful golden sear on your chicken. Salt acts as more than just a seasoning; it enhances all the other flavors, bringing them into harmonious balance.Your Kitchen Arsenal: Tools for Success
The Game Changer: Meat Mallet (or Rolling Pin)
A meat mallet is crucial for pounding your chicken to an even thickness. This ensures consistent cooking throughout the breast, eliminating those notorious dry spots. If you don’t have a mallet, a heavy rolling pin or even the bottom of a small, sturdy saucepan works just as well.Skillet Selection: Which Pan is Best?
A heavy-bottomed skillet is your best friend for pan-searing. Cast iron or a good quality stainless steel pan will retain and distribute heat evenly. This consistent heat is vital for developing that coveted golden-brown crust.The Thermometer: Your Juiciness Guardian
An instant-read meat thermometer is the ultimate tool for perfectly cooked chicken. It removes all guesswork, ensuring your chicken reaches a safe internal temperature of 165°F (74°C) without going a degree over, which prevents dryness.Mastering the Art: How to Cook Lemon Pepper Chicken Breasts
- Prep for Perfection: Pounding & Patting
Start by placing each chicken breast between two sheets of plastic wrap. Using a meat mallet or heavy rolling pin, gently pound the chicken until it’s about 1/2 to 3/4 inch thick and uniform. This step is crucial for promoting even cooking and guaranteeing tenderness.
For more tender poultry, explore making juicy garlic herb chicken thighs.
Next, remove the plastic wrap and pat the chicken breasts very dry with paper towels. Removing excess moisture is key to achieving that beautiful golden-brown crust during searing.
For another take on tender chicken with bright flavors, check out creamy lemon herb chicken thighs.
- The Golden Sear: Building Flavor
Heat the olive oil in a large skillet over medium-high heat until it shimmers. This indicates the pan is hot enough to create an immediate sear.
Complementary Recipes
Here are some ideas for what to serve alongside your lemon pepper chicken.
- For a fresh counterpoint, try this creamy kale Caesar salad, featuring tangy dressing and crunchy croutons.
- Another great option is this creamy zesty chicken and corn salad, which offers bright flavors and satisfying textures.
Carefully place the seasoned chicken breasts in the hot skillet, ensuring not to overcrowd the pan. Cook them undisturbed for 5-7 minutes on the first side; this allows a deep golden-brown crust to form, locking in juices and flavor.
- Finishing Strong: Cook Time & Temperature
Flip the chicken breasts and continue cooking for another 5-7 minutes. Use an instant-read meat thermometer inserted into the thickest part of the breast to check for an internal temperature of 165°F (74°C).
Pulling the chicken off the heat right at this temperature is vital. Overcooking even by a minute can lead to dry, tough chicken.
- The Critical Rest: Unlocking Ultimate Juiciness
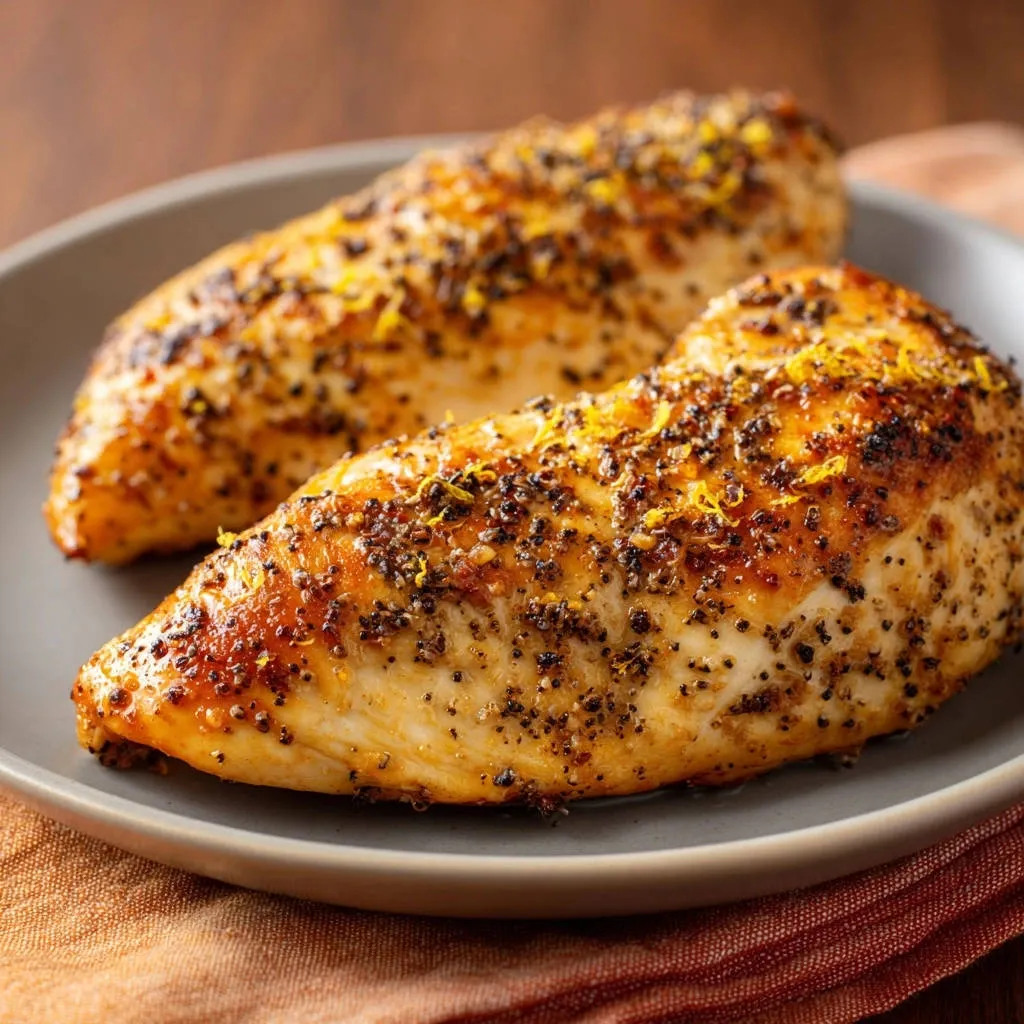
Immediately remove the cooked chicken from the skillet and transfer it to a clean cutting board. Generously sprinkle with fresh lemon zest at this stage to maximize its bright aroma and flavor.
Tent the chicken loosely with aluminum foil and let it rest for at least 5 minutes before slicing or serving. This resting period allows the muscle fibers to relax and reabsorb the flavorful juices, resulting in incredibly moist Lemon Pepper Chicken Breasts.
Elevate Your Dish: Pro Tips for Impeccable Lemon Pepper Chicken Breasts
Don’t Skip the Pound: Why Even Thickness Matters
Pounding your chicken to an even thickness guarantees that every part cooks at the same rate. This simple step prevents thinner edges from drying out while the thicker parts finish cooking, leading to uniformly tender meat.
Pat It Dry: The Key to a Crisp Crust
Moisture is the enemy of a good sear. Thoroughly patting your chicken dry with paper towels before seasoning and cooking allows the surface to make direct contact with the hot pan. This creates a beautiful, golden-brown crust that adds incredible flavor and texture.
The Power of High Heat: Searing for Flavor
Starting with a properly heated pan over medium-high heat is essential. This intense initial heat rapidly caramelizes the chicken’s exterior, forming a rich, savory crust known as the Maillard reaction. This is where a significant portion of the dish’s delicious flavor is developed.
Resting is Non-Negotiable: Patience for Juiciness
The rest period after cooking is arguably the most critical step for juicy chicken. As the chicken cooks, its juices migrate to the center. Resting allows these juices to redistribute throughout the meat, ensuring that when you slice into it, every piece is succulent and flavorful.
Fresh Zest at the End: Brightness Unleashed
Adding fresh lemon zest immediately after the chicken comes off the heat, while it’s resting, is a pro move. The residual heat helps release the aromatic oils from the zest, infusing the chicken with an intense, vibrant lemon flavor that tastes fresh and bright, rather than cooked out.
Troubleshooting Your Lemon Pepper Chicken Breasts: When Things Go Wrong
Why is my chicken dry?
The most common culprit for dry chicken is overcooking. Always use a meat thermometer and pull the chicken off the heat immediately once it reaches 165°F (74°C). Not allowing the chicken to rest after cooking can also lead to dryness, as juices will escape when sliced.My chicken isn’t browning properly.
Several factors can hinder browning. Ensure your chicken is thoroughly patted dry before it hits the pan, as moisture creates steam instead of a sear. Your skillet also needs to be sufficiently hot, so wait until the olive oil is shimmering before adding the chicken. Lastly, avoid overcrowding the pan, which lowers the temperature and steams the chicken instead of searing it.The lemon flavor isn’t strong enough.
For a more pronounced lemon flavor, ensure you’re using fresh lemon zest, added at the very end of cooking. You can also squeeze a small amount of fresh lemon juice over the chicken right before serving. Don’t be shy with the freshly ground black pepper either, as its bite complements the citrus beautifully.What to Serve with Your Zesty Chicken Breasts
Classic Sides for a Complete Meal
Lemon Pepper Chicken Breasts pair beautifully with an array of classic sides. Creamy mashed potatoes or fluffy rice provide a comforting base. For a vegetable boost, consider roasted green beans or our recipe for crispy roasted cauliflower, which offers a delightful textural contrast.Light & Fresh Accompaniments
For a lighter meal, serve your chicken with quinoa or couscous infused with fresh herbs. Steamed asparagus with a drizzle of olive oil, or a vibrant side like our simple summer tomato salad, make excellent fresh pairings. These options complement the chicken without feeling heavy.Beverage Pairings
A crisp, unoaked white wine like Sauvignon Blanc or Pinot Grigio beautifully enhances the lemon notes of the dish. For non-alcoholic options, sparkling water with a slice of lemon or a glass of unsweetened iced tea are wonderfully refreshing choices.Make-Ahead & Storage Solutions for Easy Meals
Prepping Chicken in Advance
You can get a head start by pounding the chicken breasts to an even thickness and seasoning them up to 24 hours in advance. Store them covered in the refrigerator until you’re ready to cook. This streamlines your dinner prep for busy nights.Storing Cooked Lemon Pepper Chicken Breasts
Allow any leftover cooked chicken to cool completely before transferring it to an airtight container. It will keep well in the refrigerator for 3-4 days. For longer storage, freeze the chicken in a freezer-safe bag or container for up to 3 months.Reheating for Best Results
To reheat, gently warm the chicken in a lightly oiled skillet over medium-low heat or in a preheated oven at 300°F (150°C) until just warmed through. Adding a tablespoon of chicken broth or water to the pan or baking dish can help prevent it from drying out during reheating.Your Lemon Pepper Chicken Breasts Questions, Answered
Can I use chicken thighs instead of breasts?
Absolutely! Chicken thighs are a fantastic choice for this recipe, offering even more moisture and flavor. They will typically require a slightly longer cooking time, around 7-9 minutes per side, to reach an internal temperature of 175°F (80°C) for optimal tenderness.Can I bake this chicken instead of searing it?
Yes, you can certainly bake Lemon Pepper Chicken Breasts. After seasoning, bake them in a preheated oven at 400°F (200°C) for approximately 20-25 minutes, or until the internal temperature reaches 165°F (74°C). Searing first and then finishing in the oven is also a great method for a crispier exterior.What if I don’t have a meat mallet?
No problem at all! You can easily use the bottom of a heavy skillet, a rolling pin, or even a sturdy, clean wine bottle to pound your chicken to an even thickness. Just ensure you’re gentle to avoid tearing the meat.Can I make my own lemon pepper seasoning?
Indeed! Making your own lemon pepper seasoning is simple and gives you control over the flavor. Combine dried lemon peel (or fresh zest grated very finely and dried), freshly ground black pepper, and a pinch of salt. You can adjust the ratios to your personal taste preference.Ready to Transform Your Weeknight Dinners?
Now that you have all the insider tips and tricks, you’re ready to master these incredibly juicy and flavorful Lemon Pepper Chicken Breasts. This recipe is more than just food; it’s a confidence-builder, a time-saver, and a guaranteed crowd-pleaser. Give it a try this week and prepare to be amazed at how simple perfection can be!
Lemon Pepper Chicken
Course: Main CourseCuisine: AmericanDifficulty: easy2
servings8
minutes10
minutes240
kcal25
minutesDiscover the secret to perfectly juicy, tender, and incredibly flavorful chicken breasts every time. This simple recipe ensures your weeknight dinners are never dry and bland again, using a straightforward method for delicious results.
Ingredients
2 boneless, skinless chicken breasts
1 tablespoon olive oil
1/2 teaspoon salt
1 teaspoon freshly ground black pepper
1 tablespoon lemon zest (from 1 fresh lemon)
Directions
- Prepare the chicken: Place each chicken breast between two sheets of plastic wrap. Using a meat mallet or a heavy rolling pin, gently pound the chicken breasts until they are of an even thickness, about 1/2 to 3/4 inch. This step is crucial for even cooking and preventing dry spots.
- Season the chicken: Remove the plastic wrap. Pat the chicken breasts very dry with paper towels. Season both sides generously with salt and freshly ground black pepper.
- Heat the pan: Heat the olive oil in a large skillet over medium-high heat until shimmering hot.
- Sear the chicken: Carefully place the seasoned chicken breasts in the hot skillet. Cook for 5-7 minutes on the first side, without moving them, until a beautiful golden-brown crust forms.
- Flip and finish: Flip the chicken breasts and cook for another 5-7 minutes on the second side, or until the internal temperature reaches 165°F (74°C) using a meat thermometer. Avoid overcooking, as this is the key to maintaining juiciness.
- Rest the chicken: Immediately remove the chicken from the skillet and transfer to a cutting board. Sprinkle generously with fresh lemon zest. Tent loosely with aluminum foil and let rest for at least 5 minutes before slicing or serving. This allows the juices to redistribute throughout the meat, ensuring every bite is moist and flavorful.
Notes
- Pounding chicken to even thickness and resting are crucial for juicy results.