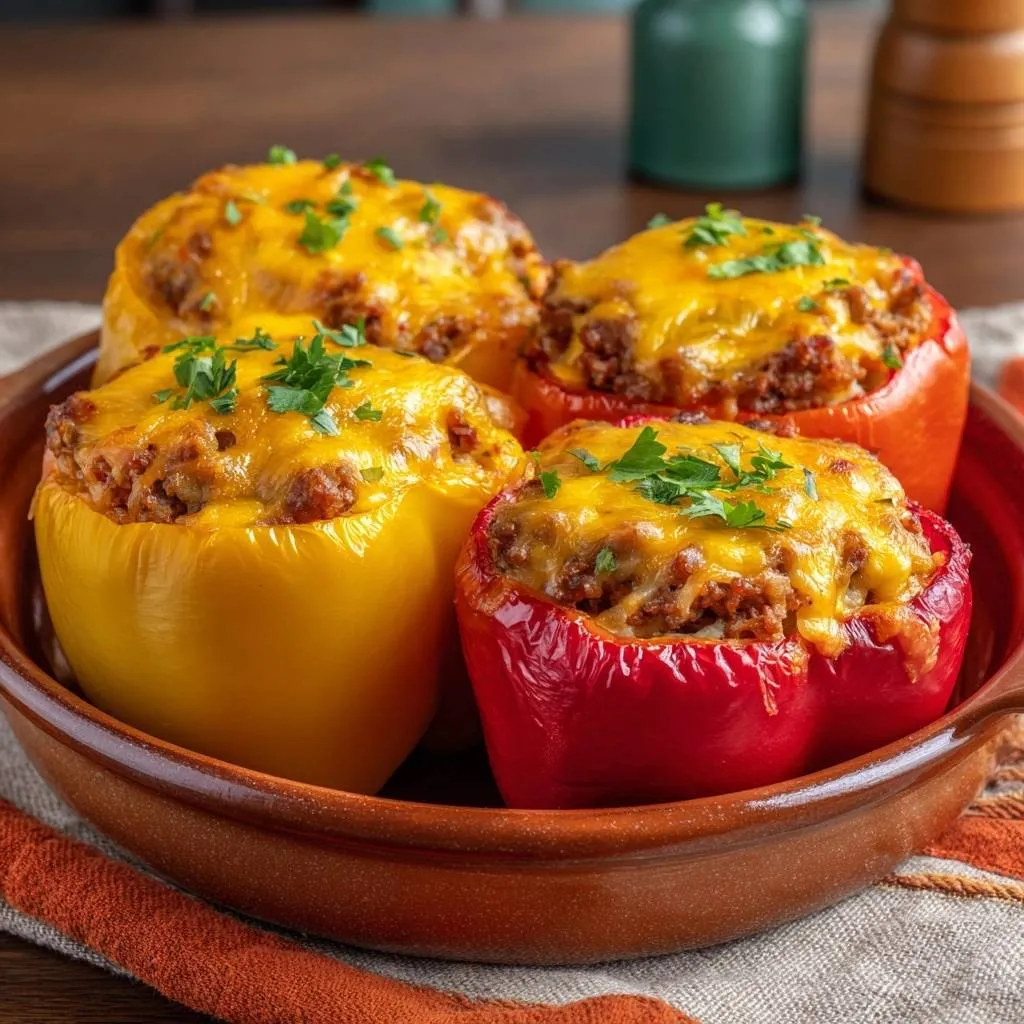
Stuffed peppers that turn out watery every time? You’re not alone. Most recipes skip a simple step, leaving your cheesy beef stuffed peppers a mushy mess. But this version changes everything with a quick microwave trick that drains hidden moisture first.
That’s why these cheesy beef stuffed peppers deliver firm, flavorful filling packed with seasoned beef, rice, and gooey cheddar. They hit the table in about 45 minutes using basic ingredients you likely have on hand. No more disappointment at dinner.
Here’s the expertise booster: microwave the empty peppers cut-side down on paper towels for 5 minutes. This steams out the water trapped in their cells, so your beef mixture stays bold and textured. Trust me, it makes all the difference.
Why Cheesy Beef Stuffed Peppers Fail
Hidden Moisture in Bell Peppers
Bell peppers hold a ton of water inside their thick cell walls. When you bake them raw, osmosis pulls that liquid out during cooking. It floods the beef filling in your cheesy beef stuffed peppers, turning everything soggy.
Red, yellow, and orange peppers pack even more moisture than green ones, about 92% water content versus 90%. That’s why they soften beautifully but sabotage texture without prep. However, draining first keeps things firm.
In addition, this excess dilutes spices like cumin and paprika. You end up with bland, watery bites instead of punchy flavor. Fix it upfront, and your cheesy beef stuffed peppers shine.
Overcooked Beef and Bland Filling
Too much pepper juice means the beef overcooks as it simmers in liquid. Flavors from garlic and onion wash away, leaving a dull mush. Soggy results lack that savory depth you crave.
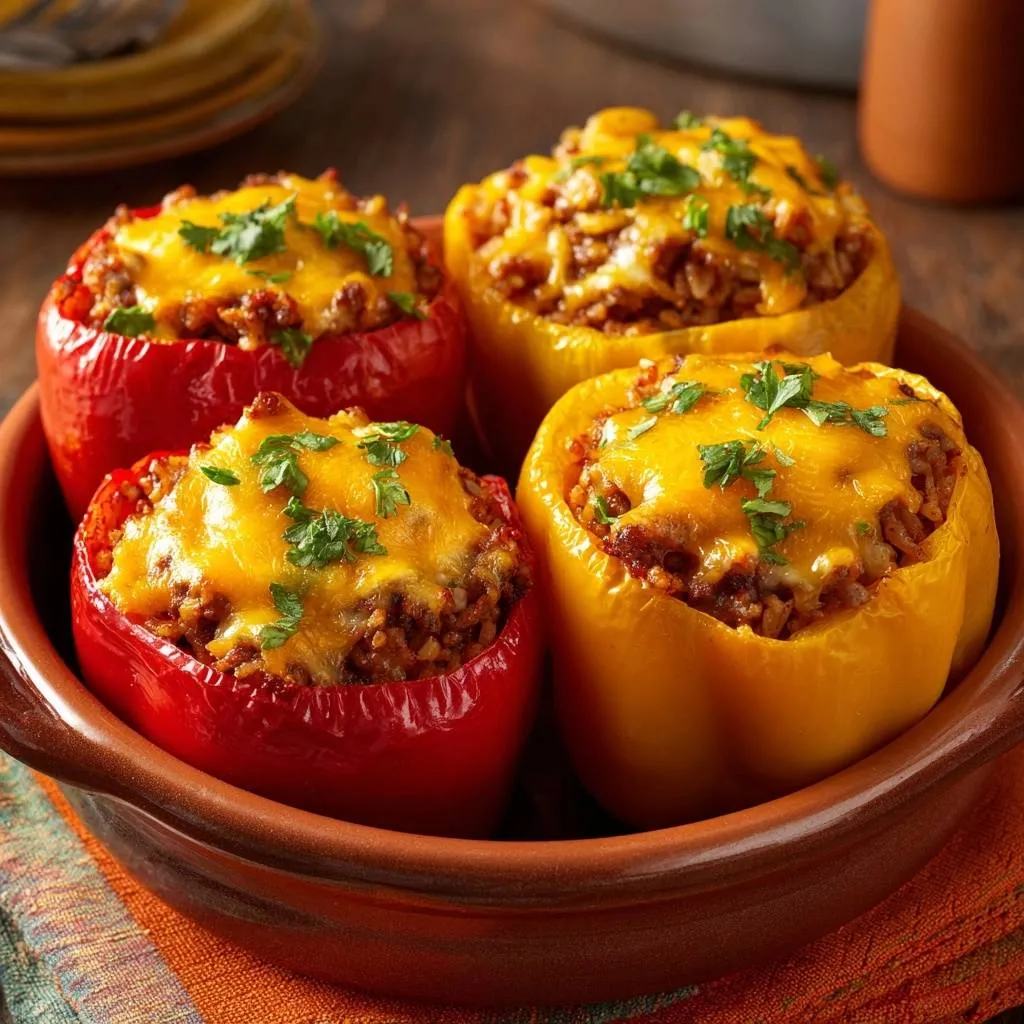
Picture this: one side dry-prepped with crisp edges and bold taste, the other watery and flat. The firm version wins every time for cheesy beef stuffed peppers. Therefore, moisture control transforms the dish.
Key Ingredients for Firm Cheesy Beef Stuffed Peppers
Selecting Vibrant Bell Peppers
Grab large red, yellow, or orange bell peppers for cheesy beef stuffed peppers. Their thicker walls hold about 1 cup of filling each without splitting. Look for firm, glossy skins and heavy weight, signs of ripeness.
These colors taste sweeter and milder than green, which can turn bitter. They’re best in summer when plump and cheap. Firstly, four big ones feed four hungry folks perfectly.
Pro tip: avoid skinny peppers; they tip over when stuffed. This choice ensures stability and max flavor payoff.
Ground Beef and Cheese Ratios
One pound of ground beef pairs with 1 cup shredded cheddar for cheesy beef stuffed peppers. This balance adds richness without grease overload. Grass-fed beef has less fat, so it stays leaner post-drain.
Sharp cheddar melts smoothly, unlike mild which gets stringy. The half-cup cooked rice soaks up tomato sauce juices. In addition, it bulks the filling without sogginess.
Spices and Aromatics Breakdown
Cumin and paprika, 1 teaspoon each, warm up the beef in cheesy beef stuffed peppers. They synergize with diced onion and minced garlic for smoky depth. Use smoked paprika if you want extra char vibe.
Tomato sauce adds viscosity, not watery thinness; pick a thick brand. Salt and pepper to taste, but go easy since cheese brings saltiness. Firstly, sauté aromatics fully for base flavor.
Substitution: oregano for paprika if you’re out. Keeps the profile bold.
Microwave Trick Drains Pepper Moisture
Science of Steaming Out Water
The microwave’s high heat vaporizes water trapped in pepper cells in just 5 minutes. Place them cut-side down on paper towels to wick away steam. This preps perfect cavities for cheesy beef stuffed peppers.
Upside-down positioning lets gravity pull moisture out efficiently. On high power, it works fast; dial to 80% if yours runs hot to avoid toughness. Safety first: use microwave-safe plates.
Therefore, peppers lose 20-30% weight in water. You’ll smell a fresh, sweet aroma when done. Game-changer for texture.
Post-Microwave Drying Technique
Let peppers sit 2 minutes to release steam fully; it prevents burns. Pat insides and outsides dry with fresh paper towels. Press gently to test; no moisture should transfer.
This step ensures zero water dilutes your filling. In addition, it takes under 5 minutes total. Dry peppers mean firm cheesy beef stuffed peppers every time.
For more ideas on keeping fillings firm, check out loaded beef taco bake solutions.
Cooking Beef Filling Perfectly
Browning Beef with Onions
Over medium heat, cook 1 lb ground beef with diced onion and minced garlic for 8 minutes. Break it up as it browns; you’ll see color shift and hear sizzle. Drain fat twice for non-greasy cheesy beef stuffed peppers.
For more ideas on building a savory beef base, check out this cheesy sweet potato and beef bake.
The Maillard reaction builds deep flavor from those browned bits. Don’t rush on high heat, or it steams instead. Medium keeps it juicy yet firm.
Pro tip: taste the onions for softness before adding rice. They should smell sweet and caramelized.
Mixing Rice and Seasonings
Stir in 1/2 cup cold cooked rice; it absorbs sauce without clumping. Add tomato sauce, cumin, paprika, salt, and pepper next. Mix in 1/2 cup cheese last for even melt.
Taste for seasoning; adjust salt since rice soaks it up. This order prevents mush and builds layers. Therefore, filling stays cohesive in cheesy beef stuffed peppers.
Stuffing and Baking Cheesy Beef Stuffed Peppers
Filling Peppers Upright
Spoon beef mixture firmly into dried peppers, packing to the top without overflow. Stand them upright in a baking dish; use toothpicks if wobbly. Sprinkle remaining 1/2 cup cheese thickly on top.
This setup maximizes filling per pepper. In addition, cheese forms a golden crust. Perfect for four peppers from 1 lb beef.
Oven Setup with Steam Control
Preheat to 375F. Add 1/4 cup water to dish bottom; it steams peppers tender without sogginess. Bake 25-30 minutes until cheese bubbles and peppers yield to a fork.
Check beef hits 165F internally for safety. Crisp exteriors meet melty insides. Garnish with chopped parsley for fresh pop.
Oh man, that first bite bursts with cheesy goodness!
Avoiding Soggy Cheesy Beef Stuffed Peppers Mistakes
Skipping the Dry Step
Without microwaving, peppers release water mid-bake, flooding filling. Side-by-side, dry-prepped ones stay firm while skips turn mushy. Most home cooks miss this, per common feedback.
Fix a watery batch by broiling open-faced to evaporate. However, prevention beats rescue. Always dry first for winning cheesy beef stuffed peppers.
Overstuffing and Cheese Excess
Each pepper holds 1 cup max; cram more, and it spills watery cheese. Stick to recipe ratios for balance. Too much cheese seeps out greasy.
Therefore, divide evenly from 1 lb beef. Keeps cheesy beef stuffed peppers intact and pretty.
Flavor Twists on Cheesy Beef Stuffed Peppers
Spicy or Mexican-Inspired Swaps
For heat, add diced jalapeños to beef sauté. Swap paprika for chipotle powder, 1 tsp. Use quinoa instead of rice; it adds nutty bite.
Mexican twist: cilantro garnish over parsley, plus black beans in filling. Core cheesy beef stuffed peppers stay, just zested up. Another: oregano and extra garlic for Italian vibe.
These keep prep simple while boosting wow factor.
Vegetarian Beef Alternatives
Swap beef for cooked lentils or plant-based crumbles. Use 1 lb equivalent; sauté same way but add 1 tbsp oil. Cut bake time by 5 minutes since less dense.
Nutrition-wise, lentils drop fat but match protein. Keeps cheesy stuffed peppers hearty. Tastes close to original.
Make-Ahead Guide for Cheesy Beef Stuffed Peppers
Prep and Freezing Steps
Dry peppers ahead; store filling separately up to 3 days in fridge. For freezing, assemble unfilled peppers on tray, freeze solid, then bag. Filling freezes 3 months solo.
Thaw overnight, stuff, and bake fresh. Double recipe for 8 peppers easily. In addition, this saves weeknight stress.
Reheating Without Mush
Oven at 350F with foil tent revives crispness best; 15-20 minutes. Microwave works but covers to steam. Airtight containers keep them 4 days fridge.
Avoid sogginess by not overcrowding. Perfect leftovers.
Pairing Sides with Cheesy Beef Stuffed Peppers
Crisp Salads and Veggies
Cucumber-tomato salad cuts richness: slice cukes, tomatoes, red onion, dress with vinegar and oil. Serves 4. Roasted zucchini spears add crunch; toss halves in oil, salt, bake alongside 20 minutes.
Complementary Dishes
Round out your meal with these fresh and flavorful additions.
- For a bright contrast to your cheesy stuffed peppers, try the Harvest Kale and Apple Salad featuring crisp apples.
- If you enjoy the combination of fruit and greens, the Harvest Apple and Walnut Salad offers a similar satisfying crunch.
Acidic bites balance beef heaviness. Therefore, lighter meal overall.
Simple Starch Complements
Garlic bread soaks up juices; or couscous fluffs quick. Portion 1 pepper plus 1/2 cup side per person. Keeps dinner satisfying.
Cheesy Beef Stuffed Peppers FAQ
Can I Use Raw Rice?
No, raw rice stays crunchy and steals moisture from peppers, ruining texture in cheesy beef stuffed peppers. Always precook 1/2 cup; it absorbs sauce perfectly. Quick hack: microwave 1/4 cup dry rice with 1/2 cup water for 5 minutes, fluff, and cool. Saves time without compromise.
How to Fix Soggy Peppers?
If soggy, broil open-faced 3-5 minutes to evaporate water and crisp cheese. For bad cases, scoop filling, remicrowave empty peppers dry, restuff, and rebake 10 minutes. Prevention recap: always microwave-dry first. Keeps future batches firm and flavorful.
Substitute Ground Turkey?
Yes, use 1 lb ground turkey; it’s leaner so add 1 tbsp oil when browning. Bake same time, but check 165F. Flavor shifts milder, so boost cumin to 1.5 tsp. Works great in cheesy beef stuffed peppers for lighter option.
Make It Low-Carb?
Swap rice for riced cauliflower, 1/2 cup cooked; sauté dry first to remove water. Drops net carbs to 8g per pepper (total 12g carbs, 4g fiber). Beef, cheese, veggies keep it filling. Full nutrition: 350 cal, 25g protein, 20g fat per serving.
Storage Time After Baking?
Fridge in airtight container up to 4 days; freezes well 2 months in single layer bags. Reheat to 165F internal. USDA guidelines confirm safety; avoid room temp over 2 hours to prevent bacteria.
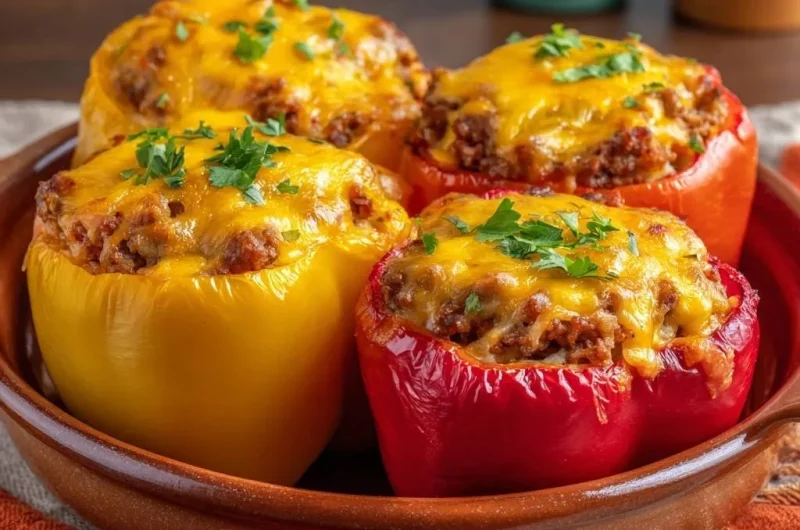
Cheesy Beef Stuffed Peppers
Course: Main CourseCuisine: AmericanDifficulty: easy4
servings20
minutes35
minutes450
kcal55
MinutesStuffed peppers always turn out watery? This foolproof microwave trick drains excess moisture from the peppers first, so your beef filling stays flavorful and firm, never mushy. Perfect weeknight win!
Ingredients
4 large bell peppers (red, yellow, orange)
1 lb ground beef
1 cup shredded cheddar cheese, divided
1/2 cup cooked rice
1/2 cup tomato sauce
1 small onion, diced
2 garlic cloves, minced
1 tsp cumin
1 tsp paprika
Salt and pepper to taste
Fresh parsley, chopped for garnish
Directions
- Preheat oven to 375F. Slice tops off peppers, remove seeds and membranes. Rinse insides.
- Heres the no-soggy secret: Place empty peppers cut-side down on a microwave-safe plate lined with paper towels. Microwave on high for 5 minutes. This steams out hidden moisture. Let sit 2 minutes to release steam, then pat insides and outsides completely dry with paper towels. Moisture gone, filling stays perfect!
- In a skillet over medium heat, cook ground beef, onion, and garlic until beef is browned, about 8 minutes. Drain fat. Stir in rice, tomato sauce, cumin, paprika, salt, and pepper. Mix in 1/2 cup cheese. Cook until no pink remains and it reaches 160°F (71°C).
- Stuff dried peppers with beef mixture. Place upright in a baking dish. Top with remaining cheese.
- Add 1/4 cup water to dish bottom for steaming without sogginess. Bake 25-30 minutes until peppers are tender and cheese bubbles. Garnish with parsley. Serve hot!
Notes
- The microwave step is key to preventing soggy filling—don’t skip it! Use any color bell peppers for variety.