For years, I struggled with the elusive crack-free cheesecake, watching my beautiful creations sink or split after all my effort. But after countless attempts, I finally unlocked the secrets to a truly flawless and Creamy Kiwi Cheesecake that boasts a silky smooth texture every time.
This recipe isn’t just about ingredients; it’s about mastering simple, expert techniques that guarantee dessert perfection, transforming a notoriously tricky dessert into an effortless triumph for any home baker.
Why THIS Creamy Kiwi Cheesecake Will Become Your Signature Dessert
Mastering the “No Crack” Secret: Our Proven Method
The frustration of a cracked cheesecake top is a thing of the past with this recipe. We prioritize a meticulous, gentle approach to baking and cooling that virtually eliminates the dreaded cracks, ensuring a stunning presentation every time.
Our method focuses on gradual temperature changes and gentle handling, which are the true keys to a perfectly smooth surface. You’ll achieve that bakery-quality finish with confidence.
The Unbeatable Texture: Dreamy Smoothness, Never Dense
Forget dry or overly dense cheesecakes. This recipe delivers an incredibly creamy, luxurious texture that melts in your mouth.
For more ways to achieve that smooth texture, check out the creamy pumpkin swirl cheesecake.
The secret lies in bringing ingredients to room temperature and precise mixing, preventing over-aeration that can lead to a crumbly or tough result. Each bite is pure, velvety bliss.
For perfectly formed cheesecake, consider our red velvet cheesecake stuffed cookies.
A Fresh Twist: Vibrant Kiwi and Healthy Chia Seeds
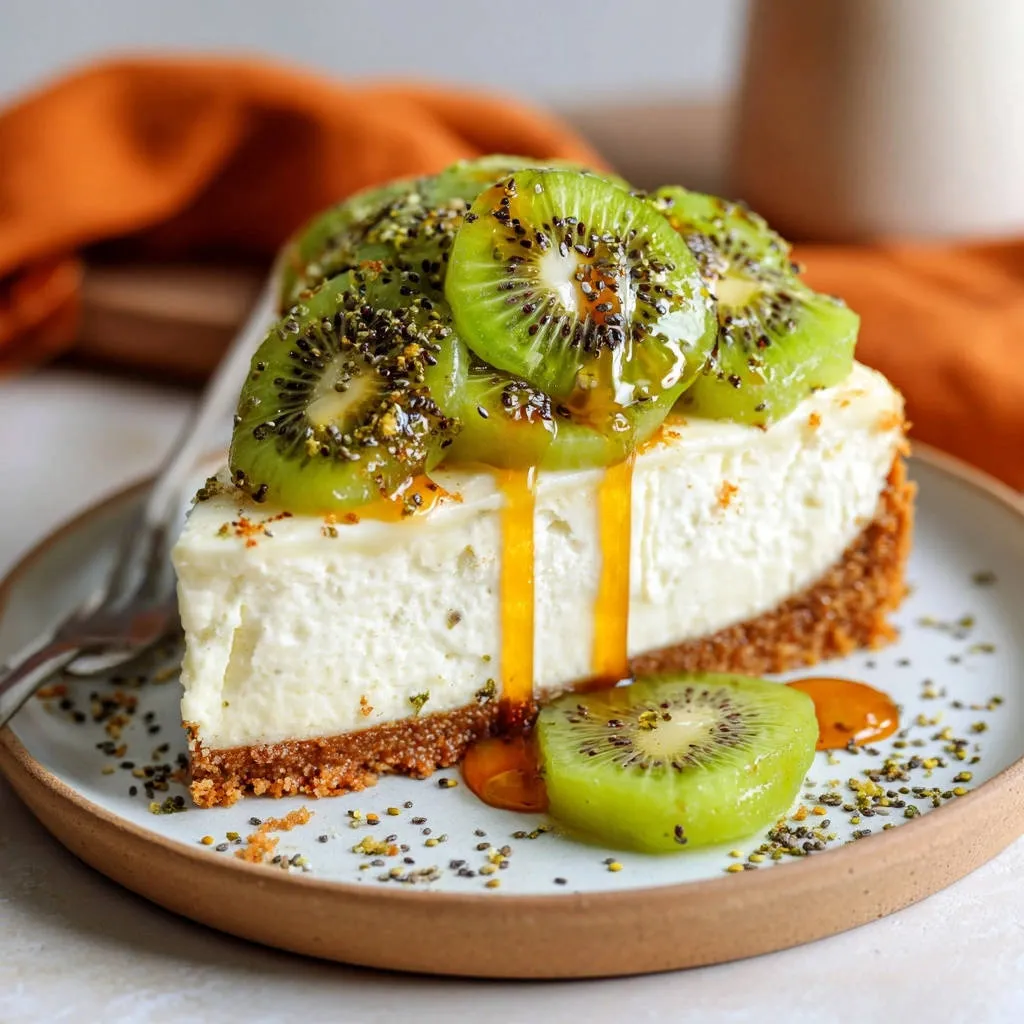
While the creamy base is a classic, the vibrant kiwi topping elevates this dessert. Its bright, tangy flavor perfectly complements the rich cheesecake, offering a refreshing contrast.
The addition of chia seeds provides a subtle texture and a healthy boost, creating visual interest and making this a sophisticated treat that feels indulgent yet fresh.
The Essential Ingredients for Your Stellar Creamy Kiwi Cheesecake
For the Irresistible Graham Cracker Crust
Graham Cracker Crumbs: The classic base for a sturdy, flavorful crust that holds its shape beautifully.
Granulated Sugar: Adds a touch of sweetness, balancing the buttery notes of the crust.
Unsalted Butter, Melted: The essential binding agent, creating a perfectly crumbly yet firm foundation for your cheesecake.
Creating the Dreamy Cheesecake Filling: Room Temp is Key!
Cream Cheese, Softened: The heart of your cheesecake; true room temperature ensures a lump-free, silky smooth batter. This is non-negotiable for a perfect Creamy Kiwi Cheesecake.
Granulated Sugar: Sweetens the rich cream cheese mixture, providing balance and depth.
Vanilla Extract: Infuses the cheesecake with a warm, aromatic depth of flavor that enhances every bite.
Sour Cream, at Room Temperature: Contributes significantly to the signature tangy flavor and incredibly creamy texture, preventing dryness.
Large Eggs, at Room Temperature: Essential for the cheesecake’s structure and richness. Room temperature eggs prevent curdling and help achieve a perfectly homogenous batter.
The Zesty, Fresh Kiwi Topping Elevates Every Slice
Ripe Kiwi, Peeled and Sliced: Provides a beautiful vibrant green color and a bright, tangy flavor that cuts through the richness.
Honey or Maple Syrup: A natural sweetener that adds a lovely glossy finish and perfectly complements the kiwi’s tartness.
Chia Seeds: Adds a subtle, pleasant texture and a healthy boost. They also create attractive visual interest against the fruit.
Tools of the Trade: Equipping Your Cheesecake Success
9-inch Springform Pan: Crucial for easy release of your delicate cheesecake and maintaining its elegant shape.
Heavy-Duty Aluminum Foil: Essential for securely wrapping the springform pan to prevent any water bath leakage, protecting your cheesecake.
Electric Mixer (Handheld or Stand): Ensures a wonderfully smooth, lump-free batter without the risk of overmixing, which is vital.
Large Roasting Pan: Used for the water bath, this provides gentle, even heat distribution during baking, promoting that silky smooth texture.
Wire Rack: Necessary for proper air circulation and gradual cooling after baking, preventing a soggy bottom and ensuring even setting.
Your Step-by-Step Journey to Creamy Kiwi Cheesecake Perfection
- Prepping Your Pan and Oven:
Preheat your oven to 325°F (160°C). Securely wrap the bottom and sides of your 9-inch springform pan with a double layer of heavy-duty aluminum foil. This crucial step prevents water from seeping into the crust and filling during the water bath.
- Crafting the Perfect Golden Crust Base:
In a medium bowl, combine the graham cracker crumbs and 1/4 cup granulated sugar. Pour in the melted butter and mix until all the crumbs are thoroughly moistened and resemble wet sand. Press this mixture firmly and evenly into the bottom of the prepared springform pan.
Bake for 10 minutes to set the crust, then remove from the oven and set aside to cool slightly while you prepare your filling. This pre-baking prevents a soggy crust.
- The Secret to Silky Smooth Batter: Room Temperature Ingredients:
Ensure your cream cheese, eggs, and sour cream are all at true room temperature. This is absolutely critical for a smooth, lump-free batter, as cold ingredients will resist blending evenly and lead to overmixing.
Plan ahead by taking these ingredients out of the refrigerator at least 1-2 hours before you start baking.
- Beating the Cream Cheese to Dreamy Smoothness:
In a large bowl, use an electric mixer on medium-low speed to beat the softened cream cheese until it is completely smooth and creamy, about 2-3 minutes. This initial beating breaks down any lumps before other ingredients are added.
Make sure to scrape down the sides of the bowl frequently to ensure no lumps remain stuck to the edges.
- Gradual Sweetening and Flavor Infusion:
Gradually add the 1 1/4 cups granulated sugar to the cream cheese mixture, beating on low speed until just combined. Overmixing here can also incorporate too much air.
Mix in the vanilla extract and sour cream until the mixture is uniform and perfectly smooth. The sour cream adds an essential tang and luscious richness.
- The Gentle Egg Incorporation Trick (No Cracks!):
Add the eggs one at a time, mixing on the absolute lowest speed just until each egg is fully incorporated into the batter. This is perhaps the most vital step for a crack-free cheesecake.
It is critical not to overmix after adding the eggs, as this incorporates too much air, which expands during baking and can cause your cheesecake to crack and sink as it cools. The batter should be smooth but not overly airy.
- Pouring the Filling:
Carefully pour the prepared cheesecake filling over the cooled crust in the springform pan. Use a spatula to gently smooth the top, ensuring an even layer.
- Preparing the Essential Water Bath:
Place the foil-wrapped springform pan into a larger roasting pan. Pour hot water into the roasting pan until it reaches halfway up the sides of the springform pan. This water bath ensures even, gentle baking, preventing the edges from overbaking.
- Baking for Flawless Results:
Carefully transfer the roasting pan with the cheesecake to the preheated oven. Bake for 60-70 minutes, or until the edges are set but the center still has a slight, gentle jiggle when the pan is gently shaken. This jiggle indicates it’s still moist but cooked.
Resist the urge to open the oven door unnecessarily during baking, as sudden temperature drops can also cause cracks. For more cheesecake baking tips, explore our guide to perfect cheesecake.
- The Critical Cooling Process (Patience is Key!):
Once baked, turn off the oven, prop the oven door open slightly with a wooden spoon, and let the cheesecake cool inside the oven for 1 hour. This gradual cooling prevents sudden temperature changes that are a major cause of cracking.
- Final Cooling and Chilling for Perfection:
Remove the cheesecake from the oven and water bath. Carefully unwrap the foil from the springform pan and place the cheesecake on a wire rack to cool completely at room temperature, which typically takes about 2-3 hours.
Once fully cooled, cover the cheesecake with plastic wrap and refrigerate for at least 6 hours, or preferably overnight, before serving. This ensures it sets properly and has the perfect dense, creamy texture.
- Assembling Your Vibrant Kiwi Topping:
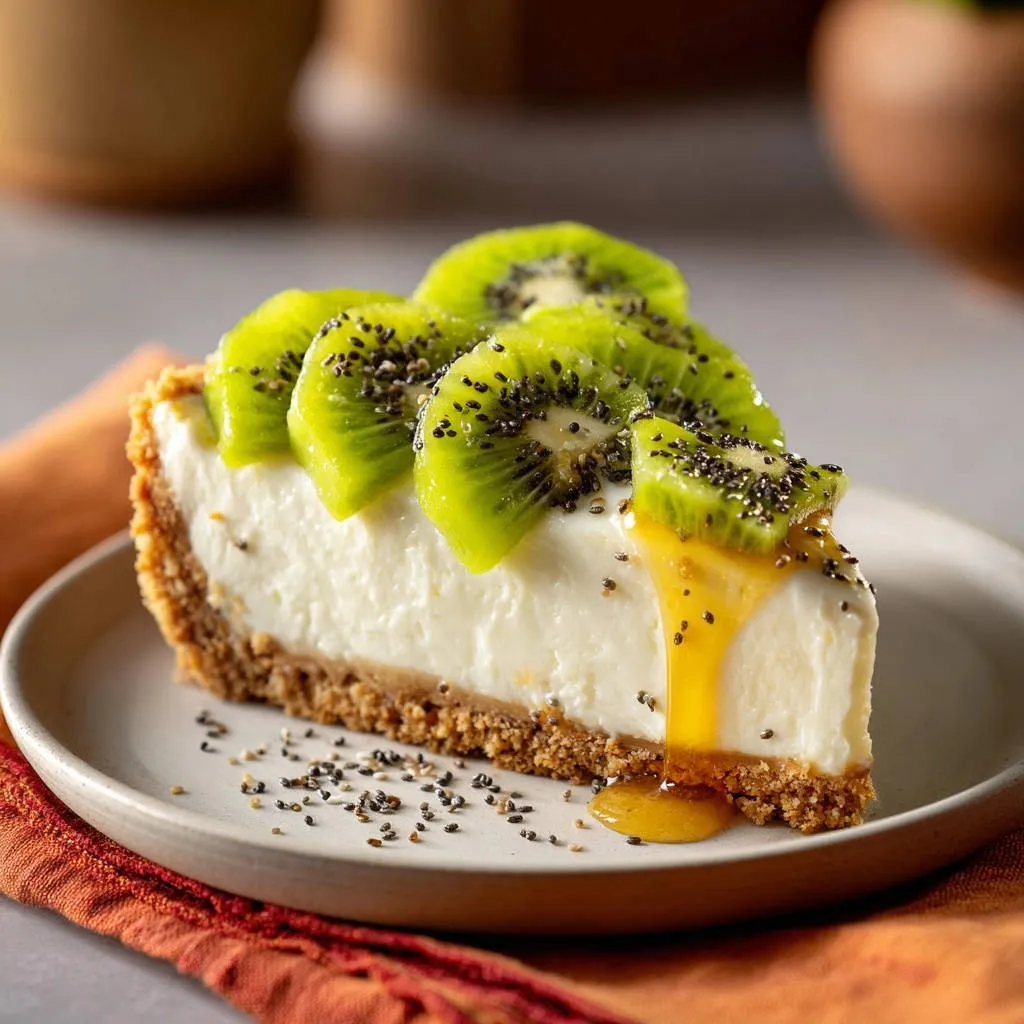
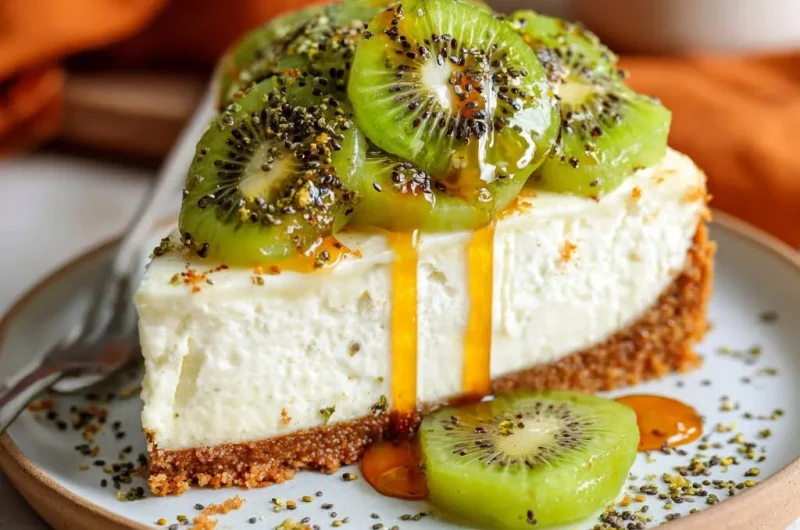
Before serving, carefully remove the cheesecake from the springform pan. Arrange the sliced kiwi artistically on top for a stunning presentation. Drizzle generously with honey or maple syrup and sprinkle with chia seeds.
Serve chilled and enjoy your perfectly smooth Creamy Kiwi Cheesecake! This vibrant fresh kiwi dessert is truly a showstopper.
Complementary dishes
To round out your meal, consider these savory options that pair well with the creamy kiwi cheesecake.
- For a hearty start, try the loaded sausage gravy tater tot bowl, offering a comforting contrast to the sweet dessert.
- If you’re in the mood for another satisfying savory item, the savory beef and cheddar breakfast pie provides a robust flavor that complements the fruitiness of the cheesecake.
Chef’s Secrets: Elevate Your Creamy Kiwi Cheesecake Game
Embrace Room Temperature: This single step is the most crucial for a lump-free, smooth batter. Cold ingredients fight against smooth mixing and can lead to overbeating, impacting texture.
Never Overmix the Eggs: Once eggs are added, mix on the absolute lowest speed just until combined. Overmixing incorporates too much air, which expands during baking and leads to cracks and sinking.
Master the Water Bath: A water bath provides a moist, even heat environment, preventing the edges from baking too quickly and cracking. Always ensure your foil wrap is leak-proof!
Patience in Cooling is a Virtue: The gradual cooling in the oven prevents a sudden temperature shock that causes cheesecakes to crack and deflate. Resist the urge to pull it out early.
Chill Time for Supreme Texture: Don’t rush the refrigeration! A minimum of 6 hours (preferably overnight) allows the cheesecake to fully set, achieving that perfect dense, creamy texture and easy slicing.
Artistic Kiwi Arrangement: For a stunning presentation, arrange kiwi slices in concentric circles or fan patterns. The visual appeal genuinely enhances the eating experience.
Common Cheesecake Hurdles & How to Solve Them
Why Did My Cheesecake Crack?
Cracking is most often caused by sudden temperature changes during cooling, overmixing the batter (especially after adding eggs), or baking at too high a temperature. Our recipe tackles this with a gentle, gradual oven cooling process and careful mixing instructions.
Ensuring your springform pan is well-wrapped for the water bath also helps create a stable, moist baking environment which reduces stress on the cheesecake as it bakes and cools.
My Cheesecake Sank in the Middle!
Sinking usually indicates that too much air was incorporated into the batter, particularly after adding eggs, or that the cheesecake was underbaked. Ensure you follow the low-speed mixing for eggs and bake until the edges are set with a slight jiggle in the center.
The internal cooling in the oven also helps the cheesecake settle gently without collapsing. Avoid moving the cheesecake too much right after baking.
Help! My Filling is Lumpy!
Lumpy filling is almost always due to using cold cream cheese or other dairy ingredients. Always ensure all your filling ingredients (cream cheese, eggs, sour cream) are at true room temperature before you begin mixing for a perfectly smooth batter.
Take your ingredients out at least an hour or two before you start, and beat the cream cheese thoroughly on its own before adding other ingredients.
Serving, Storing & Making Ahead: Enjoying Your Cheesecake Longer
The Art of the Perfect Slice & Serving Suggestions
For pristine slices, dip a sharp, thin-bladed knife in hot water and wipe it clean between each cut. This creates clean lines and prevents the cheesecake from sticking.
Serve your Creamy Kiwi Cheesecake chilled, perhaps alongside a light dollop of freshly whipped cream, a sprig of fresh mint, or a delicate lemon zest for added elegance and flavor dimension. You could also try pairing it with a slice of a perfect easy strawberry crumble cake for a delightful fruit dessert spread.
Storing Your Creamy Kiwi Cheesecake for Freshness
Store leftover cheesecake, covered tightly with plastic wrap or in an airtight container, in the refrigerator for up to 3-4 days. For optimal freshness and appearance, it’s best to add the kiwi topping just before serving to prevent it from becoming watery or affecting the cheesecake’s surface.
Can I Make This Cheesecake Ahead of Time?
Absolutely! This Creamy Kiwi Cheesecake is an excellent make-ahead dessert. You can prepare and bake the cheesecake up to 2-3 days in advance and keep it properly refrigerated, tightly covered.
Just remember to add the fresh kiwi topping, honey/maple syrup, and chia seeds just before you plan to serve for the best appearance and texture. This makes it perfect for entertaining.
Your Top Creamy Kiwi Cheesecake Questions Answered
Can I use a different fruit for the topping?
Yes, while kiwi offers a unique tartness and beautiful color, you can certainly substitute other fruits like fresh berries (strawberries, blueberries, raspberries) or sliced peaches. Choose fruits that complement the richness of the cheesecake and are in season for the best flavor.
What if I don’t have a springform pan?
While a springform pan is ideal for easy release and presentation, you can bake this cheesecake in a regular 9-inch round cake pan. Just be sure to line it with parchment paper, leaving a generous overhang on the sides, to help you lift the cheesecake out once completely cooled.
Is there a gluten-free crust option?
Yes! To make this Creamy Kiwi Cheesecake gluten-free, simply substitute the graham cracker crumbs with gluten-free graham cracker crumbs or crushed gluten-free digestive biscuits. The rest of the cheesecake filling and topping ingredients are naturally gluten-free.
How do I know when the cheesecake is perfectly baked?
The cheesecake is done when the edges are set and slightly puffed, but the center (about a 2-3 inch diameter) still has a slight, gentle jiggle when the pan is lightly shaken. It will continue to firm up considerably as it cools and chills, achieving that perfect dessert perfection.
Ready to Create Your Own Flawless Creamy Kiwi Cheesecake?
Now that you’re armed with the secrets to a perfectly smooth, crack-free Creamy Kiwi Cheesecake, it’s time to preheat your oven and impress your guests (or just yourself!) with this stunning dessert. This recipe promises an ideal creamy texture and vibrant flavors that will make it an instant favorite in your kitchen.
Gather your ingredients, follow our expert tips, and get ready for a truly spectacular homemade cheesecake experience. Don’t forget to share your creations and tag us on social media!
Kiwi Cheesecake
Course: DessertCuisine: AmericanDifficulty: medium12
servings30
minutes1
hour15
minutes450
kcal720
minutesAchieve the ideal creamy texture without the usual heartbreak of cracked tops or sunken middles. This recipe reveals the secrets to a perfectly smooth cheesecake every single time, featuring a vibrant kiwi topping. Get ready for a dessert that looks as good as it tastes!
Ingredients
For the Crust:
1 1/2 cups graham cracker crumbs
1/4 cup granulated sugar
6 tablespoons unsalted butter, melted
For the Cheesecake Filling:
3 (8-ounce) packages cream cheese, softened
1 1/4 cups granulated sugar
1 teaspoon vanilla extract
1/4 cup sour cream, at room temperature
3 large eggs, at room temperature
For the Topping:
3-4 ripe kiwi, peeled and sliced
2 tablespoons honey or maple syrup
1 tablespoon chia seeds
Directions
- Preheat your oven to 325F (160C). Prepare a 9-inch springform pan by securely wrapping the bottom and sides with a double layer of heavy-duty aluminum foil. This is a crucial step for the water bath.
- For the crust: In a medium bowl, combine the graham cracker crumbs and 1/4 cup granulated sugar. Pour in the melted butter and mix until the crumbs are thoroughly moistened. Press the mixture firmly and evenly into the bottom of the prepared springform pan. Bake for 10 minutes, then remove from the oven and let cool slightly while you prepare the filling.
- For the filling: Ensure your cream cheese, eggs, and sour cream are all at room temperature. This is the absolute key to achieving a smooth, lump-free batter without overmixing.
- In a large bowl, using an electric mixer on medium-low speed, beat the softened cream cheese until it is completely smooth and creamy, about 2-3 minutes. Scrape down the sides of the bowl to ensure no lumps remain.
- Gradually add the 1 1/4 cups granulated sugar to the cream cheese, beating on low speed until just combined. Mix in the vanilla extract and sour cream until the mixture is smooth.
- Here’s the essential trick for preventing cracks and sinking: Add the eggs one at a time, mixing on the lowest speed just until each egg is fully incorporated into the batter. It is critical not to overmix after adding the eggs, as this incorporates too much air, which expands during baking and can cause your cheesecake to crack and sink as it cools. The batter should be smooth but not overly airy.
- Pour the prepared cheesecake filling over the cooled crust in the springform pan.
- Prepare the water bath: Carefully place the foil-wrapped springform pan into a larger roasting pan. Pour hot water into the roasting pan until it reaches halfway up the sides of the springform pan.
- Carefully transfer the roasting pan with the cheesecake to the preheated oven. Bake for 60-70 minutes, or until the edges are set but the center still has a slight jiggle when gently shaken. Resist the urge to open the oven door unnecessarily during baking.
- The cooling process is vital for preventing cracks: Once baked, turn off the oven, prop the oven door open slightly with a wooden spoon, and let the cheesecake cool inside the oven for 1 hour. This gradual cooling prevents sudden temperature changes that are a major cause of cracking.
- Remove the cheesecake from the oven and water bath. Carefully unwrap the foil from the springform pan and place the cheesecake on a wire rack to cool completely at room temperature, about 2-3 hours.
- Once fully cooled, cover the cheesecake with plastic wrap and refrigerate for at least 6 hours, or preferably overnight, before serving. This ensures it sets properly and has the perfect dense, creamy texture.
- For the topping: Before serving, carefully remove the cheesecake from the springform pan. Arrange the sliced kiwi artistically on top. Drizzle generously with honey or maple syrup and sprinkle with chia seeds. Serve chilled and enjoy your perfectly smooth cheesecake!
Notes
- Ensure all dairy ingredients (cream cheese, eggs, sour cream) are at room temperature and avoid overmixing the batter, especially after adding eggs, to prevent cracks.