For years, the thought of making a truly perfect oven roast beef at home felt like an intimidating challenge, often resulting in meat drier than I’d hoped. But through countless experiments, I finally cracked the code to ensure it comes out beautifully juicy and flavorful every single time. This recipe is your reliable guide to achieving that restaurant-quality tenderness and taste right in your own kitchen.
Beyond Basic: Why This Roast Beef Recipe Works Every Single Time
This isn’t just another roast beef recipe; it’s a proven method designed for consistent success. We focus on techniques that elevate flavor and guarantee a succulent outcome, turning intimidation into culinary confidence.
Achieving Unmatched Juiciness and Tenderness
The secret to avoiding dry roast beef lies in meticulous temperature control and an absolutely non-negotiable resting period. Our guide teaches you precisely when to remove the roast, letting residual heat work its magic for ultimate juiciness.
This allows the meat’s internal juices to redistribute evenly, ensuring every slice is tender and moist.
Complementary Dishes
Round out your roast beef dinner with these dishes that pair well with flavorful beef.
- For a comforting potato choice, try this creamy garlic mashed potatoes and gravy recipe, featuring rich garlic notes that complement the roast.
- Enjoy some satisfyingly crisp bread with your meal by making this garlic bread, a classic accompaniment that holds its texture.
The Simplicity of Restaurant-Quality Results at Home
Many believe impressive dishes require complex steps, but this recipe proves otherwise. Simple, deliberate actions like proper searing and precise temperature monitoring lead to truly impressive results without unnecessary fuss.
It’s about understanding the ‘why’ behind each step, making fine dining accessible to any home cook.
Flavor That Sings: Aromatic Herb & Spice Infusion
Our carefully selected blend of dried rosemary, thyme, garlic powder, salt, and pepper forms a robust aromatic rub. This mixture, combined with a crucial searing step, creates layers of deep, rich flavor.
The sear locks in those incredible flavors, contributing significantly to the roast’s overall appeal and delicious crust.
Gather Your Essentials: Ingredients for Your Perfect Oven Roast Beef
High-quality ingredients are the foundation of any great dish. Here’s what you’ll need, along with insights into selection and purpose.
Choosing the Right Cut for a Tender Result
The beef cut is paramount for a tender, flavorful roast. We recommend leaner, tougher cuts that transform beautifully with slow roasting.
Sirloin Tip Roast: Offers good flavor and tenderness when cooked correctly.
Bottom Round Roast: A leaner, more economical choice that becomes tender with proper preparation.
Eye of Round Roast: Very lean and uniform, ideal for even cooking and slicing.
Look for cuts with good marbling if possible, even in leaner options, as this adds to flavor and moisture. Ensure the meat is fresh with a vibrant red color.
The Aromatic Rub: Herbs & Spices That Define Flavor
This powerful combination infuses the beef with classic, savory notes. Each ingredient plays a crucial role in the flavor profile.
For an even deeper dive into robust herb flavors, explore garlic herb crusted prime rib.
Dried Rosemary: Provides a piney, peppery aroma that complements beef beautifully.
Dried Thyme: Adds an earthy, slightly minty undertone, enhancing the overall herb blend.
Garlic Powder: Delivers a foundational savory depth without the risk of burning fresh garlic during searing.
Salt & Black Pepper: Essential for seasoning, they bring out the natural flavors of the beef and balance the herbs.
High-quality olive oil facilitates the searing process and helps the seasoning adhere to the meat.
Key Items for That Velvety Pan Gravy
A rich, savory gravy made from the pan drippings elevates your perfect oven roast beef to another level. These ingredients create its luscious texture and depth.
Unsalted Butter: Forms the base of the roux, adding richness without excess salt.
All-Purpose Flour: Acts as a thickening agent for the gravy, creating a smooth consistency.
Low-Sodium Beef Broth: Provides the liquid base, allowing you to control the final seasoning. The low-sodium option prevents an overly salty gravy, especially after incorporating pan drippings.
Essential Tools for Your Roast Beef Success
Having the right kitchen tools makes all the difference in achieving perfect results. These items are indispensable for your perfect oven roast beef.
The Indispensable Meat Thermometer
A reliable oven-safe meat thermometer is your absolute best friend when roasting. It eliminates guesswork, ensuring your roast reaches the exact desired doneness every single time.
This precision prevents overcooking, which is the primary cause of dry roast beef.
Your Searing Partner: An Oven-Safe Skillet or Dutch Oven
Using a heavy-bottomed, oven-safe skillet or Dutch oven is a game-changer. It allows you to sear the beef on the stovetop and then transfer it directly to the oven.
This means fewer dishes and, crucially, retaining all those flavorful browned bits (fond) in one pan for an exceptional gravy.
Other Helpful Kitchen Companions
A few other items will streamline your cooking process.
Cutting Board: Essential for prepping and, more importantly, for resting and slicing your cooked roast.
Aluminum Foil: Used to loosely tent the roast during its critical resting period, keeping it warm while juices redistribute.
Whisk: Crucial for making a lump-free, silky-smooth gravy.
Paper Towels: Absolutely necessary for thoroughly drying the roast before seasoning and searing.
Mastering the Method: A Step-by-Step Guide to Perfect Oven Roast Beef
- Prep for Perfection: Room Temperature & Patting Dry
Take the beef roast out of the refrigerator at least one hour before cooking. This crucial step allows the roast to come closer to room temperature, ensuring a more even cook from edge to center and preventing a cold interior from slowing down cooking.
Pat the roast completely dry with paper towels; this is absolutely crucial for achieving a beautiful, flavorful sear. Moisture on the surface will steam the meat instead of browning it.
- Crafting the Flavorful Rub
In a small bowl, combine the dried rosemary, dried thyme, garlic powder, salt, and black pepper. Mix these seasonings thoroughly to ensure an even distribution of flavor.
Rub this herb and spice mixture generously all over the beef roast, pressing it firmly into the surface. Don’t be shy; a good coating ensures every bite is seasoned.
- The Golden Sear: Locking in Flavor and Texture
Heat the olive oil in a large, heavy-bottomed, oven-safe skillet or Dutch oven over medium-high heat until it shimmers. The pan should be very hot to achieve an instant sear.
Carefully place the seasoned roast into the hot pan. Sear on all sides until a deep brown crust forms, about 3-4 minutes per side. This step is key for building complex flavors through the Maillard reaction and creating an appealing exterior.
- Roasting to Your Desired Doneness (Trust Your Thermometer!)
Preheat your oven to 325 degrees F (160 degrees C). Transfer the seared roast in its oven-safe skillet directly to the preheated oven.
Insert an oven-safe meat thermometer into the thickest part of the roast, being careful to avoid any bone, which can give a false reading. Cook until the internal temperature reaches your preferred level of doneness:
For Rare: 125-130 degrees F
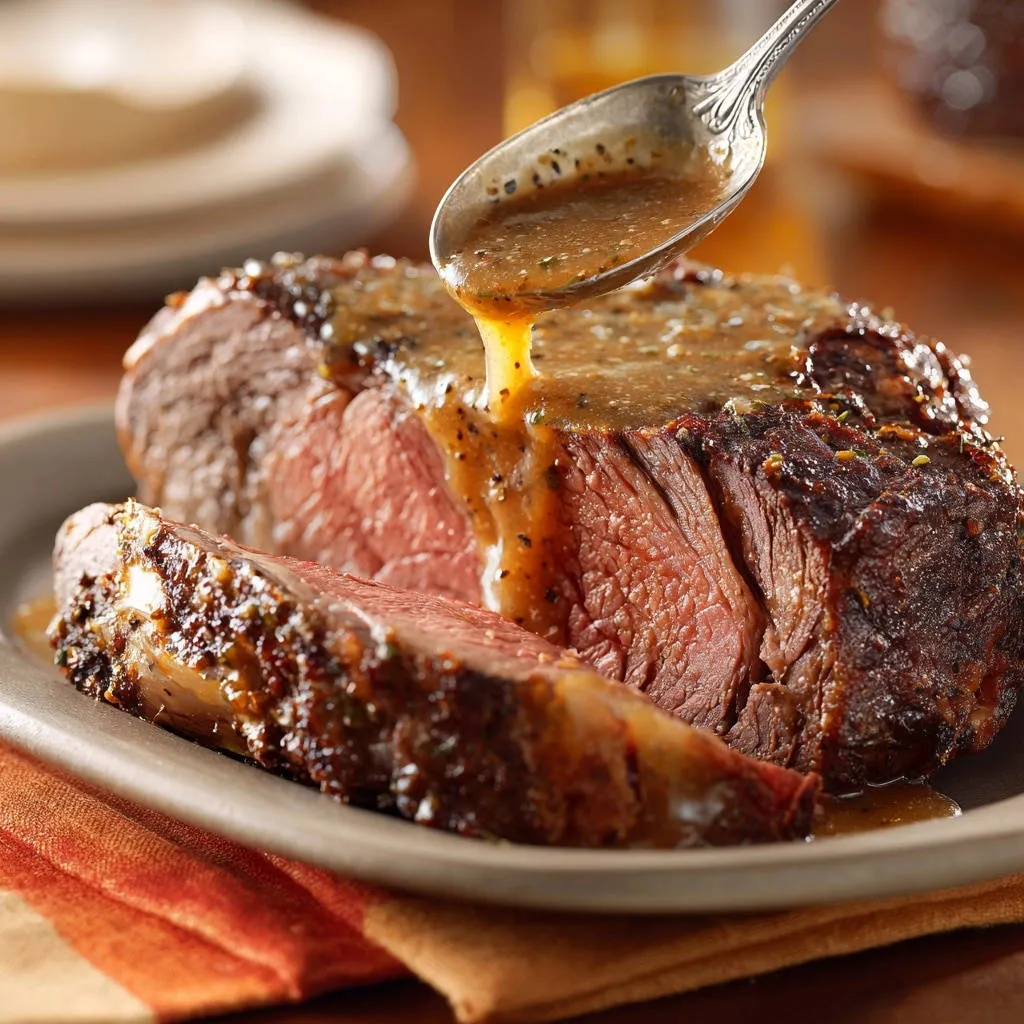
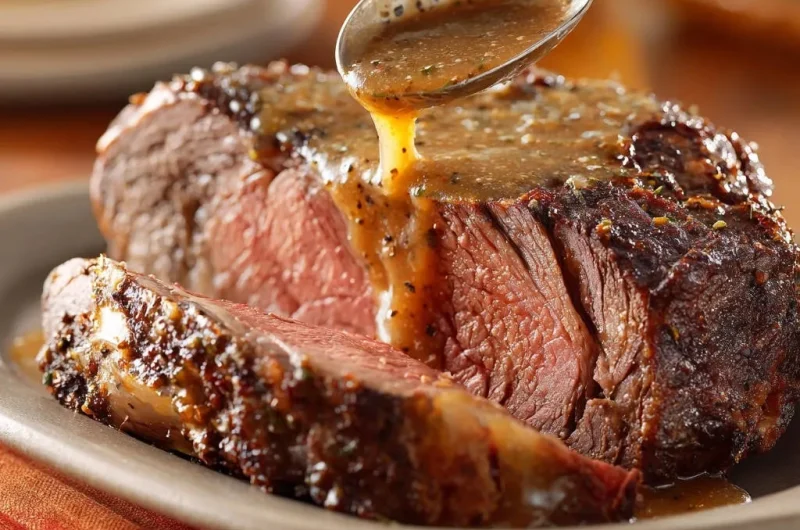
For Medium-Rare (as pictured in recipe): 130-135 degrees F (remove at 125 degrees F, as it will continue to rise while resting)
For Medium: 135-140 degrees F
This typically takes approximately 15-20 minutes per pound, but always rely on the thermometer for accuracy, not just time. Every oven and roast is different.
- The Non-Negotiable Rest: The Secret to Ultimate Juiciness
Once the roast reaches your desired temperature, immediately remove it from the oven and transfer it to a clean cutting board. Do not skip this step.
Cover the roast loosely with aluminum foil and let it rest for at least 15-20 minutes. This step is critical; it allows the muscle fibers to relax and the juices to redistribute throughout the meat, ensuring a truly juicy and tender slice every time, preventing them from running out when cut.
- Crafting the Rich Pan Gravy
While the roast rests, pour off most of the drippings from the skillet, leaving about 2 tablespoons, along with any delicious browned bits stuck to the bottom. Place the skillet over medium heat.
Add the unsalted butter to the skillet and melt it. Whisk in the all-purpose flour and cook for 1-2 minutes, stirring constantly, until a light roux forms. This cooked flour and butter mixture will be the thickening base for your gravy.
Gradually whisk in the beef broth, scraping up any delicious browned bits (fond) from the bottom of the pan. These bits are pure flavor gold and will deeply enrich your gravy.
Bring the gravy to a simmer, continuing to stir until it thickens to your desired consistency. Season with salt and pepper to taste, adjusting to balance the savory notes.
- Slice, Serve, & Savor
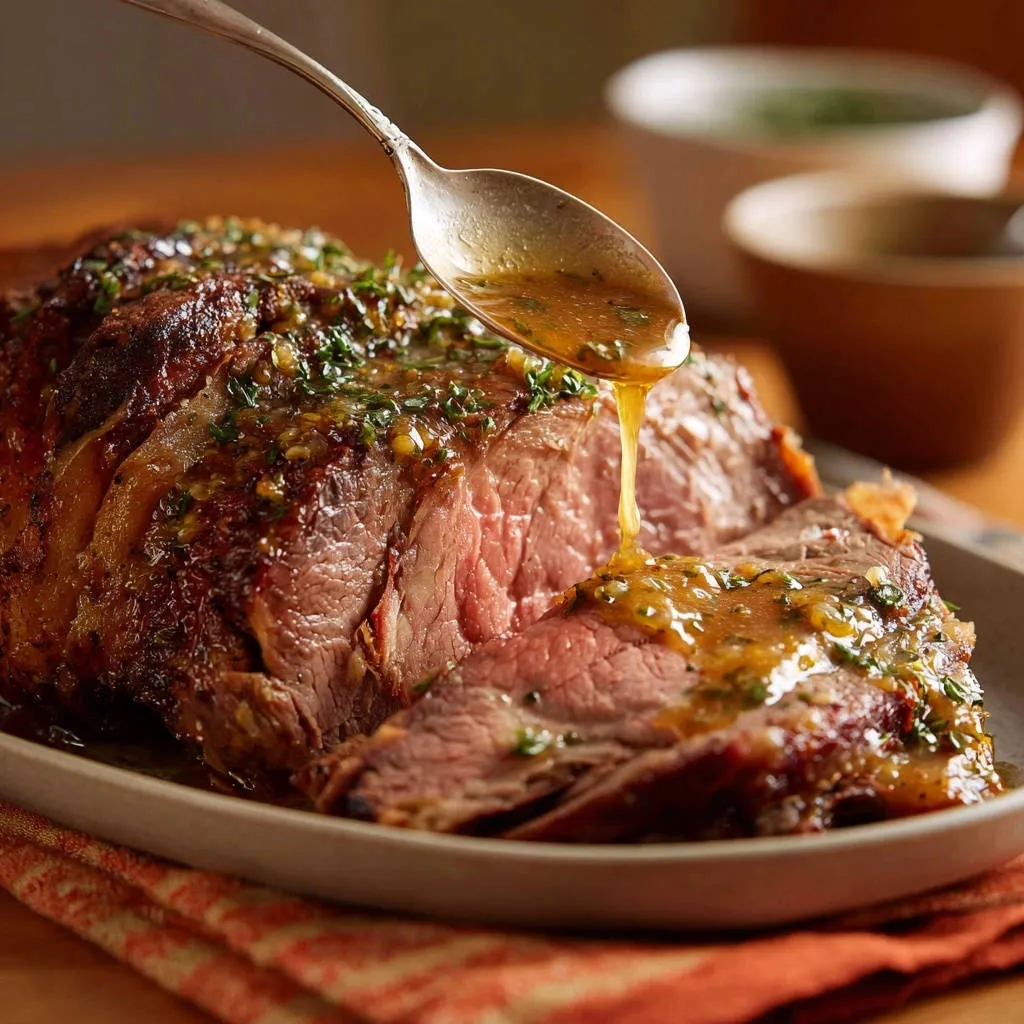
After the resting period, slice the roast against the grain into thick pieces. Slicing against the grain shortens the muscle fibers, ensuring maximum tenderness in every bite.
Drizzle generously with the warm, homemade gravy and serve immediately for an unforgettable meal that truly celebrates the perfect oven roast beef.
Chef’s Secrets: Expert Tips for Your Perfect Oven Roast Beef
Elevate your roast beef game with these invaluable insights straight from my kitchen.
Don’t Rush the Room Temperature Prep
Bringing your roast closer to room temperature before cooking is crucial. A cold roast hits the hot pan with a significant temperature differential, causing the outer layers to cook much faster than the center.
Starting at room temperature allows for more even heat penetration and a consistent doneness throughout, preventing overcooked edges and an undercooked center.
The Power of a Perfectly Dry Surface Before Searing
Patting your beef roast thoroughly dry with paper towels is non-negotiable for a superior sear. Moisture on the surface creates steam when it hits the hot pan.
Steam prevents the Maillard reaction-the chemical process responsible for that deep brown crust and complex savory flavors-from occurring effectively. A dry surface means a true, flavorful sear.
Seasoning: Don’t Be Shy, Be Generous!
Beef is a robust protein that can handle a generous amount of seasoning. Don’t be timid with your herb and spice rub.
Press the mixture firmly into the meat’s surface to ensure it adheres well and imparts maximum flavor throughout the roasting process. This is key for a truly flavorful roast beef.
Understanding the Science of the Sear
Searing is not about “sealing in juices,” as often mistakenly believed. It’s about developing intense flavor and a beautiful texture.
The high heat creates a richly browned crust through the Maillard reaction, adding layers of savory depth and a desirable texture that significantly enhances the overall eating experience of your oven-roasted beef.
Your Meat Thermometer: A True Kitchen Hero
Invest in a good quality, instant-read, oven-safe meat thermometer. It is the single most important tool for achieving perfect doneness every time. Visual cues or touch tests are unreliable.
Insert the probe into the thickest part of the roast, avoiding bone, and trust its reading. This precise measurement guarantees your desired doneness and prevents a dry, overcooked roast.
Embrace the Rest: The Ultimate Juiciness Guarantee
The resting period is arguably the most critical step for a truly juicy roast beef. When meat cooks, its muscle fibers contract, pushing juices to the center.
Resting allows these fibers to relax and the juices to redistribute evenly throughout the roast. Cutting too early will cause precious juices to escape onto your cutting board, leaving you with dry meat.
Deglazing for Gravy: Don’t Waste a Drop of Flavor!
Those browned bits stuck to the bottom of your skillet after searing and roasting are called “fond,” and they are packed with incredible flavor.
When making your gravy, actively scrape up all the fond as you whisk in the broth. This step ensures your homemade gravy captures all the rich, savory essence of the beef, making it truly exceptional.
Troubleshooting Common Roast Beef Challenges
Even expert cooks encounter challenges. Here’s how to tackle common roast beef issues to ensure your success.
“My Roast Turned Out Dry!”
This is almost always due to overcooking or insufficient resting. Ensure you remove the roast from the oven 5-10 degrees F before its target temperature, as it will continue to cook while resting.
Always, always allow the roast to rest, loosely tented with foil, for at least 15-20 minutes before slicing. This redistributes the juices, ensuring a succulent result.
“Why is My Roast Undercooked in the Middle, Overcooked on the Edges?”
This typically happens if the roast started cooking too cold from the refrigerator, or if your oven has hot spots. Allow your roast to come to room temperature for at least an hour before cooking.
Consider rotating your pan halfway through roasting if you suspect oven hot spots. An oven thermometer can also confirm your oven’s actual temperature.
“My Gravy is Lumpy/Too Thin/Too Thick”
Lumpy gravy is often caused by adding liquid too quickly to the roux or not whisking enough. Gradually whisk in broth, ensuring each addition is fully incorporated before adding more.
If too thin, make a slurry of equal parts flour/cornstarch and cold water, then slowly whisk it into simmering gravy until thickened. If too thick, whisk in a little more beef broth or water until desired consistency is reached.
“My Sear Isn’t Brown and Crispy”
A poor sear usually means the meat was too wet, the pan wasn’t hot enough, or the pan was overcrowded. Ensure the roast is thoroughly patted dry before searing.
Heat your skillet until oil shimmers and almost smokes before adding the meat. If cooking multiple roasts, sear them one at a time to prevent overcrowding, which lowers pan temperature.
Perfect Pairings: Serving Suggestions & Accompaniments
A beautifully cooked perfect oven roast beef deserves equally delicious companions. These suggestions complete the meal.
Classic Sides That Complement
Creamy Mashed Potatoes: The ultimate partner, perfect for soaking up that rich gravy.
Roasted Root Vegetables: Carrots, parsnips, and potatoes roasted alongside or separately add color and earthy sweetness.
For a richer flavor with your roasted vegetables, consider trying herb crusted roast beef.
Steamed Green Beans with Toasted Almonds: A fresh, slightly crunchy counterpoint to the richness of the beef.
Elevating Your Meal: Creative Serving Ideas
For something a little different, consider these options to truly shine.
Yorkshire Pudding: A traditional British accompaniment that is surprisingly easy and incredibly satisfying.
Creamed Spinach: A rich, decadent side that pairs wonderfully with beef.
Crispy Roasted Brussels Sprouts with Balsamic Glaze: Offers a delightful tang and texture contrast.
Making it a Complete Feast
Don’t forget the finishing touches that tie the meal together.
A simple green salad with a light vinaigrette provides freshness.
Crusty bread or dinner rolls are perfect for mopping up every last drop of gravy.
Make-Ahead, Storage, and Reheating Tips
Plan ahead and enjoy your perfect oven roast beef masterpiece for days with these practical tips.
Can I Prep Parts of the Perfect Oven Roast Beef Ahead?
Yes, you can certainly get a head start. You can prepare the herb and spice rub up to a week in advance and store it in an airtight container.
The roast itself can be seasoned up to 24 hours before cooking. Apply the rub, then cover loosely and refrigerate. Remember to bring it to room temperature for an hour before searing.
Storing Leftover Roast Beef for Freshness
Proper storage is key to preserving flavor and juiciness. Allow any leftover roast beef to cool completely before storing.
Slice any remaining roast against the grain into individual portions, then store in an airtight container in the refrigerator for up to 3-4 days. For longer storage, freeze slices in a single layer, then transfer to a freezer-safe bag or container for up to 2-3 months.
Gentle Reheating to Preserve Juiciness
Reheating can often dry out roast beef, but gentle methods prevent this. The best way is to place slices in a baking dish with a splash of beef broth.
Cover the dish tightly with foil and reheat in a preheated 275°F (135°C) oven until just warmed through, about 15-20 minutes. You can also gently warm individual slices in gravy on the stovetop over low heat.
Frequently Asked Questions About Perfect Oven Roast Beef
What is the best cut of beef for this recipe?
For this perfect oven roast beef recipe, leaner cuts like sirloin tip, bottom round, or eye of round are ideal. They become wonderfully tender and flavorful when slow-roasted.
These cuts offer great value and provide consistent results with our method.
For a similar comforting meal that’s always tender, check out this classic pot roast.
How can I tell if my roast is done without a meat thermometer?
While a meat thermometer is highly recommended for accuracy, you can use a touch test. A rare roast will feel soft and springy, medium-rare will have some give, and medium will be firmer.
However, this method is subjective and prone to error, so for guaranteed perfect results, always rely on an internal temperature reading.
Can I add vegetables to the roasting pan?
Absolutely! Adding hearty vegetables like potatoes, carrots, or onions to the pan during the last 45-60 minutes of roasting can create a delicious one-pan meal.
Be aware that vegetables release moisture, which might slightly alter the pan drippings for gravy, but the flavor will be fantastic. You may need to add more flour to thicken the gravy.
What if I don’t have an oven-safe skillet?
No oven-safe skillet? No problem! You can sear the roast in any large skillet on the stovetop as directed.
Once seared, simply transfer the roast to a sturdy roasting pan before placing it in the preheated oven to finish cooking. Remember to transfer the pan drippings to a separate saucepan for the gravy.
Can I use fresh herbs instead of dried?
Yes, fresh herbs can definitely be used! For rosemary and thyme, use about three times the amount of fresh herbs compared to dried.
Finely chop them and mix into the rub. Fresh herbs offer a brighter, more vibrant flavor profile to your delicious oven-roasted beef.
Your Turn to Shine: Share Your Perfect Oven Roast Beef Masterpiece!
You now have all the tools and knowledge to create a truly spectacular perfect oven roast beef. This recipe is designed to take the stress out of roasting, leaving you with tender, juicy, and incredibly flavorful results every single time.
Go forth and confidently create a meal that will impress your family and friends. We can’t wait to hear about your culinary triumph!
Oven Roast Beef
Course: Main CourseCuisine: AmericanDifficulty: medium6
servings20
minutes1
hour450
kcal180
minutesMaster the art of perfectly juicy and tender roast beef with this simple, foolproof recipe. Learn the secrets to a beautiful sear and a non-negotiable resting period for restaurant-quality results every time. Complete with a rich, homemade gravy to elevate your meal.
Ingredients
3-4 lb beef roast (such as sirloin tip, bottom round, or eye of round)
2 tablespoons olive oil
1 tablespoon dried rosemary
1 tablespoon dried thyme
2 teaspoons garlic powder
1.5 teaspoons salt
1 teaspoon black pepper
For the Gravy:
2 tablespoons unsalted butter
2 tablespoons all purpose flour
2 cups beef broth (low sodium)
Salt and pepper to taste
Directions
- Prep the Roast: Take your beef roast out of the refrigerator at least one hour before cooking to bring it closer to room temperature. This helps with even cooking. Pat the roast completely dry with paper towels; this is key for a good sear!
- Seasoning: In a small bowl, combine the dried rosemary, dried thyme, garlic powder, salt, and black pepper. Rub this mixture generously all over the beef roast, pressing it into the surface.
- Searing for Flavor: Heat the olive oil in a large, oven safe skillet or Dutch oven over medium high heat until shimmering. Carefully place the seasoned roast into the hot pan and sear on all sides until a deep brown crust forms, about 3-4 minutes per side. This step locks in flavor and creates that beautiful outer texture.
- Roasting to Perfection (The Secret to Juiciness): Preheat your oven to 325 degrees F (160 degrees C). Place the seared roast in the preheated oven. Insert an oven safe meat thermometer into the thickest part of the roast, avoiding bone. Roast until the internal temperature reaches your desired doneness:
- For Rare: 125-130 degrees F
- For Medium Rare (as pictured): 130-135 degrees F (remove at 125 degrees F, it will rise while resting)
- For Medium: 135-140 degrees F
- This will take approximately 15-20 minutes per pound, but always rely on the thermometer, not time.
- The All-Important Rest (No More Dry Meat!): Once the roast reaches your desired temperature, remove it from the oven and transfer it to a cutting board. Cover it loosely with aluminum foil and let it rest for at least 15-20 minutes. This step is non-negotiable for a truly juicy roast! The resting period allows the juices to redistribute throughout the meat, preventing them from running out when you slice it.
- Make the Gravy: While the roast rests, pour off most of the drippings from the skillet, leaving about 2 tablespoons, along with any browned bits stuck to the bottom. Place the skillet over medium heat. Add the unsalted butter and melt it. Whisk in the all purpose flour and cook for 1-2 minutes, stirring constantly, until a light roux forms. Gradually whisk in the beef broth, scraping up any browned bits from the bottom of the pan. Bring to a simmer, stirring until the gravy thickens. Season with salt and pepper to taste.
- Serve: Slice the rested roast against the grain into thick pieces. Drizzle generously with the warm gravy and serve immediately.
Notes
- Don’t skip the resting period; it’s crucial for juicy, tender roast beef. For an even richer gravy, deglaze the roasting pan with a splash of red wine before adding the butter and flour.